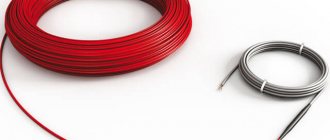
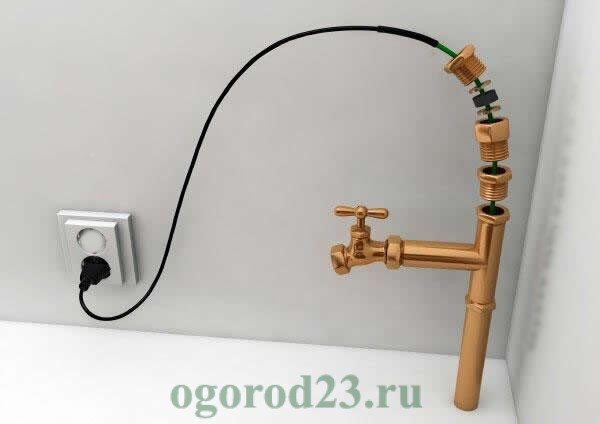
A heating cable for water supply and its use to protect pipes from freezing is a guarantee of reliable protection and long-term operation of water pipes even in harsh climatic conditions. Everything can be done with your own hands. The plumbing is one of the most basic communication systems in the home, so it is extremely important to secure the pipes in a timely manner and protect them from icing. Otherwise, freezing of pipes can lead to interruptions in water supply and even ruptures.
Heating cable for water supply
To prevent this from happening, electrical heating is installed inside or on top of the pipes, which provides a heating cable for the water supply. An easy-to-install water heating system can prevent many problems.
Even further south, where there are only short-term sharp drops in air temperature, measures to protect the water supply from freezing will also not be superfluous. To fully enjoy the coming of winter, you need to take care of the comfort and serviceability of all heating systems before the onset of cold weather.
Heating cable for pipes: operating principle and advantages
Heat is generated thanks to electricity passing through the cable, which prevents the pipe from freezing during frost. When choosing a wire, it is a good idea to pay attention to its thermal conductivity coefficient (W/m), which indicates the power of the electrical cable and the unit of its length.
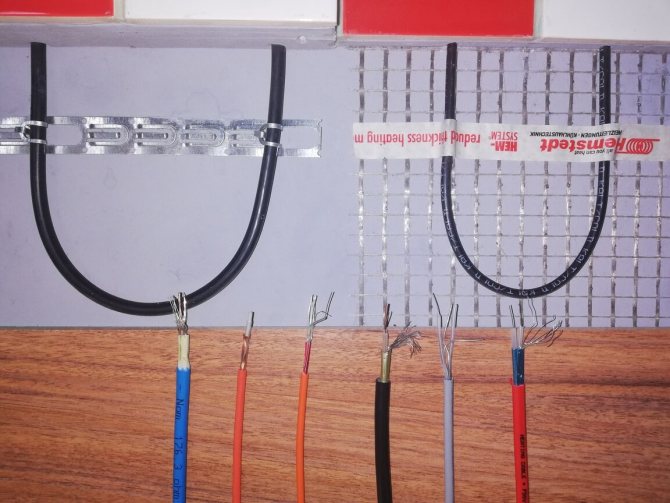
You can install this heating element yourself. If you decide to purchase a ready-made cable, you should take into account that a single-core wire does not have protection against electromagnetic radiation, while its two- and three-core counterparts have it, as well as protection for the current-carrying core.
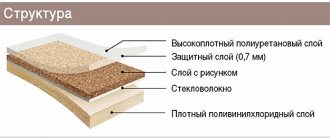
The heating cable consists of:
- inner core (made of high resistance material);
- shielding braid (aluminum or copper);
- insulating material;
- general protective shell.
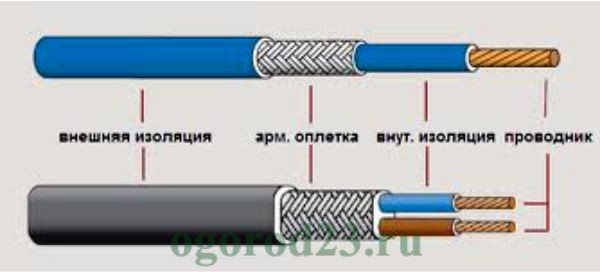
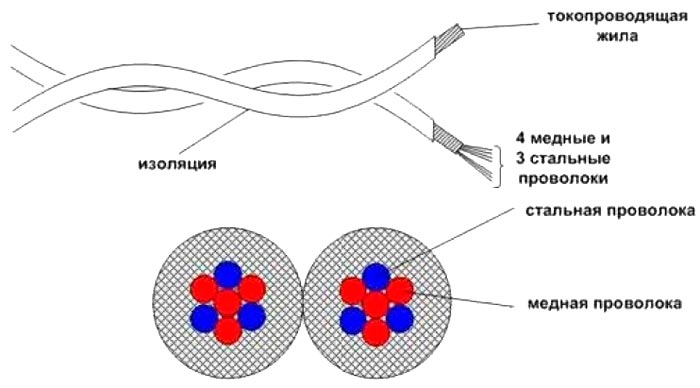
Internal structure of a single-core and two-core electrical cable
Installing this heating element has many advantages:
- With proper calculations, the water in the pipes will not freeze even at significant sub-zero temperatures.
- Internal and external installation of the cable on the pipe is allowed in any location of the system: underground, outdoors, indoors.
- Protection against burnout and the possibility of installation for drinking water systems (there are special heating electric cables made from environmentally friendly materials).
- Easy installation and comfortable operation.
- Possibility of adjusting power depending on changes in air temperature.
There are two types of heating cables - self-regulating and resistive.
Heat shrink kit with adhesive base for cable termination TKM/3
The kit is designed for hermetically sealing a self-regulating cable with a power cable and terminating a loose self-regulating cable. It is also used for repairing damaged cable sections.
Instructions for coupling self-regulating heating cables
Equipment:
- 20.6x200 mm external heat shrink tube
- 20.6x50 mm heat shrink end cap
- 16x40 mm heat shrink tube 3 pcs.
- sleeves 3 pcs.
Required tool:
Knife; scissors; wire cutters; crimping tool; pliers; construction hair dryer with nozzle.
1. Coupling the end coupling
First, use a knife to remove the outer sheath of the cable - a few centimeters from the end of the cable (Fig. 1). We separate the shielding braid using a screwdriver (Fig. 2) and cut it off with wire cutters (Fig. 3). We bite off a part of the cable, about five millimeters; on one side, a kind of “step” is formed at the end of the cable (Fig. 4).
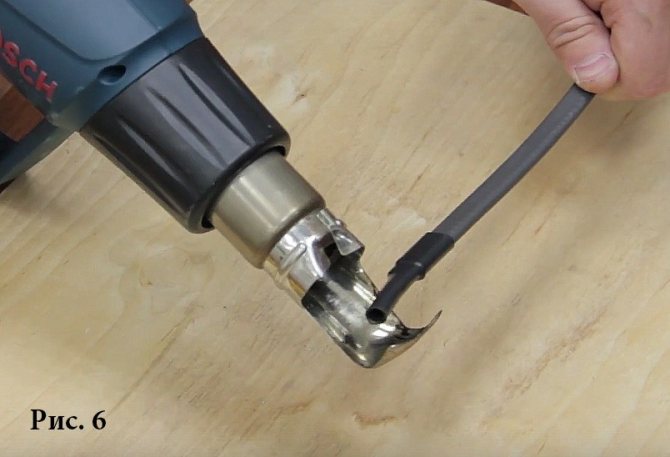
Next, we take a heat-shrinkable tube with an adhesive layer, put it on the end of the cable (Fig. 5) and heat-shrink it using an industrial hair dryer (Fig. 6) until a certain amount of silicone sealant is squeezed out from under it. The end should be crimped with pliers to completely seal the connection.
The exposed glue is an indicator of high-quality and airtight heat shrinkage. All heat-shrinkable sleeves must be heated from the center to the edges to avoid deformation and air getting under the sleeve. It is better to use a hair dryer with special attachments.
Avoid overheating the heat shrink plug. When overheating, the tube begins to shine and heating should be stopped. After treatment with a hairdryer, the connection cools down for 5-10 minutes; it is better not to touch it so as not to burn your hands or break the tightness of the connection.
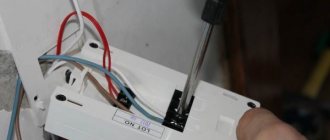
2. Connecting the heating cable to the network using a power cable, coupling the connection
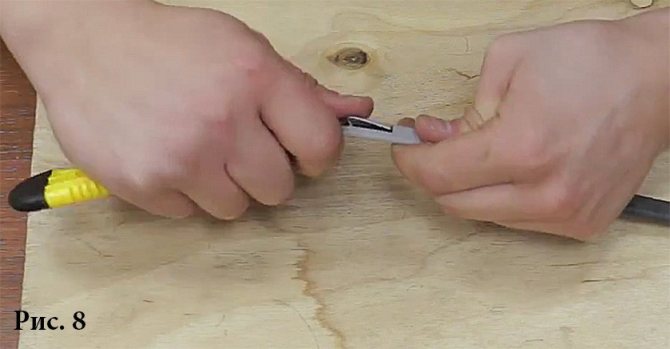
Now let's work on the other end of the cable. It is necessary to prepare it for connecting the power cord. Remove the outer shell using a knife (Fig. 1). The shielding braid is unraveled with a screwdriver (Fig. 2), and a bundle is formed from it (Fig. 7). We remove the intermediate insulation from the conductors using a knife (Fig. 8). After this, the heating matrix itself is cleaned. As a result, the stripped conductors look like this (Fig. 9). We make an angular cutout in the matrix for more convenient connection of the sleeves (Fig. 10).
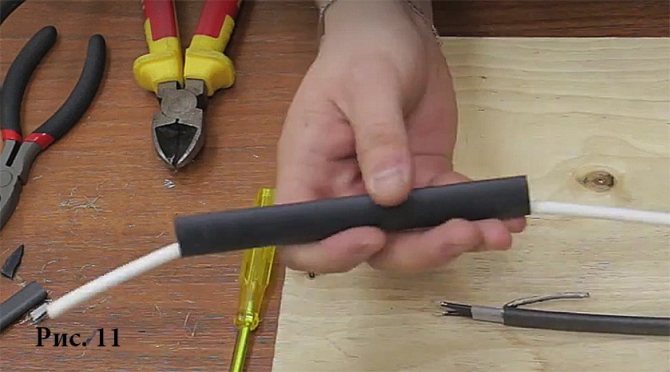
Getting ready to connect the heating cable and power cord. We put the largest coupling from the kit on the cable in advance and move it so that it can then be placed on top of the connection and all other couplings (Fig. 11). Small couplings should also be placed in advance on the stripped ends of the power cable, before the sleeves are installed and clamped onto the connection.
Preparing the power cable:
Remove the outer insulation of the power cable by approximately a few centimeters. We will also remove the insulation from the grounding conductor. If the grounding is made in the form of a copper braid, twist it into a ponytail. We cut the conductors to a length of 25 mm and remove the insulation from them by 5-6 mm.
Now the stripped conductors of the heating matrix of the self-regulating cable must be connected to the ends of the power cable. To do this, we place sleeves on the conductors and crimp them with pliers (Fig. 12).
We close each connection with a heat-shrinkable tube with a diameter of 12 millimeters, and heat-shrink it with a hairdryer. The grounding conductor is connected using a sleeve to the shielding braid of the heating cable twisted into a bundle; this connection is also closed with a heat-shrink sleeve. All connections are heated with a hairdryer until the couplings are completely shrinked (Fig. 13).
The largest coupling is pulled over all connections (Fig. 14) and heat-shrinked using a hair dryer, from the center to the edges (Fig. 15).
As you can see, the principle of connecting a self-regulating heating cable is quite simple. It is enough to connect its current-carrying conductors to network 220 and properly insulate all connections and the other end of the cable (Fig. 16).
Video instruction
Resistive heating cable
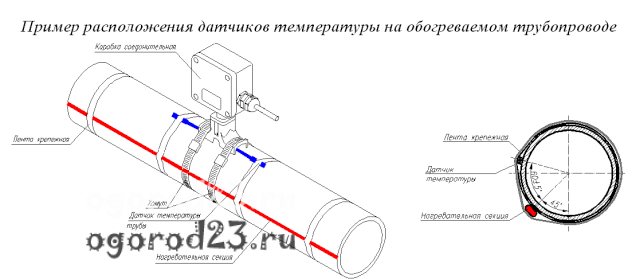
It can be placed inside the pipe or outside along the entire length of the water pipe. Thermal sensors installed on the pipes monitor the temperature: when the set limit is reached, they start heating the system, and after a decrease they automatically turn off.
For more efficient operation of the heating cable, it is recommended to use additional insulation. This can be mineral wool or foam rubber (Merylon).
The principle of laying this cable depends on the desired power: spiral, waves, in one or several rows. It must be laid without active tension, and to enhance the heating effect, you can subsequently wrap the pipe with aluminum foil.
Pros and cons of cable heating
Cable heating systems have become a real salvation for owners of private houses and cottages. If previously such a solution was available only for large industrial facilities, in recent years the market has been replenished with a variety of offers, and the range of manufacturers has expanded significantly.
Moreover, there are quite a lot of options for using heating systems. The most popular among them are water pipes, sewer pipes, drainage systems, roofs of houses, steps, small areas for various purposes, etc.
This type of heating prevents the formation of ice, which can cause a breakdown of the water supply network and result in large expenses.
In addition, the heating cable also has the following advantages:
- affordable price;
- a wide range from various manufacturers, including kits for installation in hazardous areas;
- high efficiency of systems;
- low power consumption;
- ease of operation;
- availability of ready-made kits with instructions for independent connection;
- long service life.
As for the disadvantages, the biggest one of the heating cable is its volatility. After all, for the heating system to operate, it requires a constant power supply.
Users also note that without skills, self-installation can cause some difficulties. And the issue of cost is not entirely clear - products from famous manufacturers are not cheap at all.
True, experts advise not to skimp on high-quality cable, because it is installed for more than a dozen years. For example, the service life of Raychem cable systems is 50 years.
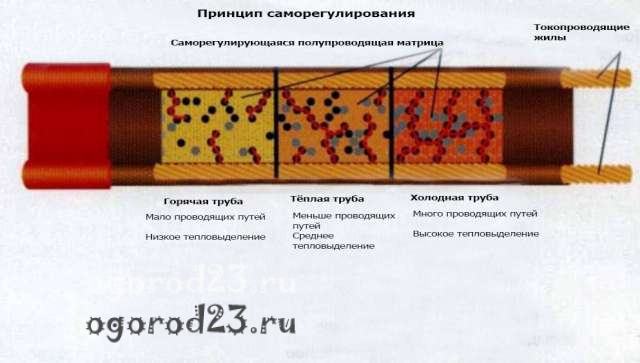
Self-regulating heating cable for water supply
A self-regulating cable has a semiconducting matrix that changes its resistance depending on temperature changes in the environment. The colder the pipes, the greater the heat generation.
Initially, the self-regulating heating cable is fixed “in place”, and after installation it is connected. You can cut the cable in any required place without fear of the appearance of cold zones. The wire can be of any length.
Detailed instructions for connection
We suggest further understanding in detail how to connect the heating cable yourself so that it is operational and does not cause problems in the future. We carry out the instructions using the example of connecting a heating system located outside the pipe.
Stage #1 – preparatory work
The first step is to carefully inspect the section of the pipeline that needs insulation. Any problems found, such as rust, damage to the integrity of the outer surface of the pipe, etc., must be corrected immediately.
Then you need to prepare materials that will be useful during the installation of the heating cable system.
Having prepared the materials, you must immediately terminate the cable. To do this, take the free end of the conductor, to which nothing will be connected, and cut it with a “step”, after first removing the protective layer.
Then the resulting “step” is firmly and reliably insulated. What is a set of heat-shrinkable tubes used for?
An easier option is to purchase a ready-made system, in which all the preparatory work with the cable has already been carried out by a specialist.
This option will cost several hundred rubles more, but will significantly ease the fate of a home-grown electrician who has no experience in performing such work.
Stage #2 – fastening the cable system
The next step is to place the cable on the pipe and secure it in the desired position. Let us consider in detail how to correctly install a self-regulating heating cable with your own hands.
To do this, you first need to read the instructions supplied by the manufacturer in the kit. Then you have to choose the optimal mounting method:
- straight, placing the conductor parallel to the pipe;
- rectilinearly, placing 2, 3 or 4 conductor strands parallel to the pipe and each other;
- winding, wrapping the cable around the pipe at a certain pitch.
There is another option to position the cable, simulating a wave. But here it is necessary to calculate the required footage and the feasibility of such fastening. Often, with a large pipe diameter, it is easier to run 2 parallel cables.
When using the winding fastening method, it should be taken into account that the consumption will be higher. Yes, and a certain step between turns must be maintained.
Having figured out the mounting method, you need to carefully position the cable in the desired position. It is recommended to select the lower part of a horizontally extended pipe.
Stage #3 - attaching the protective casing
After attaching the conductor, you will immediately need to make additional insulation using heat-insulating material for pipes. The range on the market is very rich, so you can choose the best option.
It is advisable to follow the manufacturer’s recommendations - the instructions most often specify the recommended thickness and type of heat insulator. Moreover, manufacturers such as Raychem indicate a specific material, without installation of which the buyer may lose the warranty.
Another nuance is the installation of special seals in places where the cable heating system passes through the thermal insulation. Such kits can be purchased along with the cable and other system components.
Stage #4 - connection to the power supply
At this stage, we will consider how to properly connect power to a self-regulating heating cable. If you are using products from a well-known brand, then the seller will select all the necessary elements for you at a certified point of sale along with the cable.
We invite you to familiarize yourself with the connection process in detail:
- the free end of the heating cable is freed from insulation, the protective screen is twisted into one bundle, and the conductor cores are stripped;
- the end of the supply (power) wire is cut and the ends are stripped;
- the prepared cores of the cable and the supply wire are connected to each other, for which it is convenient to use a sleeve + crimping pliers, and put heat shrink on top.
This connection option is simple; only a little experience in electrical installation work is required.
In the future, the connecting nodes/boxes must be secured with tape to prevent accidental damage.
Stage #5 – testing and commissioning
When the installation work is completed, all that remains is to check the quality of its execution and test the functionality of the system.
But before putting it into operation, you should pay attention to the following points:
- the insulation of the heating cable must be intact; it would not be amiss to check its resistance between the braid and the conductors;
- the protective casing must be without damage along the entire length of the cable heating system;
- all connections, splices, connections must be sealed;
- It is advisable that circuit breakers and fuses be installed.
To avoid accidental damage to the cable, you must immediately begin installing the heat-insulating and protective casing after attaching it.
It is advisable to allocate a separate line for the cable system, equipping it with protective devices.
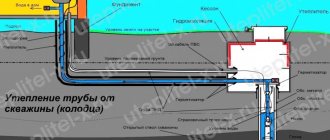
Heating cable for water supply outside or inside the pipe - installation features
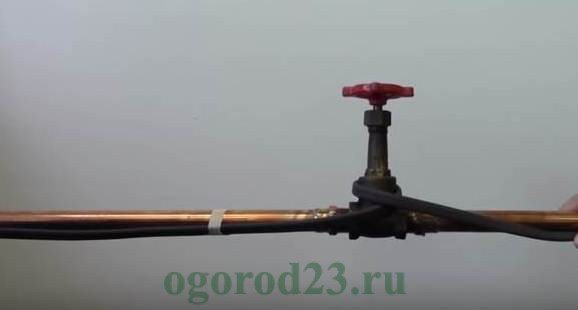
A heating or heating cable inside the pipe is installed if the water supply system is already in use and freezes when severe cold occurs. This cable is installed inside the pipe through a gland.
An important nuance is that if the heating cable is installed outside the pipe from above, then additional fixation is not required. If the heating element is installed from below, then it must be securely fixed to prevent it from slipping.
If you plan to heat a pipe through which drinking water passes, then the sheath of such a wire must be made of a polymer that meets all food safety parameters.
Installation of a self-regulating cable inside the pipe from above
To install the cable inside, accurate measurements of the length of the section of water supply that needs heating are required. The heating cable must be inserted into the pipe very carefully to avoid damage to the protective sheath. Cables are not routed through shut-off valves.
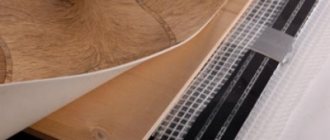
The cable is secured over the pipe using aluminum adhesive tape (regular tape cannot be used). During the installation of the heating cable, it is necessary to ensure that the wire is not pinched, stretched, or chafed by sharp elements. First, the electrical cable is attached to the pipe with separate pieces of aluminum tape, and then more radically, along the entire length.
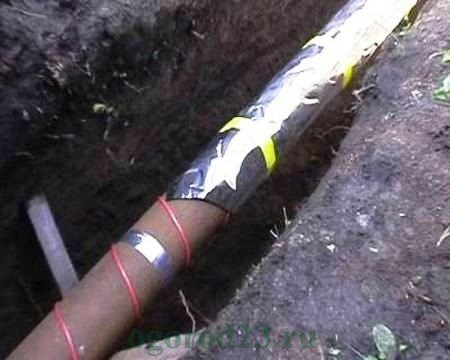
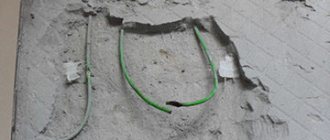
Installing a heating cable over a pipe
If the pipe is plastic, then before installing the cable it would be useful to cover it with aluminum tape or foil. The thermostat sensor, coupling, heating section and other additional elements are also attached using aluminum tape.
Top 5 articles
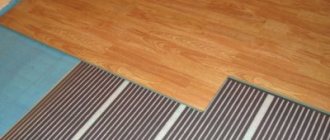
- Review of the cost of heated floors per m2, installation cost
- DIY installation of electric and water heated floors
- Which heated floor is better
- What flooring can be used for heated floors?!
- How much does underfloor heating cost per month?
Heating cables are designed for a certain area, even at the manufacturer’s factory. They are not sold by the cut
But in some cases, it happens that the coolant has already been purchased, and the area of the room has decreased due to the addition of furniture (or other reasons), a problem arises, since it is impossible to install the cable under closed places, which will lead to air being blocked, and in the future can lead to leakage cable is faulty. Ideally, it would be good to replace the section with a smaller area.
What else can you do with a heated floor (is it possible...)
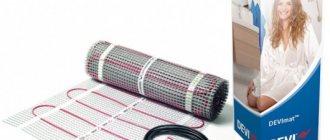
(information also applies to underfloor heating mats)
What to do if this is not possible?
You can simply raise the furniture by 1.5-3 cm,
By installing mini legs (which are purchased separately, you can drill 1-3 holes in the cabinet by inserting plastic covers, all this is necessary for air circulation. This is the first way out of the situation.
You can also reduce the wire laying pitch by reducing the distance between the turns within the limits specified by the manufacturer (usually up to 7 cm). After reducing the laying width, you need to record the places on paper or take a photograph so that in the future you will know the location of the cable under the screed; this will make it easier to determine the location of a breakdown if this happens. It is also possible to lay part of the remaining wire in a combined room or even on the walls, or lay the rest of the cable around the perimeter of the room near the baseboard, but so that it does not overheat (that is, cover it with tile adhesive or concrete).
Choosing electric and water heated floors (Read)
HEATING CABLE WITH YOUR OWN HANDS: MANUFACTURING INSTRUCTIONS
Factory models are quite expensive, so with minimal skills and dexterity, you can make a homemade cable using alternative materials.
DIY heating cable
Stage 1. First you need to find this very alternative. Experts advise replacing the heating cable with a “polevik” - a military field telephone cable officially marked P274-M. Its advantages include small diameter, rigidity, strength and good insulation (it is thanks to the latter that the cable can be used in a humid environment).
Of course, such a cable cannot compare with store-bought analogues. For example, it will not have self-regulating or food isolation functions. But if the cable will be used only occasionally (say, at a dacha, where people rarely come in winter) and will be laid not inside, but outside the pipeline, then the above qualities can be completely dispensed with.
Stage 2. When installing the “field switch”, it should be separated into a pair of separate wires. One of the wires is bent in half and doubled back. At the open ends, it is necessary to ensure a sealed cable entry, for which it is better to use a flange from a water hose. To ensure the tightness of the input, a fitting with wires threaded inside is used.
Stage 3. The fitting is filled with epoxy glue and slightly flattened. For a more durable connection, a union nut is used.