How to make a natural pond?
First, let's define what is meant by this phrase:
How to choose a place and what to provide:
- distance from trees and tall bushes. Leaves and branches should not clog the water;
- good lighting, direct rays of the sun throughout the daylight hours are unacceptable;
- correctly located in a low area so that rainwater does not spill over the area, but flows into the pond;
- choose a flat area with a slight slope.
What to consider so that the reservoir is “alive” and does not rot:
Making a pond
A properly made pond occupies at least 10th of the site. Deep - it warms up poorly and is simply dangerous, shallow - it blooms. On the forums of summer residents, the optimal size of a reservoir is recommended to be 2.5 - 3 m in diameter, 1.5 m in depth. The hole is dug manually or using machinery. Next, waterproofing is done.
Ecopond - involves natural waterproofing, called a clay castle.
Only this natural material contributes to the functioning of a living ecological system. This is a good way to make a pond without film:
From the history
This technology was known long before the invention of bitumen and film, even though clay foundations were discovered even in medieval buildings. Even today, with all the wealth of choice of materials, clay castles are widely used in construction. The reasons are obvious: clay is a budget and affordable material, which, moreover, has no expiration date. Clay waterproofing is environmentally friendly, does not require repairs and effectively protects the foundation from flooding or the destructive effects of groundwater.
How to make a small pond?
There are several simple ways to arrange miniature ponds on your site.
Since the shape is a wave-like configuration, transitions during burial are taken into account. Special steps are made, one wider than the other. After installation, the voids are filled with earth.
The form is set slightly above ground level, a layer of sand of approximately 20-30 cm is poured under it, but first markings are made on the ground. Then you can start digging a pit. How to do this can be clearly seen in the pictures below.
The first stage of laying a clay castle
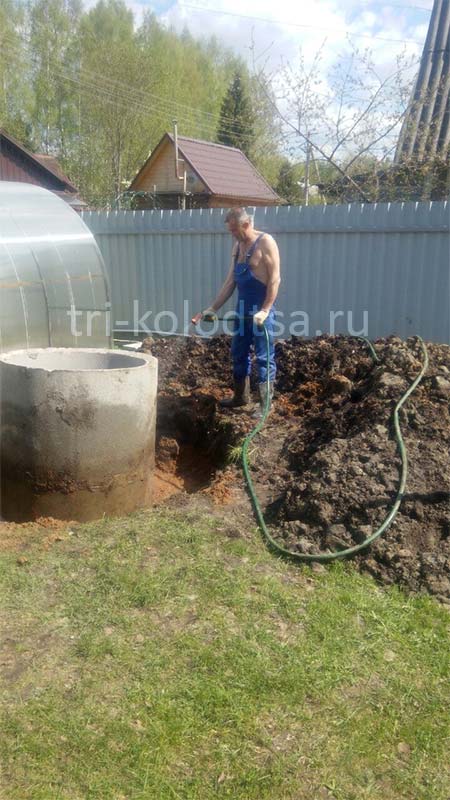
This is done after the soil around the well has settled and stabilized.
A trench is dug around the rings to a depth of about one and a half meters. It should narrow as it deepens and must have a slope from the walls of the well. This is the only way to achieve the effect of draining water from the shaft. If you make an angle towards the shaft, then the water will flow along the boundary of clay and soil directly to the walls of the well and begin to destroy the waterproofing. Before laying the first portion of clay, the bottom of the trench is sprinkled with a thin layer of sand or pebbles.
How to make a big pond?
- First, outline the contours.
For irregular shapes, a regular rope will do; for a rectangle, square - hammer in pegs and stretch a string between them. - An excavator is used to dig a pit.
You can calculate its dimensions using the formula for calculating the volume of a truncated cone. This can be easily done on a site like fxyz.ru. You just need to insert the numbers into the required line. - Next, they level the walls of the dug bowl and make them flat
. Provide terraces around the perimeter of the reservoir. They prevent the soil from crumbling and serve as convenient steps when laying waterproofing. They will be useful in the future when decorating a pond.
Important! Three zones are provided in the pit bowl: deep, 1.8-2.0 meters (below the freezing level of the ground). She is being prepared so that she can successfully winter. Medium – for plants. Small – in summer such places warm up well, fry and living creatures accumulate here, and microflora multiplies.
If you are digging a pond for swimming, you do not need to deepen the bottom, it is made smooth.
Next you need:
- remove stones and driftwood from the bottom;
- prepare waterproofing material.
recommends first filling the bottom with sand and laying geotextiles on top.
butyl rubber is usually chosen
film. The main argument is durability. It lasts up to 20 years.
Lay out the film
How else can you waterproof a pond?
For your information! In specialized stores you can buy a ready-made plastic mold for a reservoir of 1000 liters or more.
Lake project on a clay castle
First of all, dig a depression with sloping (no steeper than 20-25 degrees) banks, one third of the depth of the reservoir you have planned. The excavated soil will continue the banks and triple the depth... With a slope from the pit, make a groove into which, from the very wall of the reservoir, lay a pipe to drain excess water into a ditch or ravine. Strengthen the bottom and walls of the reservoir with clay.
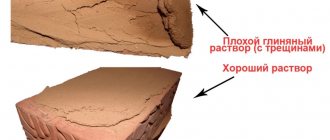
The clay is kneaded with water until it becomes a soft dough that does not stick to the shovel. The mass is placed in a layer of 15 centimeters on the bottom and walls of the reservoir and compacted. The clay is allowed to dry, a second layer is laid and compacted again. Then the third layer is laid. Each layer shrinks by approximately 3 centimeters, so the final thickness is about 35-39 cm.
Along the edges of the reservoir, reinforcing layers of clay are made 15 cm above the expected water level. After final drying, a 2-3 cm layer of coarse gravel is compacted into the top layer of clay. For final finishing, 5-7 cm of fine crushed stone or sand is poured over the gravel.
If the soil is less moisture-absorbing, the bottom of the pool is strengthened with clay mixed with straw: Pools are most often filled with rainwater.
Much attention is paid to the plant design of the lake:
The yellow flowers of the marigold and the lower marigold harmonize with the blue forget-me-nots reflected in the water. Graceful inflorescences of astilbe bloom in July, when other plants have already faded.
The dense foliage of the peony serves as a good background for the lacy leaves of astilbe and swimsuit, and the large purple flowers add life to the blue-yellow color scheme of spring blooms. The floral design is complemented by willow - a constant companion of natural reservoirs: Flowers are illuminated by the sun; Ferns grow in the deep shade of the willow. The pleasant aroma of mock orange (jasmine) planted near the bench will add even more charm to this corner of the garden.
It seems that events in my life are lining up with an increasingly strict logic. At the “Cup of Love” festival, taking a break from the heat and immobility, I swam in the local pool and was amazed at how successful its size was - small, but allowing me to relax, joining in a different, joyful state .
The trainer, who is also looking after the pool, reported its dimensions - 10x25 meters, depth - 1.1-1.2 m. Anastasia’s words came to mind: “ In the garden we will dig a shallow pond, about two hundred square meters in size.”
". 10x20 meters - just two hundred square meters! Taking into account the gradual decline of the banks (maximum 25o), the volume of the pond is about 160 m3.
To replace the water in it in 2 weeks, as is done in a swimming pool, you need a source with a capacity of 8 liters per minute - a water tap with good pressure gives 15. The spring that Anastasia proposed to create at each site (Vladimir Megre talked about it at the presentation of the fifth books in St. Petersburg) can flow into the pond, replenishing it with fresh water.
Based on materials from the site www.anastasiaclub.ru
PS If you think this information is worth sharing with others, please share it on social networks.
For waterproofing artificial reservoirs, butyl rubber membrane (EPDM) is most often used. This is no coincidence: thanks to its ability to stretch, it takes the shape of a bed without tension or voids. However, a pond with rubber banks looks unsightly. What is the best way to design its edge?
Water will hide everything
This can only be said about the deep-water zone of the reservoir. A few weeks after filling the pond with water, the membrane becomes covered with a coating, and at depth its artificial appearance is no longer so noticeable. But the shallow water area and especially the visible part of the shore need to be decorated, otherwise the pond will have an unfinished appearance. To do this, it is important to correctly perform the upper edge of the bowl.
Usually it ends in a low roller, the ridge of which is aligned strictly in the horizontal plane. This compensates for the unevenness of the earth's surface and makes the edge of the bowl parallel to the water level. A membrane is placed over the roller and secured behind it. A roller made of sand or soil usually crumbles over time, releasing some of the water from the pond, so it needs to be removed from a more stable material. Most often, a “belt” is made of concrete, sometimes plastic and even metal.
Strengthening the shore of the pond
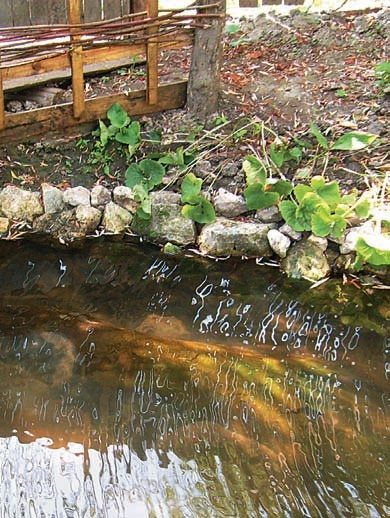
, you can start decorating the butyl rubber film. The materials used to beautifully decorate the shore are pebbles, sand, stones, and boardwalk. An excellent decorative element can be lawn grass, shrubs, perennials with large leaves or creeping plants, for example, loosestrife (photo 1). If the pond is located in a lowland and there is a lawn or other plantings at its edge, drainage is needed along the entire perimeter of the pond. For a beautiful lawn, the soil must be fertile.
With abundant watering or heavy rain, its nutrients will enter the pond and become available not only to terrestrial plants, but also to single-celled algae, causing the water in the pond to acquire a greenish tint. Drainage will prevent this. A drainage channel in the form of a pipe filled with crushed stone must be laid along the side of the reservoir and led into the drainage drain. You can decorate it with a small layer of loose soil, pebbles or crushed stone (photo 2).
Large pond in natural style
When decorating shallow water and the shore, it is best to use stones and pebbles. Moreover, the more different factions there are, the more natural and interesting both the pond itself and the coastal zone look (photo 3).
On gently sloping banks, you can lay non-woven material over the film, lay stones on top and then fill the voids with pebbles. In addition to ease of installation, the advantage of such decoration is environmental friendliness.
Pebbles are a habitat for bacteria that clean the pond. The inconvenience of this method usually manifests itself after a few years when flushing the reservoir. It will take a lot of effort to rinse it clean. You can also lay stones and pebbles on a concrete base - then they lie more stable. The decorative effect is not lost, and it is much easier to wash such a pond. There is only one drawback - cement comes into contact with water and makes it more alkaline. It has been noticed that many filamentous algae, popularly called mud, prefer lime water.
Vegetable soil can also be used to decorate EPDM membranes in very large and deep reservoirs. It contains a lot of organic matter, which is why a small pond will quickly become overgrown with aquatic plants or filamentous algae and look like a puddle. And in large bodies of water, the filled bank will eventually be overgrown with grass and will look like a natural one.
Pond with steep walls
In this case, decorating with stones and pebbles will require more skilled work. The stones are laid with the end part facing the wall of the reservoir using a solution (cement, sand and external tile adhesive 2:4:1). This method is good for constructing deep reservoirs with a relatively small surface area (photo 4).
Rounded stones or large pebbles can be used to decorate the walls of swimming ponds.
In small reservoirs with vertical walls, laying natural stone “steals” volume. Here you can use, for example, PVC film with small pebbles glued to it. True, it is not much more beautiful than the membrane: the glue is very clearly visible, and in those places where the pebbles have come off, they cannot be attached back. In specialized stores you can buy coconut sheets for constructing ponds. Although it looks like a rare fabric, it copes well with decorative functions (photo 5).
It is better to fasten it immediately during construction or leave more mortgages in the side, since when wet the canvas may sag and the edge of the film will be visible. Its color may seem too bright, but over time it will become neutral.
Pond near the recreation area
You can solve the problem of the edge quite simply if the pond is surrounded by a recreation area (photo 6).
Even if the site is adjacent to the pond on only one side, you can frame it with the same material. If the site is paved with natural stone, then its thickness should be 3 cm or more. The paving should be laid with an overlap of 5-7 cm above the water - then when the reservoir is filled, the edge of the film will practically not be visible. During the construction of such a pond, it is necessary to provide for the overflow of excess rain or flood water into the drainage ditch. Otherwise, the area around the pond, laid on a concrete base, may be flooded if the reservoir overflows.
Another classic and very beautiful option for decorating the shore of a reservoir is wooden flooring made of larch or pine with oil impregnation (photo 7).
If wooden products do not come into contact with water, then this is a fairly durable structure. You can use boards made of composite material, which is almost indistinguishable from wood in appearance, but even more durable.
In the process of creating a pond at your own dacha, many questions arise; general recommendations are not enough. Let's consider these questions.
How to build a dam?
A pit is not necessary for a pond; it is enough to make a dam using a stream or a drainage area where water flows. Running water constantly fills the reservoir. They block it in the narrowest place. First, a ditch is dug, the bottom is lined with rich clay, and compacted. Then a clay wall is erected and buried into the bottom and edges of the ravine. The dam crest is raised one meter above the future water level, and the rapids are made steep.
Dams are constructed from natural materials: stone, gravel, logs, and sometimes concrete. The base is supposed to be wide so that the structure can withstand water pressure.
When constructing such structures, remember about floods and consider water drainage in extreme situations.
The embankment is filled with a width of half a meter to 4 meters, a height of at least 0.5 m. The dam is filled only after the dam has settled.
Concrete dam.
It is reinforced with rods, angle iron, and steel mesh. For concreting, waterproof cement is used, liquid glass and PVA glue are added.
General information
The construction of a clay well castle is a rather labor-intensive process and requires the preparation of a significant amount of material. At the end of the work, it is necessary to clean the well from possible contamination so as not to worry about the quality of the water. .
Instructions for creating a clay castle usually consist of 3 steps, although adjustments can be made to it:
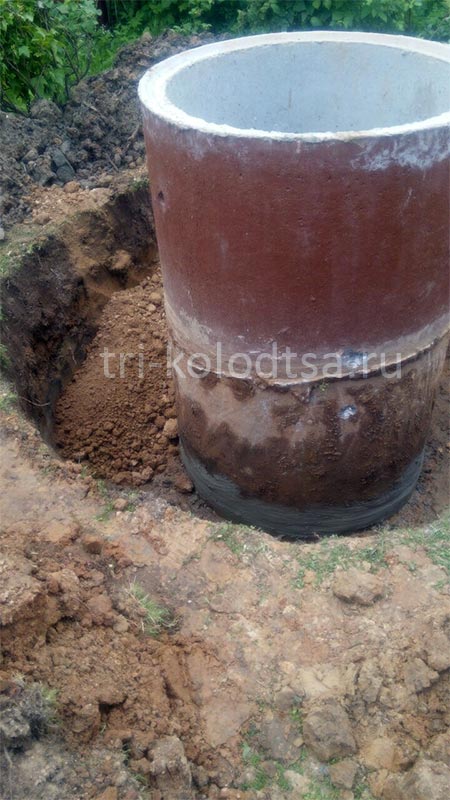
- A trench is made along the perimeter of the well shaft with dimensions: width - 500-600 mm, depth 1500-1800 mm.
- Clay is poured into it, which must be compacted periodically.
- A small blind area is made on top of the castle, sloping away from the well, its height is 150-200 mm.
Below we will look at how to make a clay castle around a well in more detail.
Layout of the lock and blind area
Technology
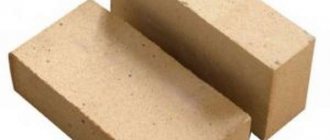
- For a clay castle, you need to take material with natural moisture. When it is removed from the ground for subsequent storage, it should be soaked in water and covered on top.
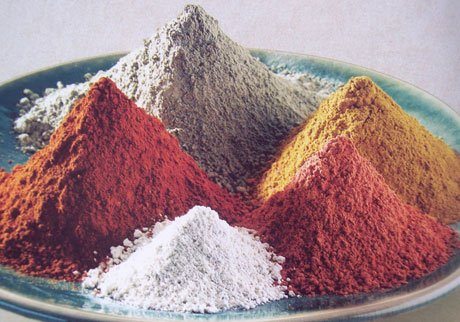
Preparing the clay
You can check the condition of the clay by trying to mold something out of it; the material should not crumble or slip between your fingers. You may have to add 10-20% lime to it to neutralize the increased sand content in it.
Tip: crumple a piece of clay and see if it holds its shape, does not spread between your fingers or fall apart to understand whether the material is ready for use.
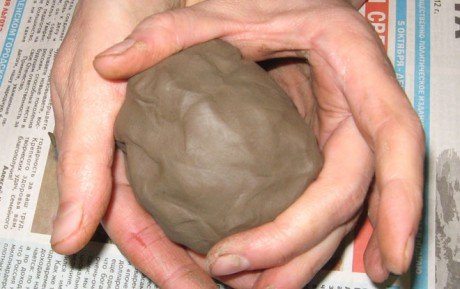
We check the material for plasticity
- The best result will be when the clay is thoroughly compacted into the formwork. To do this, take wooden panels and install them so that the thickness of the lock is 150-200 mm. When the pit is not wide and there is enough material, its walls usually serve as formwork. The clay must be compacted in layers 200-300 mm high.
- Place a geotextile fabric outside the castle, which will prevent the structure from being washed away by groundwater.
Advice: when the foundation pit is not wide, you don’t need to install formwork.
- A clay castle is made like a blind area for a house. Its width is from 1 m, it does not necessarily have to be deep, from 0.5 m. Although it is better for the dimensions to be larger. If a water pipe goes from a well source to a private house, it should also be insulated with a lock, regardless of the depth of its installation. You can cover the clay on top with geotextiles, placing cobblestones or paving slabs on top of it.
Tip: protect the clay blind area on top with geotextiles or pave it.
From the above, it became clear that clay is a traditional and promising material in terms of waterproofing various structures, in particular the well shaft from ground moisture. Its price is cheap, since it can literally be found under your feet, and working with it does not require special qualifications, skills or complex tools, although it is labor-intensive.
Is it possible to replace clay?
On the market today you can find quite a few companies offering to replace clay with a mixture of sand and gravel or just sand. It should be understood that they simplify the work for themselves, but not for the consumer.

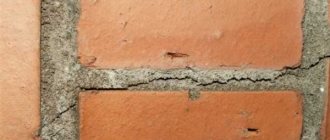
Finished clay castle
If you look at the problem logically, then you can understand whether such a lock is needed or not. The fact is that sand is not designed to retain water, but only passes it through itself, working on the principle of a filter. After it, the liquid reaches the wall of the concrete rings and, through possible cracks, rushes into the well shaft. (See also the article Filter well: features.)
Advice: it is better to make a clay castle around the perimeter of the source - the well will only benefit from this.
Clay is a material that is impermeable to water, although it can get wet on the surface. Because of this, in winter, when there is severe frost, you can sometimes observe a slight movement of the well rings.
At the same time, the material does not allow surface water to penetrate and moisten the soil, therefore, despite the variety of mixtures for castles, they are not able to replace clay.
Protection of well rings from displacement
To prevent the shaft of a well made of concrete rings from moving, make additional fastenings using stainless steel plates with anchor bolts. Plastic non-woven materials that do not rot have also proven themselves well.
Laying them should begin from the surface of the ground, and end 200 mm below the second seam. Thus, you will receive additional protection from the ingress of water and prevent clay from spilling due to unsealed seams.
Tip: to reduce the coefficient of adhesion between clay and rings, use non-woven plastic materials that are not subject to rotting.
How to tamp clay correctly
The work should be carried out in several passes, after laying 150-200 mm of clay. Sometimes precisely because of poor-quality sealing, it was often necessary to redo everything all over again. The finished clay for the castle should have a moisture content of 15-30%, which should not be forgotten.
Tip: Use for best tamping effect with small footprint but significant weight.
Now you need to remember when to make a clay castle. It is not installed immediately after the well is made; the soil around the perimeter must be allowed to settle and settle.
Compacting clay
Otherwise, cracks in the ground will render the castle useless. You can do the work yourself or with an assistant, or you can turn to professionals for help.
If there is a ravine
A ravine next to an area along the bottom of which a stream flows and overflows during floods can be turned from a potential enemy into a friend and helper. The ravine is blocked from bank to bank by an embankment. Rain, spring, or river water gradually accumulates in front of it, forming a water surface.
We present such a positive experience step by step:
- Dig a bypass channel
and temporarily direct a stream into it so that it does not interfere with work. - Make shields from boards, cover them with film, and top with roofing felt.
. - Make gaps in the ravine, insert shields into them, lay out a dam from stones
. - the bottom of the proposed pond with clay, compact it, lay a layer of sand on top, and level it
.
Finally, line the pond with film and the walls with stone
. - In order to keep the water at a certain level, an overflow pipe
. Excess water goes further through the diversion channel into the ravine. To avoid siltation, a septic tank is dug just upstream of the natural stream.
Such a water oasis requires virtually no costs, will avert the threat of flooding, and will decorate a vacation spot.
When is a clay castle built?
In different sources, from old literature to modern forums, you can find completely different approaches to laying a clay castle.
Therefore, when describing the construction procedure, we will explain why it is this way and not otherwise. First rule
– you cannot lay a clay castle immediately after building a well. After completing the main labor-intensive work, it must stand for six months to two years so that the soil around it naturally subsides. To ensure the drainage of overhead water, a temporary clay blind area is used. The earth has a porous structure, which is destroyed when digging a mine. In some cases, subsidence of the soil around the well continues for several years.
If the clay is poured and compacted immediately, it will form a dense dome around the rings, under which the natural shrinkage process will continue. Subsequently, voluminous cavities will appear under the clay and cracks in the castle itself. Groundwater and rodents will freely penetrate into them. It will only be a matter of time before sewage enters the well. To correct the situation, it is necessary to remove the old lock and re-lay the new one with high-quality kneading and compaction of the clay.
Some craftsmen suggest building a clay castle immediately after digging a well. It will be money wasted. It’s better to completely abandon such a lock than to then eliminate the consequences of “hackwork”
To ensure the drainage of overhead water, a temporary clay blind area is used
How to prevent a pond from freezing in winter?
In autumn, especially tender and valuable plants are removed from the pond, and ornamental fish are moved to the aquarium. The pond will freeze at low temperatures, it is impossible to counteract nature, but it is possible to make it easier for fish to winter in the reservoir and ensure an influx of oxygen.
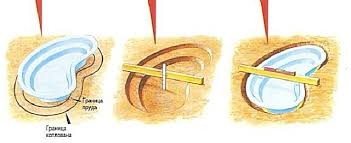
- Reeds and cattails
are placed vertically. Oxygen penetrates into the water through the hollow stems. - Styrofoam and bundles of straw
on the water will slow down freezing. - They make drinks by pouring boiling water over the ice
. - In severe frosts, cover with insulation (straw, burlap, roofing felt)
. You cannot keep such a flooring for a long time, you need natural light. A wooden or foam box is placed above the hole, an incandescent lamp is hung, the hole does not freeze.
A floating aerator was used here
, however, its effect is effective only at low subzero temperatures.
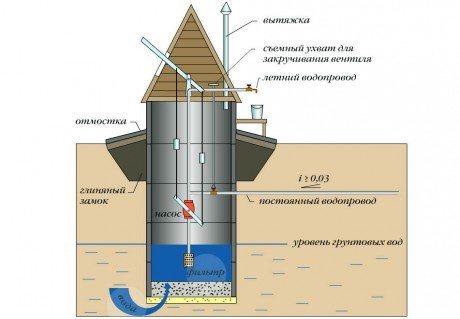
If there is a well
The easiest way to feed a reservoir is from a well. The owner of such a pond shared this scheme, with the help of which a good idea was realized, on a dacha forum. Water circulates and its consumption is small.
- Water from the pond flows to the filter
. In this case, it acts as a skimmer. - The water, cleared of debris, flows into a waterfall
, which saturates the reservoir with oxygen. The pump in the well turns on only when there is a need to raise the water level. - The relay is activated, turns on the pump in the well, water enters the pond, fills it to the required level. Next comes the turn of the filter. All mechanisms come into play one by one. This circuit automatically maintains the water level necessary for the filter and waterfall to operate.
Why a clay castle?
The availability of modern building materials allows the use of different technologies for an insulating lock. They have both advantages and disadvantages, but the oldest and most proven is a castle made of natural clay. This is the case when ancient methods are not only not forgotten, but also continue to be actively used in the modern construction of drinking wells. A properly laid clay castle will create a reliable barrier against the penetration of upper contaminated waters.
The clay castle provides protection against melt and waste water entering the well
The clay that is used to create the castle is a natural and cheap material. If there are no deposits in the adjacent territory, then bringing it to the site will not be a problem.
To build a clay castle, only dense, oily clay with a high degree of viscosity is used. Loams or sandy loams are absolutely not suitable for waterproofing because they do not have the required degree of density