- Video author: DoHow
- Author's channel: https://www.youtube.com/channel/UCVan_d0CRKJZ3j2qwPA8c4Q
- Video:
We will tell you about choosing a pump, piping it and installing it in a well.
In this case, we will talk about submersible centrifugal and screw pumps. We will share with you experience from our own practice.
Characteristics of various pumps
Let's start with choosing a pump. Now there are a huge number of different brands of submersible pumps on the market. The choice of pump begins with its pressure characteristics.

A similar graph is present in the catalog of any manufacturer. The performance of the pump is recorded here, as well as the pressure provided. Each line on the graph represents a specific pump. For example, at shallow diving depths, the first pump on the graph will provide a flow rate of 20 liters per minute.
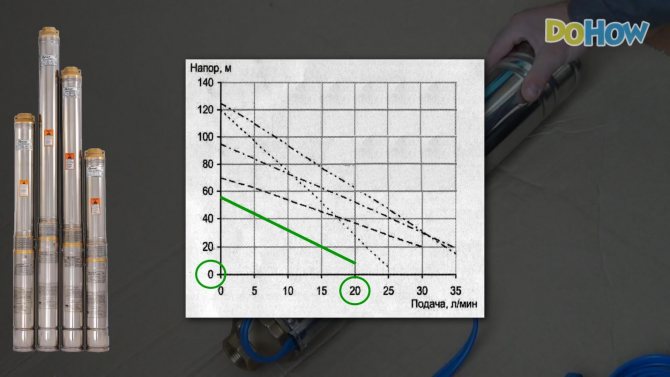
If you need to raise water to a height of 20 meters, then the flow rate will be 15 liters per minute or 900 liters per hour. If these values suit us, we select a pump with this characteristic. Please note that these characteristics are reliable only for expensive brand pumps. For cheap pumps, this characteristic will have a significant error in one direction or another. When calculating the required pressure, not only the depth of immersion of the pump into the well is taken into account, but also the passage of water through horizontal sections. Five meters of horizontal section is equal to one meter of pressure.

A 20% power reserve must be added to the selected characteristic so that the pump does not operate at its maximum capacity. The diameter of the pump must be smaller than the well pipe, since there must be free water around it. Note that branded pumps in practice have higher quality components, and this applies not only to the blades and body material. For example, well-known brands use high-quality cable that is certified for food purposes, while cheap Chinese pumps use a cable that swells in water over time. In addition, not all pumps come with a cable included. This is important for high-capacity pumps submersible to great depths. When connecting a cable to such a pump, the connection point will have to be carefully waterproofed. A heat-shrink sleeve must be installed over the cable braid. If there is a lot of sand in your well, then when choosing a pump you should give preference to the screw type. Unlike centrifugal pumps, they are more wear-resistant.
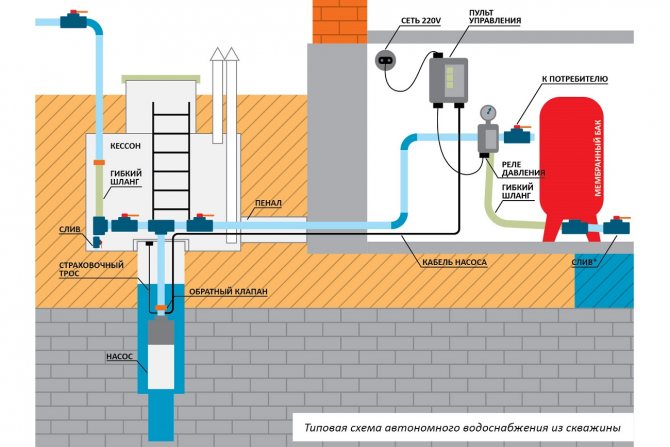
Water supply schemes
So, we are going to study two schemes using deep-well pumps: water supply can be implemented with a hydraulic accumulator or with a storage tank. First, a few words about why buffer tanks are needed at all.
They perform two functions:
- Allow the pump to idle longer, thereby saving its resource. Frequent switching on with high starting currents wears out equipment much faster than stable operation at constant speeds;
- They stabilize the pressure in the cold water circuit, smoothing out its surges when the pump is turned on (in the case of a hydraulic accumulator) or completely decoupling the water supply from the water supply inlet (in the case of a tank).
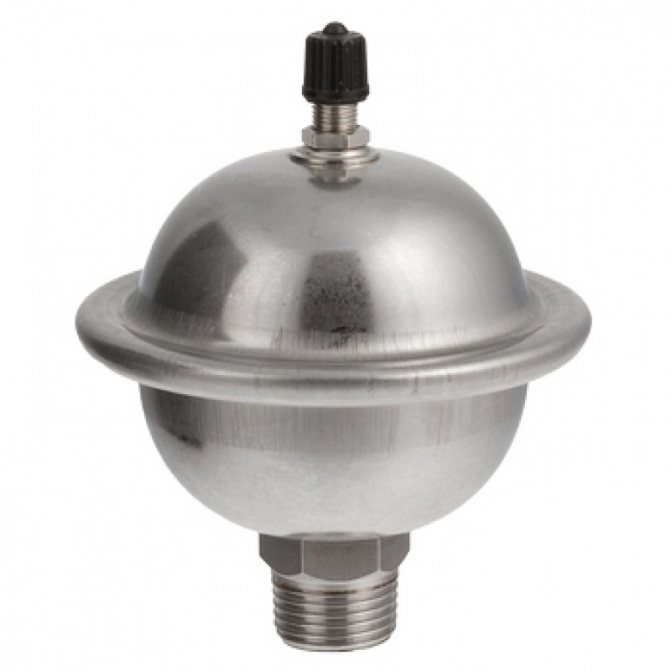
Membrane tanks are used as hydraulic shock absorbers
Now let's move on to the list of equipment and the actual diagrams.
With hydraulic accumulator
In addition to the submersible pump, the water supply system includes:
| Image | Description |
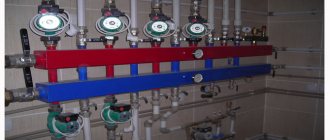
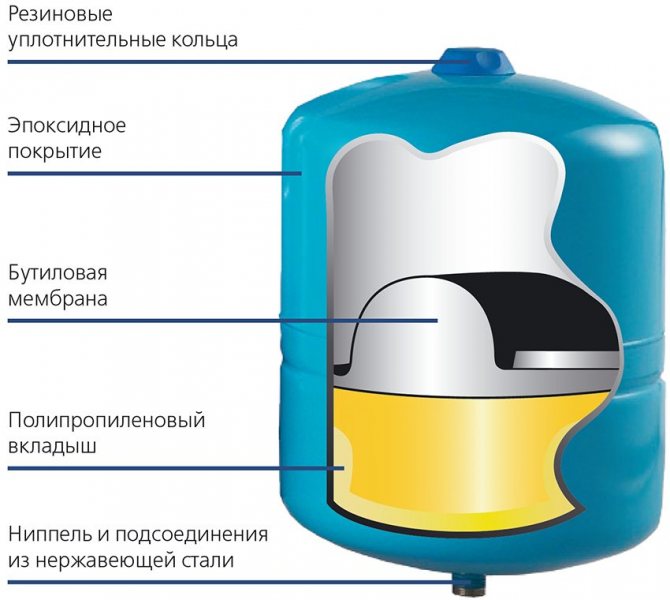
| The hydraulic accumulator is a steel tank with an elastic membrane that divides it into air and water compartments. The membrane tank can be connected to any part of the cold water supply system. However, most often it is mounted at the water supply inlet - or even in the well caisson. |
| On/off relay with pressure sensor. It supplies power to the pump electric motor when the pressure in the accumulator and water supply drops below a threshold value (usually 1.5 kgf/cm2), and turns it off when the upper threshold is reached (3-5 kgf/cm2). |
| Check valve. It is located on the outlet pipe of the pump, and prevents water from draining from the accumulator and water supply when it is turned off. |


Useful: the pumping pressure of the membrane tank should be slightly higher than the lower threshold of the automatic relay. In this case, the water supply will be uninterrupted: the pump will turn on until the water is completely consumed from the accumulator.
It’s not hard to guess how this scheme works:
- After turning on the pump, the pressure in the water supply system increases as the accumulator fills;
- When the upper threshold for automatic operation is reached, the pump turns off;
- The insignificant water consumption is compensated by its reserve in the membrane tank;
- When the pressure drops to the lower threshold of the automatic relay, it turns on the pump again.
Water supply diagram with membrane tank
This water supply scheme is the most common, but has one drawback: it is energy dependent. In case of frequent and long-term power outages, the owner of the house has only water from a hydraulic accumulator, the capacity of which is relatively small.
In addition: the amount of water in the membrane tank is not equal to its full capacity. The actual volume of water reserve is largely determined by the pressures to which the automatic relay is set and the pumping pressure of the accumulator.
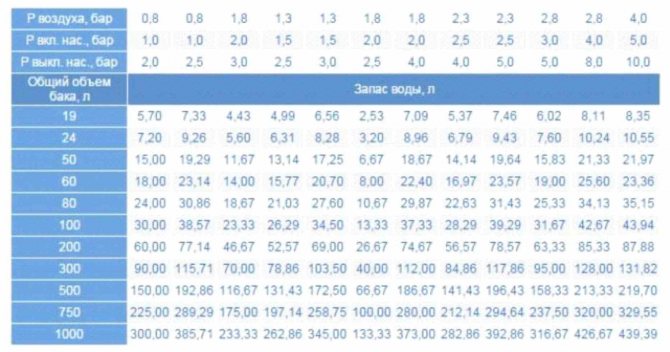
Water supply for different volumes of hydraulic accumulator depending on pressure
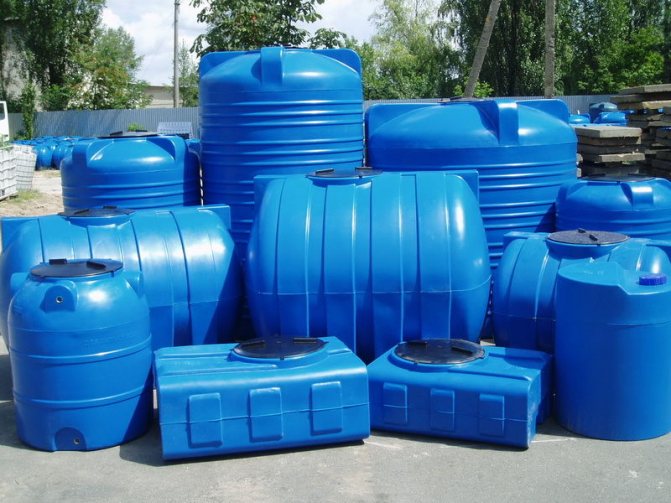
With storage capacity
The second scheme, unlike the first, is capable of providing water supply to the house for a long time even during a power outage. The water supply is limited only by the volume of the tank and is usually calculated in hundreds or even thousands of liters.
The circuit includes, in addition to the check valve already familiar to us, the following elements:
| Image | Description |
| Polyethylene tank for drinking water. Containers are usually equipped with pipes for filling and a drain tap. |
| Ball valve. It is mounted on the outlet pipe of the tank, and allows you to drain the water supply for plumbing repairs without dumping water from the storage tank. |
| Power relay with float sensor. It controls the pump turning on and off depending on the water level in the tank. |


Important: when installing a water supply system with your own hands, keep in mind that the tank must be raised to a height of at least 3 meters above the top point of water collection. What is this instruction related to? The fact is that a significant part of household appliances (dishwashers, instantaneous water heaters, etc.) operate at a pressure in the water supply of at least 0.3 kgf/cm

Atmor instantaneous water heaters turn off heating when the pressure in the tank with heating elements is below 0.3 kgf/cm2
The operating cycle of this circuit looks like this:
- The pump turns on and fills the container, after which the float relay is activated and turns off its power;
- Water flows by gravity into the water supply system and is consumed through plumbing fixtures;
- When the water level in the tank drops to a critical value, the float relay turns on the pump.

Scheme of gravity water supply with storage tank
Alas, this scheme also has several disadvantages:
- The container can only be placed in a heated room. In a cold attic, water will simply freeze;
- The water pressure is limited by the height of the container;
- The volume of the tank is limited by the strength of the floors.

The strength of the ceiling limits the size of the tank
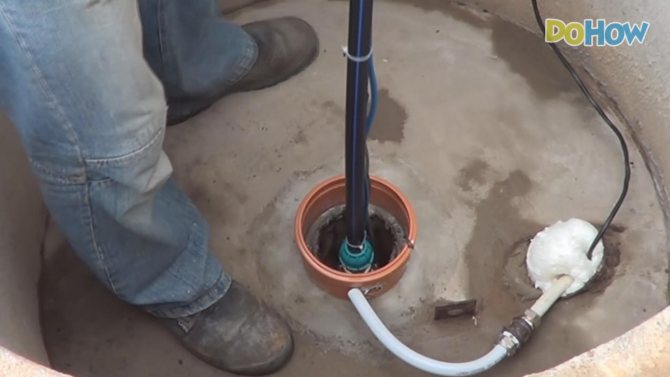
The first, simpler option for pump piping
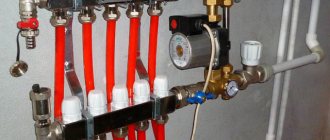
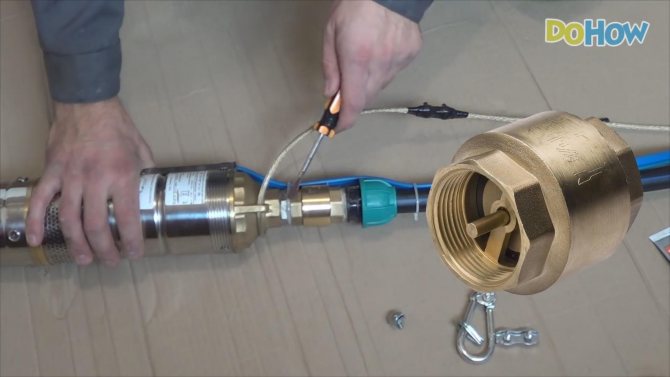
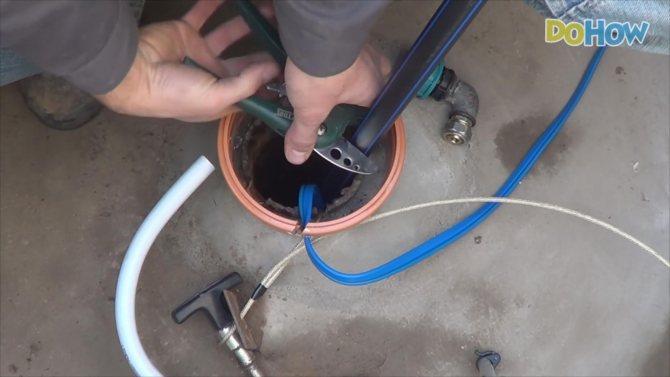
Let's look at the basic techniques for piping a pump using the example of a submersible screw pump.

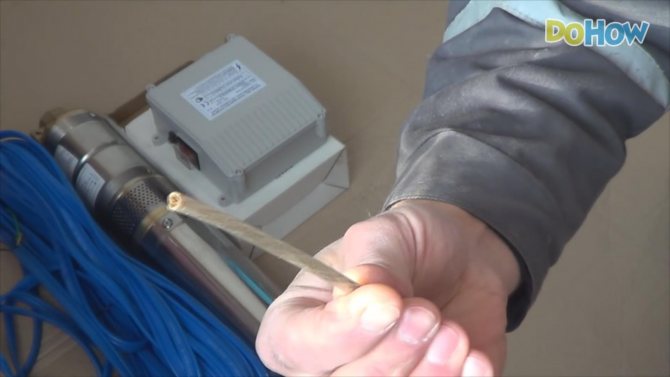
An outlet with internal thread is provided at the top of the unit. This is usually 1 inch or an inch and a quarter. A plastic check valve is also installed at the outlet, which prevents the outflow of water when the pump is turned off. This pump model is equipped with a high-quality cable 20 m long. It is easily recognized by its blue color and VDE standard markings.

This model has an external start-up protection device to which the cable is connected. Inside the starter protection device there is a capacitor and switches. This box is mounted indoors, to which there is free access. The cable connection diagram is in the pump instructions. Note that some pumps have a protective device installed directly in the housing, and then the power cable ends with a plug. To suspend the pump in the well, you will need a steel cable.
The ideal solution is a stainless steel cable, but its cost is high, so we will use a PVC-sheathed cable. We will need to protect the end of the cable from moisture. Note that the lifting capacity of the cable is calculated not only by the weight of the pump, but also by the weight of the water that it lifts to the top.
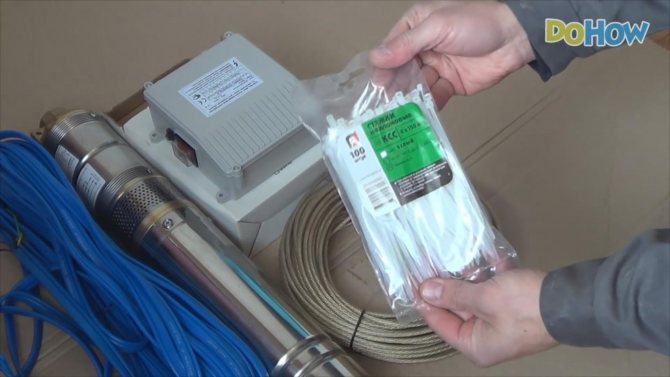
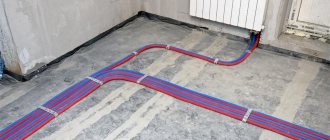
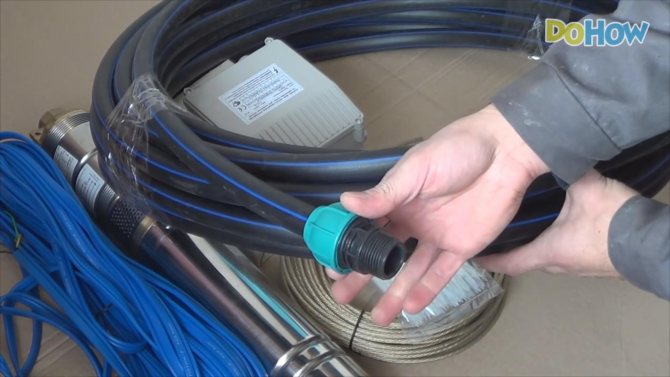
We will need plastic clamps with which we will secure the cable to the water-lifting pipe. A pipe based on HDPE (low-density polyethylene) is often used as a water-lifting pipe.

However, for greater pump immersion depths, it is better to use polypropylene pipes and fittings. To connect the HDPE pipe to the pump, a dismountable coupling with a suitable diameter is put on its end. It can be regular plastic or stronger brass.
In a simple version of the piping, the coupling will be screwed directly into the pump housing.
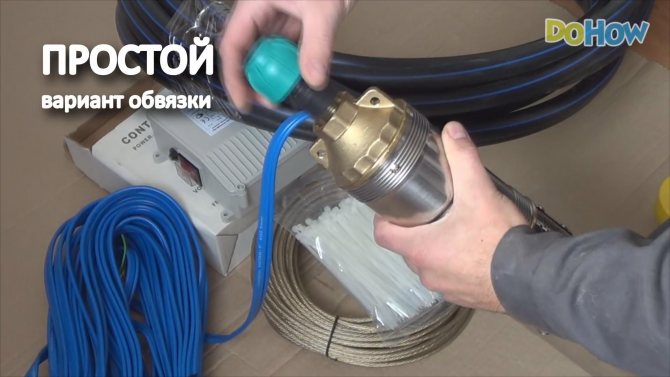
Care should be taken to ensure a high-quality seal of the threaded connection. This can be fum tape or sanitary linen together with Unipak paste. The second option is more preferable, especially when joining plastic fittings. The connection between the coupling and the pump is tightened with a wrench.
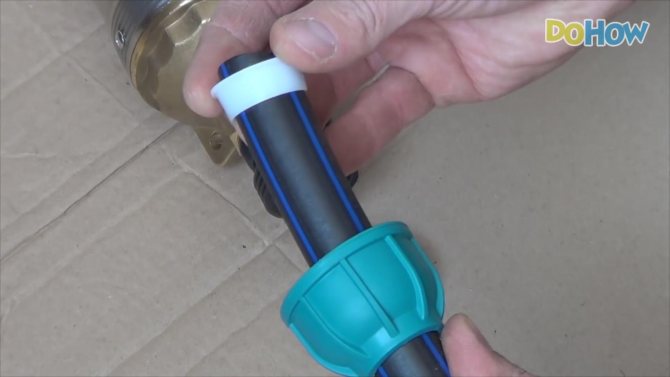
When connecting a pipe to a coupling, first put on the outer housing of the coupling, then the O-ring. Next, the pipe is cut exactly at 90°.
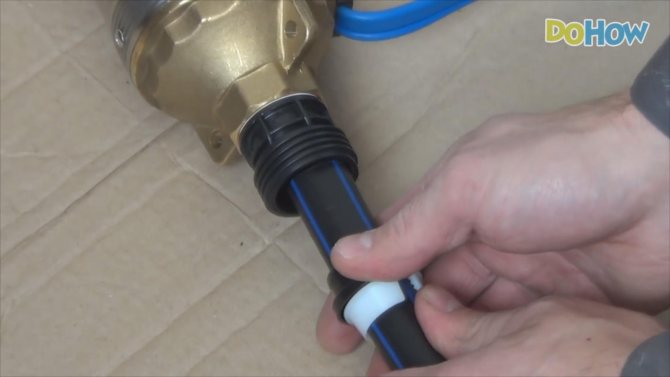
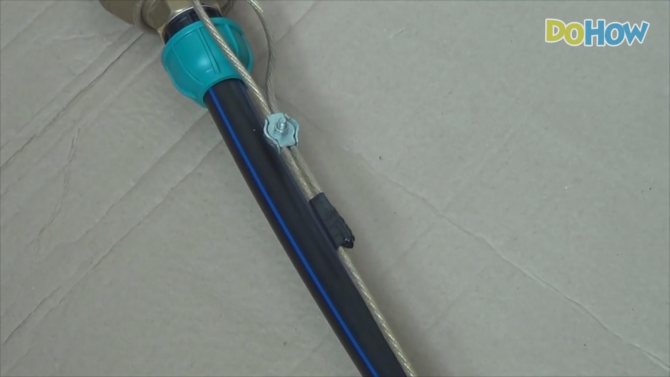
The pipe is inserted into the inner housing of the coupling and must be pushed forward until it stops. By screwing the outer coupling housing, the HDPE pipe is securely fixed in this connection. At the top of the pump housing there are usually two special eyes through which a steel cable is inserted. The first option for fixing the cable on the pump is to insert the cable into the ears and twist it inward once.
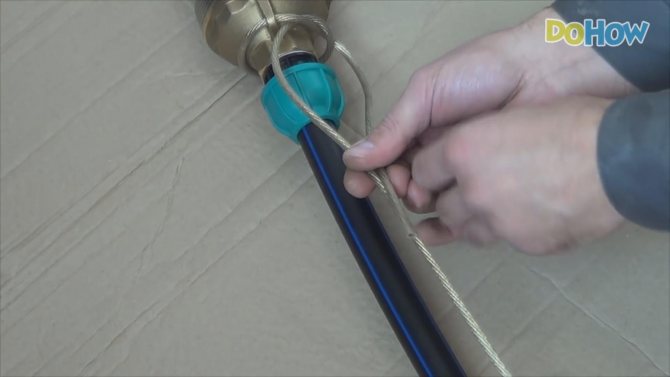
Slightly tighten this loop and bring the end of the cable along the main cable. To securely fix the end of the cable, we will use a special metal clamp.
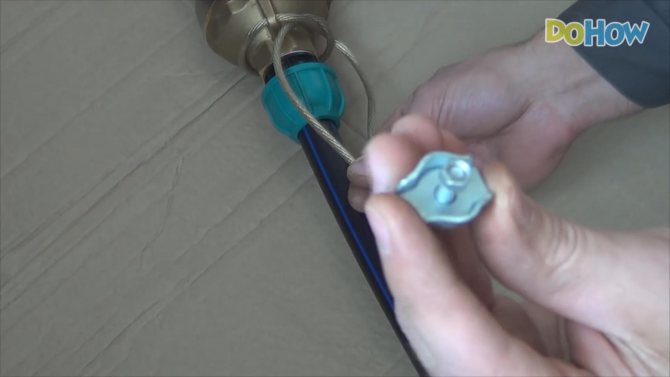
We place the main cable and the end coming from the pump inside the clamp. All that remains is to install the plate and tighten it with a nut.
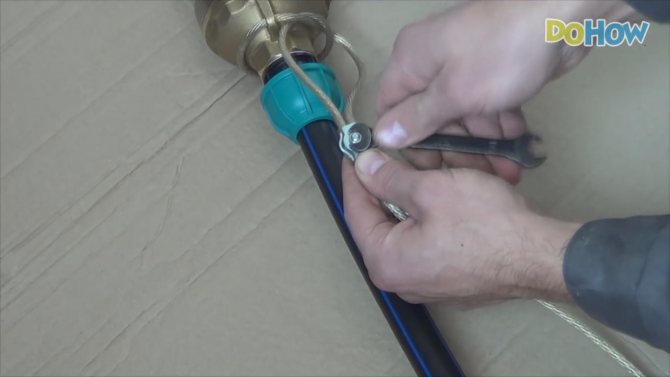
So, we fixed the cable according to the first option. Now let's start sealing the end of the cable. To do this, we use heated glue, which we apply to the cut of the cable. When it hardened, it created an airtight seal.
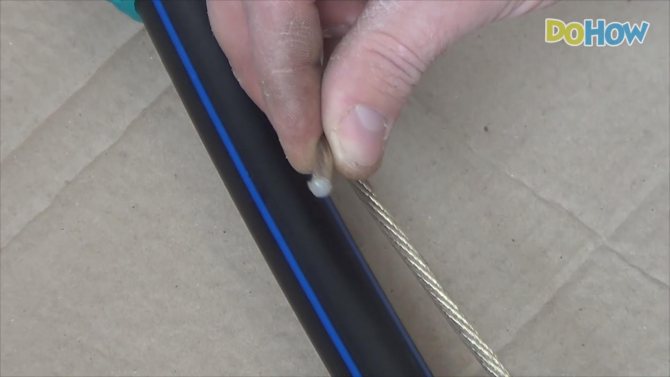
For additional protection of the cable, we will use electrical tape.
This is how we protected the cable from water getting under the sheath. Let's see how to properly fix the pump power cable so that it does not dangle in the well and is not damaged during lowering. To do this, we will use ordinary plastic clamps. We begin to fix the cable at the beginning of the water supply pipe. You should not fix the cable and cables on the same ties, as some of them may come off during lowering. During the first few meters, screeds can be installed more often. In the future, the installation step can be from 1 to 2 meters.

At shallow immersion depths, it makes sense to secure the cable itself with ties. In this case, there is no point in tightening the ties too much - they are only needed to transport the entire structure to the well area.

So, we have figured out how to tie a pump using the first, simplest option.
The most popular models of the series
Dab produces various types of pumping equipment. Circulation pumps for heating systems, pumping stations, sewage units, and drainage systems are supplied to the world market. Each product segment is represented by several series.
The Divertron series belongs to the segment of well and borehole units. It includes four main models:
- Divertron 1000 m;
- Divertron X 1000 m;
- Divertron 1200 m;
- Divertron X 1200 m.
Model 1000 m
The dab divertron 1000 m pump is designed to work with fresh water, free of impurities and oils, chemically neutral. The device operates in a vertical position. Before turning on, it requires complete immersion in the working fluid. Not complete immersion is allowed during prolonged work. The device is equipped with protection against dry running and thermal shock. The unit is equipped with an electrical control system and sensors for automatic switching on.
Main operating characteristics of the device:
- rated motor power – 0.65 kW;
- the volume of pumped liquid is 5.7 m3/h;
- the maximum immersion of the device to a depth of 10 m is permissible;
- the supply pressure is maintained at a height of 36 m;
- source cross-section – not less than 150 mm.
The device is designed to work with liquid whose temperature does not exceed 35 degrees.
Pump Divertron 1200 m
The dab divertron 1200 m pump is the most popular model in the series. Its power is enough to provide a complete water supply system in the house with stable pressure. It is equipped with an upgraded system of protection against overheating and idle operation. In case of overheating, the built-in thermal relay is activated, which automatically turns off the engine. After this, the device cools down for 15 minutes, after which it turns on again.

DAB divertron 1000M
As for protection against dry running, it is controlled by a pressure sensor in the working chamber and a flow sensor on the upper valve of the device. If the check valve is clogged or there is no water inside the diffuser, the automatic system is activated and the engine is turned off for an hour. After this, the next attempt to turn on occurs. If operating conditions have not changed, the device turns off again.
During operation, the unit makes virtually no noise and is also protected from vibrations created by the engine.
Device specifications:
- device power – 0.75 kW;
- pumped volume of liquid – 4.8 m3/h4
- maximum liquid lifting height – 45 m;
- maximum immersion – 10 m;
- device weight – 11 kg.
Review of the DIVERTRON 1200 DAB pump (video)
Divertron X models
In addition to the two main models, the series is represented by two models with the designation “X”. In terms of design features and performance, they actually repeat the main models. The only difference is that the X 1000 m and X 1200 m models are designed for sources with low water levels. Accordingly, they are equipped with a side suction pipe. In addition to this pipe, a flexible hose with a float mechanism is purchased. Such a hose always remains in the surface layer of liquid and does not allow the device to suck up sludge from the bottom.
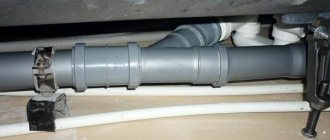
The second, more reliable option for pump piping
Now let's look at the second, more reliable option for piping the pump. Unlike the first option, here we have changed two elements. Firstly, we changed the connection of the pump to the cable.
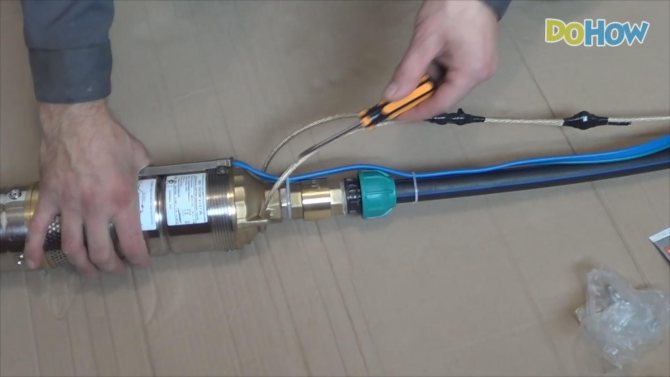
There is no longer a loop here, and both ends of the cable are carried much further than the coupling. Now, not a single, but a double clamp is used to secure the cable.
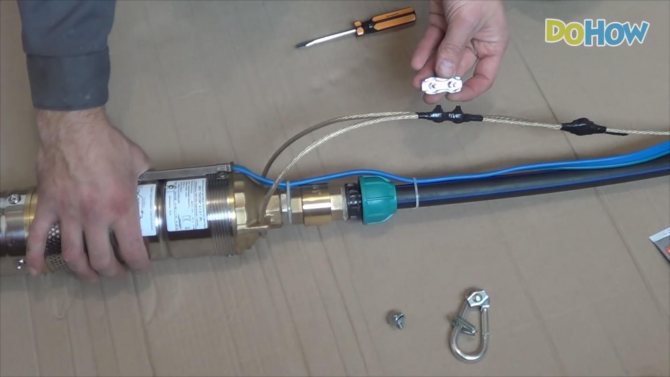
In addition, the double clamp is duplicated at the end of the cable with another single one. Both clamps are carefully wrapped with electrical tape to protect them from corrosion. The next difference from the first method is the use of a backup check valve.
In order to install it, we screwed a special nipple onto the pump. The brass check valve increases the reliability of the system and duplicates the valve located inside the pump housing. Please note that when installing a check valve, you must take into account the direction of water movement. It is indicated on the valve by the corresponding arrow. When starting the pump for the first time through the second piping system, it is necessary to forcibly suck air from the pipe. This will remove the air pocket that occurs in front of the valve.
Well head design
To complete the pump installation, we will need a standard well head.
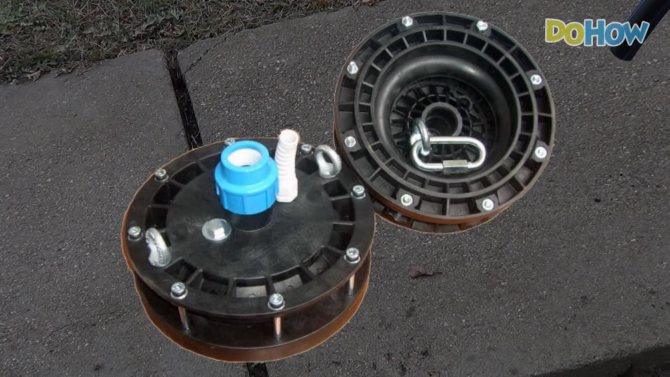
With its design, it reliably seals the well. It has a cable hanger and pipe and cable outlets. Its diameter is selected according to the diameter of your well.
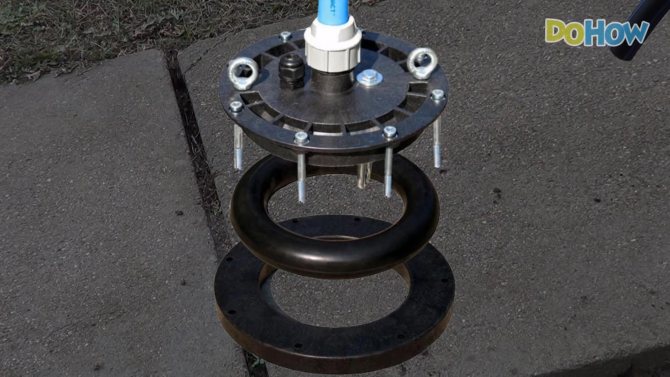
For deep wells, it is better to use a metal head. The following diagram shows the head structure and its main advantages - well sealing, cable sealing, pipe fixation and cable fixation.
The pipe coming from the pump is securely fixed on top with a coupling, then we cut the pipe and install the well head or cover.
If you need to install a pump in a well, use these simple recommendations in your work.