Share
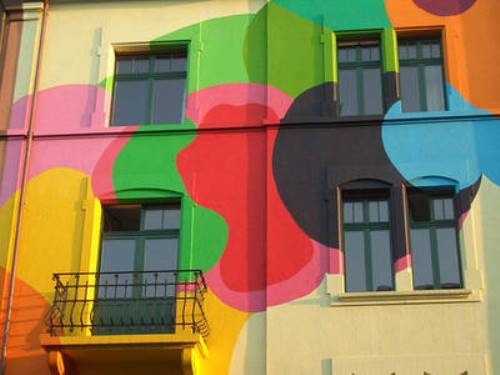
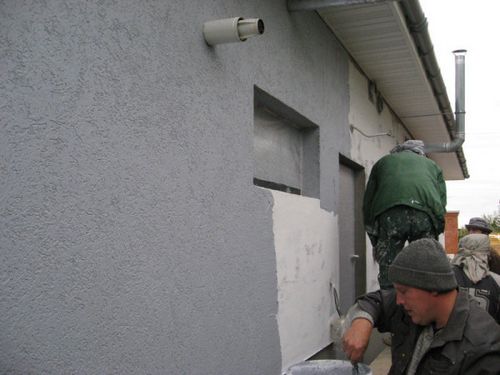
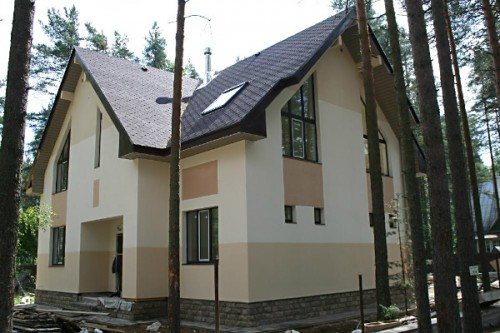
The work of plastering facades involves applying a cement layer or a cement-based coating to the external walls. This is done for protective and decorative purposes. Before starting work, you need to think through the design. The fact is that the facade of the building must be in harmony with its overall appearance.
You can be guided by your taste when performing work. After all, there are no strict requirements in this regard. Everything is limited only by your financial capabilities and personal preferences. In addition, it is worth considering that your home should be in harmony with neighboring houses.
When carrying out facing work, almost the same tools are used as for interior plastering. The techniques for carrying out these works are also similar.
Materials
Today there are quite a lot of materials for these works, but they can all be divided into three groups:
- Colored lime-sand.
- Stone.
- Terrasite.
Colored lime-sand plaster mixtures are used for finishing lightweight concrete, brick walls, tuff walls, porous ceramic blocks and shell rock. These coatings are usually applied to soils with the addition of cement.
Terrasite plasters are used for finishing permanent buildings.
Surfaces made of brick, heavy concrete and materials with a grade of at least 100 can be decorated using stone plaster. Before applying it, the walls must be treated with a cement primer. This mixture imitates natural facing materials in appearance. This mixture cannot be used for less durable surfaces.
Characteristics of facade plaster
Modern plasters must have the following important characteristics:
- Resistance to temperature changes - is of great importance for areas where there is a large difference in seasonal temperatures.
- Moisture resistance - protecting the building from high air humidity and precipitation.
- Vapor permeability - this property allows steam to escape outside and thereby the building breathes.
- Sound insulation and thermal insulation - thanks to these properties, a more comfortable microclimate is created in the house.
- Strength – resistance to mechanical stress.
- A variety of colors and textures - allows you to create surfaces of different colors and textures.
- Ease of applying the solution - this property helps to plaster facades with your own hands, while saving on expensive services.
How to choose plaster for facade walls?
When calculating the required volume of decorative facade plaster, it is necessary to determine the layer thickness per square meter. To do this, you will need to evaluate the surface roughness and calculate the arithmetic mean length of the beacons. After this, you should familiarize yourself with the information indicated on the packaging - there is material consumption per square meter of surface for a layer thickness of 10 mm.
The consumption of facade putty must be calculated in advance, before starting to work with the material.
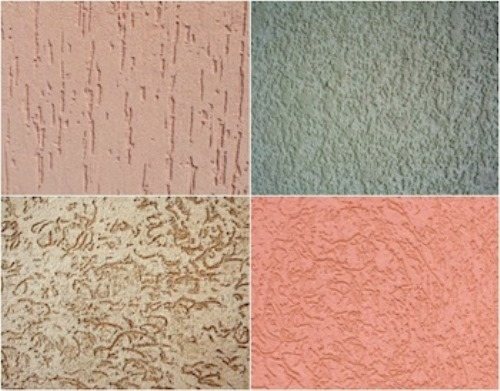
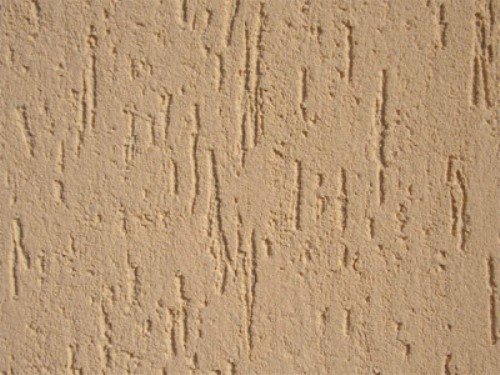
- Stamped - they are created on a freshly plastered surface; a board or roller with a three-dimensional pattern is used as accessories.
- Rough - they are obtained by throwing chips of natural stone onto fresh plaster; as a result of grouting, the surface becomes grainy in accordance with the additive used.
- Small furrow - this texture is obtained by scraping along the set plaster layer.
- Fur coat is a very popular texture that can be achieved using a roller or tongue.
- Imitation of torn stone - processing the hardened mortar with a chisel.
- Acid etching allows you to obtain a spectacular relief, and when you add various fillers to the composition, such as marble chips or bricks, you get a spectacular multi-color surface.
- Mosaic plaster - the effect is achieved due to the presence of fillers of different colors and sizes - they create a mosaic effect.
Imitation of masonry made of plaster
Characteristics:
- Vapor permeability. To ensure that the greenhouse effect does not form inside the room and the structure is ventilated, this parameter is indispensable. This is the only way to create an optimal microclimate inside.
- Easy to apply plaster to the wall, which simplifies the decorating process.
- Resistance to mechanical stress.
- Ability to withstand static load.
- Resistance to external influences: precipitation, wind, ultraviolet rays.
- Resistance to temperature fluctuations.
One more nuance: decorative plaster for the facade of the house is selected in accordance with the overall interior of the building, because the decorative component is very important. This includes color, texture and material quality.
This is an ideal surface for applying the plaster mixture (the same applies to brick). The entire work process boils down to normal surface preparation (leveling and applying primer) and plastering. The exception is the use of thin-layer materials. Then, using a roller, the walls are treated with primer and pigment; its shade is selected depending on the future color of the plaster.
Step-by-step instructions for applying decorative plaster to aerated concrete manually:
- If a dry plaster mixture is used, it must be prepared. Facade decorative plaster for exterior use is mixed with water. The ratio is indicated on the packaging. Everything is thoroughly mixed with a construction mixer. After kneading, you need to let the mixture sit for 15 minutes, so it will reach readiness.
- If necessary, the composition is tinted in the selected color.
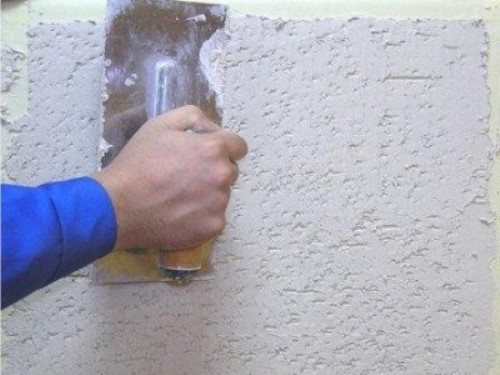
- The plaster is applied to the surface using a trowel. Using a spatula from the container, spread the mixture onto the edge of the trowel.
- The trowel with plaster is applied to the surface at almost an angle of 90°, after which a movement is made from bottom to top, while the angle decreases as the trowel passes until it completely reaches a parallel position. This way the composition will be evenly applied to the surface.
- With virtually no pressure, the tool is guided along the wall. This way the decorative plaster will be stretched into a layer with the required thickness.
- Having treated a surface of approximately 1.5 m2, it must be rubbed using a plastic grater. This will give you the desired texture.
All manipulations are repeated 3 to 6 times until the entire surface of the house outside has been treated.
The work is also simple. Technology for creating exterior decoration of a house:
- Prepare the solution following the instructions on the package. If these are ready-made mixtures, then simply open the plaster.
- Bring the solution to the construction site.
- Take measures to prime the brick wall to improve adhesion. The work is done with a roller and brush.
- Metal beacons are fixed to the wall. Plastering on beacons is more convenient and easier for beginners.
- The wall is wetted to increase the drying time of the plaster after application.
- The plaster mixture is mixed to a homogeneous consistency.
- The solution is sprayed onto a brick surface separated by a lighthouse.
- Using a spatula, the surface is leveled with movements from bottom to top.
- Having processed one section of beacons, all defects are eliminated using a long rule. The surface turns out to be perfectly flat, since the beacons serve as a guide in working with the rule.
- While the surface is damp, small grooves are created using a scraper. They are needed to improve adhesion with rolling, that’s what the next layer is called.
- When the first layer has dried, you can begin to form the decorative finish.
At the end, the plaster layer is smoothed and leveled.
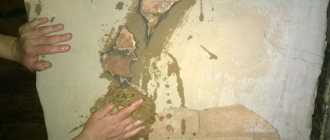
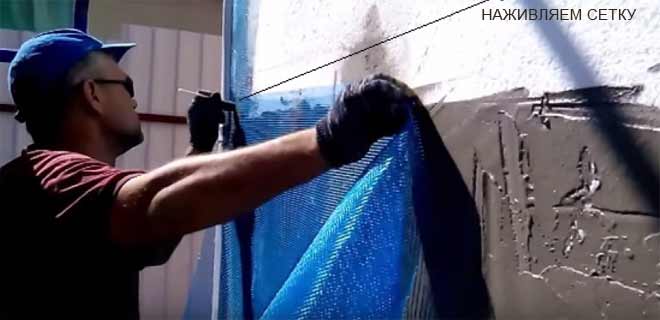
It is more difficult to plaster such a surface; it is not so strong and stable. Therefore, before application to the façade, a special reinforcing mesh is installed. Many people make a mistake in this matter - they apply the adhesive only on top of the mesh.
The correct technology looks like this:
- An adhesive composition must be applied to the facade. The treated area at a time is from 1 to 1.5 m2. The reinforcing mesh is fixed to the treated area and secured in the corners using thin sticks, as shown in the photo.
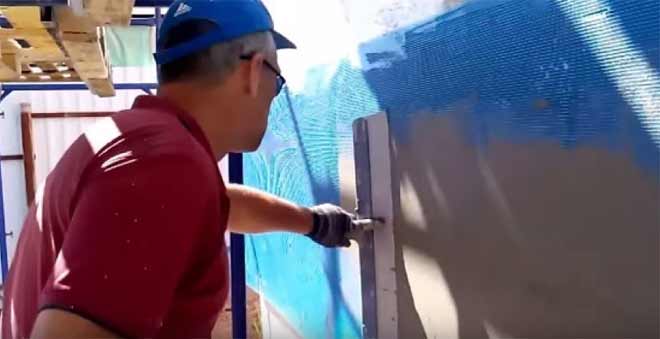
- A wide trowel (more than 30 cm) needs to be drawn along the surface of the mesh in different directions. You need to press lightly so that the adhesive substance comes out through the holes of the mesh, almost completely hiding it underneath.
- The edge of the mesh that hangs over the base is folded down and glued in the same way. To get a perfect bend, you can use a carbon spatula. All walls in the house are treated in the same way.
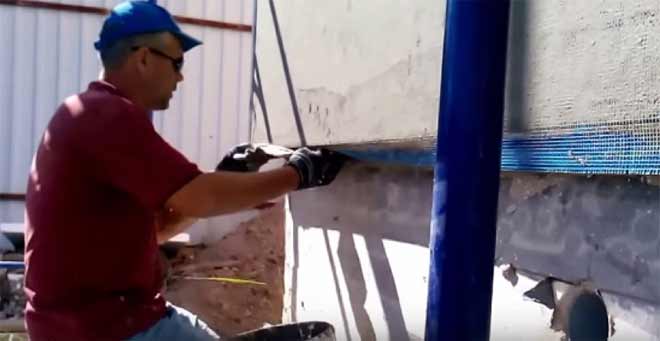
- When the glue dries, a second layer is applied, the mesh is hidden entirely.
- After which the surface requires priming. Then it is covered with a decorative composition for exterior use. Final plastering of the surface over the prepared layer is the same as with aerated concrete walls. It is described above.
READ MORE: Dimensions of bedside tables for the bedroom 41 photos width 30 35 and 40 cm standard sizes
If you work with wooden walls (timber, chipboard, OSB), then there are two ways to finish the facade. The first of them is identical to working with insulation, as described above.
The second plastering technology is as follows:
- The outside of the facade is sheathed with special paper for this work (construction paper). This will enhance surface protection. It is fixed using a construction stapler.
- A metal facade mesh is laid on top of the paper layer. It is used for plastering work and has large cells. It is also fixed with a stapler. The inclination of the mesh and the level of its contact with the wall depends on the evenness of the walls.
- To treat a wooden facade, the plaster layer will be thick. In view of this, an aluminum profile is fixed at the bottom. It will serve as a limiter.
- The first layer is applied. It is made thick enough to practically hide the mesh. You need to wait for it to dry, and then apply a second layer of plaster. It will be leveling.
The finishing is carried out according to an identical algorithm, the same as with a gas silicate surface. The process is described above.
To find out the composition consumption, you need to consider several nuances. The first of these is the type of filler, the second is the binder, and the third is the quality of the surface. Typically, the material consumption is printed on the packaging, which, according to the requirements, each external decorative plaster must have.
Average indicators:
- mineral products – from 2.3 to 3.7 kg/m2;
- acrylic products - from 1.3 to 2.8 kg/m2;
- silicone products – from 2.2 to 3.6 kg/m2.
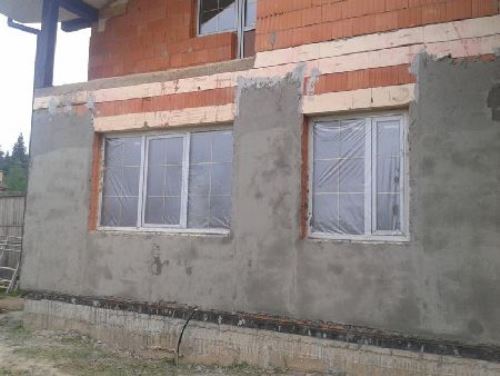
Facade plastering on aerated concrete is not much different from plastering other building structures. If you are doing external plastering of the facade with your own hands on walls made of aerated concrete blocks, their outer surface should be strengthened. Various primers and impregnations are suitable for this, which are used when plastering on loose bases. After treating the wall with such compositions, you can begin applying facade plaster in the usual way with a mesh of glass-polymer thread.
Plastering the external walls of the facade can be done by hand. The technology of plastering facades is not difficult to study on your own. It is also necessary to acquire special tools, which include trowels, rules, graters and graters (cuts of a smooth wooden board with a handle), brushes, spatulas of various widths, falcons (a square measuring up to 400 x 400 mm made of aluminum or steel sheet with a handle ), plaster ladles for pouring, containers with a volume of up to 0.1 m3 for preparing mortar.
The service life of plastered building facades is 15...25 years or more, depending on the composition of the plaster and compliance with the technology of work when applying it.
Types of facade plaster
Any plaster is a complex of binders and additives that affect the properties of the finished coating, application technology and appearance.
Mineral plaster
It is usually sold in the form of a dry mixture. For mixing, it is very important to follow the proportions indicated on the packaging by the manufacturer.
Advantages
- High strength that increases over time.
- To increase moisture resistance, this material is enriched with special additives.
Flaws
Small selection of colors.
Acrylic plaster
This material is sold as a ready-mix. To use it you just need to mix it well. It is well suited as a material for decorative plastering of house facades. The binders are various resins. To increase resistance to temperature changes and high humidity, special additives are added to the composition. This plaster is capable of protecting buildings from various microorganisms, such as mold. The most popular type of such material is bark beetle plaster.
Plaster Bark beetle
This plaster may contain various polymer fillers, which is why the technology for plastering facades with material from different manufacturers may differ. Therefore, there is no single method for applying bark beetle - therefore, you should always carefully read the instructions before starting work. All brands of this plaster contain cement and marble chips with a grain size of 0.1-3.5 millimeters. The larger the grains, the greater the material consumption. The average consumption is usually indicated on the Bark Beetle packaging. This can help to calculate the required amount of material. Most brands of this plaster are white, but sometimes it is tinted using special paints.
Advantages:
- Weather resistance.
- Frost resistance.
- High strength.
- The coating can be washed.
- It is resistant to direct sunlight.
- Resistant to alkalis, acids and industrial gases.
- Even with high humidity, the surface will retain its attractive appearance for a long time.
Silicone plaster
This is a high-quality and versatile finishing material. This plaster is based on polymer compounds, which allows it to protect the building from any influences and keep it in its original form for a long time. This material prevents the development of microorganisms, repels dirt well and is highly vapor permeable. You can find silicone plaster in almost any shade on sale, but it is also very expensive. As a result, we get high-quality plastering of facades. The price of the work is the highest.
Silicate plaster
This material is made on the basis of liquid glass. This plaster is recommended for finishing buildings made of porous materials.
Advantages:
- High vapor permeability.
- Good ductility.
- Easy to apply.
- Excellently repels dirt.
When choosing facade plaster, you need to take into account the requirements for the appearance and properties of the surface. On the packaging you can often read the characteristics and recommendations for using this plaster.
How to choose plaster for facade walls?
Plastering the facade
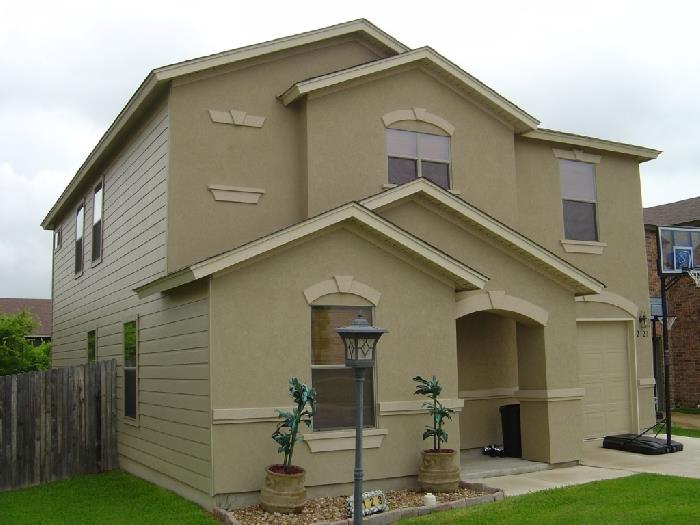
The main purpose of facade finishing plaster is to create an attractive design and protect it from all kinds of external influences that can contribute to destruction. This is ensured by the technology of applying facade decorative plaster and the fact that it has the following properties that are advantageous over other similar coatings:
- It does not lose its qualities under the influence of wind, precipitation and ultraviolet radiation; in fact, it is a kind of protection for the facade.
- Shows resistance to temperature changes and climatic conditions.
- Has high compressive strength.
- Endowed with the ability to “breathe”, that is, to let air and steam pass out. This helps maintain the original surface structure of the building.
- Improves thermal insulation of interior spaces.
- It is an excellent sound insulator and prevents street noise from entering the house.
- Provides the opportunity to implement a variety of design projects with a wide selection of colors.
- The technology for applying facade decorative plaster is very simple and easy. It does not require complex preparation of the base.
- All work can be carried out on your own, without involving specialists.
- Large selection of textures and colors.
- Cost benefit when compared with other finishing materials. The price of each type of decorative plaster depends on the structure and the available ingredients in its composition.
Applying facade plaster
Decorative finishing of facades with plaster can be done either manually or by machine. For manual application of mixtures, no special equipment is required; it is enough to acquire only a standard set of devices, as well as tools, for example, special spatulas. When performing finishing work, it is imperative to follow the technology for applying facade decorative plaster recommended by the manufacturer, including the speed of applying the mixture, as well as its drying time.
To prevent the formation of cracks, before plastering the facade, you should wait a certain time until the shrinkage of the walls is completed. It is necessary to complete the installation of the roof and balconies, installation of external waterproofing, drainpipes and communications.
The façade is finished with decorative plaster in the following sequence:
- Preparatory stage. Install scaffolding. Clean the entire surface of the facade from protruding grease and bitumen stains, salts, dust and dirt. In hot and dry weather, walls made of concrete blocks, bricks or cinder blocks that need to be plastered must be moistened. Surface leveling is ensured during the preliminary main plastering process.
- Surface treatment with primer. It is impossible to obtain a reliable and high-quality coating without this stage. Therefore, there is no point in saving materials here. Careful priming is necessary because it increases the adhesion coefficient and prevents the spread of all kinds of biological pests, including fungi. In addition, the primer allows you to overcome uneven drying of the solution, and therefore the appearance of stains and cracks over time.
The primer should be applied with a roller or wide brush. Usually one or two layers are enough, but if the facade is made of moisture-absorbing or bulk materials such as gas silicate and foam concrete, several more layers will need to be applied. They will not allow the surface to absorb moisture present in the plaster mortar. Be sure to maintain the drying time, which is indicated in the description attached to the primer.
- Prepare the plaster solution according to the instructions.
- Plastering. The technology of applying facade decorative plaster allows you to recreate the structure of granite, wood, fabric and many other materials. This is done using various tools - rollers, wide brushes, paint spatulas or others. The thickness of the layer is determined by the diameter of the filler grain. During operation, the plaster composition should be stirred periodically.
If you need to get a needle-like surface of a facade wall, a pattern in the form of a pigtail or other texture, then first apply a base layer of plaster. Then it is dried and after about 15 minutes the second layer is applied. It is processed with a special structural roller, which is made of rubber.
If desired, you can print the drawing. This is done over a layer that is still pressed with a finger. Usually two people participate. One applies a texture matrix to the surface, the other presses on it with his hands or a trowel, imprinting an image. Sagging is removed with a soft sponge.
- The final stage. Painting of plaster is possible. This is not necessary if a pigmented plaster mixture is used.
- It is important to ensure that the decorative finishing process takes place in calm weather, a temperature of 5–25 degrees, with a humidity of no more than 70%. Unfavorable conditions impair adhesion and can cause various defects.
Decorative plaster has many advantages over all other options for finishing building facades. By choosing this method, you have a real opportunity to give your home a unique personality that will always distinguish it from most buildings. You can select any plaster solution based on structure and color, taking into account the specific features of the facade surface. You can do all this yourself, without turning to highly paid specialists. It is enough to have some skills.
READ MORE: How to make a children's canopy with your own hands step by step
Thermal insulation of the walls of a structure helps to increase the energy efficiency of the structure, as well as protect the walls from the negative effects of external destructive factors.
When insulating the façade of a building before plastering, heat-insulating materials are secured using adhesives or umbrella nails.
Adhesive mixtures
Before carrying out plastering work, it is necessary to seal all joints of the heat-insulating material and apply a special adhesive composition to the heat-insulating layer, which serves to secure the reinforcing mesh to the wall of the building.
Apply glue using a special spatula.
The most common adhesives are Ilmax KS-1, Typhoon Master No. 51, Ceresit ST 85.
Thermal insulation materials
To insulate the facades of buildings that will be plastered, it is best to use heat insulators such as polystyrene foam, extruded polystyrene foam, mineral wool boards or polyurethane foam.
In order to provide the heat-insulating layer with the required rigidity before applying the plaster mixture, it must be additionally reinforced using reinforcing mesh.
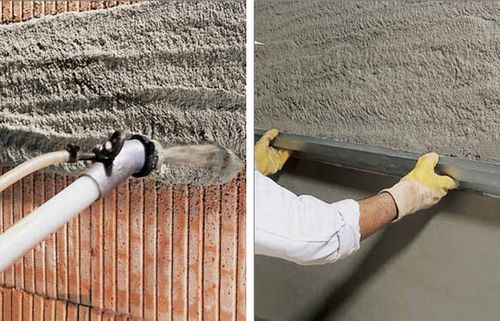
There is only one difference between the manual and machine methods of plastering surfaces - the technique of applying the solution. Otherwise the sequence of steps is the same:
- cleaning walls from remnants of old paint, lime, plaster, dirt;
- primer;
- sealing cracks and height differences;
- installation of beacons.
Beacons are mounted on the wall, having previously aligned them vertically using a plumb line. If there are more than two beacon profiles, then horizontal alignment is also required.
The distance between the beacons is determined by the size of the rule - it should be 0.2 m less than it. Their thickness can vary from 0.6 to 2 cm. The larger this parameter, the greater the rigidity of the profile, which means the easier it is to level it.
First of all, you need to check that the thickness of the applied layer is not more than 5 cm on the wall and 4 cm on the ceiling. If this value is greater on the wall surface, then it is necessary to spray it first.
Prepare the solution strictly according to the instructions given by the manufacturer. It must be applied in horizontal stripes and then pulled together with a rule.
For the finishing layer, manual application is usually used, although machine application is also possible if the area to be treated is large enough.
If you do not have experience in applying mechanized plaster or you doubt your abilities, then it is better to turn to experienced specialists than to deal with your own mistakes later.
The demand for decorative plaster for facade finishing is based on the performance characteristics of the material and the ability to improve the aesthetic appearance of the building. Among the advantages:
- Increased thermal insulation and sound insulation of walls.
- Wide color variety of building finishing mixtures.
- The technology of decorative plaster of the facade does not require automated equipment.
- Permissibility of applying decorative plaster with your own hands.
- The cost of the finishing layer is lower compared to competing building design designs.
Techniques for applying decorative plaster allow you to create a grainy or grooved surface, imitating the texture of wood, granite, sandstone and other materials. The choice of tools depends on the task at hand. Rollers, graters, spatulas, and stencils will become indispensable assistants in this matter. When carrying out work, it is necessary to strictly follow the manufacturer’s recommendations regarding the speed of pouring the mixture, as well as maintain technological breaks. Among the favorable moments for applying the finishing layer are:
- Air temperature 5⁰С–25⁰С.
- Humidity up to 70%.
The mosaic decorative mixture consists of a synthetic binder and fine-grained natural stone chips. The finishing layer is applied with a trowel or a stainless spatula from bottom to top.
Pebble plaster is applied using continuous strokes. The thickness of the layer is dictated by the grain size of the filler. The size of the solid fraction will serve as a limit for the spatula. When a smooth area with a small amount of scratches is formed, begin grouting:
- The grooved “bark beetle” pattern is formed by smooth horizontal, vertical or zigzag movement of a plastic grater. Smooth and measured movements of the hand will allow you to obtain a uniform texture in the pattern. To connect areas without a visible seam, the area to be treated is not grouted for 10 cm. Grouting begins after plastering the next area.
- The “lamb” texture is obtained by moving the hand in a circular motion with a grater or processing the surface with a roller, which allows the pebbles to be evenly distributed over the area. At the final stage, you can paint the finishing layer if you did not use a tinted mixture.
Features of mortar
Composition of the building mixture:
- Sand is the main mass of the mixture.
- Cement – for binding individual fractions.
- Pure water.
If the mixture is of high quality, then it can adhere well to any masonry texture. The solution can be of any density. To do this, you only need to change the proportions of cement and sand. Instead of cement, you can also add lime.
For light bricks and foam blocks, cement mortar is suitable, and for walls made of dense, heavy brick, it is better to choose cement-sand mortar.
Once cement and water are mixed, a chemical reaction called hydration begins. It is thanks to this reaction that the cement hardens. Moreover, the longer the cement dries, the stronger it will be. Therefore, if plastering work is carried out in the summer, then the hardening cement should be abundantly moistened by watering the facade with a hose. You can also moisten it by covering the façade with a damp rag.
When carrying out plastering work, the following materials are used:
- Cement.
- Sand.
- Dry mixture solution.
Often, cement is used in the work, which is called Portland cement. This material consists of limestone, clay and chalk. By using additives or adjusting manufacturing technology, different types of cement are obtained.
So, you can get, for example, the following types of material:
- Portland cement for general purpose. This is ordinary cement, light gray in color. It's quite cheap. To get the mortar needed for the job, you need to mix it with aggregates. It is usually supplied in bags of 25 or 50 kilograms.
- White Portland cement. This type of cement is higher quality and slightly more expensive than regular cement. It is used to prepare mortar for rubble and brickwork, as well as for concrete and cement plaster. It mixes easily with building dyes.
- Fast setting cement. This material is most suitable where quick drying is required without loss of quality. It only takes 30 minutes for it to set. At the same time, it is water resistant and does not shrink.
- Masonry cement. It is used for exterior decoration, as well as for rubble and brickwork.
Sand is also used for plastering work. This is the finest aggregate. It comes in several types, which differ in grain size and shape. This material may be:
- Coarse-grained.
- Fine-grained.
- Graduated (fractions of different sizes).
Before using sand in plastering work, it must be washed thoroughly and foreign bodies removed from it.
Facade finishing work is noticeably easier if you use solutions from ready-made dry mixtures. Today you can buy them at any hardware store. They are usually sold in bags of different sizes. To prepare a solution from such mixtures, it is enough to combine the contents of the bags with clean water in the proportions indicated on the package. You just need to remember that you can’t keep the packaging open for a long time. In addition, before diluting the mixture with water, you must first mix it thoroughly. In order for the final color of the surface to be uniform and the texture to be uniform, it is necessary to strictly adhere to the instructions.
Plaster compositions
Do-it-yourself facade plaster can be done using ready-made plaster mixtures, the purpose and scope of which is indicated on the packaging, but you can prepare the plaster composition yourself. All three layers applied to the walls should be made from the same type of plaster mortar. For plastering building facades the following is usually used:
- cement-sand mortars, ratio of cement and sand by volume for spraying 1:2.5...4, for soil 1:2...3, for covering 1:1...1.5;
- cement-lime mortars, ratio of cement, sand and lime by volume for spraying is 1:2.5...4:2.5...4, for soil 1:2...3:0.7...1, for covering 1:1...1.5:1...1.5;
- lime-sand mortars, the ratio of lime paste and sand for all layers is 1: 2...4. Such solutions need to be prepared in small portions, as they set in 20 minutes to half an hour.
Various water-repellent and plasticizing additives can be added to all types of solutions.
How to mix the solution
- One prepared portion of the solution can be used for about one hour. Therefore, you need to cook exactly the amount that will be consumed in one hour. After an hour, the solution will already be dry and unsuitable for use. Before starting work, you need to check the tool - there should be no residues of old material on it and it should be clean. Take different buckets for sand and cement so as not to mix and spoil the material.
- To mix the mortar, first measure out the required number of buckets of sand and pour them onto the mortar board.
- Then, using a second bucket, you need to measure out the required amount of cement and pour the mixture next to a board with a bunch of sand.
- Then these materials need to be mixed until completely heterogeneous. To do this, shift it in turn from one pile to another.
- Make a hole in the center of the pile and pour water into it.
- Next, using a shovel, you need to add the dry mixture lying nearby into the water.
- Before starting work, you should check the density of the prepared solution. To do this, you can make a furrow through the mixture with a shovel. If the edges crumble, then the solution is too dry; if the edges melt, then it is too wet. If both are missing, then you need to remember the amount of water in order to know how much to take for the next portions.
Mixing with a concrete mixer
Even a small concrete mixer can simplify and speed up the preparation of the mixture. Today there is no need to buy it at all. Especially if you plan to use it only once. Some stores and construction companies provide rental services for such tools. Before mixing, be sure to place a board under the drum so that any material that accidentally falls will fall onto it.
The process of loading a concrete mixer consists of the following steps:
- Load ½ portion of sand.
- Load ½ portion of cement.
- Mix the dry ingredients by turning on the concrete mixer.
- Stop stirring, add ½ water and start stirring again.
- Add cement, sand and water in parts.
- After each batch, the concrete mixer drum must be washed. To do this, after work, release a powerful stream from a hose there.
Preparatory work
When plastering the facade you must:
- Strictly follow the technology for preparing the solution.
- Competently break into grips.
- Use the same ingredients.
- Have all the necessary tools at hand and be careful.
- Before the main work, it is recommended to practice on something unimportant in selecting the same color of the mixture.
- It is important that the temperature of the surface being treated is not less than +5 and not more than +30 degrees. In this case, the optimal humidity value is considered to be 70%.
- In addition, you should not plaster during bad weather (rain, snow) or immediately after it. There is no need to allow direct sunlight to fall on the surface.
Application methods
There are only two ways to apply the solution:
- Manual - using special tools.
- Mechanical - using mechanisms and machines.
For large volumes of work, it is better to use the mechanical method.
Preparing the walls
Before applying decorative plaster to the walls, you must:
- Level the walls with rough plaster.
- After drying, treat with a layer of plaster.
- Cover with primer.
- Make markings for grips.
To hide the joints from the connections of the layers, the surface must be divided into sections called grips. In this case, their edges should pass along the internal corners and the edges of any protruding elements. To achieve even and smooth edges of the grips, when applying the covering layer you need to set beacons and rules.
Plastering process
There are two main ways to apply smooth plaster:
- By lighthouses. Beacons are thin slats with a protruding edge, which are mounted on the wall in a vertical position. The distance between them is 0.5 - 1 meter. All ribs must be checked using a level. A trowel or trowel is used to apply the solution. You can level it using a wide spatula.
- With the help of rules. A rule is a special construction tool that is used when laying out leveling material in large volumes. This tool is convenient when working on wide walls.
The solution can be applied to the wall in the following ways:
- Mastercom.
- With a small spatula.
- With a wide spatula.
Plastering walls made of gas and foam concrete
- The suitable thickness of plaster for such walls is 5-10 millimeters. It is important that the outer layer is two times thinner than the inner one. A thickness of 5-10 millimeters will be sufficient on the outside, and 10-20 millimeters on the inside.
- Plaster adheres better to a cut surface made of cellular concrete. Cast blocks should be sanded first.
- Mixtures with a high adhesion coefficient are most suitable for foam concrete. It can also be used for plastering facades over polystyrene foam.
- To increase adhesion, reinforced mesh is usually used.
- For painting plastered facades made of foam concrete, facade hooks with the addition of silicate or silicone are best suited.
Plastering concrete walls
Before starting work, various small defects on the surface should be eliminated using rough plaster or repair putty. Before applying the decorative coating, the surface must be primed with a roller or using a spray gun.
Three separate layers are applied to concrete walls, called:
- Spray is a semi-liquid layer 3-5 millimeters thick.
- The soil is a thicker layer 7-10 millimeters thick.
- The covering is a decorative thick layer 4-7 millimeters thick.
Plastering brick walls
If it is necessary to work on a brick surface, then the facade is plastered using a grid. Notches are made or a fine metal mesh is placed under the bottom of the plaster. After which the same three layers are applied: spray, primer and topcoat. The same technology is used to plaster facades using insulation.
Plastering the facade: video
_ _ _ _ _ _ _ _ _ _ _ _ _ _ _ _ _ _ _ _ _ _ _ _ _ _ _ _ _ _ _ _ _ _ _ _ _ _ _ _ _ _ _ _ _ _ _ _ _ _ _ _ _ _ _ _ _ _ _ _ _ _ _ _ _ _ _ _ _ _ _ _ _ _
Mesh for plaster
To improve the adhesion of the plaster layer to the surface of the walls, especially when plastering the facade of a building, additional reinforcing mesh is used, which can be metal - wicker or expanded metal, as well as polymer or made of fiberglass. In individual construction, if you need to plaster external walls with your own hands, it is best to use fiberglass mesh for reinforcement.
To strengthen the external corners of the facade - the junction of walls, external slopes of window openings, cornices, it is recommended to use a facade corner - this is a metal corner with a groove for better adhesion to the plaster. Sometimes, for even greater traction, a corner with a mesh attached on each side in the form of an apron tape, up to 150 mm wide, is used.
READ MORE: Hiller dimensions How to select and configure a two-row active device for planting potatoes How to use it