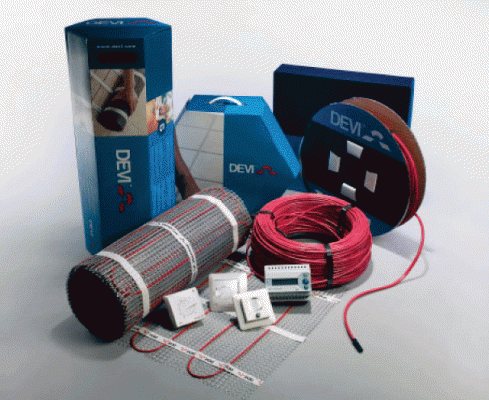
Product varieties
All products manufactured by Devi are located in the market segment that is responsible for heating using cable elements. These are not only underfloor heating systems, but also equipment for protecting pipes from freezing or roofs from ice formation. But we are only interested in options for indoor installation.
Devi cable systems are available in two formats:
- Single-core;
- Two-core.
Additionally, they can be immediately fixed to the mats. Occupying such a narrow market segment, Devi fully concentrated on improving cable products, customizing them to the increased demands of European consumers. As a result, the finishing materials market received a heating cable with a uniquely low thickness and increased insulation protection. For example, the thickness of the DSVF series mat is only 3 mm! It's a little thicker than a match. At the same time, fluoroplastic is used for insulation, and the mats are self-adhesive.
The manufacturer positions its products as mats for installation in tile adhesive. In other words, on the prepared floor, it is enough to lay such a heating mat, integrate a temperature sensor and you can glue tiles onto it.
But there is an even more attractive series - Devidry . This is a system for do-it-yourself assembly, without preliminary preparation of the base. It is not sold in sets, and it must be assembled for each room separately from standard modules. There are two types of mats:
- Heating mat;
- Filler mat.
All of them have a thickness of 8 mm and a width of 1 m. But the length varies. The first ones have from 1 to 5 m, in increments of one meter. And the latter have only three types of length: 1, 2, and 4 m.
The basis of the heating mats is polypropylene foam with a reflective layer, there is a quarter meter allowance on two narrow edges for trimming and high-class protection contact connectors for serial connection.
Assembling the entire structure is reminiscent of playing with LEGO. It is almost impossible to install and connect something wrong. On these mats, even the groove for the temperature sensor is prepared during production. All you need to do is remove the plug and place the reading sensor.
Thermostats
Devi thermostats deserve special attention. The demanding and lazy European consumer forced the manufacturer to develop and release a product that, to put it mildly, looks absurd for the Russian market. If color and touch screens are still understandable and pleasant, then here is Internet access for Devi thermostats, this is already something futuristic.
The simplest models of the touch series, 130 or 330, have a standard set of functions, plus a stylish design and a touch screen. But the 550 or Link series is already a full-fledged controller, with Internet access and a Wi-Fi module. They are able to regulate the temperature in several rooms by taking readings from a couple of dozen sensors. Moreover, the sensors are not only integrated into the floor, but also located on the walls of the room.
The prices for this thermostat are quite reasonable. Simple models will cost 4-5 thousand rubles, and sophisticated ones cost more than 30 thousand rubles.
Installation of heated floor Devi
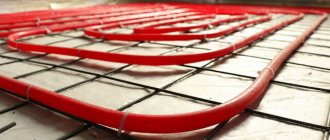
Installation of Devi heated floors should be carried out after the required system power has been selected. In the case of concrete floors, deviflex heating cables are used, the power of which is no more than 20 W/m2. In living rooms, children's rooms and in the kitchen, installing heated floors requires a power of at least 100 W/m2. Bathrooms and toilets require a higher floor temperature, so a system with a power of at least 120 W/m2 is used here.
The instructions recommend laying the cable only in free areas in the room, that is, not occupied by a refrigerator, cabinet, stove or washing machine, etc. There is a special formula according to which the distance between cables during installation is calculated.
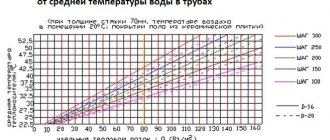
Choosing the optimal cable pitch will allow you to maintain the selected power and heat transfer during the design and development stage of the plan. Therefore, for auxiliary heating, the step should be about 10-15 cm, and for full heating using a heated floor - 7.5-10 cm.
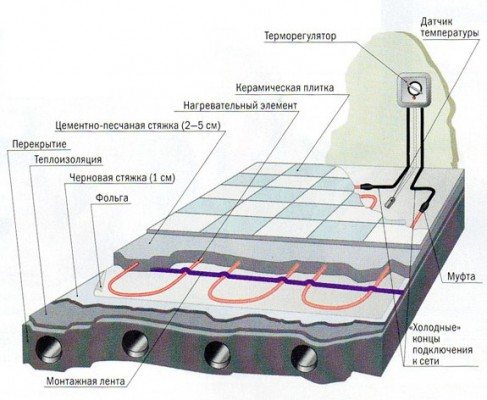
If there are cold rooms or basements under your premises, as well as local cooling zones, then a thermal insulation layer must be installed on the floor. Installing thermal insulation will save you money during operation, and will also make your stay in the room more comfortable. In order to avoid possible overheating of the cable, it is recommended to make an intermediate screed on top of the thermal insulation. Subsequently, the cable is laid on the mesh. In this case, the screed turns out to be monolithic and has a reinforcing frame.
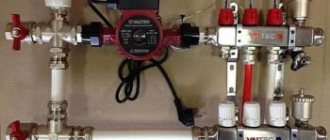
A floor temperature sensor is installed in a special tube in the screed, which is connected to the thermostat. Thermostats can be of different types, but they are all designed to control and regulate the temperature in a room.
Devi thermomats are a thin and high-tech product that can be installed under virtually any floor covering. The simplicity of design and installation will allow you to install this system over the old floor and save money during installation.
Since the system is quite inertial, after the first turn on it will return to operating mode after a long period of time, up to 24 hours. However, in the future you will not need to turn the structure on and off - it will work in automatic mode.
Before you buy a Devi heated floor, you need to decide what you want to get from this system. The final price will depend not only on the type of floor, but also on room temperature requirements and other parameters.
Warranties and equipment
At this point, Devi holds its own. They provide a 20-year warranty on their heating cables, provided the insulation is intact. A very bold statement requires strict control over the products sold. Therefore, Devi cables are sold only in whole pieces! In other words, they won’t sell you 50 meters of cable in a store. There are sections of 40 m, and there are 60. Take any. And if you shred it, the warranty will be voided.
There are quite a lot of standard sizes, and it is unlikely that you will be able to find any kind of length gradation system. Some series have pitches of 5, 7 or 14 m, some have 3 and 6 m. If desired, you can choose to suit your needs. But the prices are quite high. The “cheapest” heating cable will cost ≈ 170 rubles/m.p . Subject to the purchase of a bay of 198 m.
And heating mats are even more expensive. With a single standard width (50 cm), mat lengths vary from 1 to 24 meters. At the same time, a mat with an area of 0.5 m2 will cost ≈ 5.5 thousand rubles, and 12 m2 will cost 26 thousand rubles.
That is why there are no ready-made Devi Warm Floor kits on sale. For each room, an individual set is compiled. Considering that the products of this Danish company are sold in specialized centers, you can count on the full assistance of consultants.
Installation of DEVI underfloor heating, using the example of DTIF series mats
DTIF series mats are available in single and double-core versions. But in both cases, the thickness of the product does not exceed 3 mm. The manufacturer recommends installing them in tile adhesive. That's what we'll do.
Equipment
For installation you will need:
- Heating mats;
- Thermal sensor;
- Thermostat;
- Corrugated pipe;
- Tile adhesive;
- Tile;
- Crosses;
- Grinder with cutting disc;
- Self-leveling screed.
Depending on the area of the room, the size of the heating mat is selected. DEVI thermostats are universal and are suitable for any cables. The need for a self-leveling screed is dictated by the desire to facilitate the installation of tiles. Because leveling floors with tile adhesive is much more difficult and costly than using a screed.
Preparatory work
If there is a living space under the workroom, then it is not necessary to install insulation (recommendation from Devi). This means that the base is swept, primed and a self-leveling screed is prepared. The mixture is diluted according to the manufacturer's instructions.
IMPORTANT: To speed up the process, it is better to use a quick-drying self-leveling screed. Fill the floors in the room starting from the far corner. It is recommended to maintain a minimum screed layer of 5 mm.

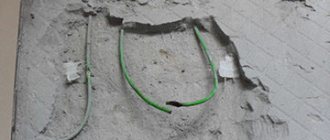
Quick-drying mixtures acquire the stated strength within 24 hours. Then you can start laying the mats. But first, you need to cut a groove in the wall for the power cable and temperature sensor.
Installation of DEVI heating mats
bupropion hcl xl 150 mg.jpg 450w, https://comfortpola.ru/wp-content/uploads/elektr-pol-8-250×138.jpg 250w" sizes="(max-width: 450px) 100vw, 450px" />
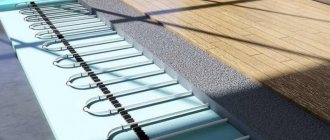
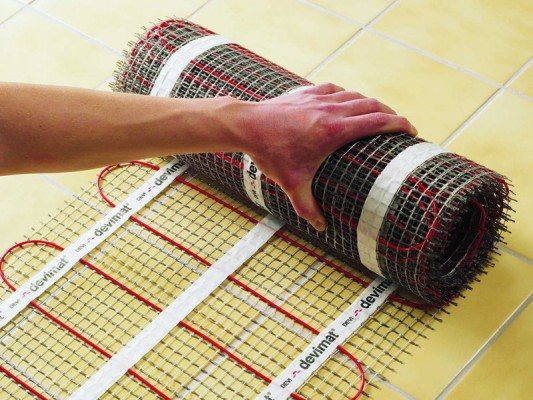
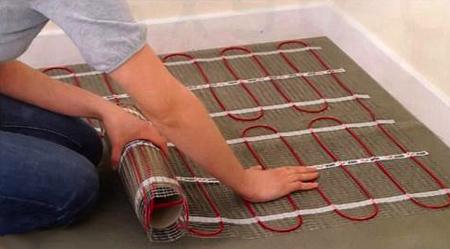
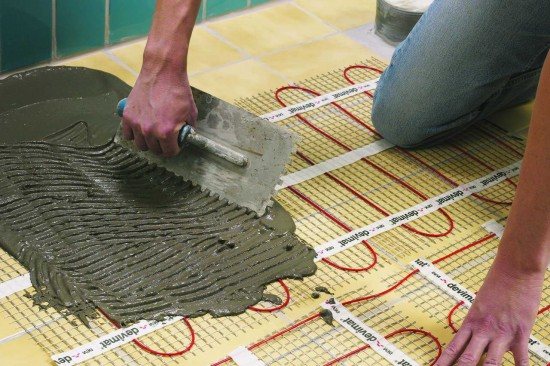
The surface of the screed is primed. After 40-50 minutes, the primer dries and they begin gluing the heating mats. From the back side of the substrate, tear off the protective layer and lay the mats on the floor. To minimize power cable consumption, start laying from the place where the thermostat will be located. The adhesive surface holds firmly enough so that the mats do not move during installation. But still the work is carried out carefully. To change direction, the substrate is cut.
Between the turns of the heating cable, a corrugated pipe with a capped end is laid. Its other end is led along the floor to the wall, and then along the groove to the thermostat. The bend radius of the corrugated pipe must be at least 5 cm! The heating cable and temperature sensor are connected to the thermostat.
To check, turn on the power for 2-3 minutes. If the result is positive, you can begin laying the flooring.
Connecting Devi heated floor
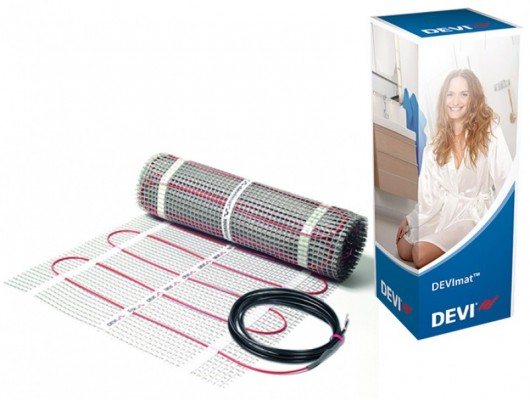
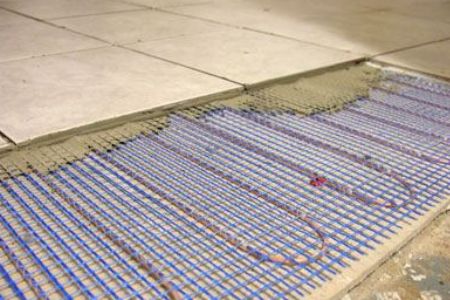
Let's look at connecting a heated floor using the Devimat heating mat as an example. It is produced on a self-adhesive mesh and comes in rolls, making installation easy. In addition to the mats, Danfoss offers an electric thermostat with floor and air sensors. You should begin work by preparing the site for installing this device.
PREPARATION AND INSTALLATION WORK
Preparation for installation of the thermostat and cable
First of all, you need to choose a place on the wall where the thermostat with sensors will be located. The device can be placed at eye level or lower, the main thing is that the height is at least 30 cm from the floor. At the selected point, a niche is arranged that is sufficient to accommodate the thermostat.
Grooves are prepared in the wall and floor for the mounting ends and power cable. Power is supplied to the niche created for installing the device. Please note: the cross-section of the power line conductor must correspond to the current strength of the heated floor.
Cleaning and marking the surface
Debris is removed from the base and the floor is treated with a primer. The surface on which the heating sections will be laid is marked.
Installation of mats
The sections are laid along the marked area - for this they can be cut, but without affecting the cable. It is important that the heating elements do not overlap each other. On each side it is necessary to make a distance from the walls - at least 5 cm; it is also undesirable to approach the heating devices less than 10 cm. The location of the temperature sensor should be exactly in the middle between the sections.
CONNECTION DIAGRAM FOR DEVI WARM FLOOR
Devimat heating mats include mounting ends, so the connection diagram for a heated floor comes down to inserting these ends into a junction box and connecting them to the thermostat terminals. However, there are nuances to this process.
Resistance measurement
After the mounting ends of the heating sections are connected to the junction box, the resistance of the mat and the temperature sensor should be measured to ensure that the heated floor is connected correctly.
Installing a temperature sensor and thermostat
Next, we place the temperature sensor in the corrugated tube intended for it, closer to one of its ends, on which a plug is installed. We take the wire out from the other end, and place the tube itself in the prepared groove and bring it to the junction box. It is worth making sure that the bending radius of the corrugated tube is at least 5 cm.
Connection to terminals
Before connecting the ends of the mounting wires to the thermostat terminals, they should be irradiated. After connecting, we check the electrical connections and perform a test run of the system - no more than 1-2 minutes.
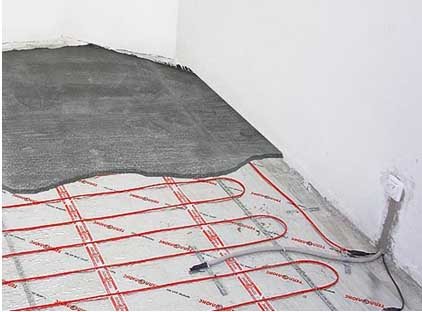
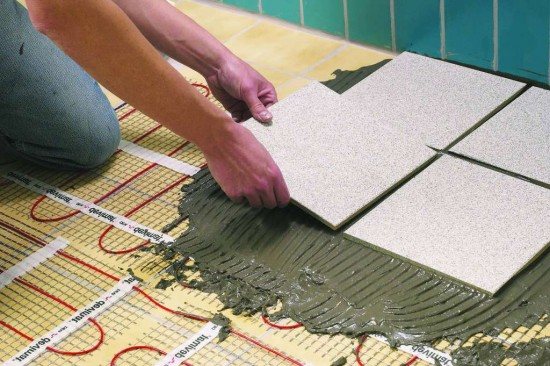
If the launch was successful, you can fill the mats with a thin concrete screed or an adhesive solution under the tiles (the thickness of the mixture should be 8-10 mm). Turning on the system is allowed only after the solution has completely dried.
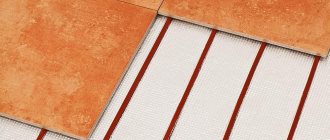
Laying tiles on a heated floor
Tile adhesive is diluted according to the instructions in small volumes. 2-3 liters is enough. It sets quickly, but the work ahead is specific. The manufacturer of the mats recommends maintaining a layer of glue above the cable, 5 mm. That is, taking into account the thickness of the mats themselves, 3 mm, in total it turns out that 8 mm of glue should be applied under each tile.
To comply with these parameters, you will need a laser level and a construction angle.
The laser level is placed on the floor, and using a corner, the level at which the tile surface should be is determined. To do this, add the thickness of the tile to the 8 mm adhesive layer. For example: 8 mm thick tile + 8 mm adhesive layer. This means that relative to the floor, the surface of the tile should be at a height of 1.6 cm.
This is painstaking work, so the glue had to be diluted in small portions.
Each tile must be checked for horizontal position. Between adjacent elements of the flooring, insert corners, 2 pieces each. to one side. The last tiles are cut using a grinder and a cutting disc.
The first switching on of the heated floor can be carried out no earlier than after 3 days . Typically, this is exactly how much tile adhesive needs to achieve its stated strength. The switching mode is as follows: on the first day, set the temperature to 18°C, and then every day, increase the heating by 2°C, to 26°C.
After such a “break-in”, heated floors can be turned on in operating mode.
Features of Devi heated floors
are available in the retail chain :
- Devimat DSVF is a classic, durable option, produced since 1996, very thin, with a 2.5 mm single-core cable, secured in a self-adhesive mesh, used only indoors, easy to install, power 150 W/m2. Two insulating layers - internal and external. During installation, no thick screed is required. Kits for an area of 0.5 - 10 m² are supplied to the retail chain. One square meter costs from 3800 rubles;
- Devimat DTIR - produced since 2013, power of a two-core 4.5 mm cable - 137 W/m2, with two-layer PVC insulation, used in both residential and commercial premises. on loggias and balconies; installation does not require a thick screed. The mesh is self-adhesive, the cost per square meter is from 4,200 rubles;
- Devimat DTIF - two-core 3 mm cable in double PVDF insulation and with a continuous screen, used only indoors, no need for a thick screed, self-adhesive mesh based on a new adhesive composition that significantly increases adhesion, kits for an area of 0.5 - 10 m².
One of the main elements of Devi “warm floors” is the Devireg thermostat, which is capable of independently determining the moments when heating is turned on and off. These devices have a built-in autonomous power source , you can connect various temperature sensors to them, have a child protection system, and a maximum and minimum temperature limiter. Information is displayed on the screen.
the following benefits of products from Devi :
- the ability to save on electricity thanks to thermostats;
- the heating system does not occupy useful space , which improves the appearance of the room;
- the air in the room warms up evenly;
- you can heat both a separate zone and the entire room;
- you can turn on the heating while the centralized system is turned off;
- the system in the form of a cable is laid under almost any floor covering;
- easy installation (no special tools required);
- minimal maintenance during operation.