The word “siding” comes from the English language, where it meant the external decoration of the facade of a house.
Today there are a huge number of types of siding; the general principle of fastening remains - this is a collection of decorative elements that are mounted to the sheathing (or wall) from the bottom up.
Plastic or metal, vertical or horizontal, imitating wood or stone, smooth or textured, siding has become a leader in the private sector for its affordable cost and ease of installation.
And if you decide to figure out how to properly cover a house with siding with your own hands, without the involvement of paid workers, this article is for you.
Tools and materials
Before installation begins, you need to prepare the entire set of tools that will be needed:
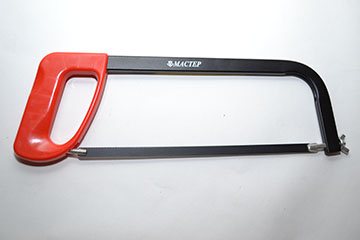
- A hacksaw or grinder.
- Metal scissors.
- Screwdriver and screwdriver.
- Tape measure, level, square.
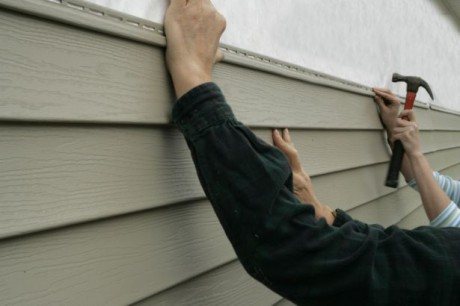
- Hammer.
Self-tapping screws are a key figure in installation. When calculating their number, you need to multiply the number of square meters of future coverage by 15-16 and add a margin.
The best self-tapping screws for fastening siding are galvanized 25-35 mm.
You will also need either a good stepladder that will allow you to climb up to the roof, or you will need to build temporary scaffolding. Thin and damaged boards that may not support a person’s weight should not be used for scaffolding!
The cladding material must be a set that includes all the parts and elements. In specialized construction stores, sellers can select all the necessary configurations and calculate the number and size of parts. But you need to come armed with the following information:
- wall size, area;
- type of roof;
- number and size of windows and doors.
Let's look at the components of the structure and some of their features.
When thinking about insulating a house, you need to take into account the fact that rodents can chew through the insulation layer. What kind of insulation is not chewed by rats and mice: a review of materials for protection against rodents.
See a comparative review of copper and aluminum heating radiators here.
Supply and exhaust ventilation ensures a comfortable climate in the house. To save energy, it is better to install a ventilation system with heat recovery. Here https://microklimat.pro/sistemy-ventilyacii/pritochno-vytyazhnaya-s-rekuperaciej-tepla.html we will look at the principle of its operation and the cost of the equipment.
Outer corner
At the corners, two planes of the skin meet, leaving a gap. This is not aesthetically pleasing, and precipitation, wind, etc. can get into the gap. These areas are covered with a corner, which gives the structure a finished look.
The standard length of this part is 3 m. If this height is enough, or the house is lower, buy 4 pieces to install a solid element at each corner.
Installation of siding corners
If the house is higher, then the heights of all four sides are summed up. By dividing this result by three, you can find out how many pieces of corners you need to buy (for joints and unforeseen situations, you need to leave a small reserve).
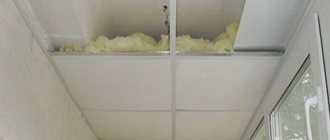
Inner corner
It is used at the junction between the wall and the roof, as well as for finishing “pressed-in” parts of buildings with complex architecture. To calculate their number, the same principles are applied as in the previous case.
If the upper joint is already formed and will not be finished with siding, the wall is completed with a finishing strip.
Cornice finishing
To finish the lower overhang on the roof, a soffit is used (this element is also used for lining the ceilings of verandas).
Soffit profiles can be two or three sections, solid or perforated. Perforated elements are made in order to ensure ventilation of the under-roof space.
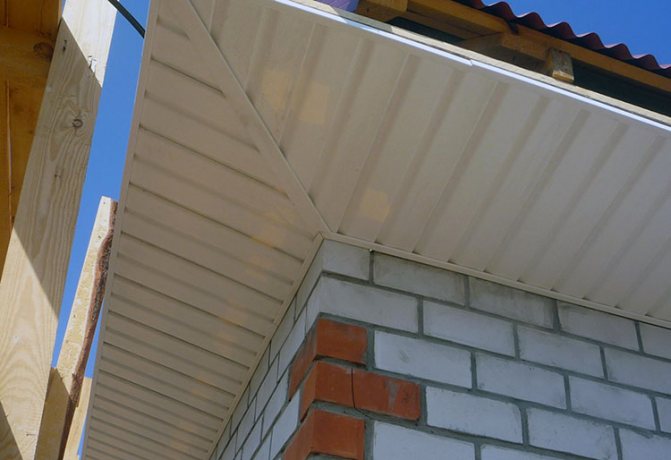
Finishing cornices with soffit
Without perforation, you can sheathe the veranda. There are models with hidden perforation (holes are made at the joints).
Ceiling molding is used to trim the edges of the soffits.
Start strip
The lower profile of the siding will be attached to it (sometimes they “invent” fastening methods without a bottom strip, but then either the edge dangles or unintended holes are made in it, which can cause the part to crack in a year or two).
You can find out the length of the plank by subtracting the width of the doors from the perimeter of the house.
Window and door finishing
To decorate windows and doors, platbands, window trims, J-profiles and ebbs are used. Elements should be with a small margin so that there are no joints.
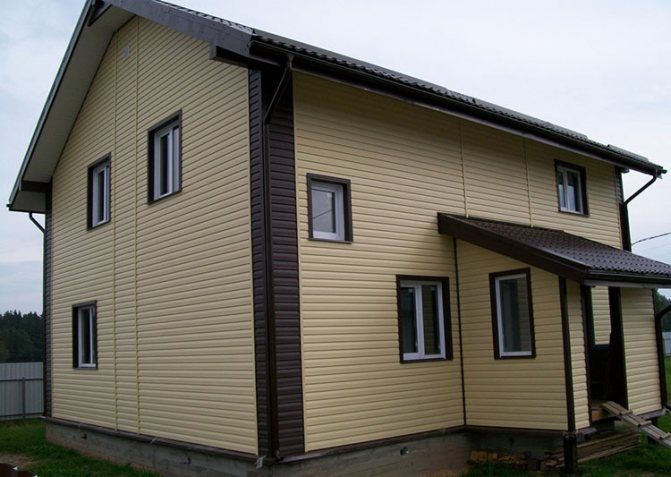
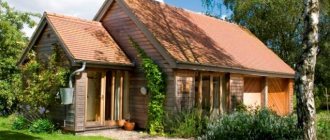
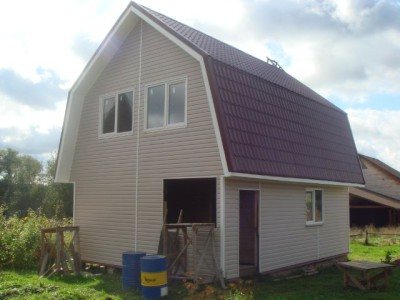
House completely finished with siding
H-profile
Standard length of siding strip = 3.66 m. If the wall length is longer, the elements will need to be joined. At the junction, the H-profile is used. Before starting work, it is important to consider the location of the joint so that it does not interfere with the appearance of the building.
There are other additional elements that are not needed in all cases.
Main panels
To calculate the amount of siding, the surface of the house is “divided” into sections of simple geometric shapes (rectangles, squares, triangles) and their total area is calculated. The area of windows and doors is subtracted. Add 10% for customization and defects. Now the resulting result is divided by the area of one profile element.
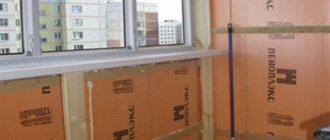
Why is waterproofing performed ↑
Before covering the walls with siding, the sheathing is installed. A waterproofing film is attached to it from the inside.
A free space is formed between the wall and the siding, which is usually filled with insulation. Despite the fact that vinyl (the material from which siding is made) is waterproof, the cladding is not airtight: air freely penetrates between the panels and the moisture contained in it saturates the insulation. Mineral wool and glass wool, which are most often used to fill the walls, are not afraid of open fire, have a low specific gravity and do an excellent job of their main function as insulation. But, when saturated with moisture, they lose their qualities and become deformed. Wall materials also suffer: drywall swells, wallpaper becomes moldy. This creates a threat to the safe operation of electrical networks.
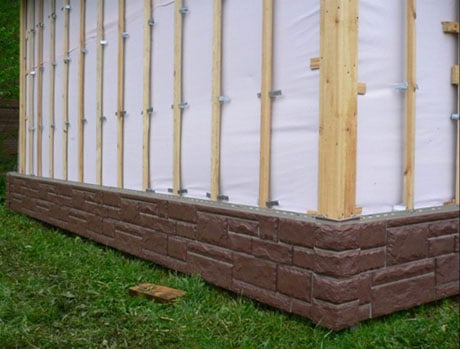
The waterproofing film is attached to the inside of the sheathing
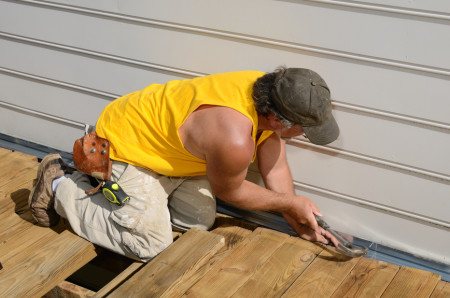
Preparatory work
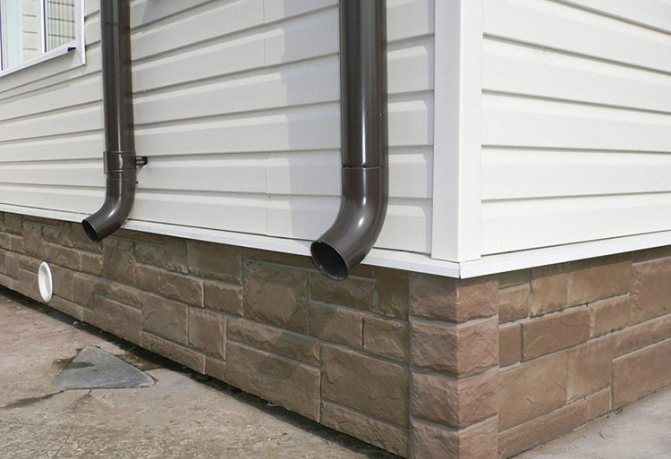
If there was old decoration on the walls, first of all it is dismantled. All parts that will interfere with the work are removed - gutters, trim, lights, etc.
If areas with fungus or mold are found, the infestation must be eliminated before moving on to further work.
The cracks in wooden houses are caulked, and the wood is treated with an antiseptic. Cracks in brick walls are covered. The surface is leveled at least minimally.
It is important to choose the right time to start installation. At temperatures from zero to -9°C, it is recommended to cut plastic panels only with a grinder, and not with scissors (frozen material breaks). Temperatures below -10°C are generally not suitable for working with vinyl siding.
Insulation and insulation
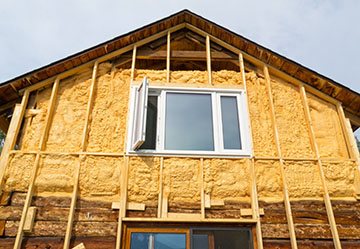
Opinions among builders regarding materials may differ, but in order to properly arrange the “pie” on the walls, it is important to understand the essence.
There is always humid air (or steam) inside the house; it must be able to escape to the street (well, or up to the ventilation gap under the siding).
If this opportunity is not provided, the steam will condense wherever it reaches. If this happens in the insulation, the latter will get wet and lose half of its properties. If steam condenses in a wooden wall, the wall will gradually rot.
Therefore, you need to consider the following:
- There should be no waterproofing on the outside! Waterproofing is a material that does not allow moisture to pass through, for example, cellophane film, Plenex (NPE) and others.
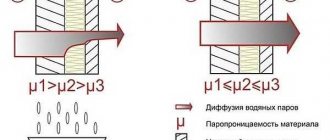
- It is best to use a moisture and windproof membrane as a vapor barrier. It is designed in such a way that it releases steam to the outside, but not from the outside to the inside. (There are cheaper types that allow steam to flow in both directions).
- The vapor barrier layer should not touch the external finish, otherwise it will become damp and lose its properties. The gap between the vapor barrier and the siding is 2-5 cm.
- The advisability of using a vapor barrier layer or wind protection is a controversial issue; to decide it for yourself, you should independently study the pros and cons of using this material (the main one is the flammability of the membrane).
- Brick, concrete and aerated concrete can be left “bare” – i.e. attach sheathing to the walls, and siding on it.
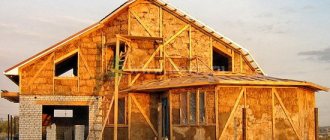
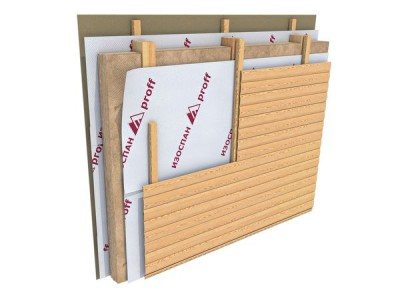
The cake for a wooden house with and without insulation will be different.
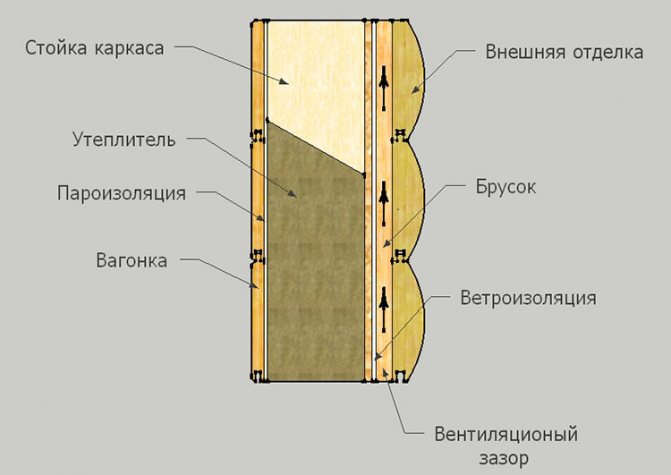
Covering a house with siding with insulation in layers
For sheathing without insulation:
- Logs.
- Windproof membrane.
- Lathing.
- Siding.
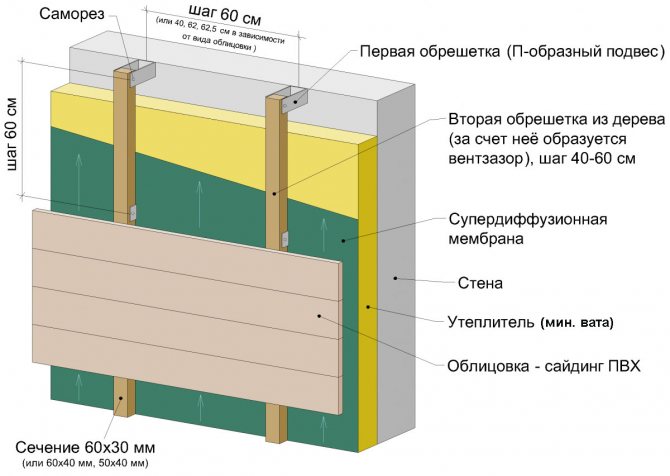
For sheathing with insulation:
- Logs.
- Lathing with insulation mats laid between the bars.
- Windproof membrane.
- The second layer of sheathing, creating a ventilation gap.
- Siding.
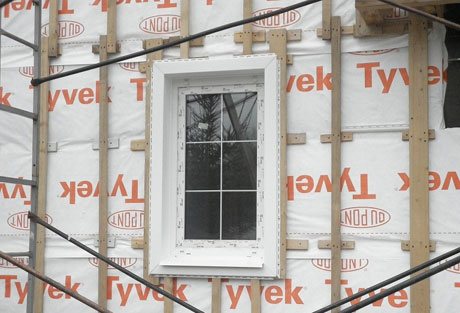
The vapor barrier must envelop the house completely, along with the windows (windows are cut out at the end of installation because otherwise the material may move, and the glass receives additional protection during work).
Insulation of walls with siding, installation of siding with insulation
/wp-content/uploads/2014/05/Insulation-of-walls-outside-under-siding.mp4
Let's talk about external thermal insulation of walls under siding. One of the most important problems that can be solved with insulation is the reduction of heat transfer. It is this criterion that people pay attention to first of all when choosing the option of insulating the walls from the outside under siding.
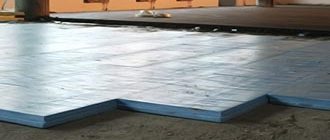
Insulation of walls with polystyrene foam under siding
insulation of walls with polystyrene foam laid under the siding
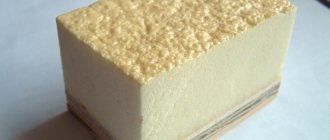
Insulating walls with polystyrene foam is an ideal solution for saving heat in the house. Due to its high density (35 kg/cub.m), its thermal conductivity is about 0.030 W/(m*K), which in turn makes this material the most beneficial in terms of retaining heat in the house. Another advantage of expanded polystyrene is the very low level of water absorption of 0.1-0.4%. But, despite all these advantages, it has a big drawback - it is flammable.
Insulation of walls with foam plastic under siding
Stage 1: foam insulation under siding
Also very popular on the market is wall insulation with foam plastic under siding..
The thermal conductivity coefficient of polystyrene foam is 0.035 W/(m*K), which makes it very advantageous. It almost does not allow water to pass through and is very light, but the downside is flammability.
Stage 2: installation of siding and closing of foam plastic
Along with other thermal insulation materials for walls under siding, which are now popular on the market (mineral wool insulation and glass wool), polystyrene foam and polystyrene foam are inferior to them only in flammability, since all of the above insulation materials do not burn. You should decide between the maximum level of heat savings and the safety of your home.
Installation of siding with insulation
/wp-content/uploads/2014/05/Video-instructions-Holzplast-for-siding-installation.mp4
The main aspects of installing thermal insulation material and siding are: correct calculations, installation of thermal insulation and installation of siding.
Basic tips:
- Installation of insulation under siding is the most important aspect on which a positive result depends. The insulation should always be less in thickness than the timber between which it will be laid, by approximately 3-5 cm.
- The insulation must be attached to the walls using glue or mastic.
applying glue to a sheet of foam plastic
- The thickness of the thermal insulation material is always calculated depending on the climate.
- Installing siding directly on the walls of the house and insulation (a cheaper option) will give you protection from drafts and slight cold, but will not protect you from sudden temperature changes. But installation on a frame will give you complete protection and thermal insulation.
- Use a diffusion hydro-windproof membrane; it will allow you to protect the thermal insulation material from moisture penetration.
example of hydro-windproof membrane isospan Proff
- Don't forget to leave a ventilation gap. To do this, you need to attach more bars about 2cm thick on top of the entire frame (bars).
Do-it-yourself insulation of walls under siding
If you have the desire and you have minimal construction skills, you can insulate the walls yourself and then lay down the siding. This process is not complicated and does not require special skills or tools. But, still, if you are in doubt, it is better to ask for help from specialists. This way you will know that everything is done correctly and your house will remain warm and not bloom from the inside.
Insulating exterior walls under siding is not a very complicated process, and with minimal tools and materials, anyone can efficiently install siding with insulation. To get the full picture and decide on the type of insulation for your home, you should look at other options, such as wall insulation with polystyrene foam, wall insulation with polystyrene foam and wall insulation with penoplex. This will give you a complete picture to think about.
Leading siding manufacturers
We recommend that you take a closer look at the following manufacturers - Deke (the No. 1 company in Russia for the production and installation of siding), Grand Line, FineBer, Mitten. All of them offer their services not only in Moscow and St. Petersburg, but throughout Russia. By contacting these companies, you will get the best product at a reasonable price, as well as a guarantee of up to 50 years. Thermal insulation of walls is a very important step and therefore it is better to turn to the best of the best.
How to choose siding or what you need to pay attention to?
- Plasticity of panels. Take the panel by the place where the nail hole is and try to bend it several times in both directions. If the panel does not crack or break, then this indicates high quality.
- Surface of panels (front). When choosing metal siding, carefully inspect the panels for small cracks, unevenness and roughness. All of the above indicates very low quality. Another important point is that the front side of the panel should not be glossy, but matte.
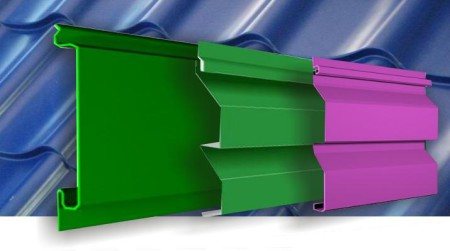
- Panel thickness. If on the side cut you see that the panel is uneven and there is clearly a difference in thickness, then this indicator immediately indicates that such a panel has minimal production quality. The entire panel should be the same thickness in all places (edges, nail holes, attachment points). On panels where the thickness is different, the impact resistance immediately decreases.
- Is the siding painted evenly or not? The color of the siding plays an important role, and the cost of installing siding with insulation will vary. For example, if your choice has narrowed down to two different panels, and you don’t know how to decide, then take a closer look. For cheaper panels, the color on the back side will be lighter than on the front. This suggests that the manufacturer saved on dye (this is an expensive part of production).
- Holes for nails. Everything is simple here! Look at the location of the holes, they should be the same width and thickness, be in one line and not have rough edges.
Installation of siding with insulation video
Finishing the house with siding and basement siding and insulating polystyrene foam
/wp-content/uploads/2014/05/Decorating-a-house-siding-SIMPLE-and-BASED-and-EPS-insulation.mp4
- Wall decoration with siding
- DIY floor installation
- Insulation of frame walls from the inside, outside, video
- Insulation of brick walls with mineral wool, polystyrene foam and...
- Insulation of walls in an apartment from the outside and inside, video
- Insulation of timber house walls from the outside and inside
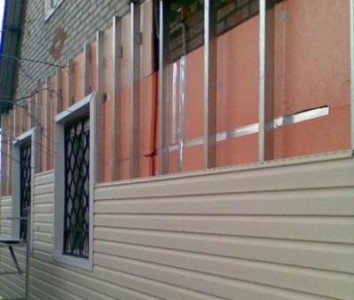
Installation of sheathing
The frame on which the siding will be attached can be of two types:
- From bars.
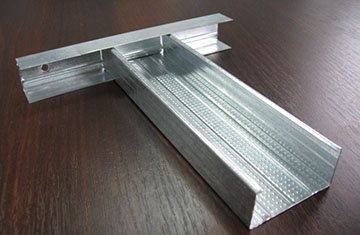
- Metallic profile.
For wooden houses it is better to use wooden sheathing, but metal sheathing is also possible. And for brick and concrete walls, as well as when using metal siding, only a metal profile is suitable.
It is important to make markings in order to set strictly horizontal planks (regardless of how the height of the foundation “plays”). To do this, a straight line is drawn along the perimeter of the house at a convenient height and level. You need to measure the distance from it to the base in all corners of the house.

Wooden sheathing for siding
If the values turn out to be different, the minimum is selected (this will be the highest point of the foundation) and a straight line is duplicated from it along the level. It will become the mark from which the starting bar will go. The bottom beam is attached to this line, and the beam under the roof is similarly fixed.
On an uneven wall there is the most protruding point, which will become a guideline for establishing a single indentation of vertical planks from the wall (special U-shaped brackets are used for fastening).
Vertical sheathing strips are installed along the cords, starting from the corners. The step between them should be about 40 cm. If a layer of insulation is laid, then the step of the sheathing should be less than its width. For example, if the width of the roll insulation is 40 cm, then the step between the planks is 39 cm.
If the wooden walls are smooth, the siding can be attached without any sheathing at all. Taking into account that the new house will shrink over time.
Installation of hydro- and vapor barrier ↑
Rolled materials are first released from packaging, after which they are laid on top of the mounted sheathing on its inner side. There are two ways to do this. The first is more preferable, since it ensures tightness to a greater extent. This method consists of unwinding a roll around the perimeter of the house and simultaneously fastening the material. It is laid from bottom to top: the first row is attached at the very bottom, and the next one is installed higher, overlapping the bottom one. In this case, the joints are taped with adhesive tape.
The waterproofing film is laid in horizontal rows with overlap
For ease of use, a pole with a round stop at the bottom is used to prevent the film from slipping. A roll of film is placed on the pole: this device simplifies the unwinding of the waterproofing.
The second method is to unwind the rolls from the top level of the building downwards: the material is laid in vertical parallel rows. In this case, you should also observe the overlap and glue the places where the rows join.
Roof waterproofing, carried out using a similar material, must extend its lower edge over the film laid on the walls: this is necessary so that the moisture from above drains from the outside of the material. The vapor barrier material is attached from the inside in a similar way, but only after installing the thermal insulation boards.
After completing the installation of the hydro- and vapor barrier film, you can begin cladding the walls of the building with siding: the entry points of the self-tapping screws will not break the seal, since they are screwed in from the outside.
After installing the waterproofing, you can begin cladding the walls with siding.
Fastening the guide elements
Unless otherwise indicated, screws should be slightly undertightened.
Then the plastic siding will not deform due to thermal expansion.
You can check the gap by inserting a coin into it.
Step by step instructions:
- A “drainage” element, which is more rigid than a conventional panel, is installed on the protruding edge of the base. Its upper edge should run along the marked straight line.
- Installation of external and internal corners. The upper part is attached tightly, the middle and lower parts should leave a slight slack. In addition, the first screw is located in the upper part of the hole, and the lower ones in the middle. If you need to increase the length, the upper part is installed with an overlap (2-3 cm) on the lower one.
- Installation of the starting bar. It is located 5 mm higher than the lower edge of the corner.
- Decorating windows with siding is a whole science. It is required to use many elements and make neat, precise cuts with scissors. Doorways are also edged with j-profile.
- In places of future joints, an H-profile is mounted strictly vertically. Here, and in other vertical planks, you need to leave about 5 mm at the top and bottom so that there is a gap to the base and cornice.
conclusions
Actually, all the work on insulating the facade with subsequent siding will not differ much from that when insulating the loggia or insulating plastic windows was carried out - the correct choice of material, means of fastening, multi-layer structure and mandatory insulation (see also the article Correct cladding of a house with siding with insulation) . Here are the instructions “for all occasions.” This instruction includes the obligatory thorough execution of all work, otherwise the cost of mistakes can be quite significant, especially since you will feel it in a few months, when not just cold weather, but frosts arrive.
Then you yourself will forget what “trash” was used to create comfort in your home, although everything was done with your own hands
In the video presented in this article you will find additional information on this topic.
Installation of panels
The guides are installed, now it's time to install the main siding profile. The first lower element is placed on the starting bar (there should be a characteristic click at the bottom). This part is screwed with self-tapping screws along the entire length of the upper edge. The distance between the fasteners is approximately 40 cm.
It is also important to monitor the location of the screw head in the hole: it should not be shifted to the sides, but located in the middle. All fastenings must be free. There have been cases where, due to improper, too tight installation, the siding cracked in the first winter.
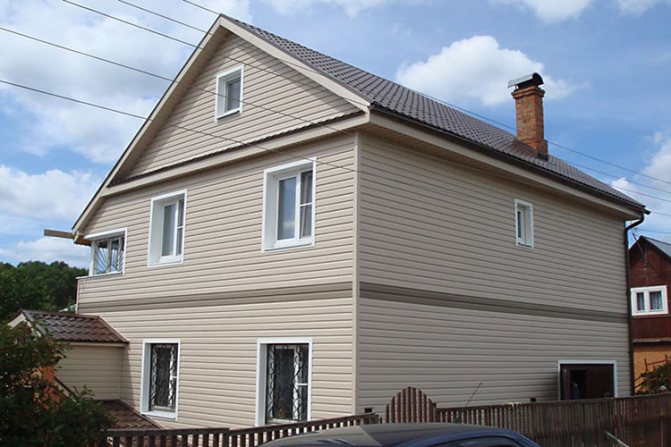
House covered with siding panels
All subsequent rows of the profile are installed according to the same principle.
Before the last siding strip is screwed in, a finishing strip is secured under the roof. The last element of the profile fits into a groove with it.
The final stage will be the installation of soffits, moldings, gutters, flashings and decorative elements.
Soffits are usually mounted between a J-profile and an F-profile, or between two J-profiles.
What should you consider?
In addition to the fact that the panels should be fastened loosely, and the self-tapping screw should be located in the middle of the nail hole, you can take into account a few more tips:
- It is important to screw the fasteners into the bar strictly perpendicularly.
- The surface of the siding cannot be pierced with nails, staples or screws. If an unexpected hole is required, it can be made with a siding punch.
- You can check whether the element is secured correctly by moving it from side to side - it should move freely.
- There should be gaps between each plank and each guide. For summer installation - 5 - 6 mm, in winter - 10 - 12 mm.
- The fittings can be joined with an overlap, but parts cut at 45° and fitted to each other look better.
- To cover an arched window, the same J-profile is used, but it is manually cut in several places to obtain a smooth bend.
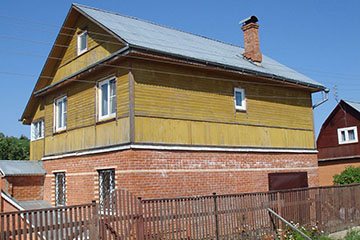
How to cover a brick house with siding
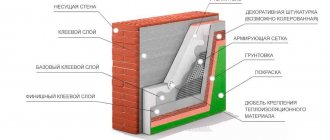
There are several ways to improve the facade of a residential building, while at the same time insulating it. This can be done during construction, using the so-called sandwich technology , or thermal insulation along with finishing can be done on an already in use building. In the second case, either “wet” insulation is used, in which the thermal insulation layer is plastered, or a ventilated facade system is installed, when the thermal insulation material is laid under the finishing cladding, which is done over the lathing.
If there are strong brick walls and a reliable foundation that can “survive” the additional load, the latter method of thermal insulation of the walls from the outside is usually used, and one of the types of siding is most often used as cladding. As insulation, priority is given to inexpensive and effective thermal insulation products, such as mineral wool and cellular polystyrene foam, better known as polystyrene foam.
Therefore, it is worth considering ways to insulate a brick house using each of these thermal insulation materials.
Insulation of the facade with mineral wool under the cladding
This material is the only insulation among the most used, which is made from natural raw materials , which are usually either some rocks or blast furnace slag. The fibers that make up the structure of the material of this heat insulator are obtained by melting the above-mentioned raw materials, therefore mineral wool has a strong advantage over polymer insulation - it does not burn at all. In addition, mineral wool has the following positive properties:
- does not emit chemical compounds hazardous to health;
- perfectly blocks not only heat flows, but also sound vibrations;
- allows steam and air to pass through, making the walls able to “breathe”;
- It has a long (up to 30-50 years) service life when the right conditions are created.
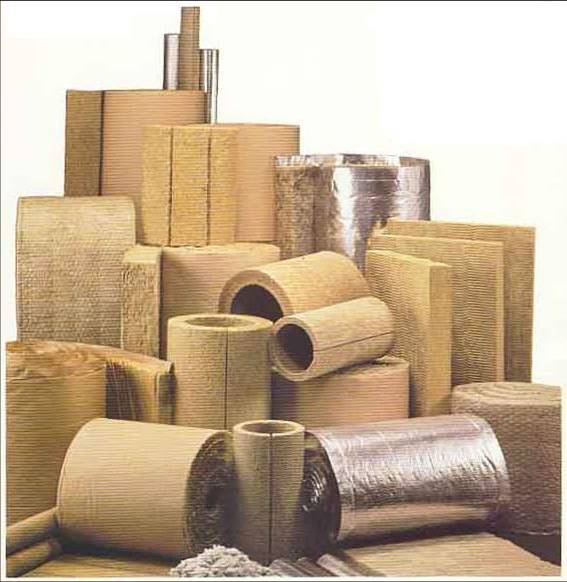
The disadvantage of mineral wool is considered to be hygroscopicity, that is, the ability to get wet and lose its performance properties. Also, many people do not like working with this heat-insulating agent because many small fragments of fibers fall off, especially when cutting, which irritate the skin and mucous membranes, including the respiratory tract. However, this can be avoided by using protective equipment such as a thick work suit, gloves, a respirator and safety glasses.
Now let’s talk about how to actually insulate a brick house with mineral wool before covering it with siding.
- A special hydrobarrier film is fixed over the entire surface of the wall, which is capable of allowing steam to pass through. This must be done, since mineral wool is afraid of excess moisture. You can secure the film in any suitable way, the main thing is that it does not interfere with the construction of the sheathing. The film should cover the surface of the wall completely, with the joining edges overlapping by approximately 8-10 cm.
- Now the primary sheathing is being arranged, where the direction of the load-bearing structures should coincide with the intended location during installation of the structural elements of the siding. It is better to make the pitch of the slats so that it matches the size of the mineral wool sheets. The distance from the brick wall to the outer surface of the sheathing should be correlated with the thickness of the insulating boards.
- Mineral wool mats are laid between the slats of the primary sheathing and fixed in several places using plastic umbrella dowels.
- On top of the insulation and frame, another layer of moisture-protecting film is fixed, which is attached to the wooden structural elements with staples using a manual stapler.
- A counter-lattice is mounted perpendicular to the primary one, which will be the basis for covering the house with siding, so here the distance between the slats must be calculated so that it is convenient to join the elements of the finishing material.
You can insulate mineral wool mats from moisture differently. To do this, each sheet of insulation is wrapped in film and then pulled to the wall with umbrellas. It is clear that in this case there is no need for continuous layers of waterproofing film.
The advantage of this method of insulating and covering a house with siding over secondary sheathing is that between the sheathing material and the insulation there is guaranteed to remain space for ventilation, which will have a beneficial effect on both the quality of the thermal insulation and the durability of the insulation.
Insulation of a brick house with polystyrene foam for siding
There is no big difference in the technological process when insulating with polystyrene foam, when compared with that when insulating with mineral wool. The only thing is that the second layer of waterproofing film does not need to be installed.

From the point of view of using polystyrene foam itself as insulation, you can focus on this.
Expanded polystyrene, being a good thermal insulator and having a very attractive price, has a big disadvantage, which causes fair concern among many consumers. The fact is that polystyrene foam is a flammable material, so from a fire safety point of view it is far from ideal. Moreover, when burning and even smoldering, polystyrene foam releases extremely toxic substances that can cause irreparable harm to health even in small quantities.
Therefore, when insulating walls with foam plastic, you should try to avoid laying electrical cables in them and installing sockets, switches and electrical panels here.