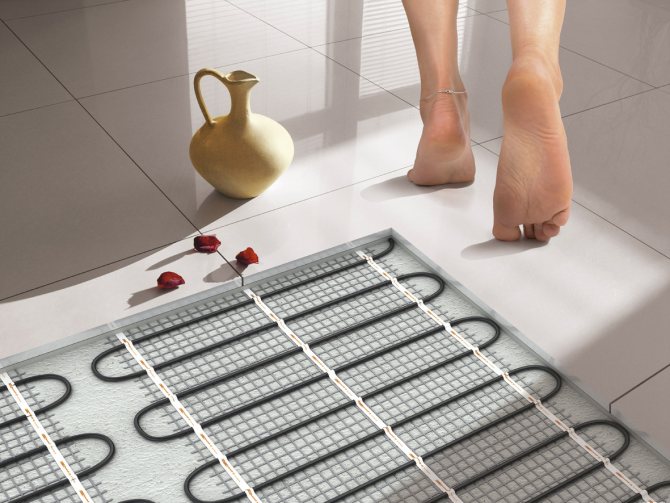
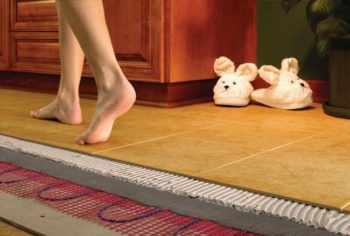
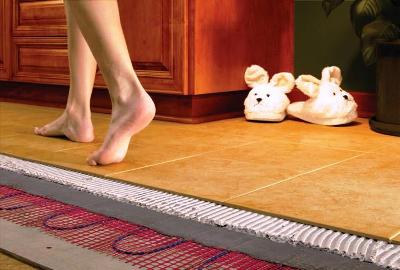
If you want coziness and comfort in your home, then even at the renovation planning stage you should consider all possible options for improving the atmosphere in the room. For example, in a cool apartment or in a house on the first floors, in order to feel comfortable and not freeze, a heated floor system is often equipped. Laying tiles on a heated floor is especially common, since tiles are the material that retains heat rather poorly, and walking on it barefoot is not always comfortable. What types of underfloor heating systems are there? How to install them specifically under a tiled floor covering?
Laying tiles on a heated floor
A few words about tiles and warm floors
Tile has been and remains one of the most popular coverings used for flooring. This material has a lot of advantages, namely:
- it retains its original appearance for many years;
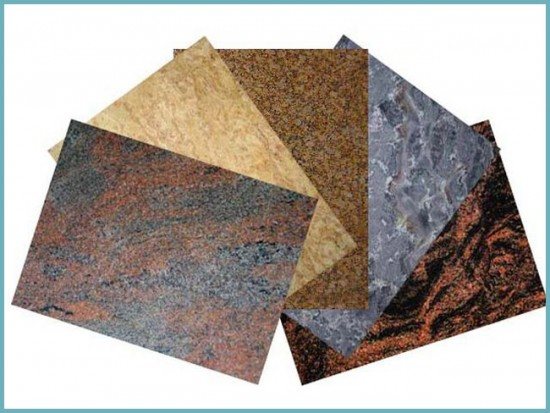
Floor tiles
- is not afraid of exposure to moisture, and therefore can be installed in the kitchen or bathroom without fear of loss of quality;
- The service life of tiles is decades with proper installation and careful handling;
- the tiles are easy to wash and disinfect, as they are inert to all chemicals used to make household products;
- The tile is durable and extremely difficult to damage, provided that during installation there are no voids left underneath it and there is no heavy mechanical load on it.
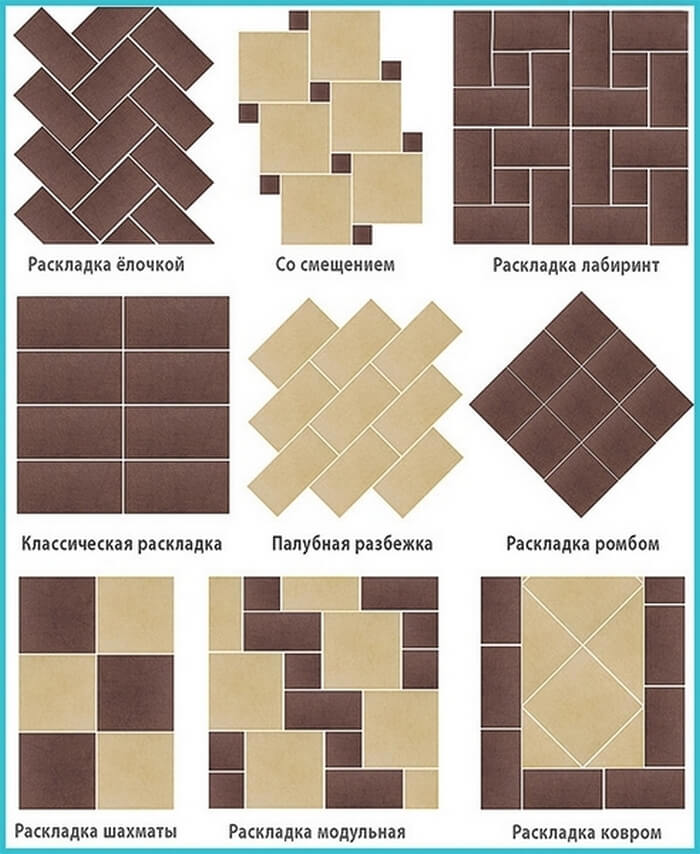
Methods for laying floor tiles
However, tiles also have their drawbacks, because nothing is perfect. So, this material has a fairly high price. But its main drawback is its poor ability to retain heat. In the autumn-winter period, when the weather outside is far from summer, the tiles cool down quite quickly, and standing on them with bare feet is very uncomfortable - the material will be tactilely felt as unpleasantly cold.
Pros and cons of tiles over heated floors
It is precisely because of this last drawback that a heated floor system is increasingly being installed under the tile covering. It is designed to heat the base underfoot using a coolant, which can be water or other systems powered by electricity.
There are several types of heated floors, and each of them has its own characteristics, advantages and disadvantages. These include electric floors, infrared floors, and even water floors. You need to choose which option to install in the room being renovated based on knowledge about the systems and their operating conditions. Let's take a closer look at when, how and what kind of heating is best to choose for installation under a tiled base.
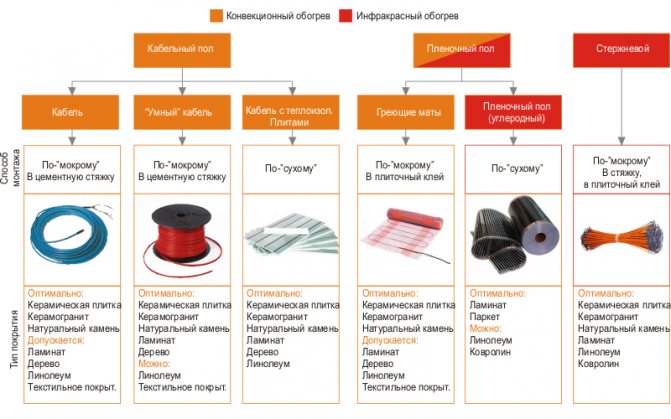
Types of electric heated floors
Installation and recommended floor coverings for different types of heated floors
Prices for Tarkett floor tiles
Tarquette floor tiles
Warm floors under porcelain stoneware, features of their combination. Nuances of the installation process
2690
Porcelain stoneware is a common floor covering when laying “warm floors”. Durable, with excellent thermal conductivity and excellent external qualities. Laying porcelain stoneware on a heated floor has its own technology and nuances, which we will consider in the article.
Warm floor under porcelain stoneware
Advantages of combining porcelain stoneware with heated floors
The advantages of combining porcelain stoneware with heated floors are as follows:
- When using porcelain tiles, heated floors are laid with or without a screed.
- Using a heated floor as an additional source of heat, porcelain tiles release the resulting heat to the maximum, creating a comfortable environment in the room in a short period of time.
- Porcelain tiles distribute heat evenly throughout the room.
- Retains heat even after the heated floor is turned off, saving energy.
- Due to the fact that the tiles allow the use of any type of heating, if it is impossible to make a screed, heating mats are laid under the coating itself.
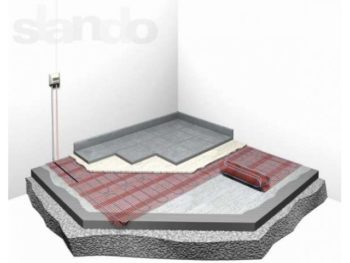
Warm floor pie under porcelain tiles
Types and features of heated floors for porcelain stoneware
Warm floors are divided into two types - electric and water. The principle of operation is to lay heating elements in the screed or under the floor covering, depending on the type of system. They choose one or another type of heating depending on the characteristics of the house or the financial capabilities of the owner.
Features of heated floors:
- When laying water heated floors, metal-plastic pipes with a long service life are used.
- The pipes are connected to the hot water supply system, which saves energy.
- When using water heating, it is difficult to adjust the heating temperature.
- It is not recommended to use water heating in apartment buildings, as there is a risk of leaks.
- When choosing a heating system based on installation technology, the leader is the electric one without a screed, which is in demand due to the ease of installation and the efficiency of heating the room.
- Electric heaters are regulated automatically thanks to installed sensors and thermostats.

Types of heated floors
Nuances influencing the choice of “warm floor” for porcelain stoneware
Having chosen porcelain tiles, decide on the type of heating; for this, consider some points:
- Is it possible to raise the floor by a few centimeters, since when using a water floor you need a screed that is at least 5 cm.
- How the heating system will be used: as a main or additional source of heat.
- In which house is the structure being installed?
- The need for automatic control mode.
- Availability of sufficient energy resources to maintain the heating system.
Important! To maintain comfortable indoor conditions, the heating system must occupy at least 70% of the room area.
Warm floor under tiles with screed
When deciding to lay a heated floor under porcelain tiles with a screed, you need to take into account some nuances:
- If heating elements are used as the main source of heat, then an electric cable or water pipes are recommended, which are laid in a screed.
- The screed should be from 3 to 5 cm. If the thickness is exceeded, there is an overconsumption of resources and poor heating of the room.
Important! The quality and speed of heating of the floor and room depends on the pitch of the cable or pipe.
- When pouring screeds, make sure that there are no air spaces that will have a detrimental effect on the cable or pipe.
- When pouring the solution, the heating element must be well fixed, preventing shifting, which will lead to uneven heating and the possibility of damage to the cable or pipe.
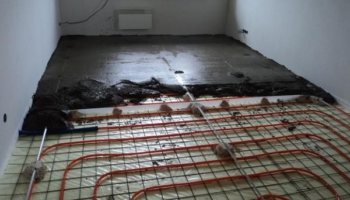
Screed hiding water heating pipes
Warm floor without screed for porcelain stoneware
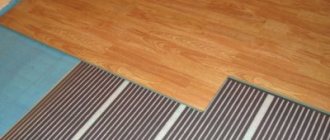
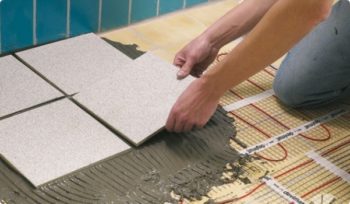
If it is not possible to raise the floor, electric mats or infrared films are laid. Laying is done in a thin layer of tile adhesive.
Electrical mats are a cable pre-placed on a self-adhesive mesh, facilitating quick and convenient installation. The main difference is the specific power per square meter.
For high-quality heating of a room under porcelain stoneware, a two-core heating mat with a power of 140 W/sq.m. is recommended. m. This is enough to provide a comfortable environment in the bathroom or kitchen.
Important! When using mats on balconies or the first floors of a room, it is recommended to use more power - from 180 W/sq.m.
Tips for laying heated floors under porcelain tiles
When laying heated floors under porcelain stoneware, you must adhere to the recommendations, which we will consider in detail:
- When laying the electrical circuit, the thickness of the tile adhesive is from 3 to 10 mm in order to completely hide the cable. It should be located in the thickness of the layer, without air gaps or translucency on the surface, which will ensure uniform heating of the room and prevent overheating.
- Before laying porcelain tiles, the heating system must be tested for functionality and absence of defects. After turning off the system, wait one day and only then start working.
- After grouting the joints, the heated floor (without screed) is turned on two days later.
- To install porcelain tiles, use glue that contains plastic polymers that give elasticity to the solution.
Laying porcelain tiles with glue
- When deciding to install a water-heated floor, they evaluate their skills and capabilities. This process is not easy and if you deviate from the technology, the result will be negative, which will lead to a number of problems.
- When laying a water heated floor, the screed is made no thicker than 5 cm. The thickness of the concrete above the pipes is 2.5 cm.
- During installation work, the room temperature is ensured from 18 to 25 degrees. On the second day, cover the surface of the screed with polyethylene to prevent excessive evaporation of water.
- Lay the tiles on the screed after 28–30 days.
How to lay porcelain tiles on a heated floor
The combination of heated floors and porcelain stoneware has a beneficial effect on the quality of heating. The surface with such a coating heats up quickly and retains heat for a long time, which saves energy. When using any heating system, uniform heat transfer occurs, allowing the room to be heated in a short period of time.
Average score of ratings is more than 0
Share link
Comments There are no comments yet, but you could be the first...
Electric heating systems
This flooring option works using electric current. The system is connected to the premises' electrical network and can operate throughout the year, regardless of the heating season. These floors are easy to adjust the temperature.
Expert opinion
Afanasyev E.V.
Chief editor of the pol-exp.com project Engineer.
In apartment buildings, it is recommended to install electric floor heating systems, since, although they consume electricity, they do not pose a threat of flooding in the rooms located below a particular apartment.
Laying tiles on a heated floor
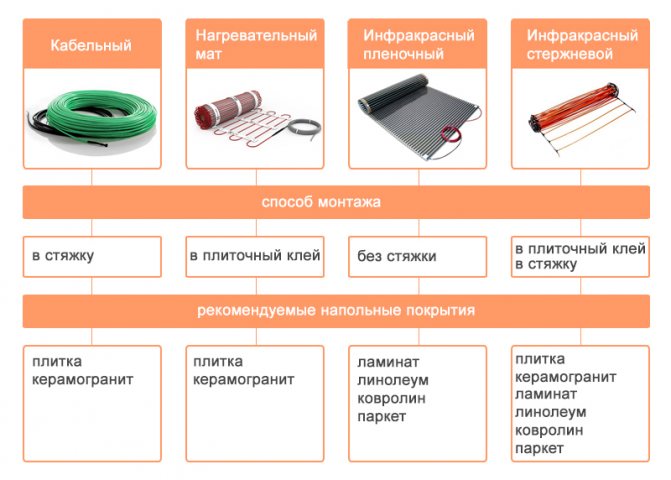
In turn, electric heating systems can be divided into several types:
- cable;
- film;
- thermal mats;
- core floors.
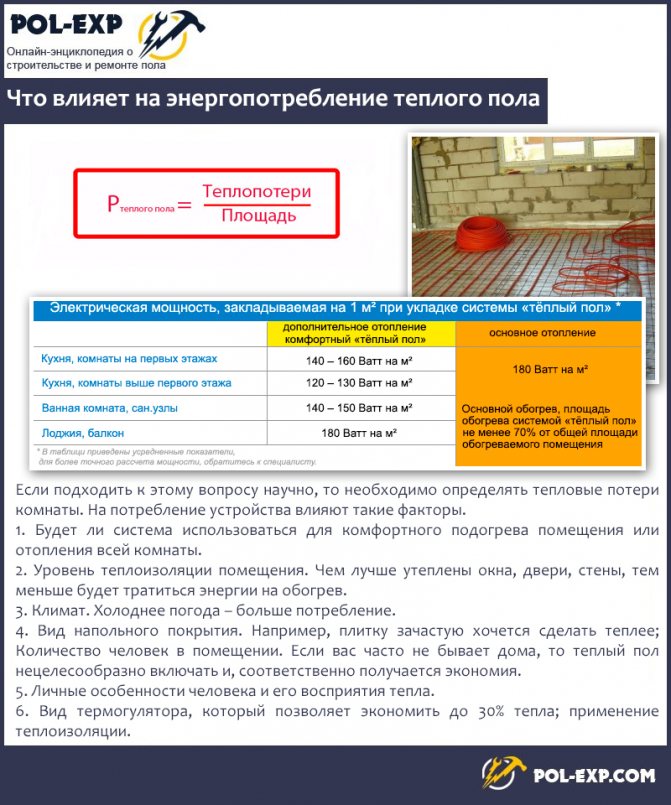
What affects the energy consumption of underfloor heating
Cable systems
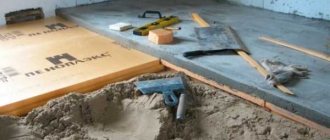
In this case, a fairly thick cable laid under the screed and tiles is used as a heating circuit. Such heating can be either the main or an additional source of heat.

Cable for heated floor
As a rule, cable floors in apartments under tiles are used extremely rarely. The reasons are simple - to make cable heating, after laying the circuit, you will have to fill in the screed, which takes a long time to dry (28 days), and only then can you lay the tile itself directly as a finishing material. It is also important to remember that due to the additional screed, the height of the floors in the room will increase slightly, which sometimes will not allow the doors to function normally. And the additional weight that the cement mixture will add to the floors is also not the best condition for an apartment building. But in a private house it is quite possible to install such floors.
On a note! It is also possible to install cable floors in an apartment building, but it is better if the room has not yet been finished - in this case, the likelihood that the screed has already been poured is minimal. This means that you can do it yourself by first laying the heating wires.

Stages of laying cable heated floors
The cable system can be made of single-core or double-core cable. You can use heating only after the cement screed has dried, but before pouring it, the system must be checked for functionality. The disadvantages of cable heating include the fact that if the heating system fails, it will be extremely difficult to repair it - you will have to disassemble the entire screed.
Table. Power of heating mats.
| Room type | Average power (required, W/m2) | Maximum power (required, W/m2) | Linear power of cable, W/m |
| Bathroom, toilet, toilet | 130-150 | 200 | 10-18 |
| Rooms on the first floors | 130-180 | 200 | 10-18 |
| Thin floors (using IR floors) | 100-120 | 150 | 8-10 |
| Balconies or loggias | 130-180 | 200 | 10-18 |
| Floors as main heating | 150-200 | 200 | 18-20 |
| Heated wooden floors using a log system | 60-80 | 80 | 8-10 |
| Kitchen, corridor, bedroom, children's room | 100-150 | 170 | 10-18 |
Cable heated floor
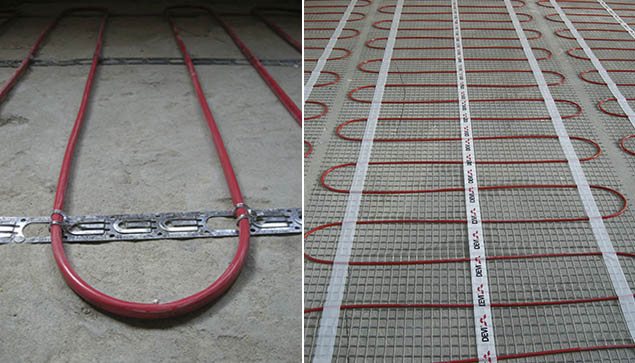
Heating mats
Heating mats, which were also invented for underfloor heating, are a variation of electric underfloor heating. They are much more often used for installing heating in an apartment, since they do not require pouring a screed. Heating mats are a mesh on which sections of heating cable are fixed. Power comes from electricity.
Installation of such a system is carried out using tile adhesive, and tiles are laid on top. Thus, work on arranging heating can be done very, very quickly - the floors can be used as soon as the tile adhesive has dried. And the height of the floors will increase by a maximum of 1.5 cm.
Heating mats do not require screeding
Important! Before laying heating mats on the base, you need to think about where and how the interior items will be placed. The fact is that in those places where such a mat will lie, no objects can be placed. Otherwise, you can cause the system to overheat and fail.
Installation of the system is simple, the main thing is to know the basics of physics and carefully study the instructions for connecting to the electrical network. Everything else is extremely simple and clear.
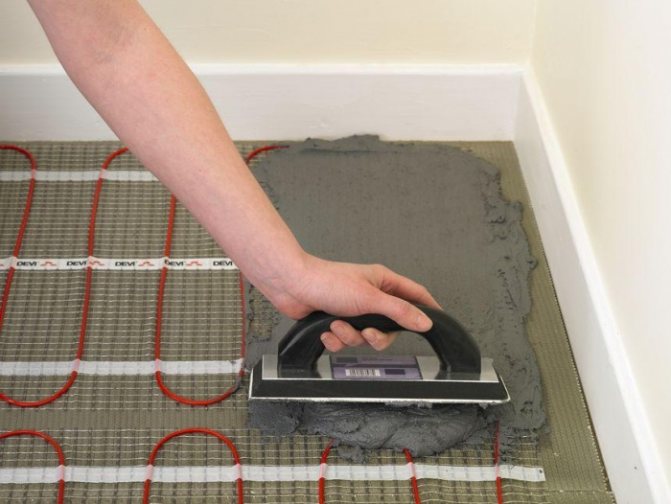
Installation of thermal mats
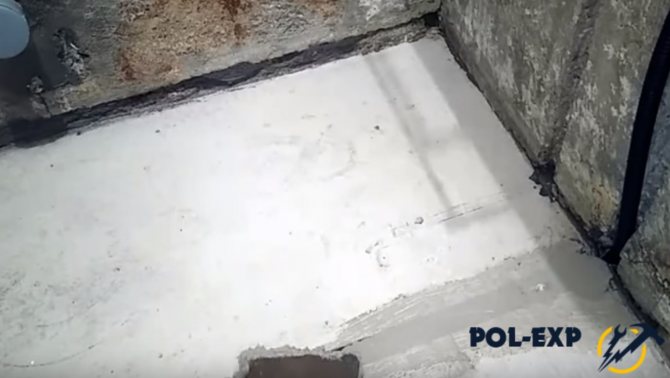
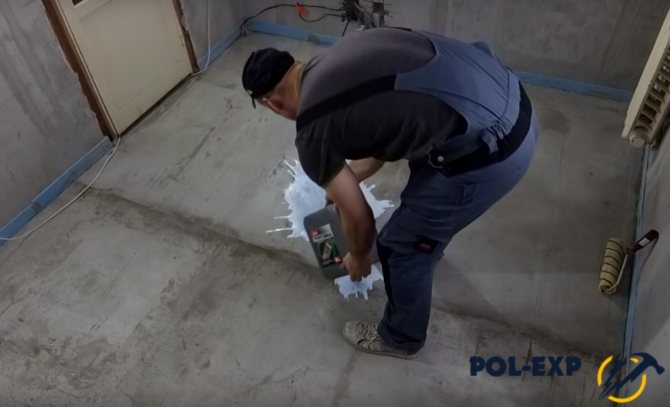
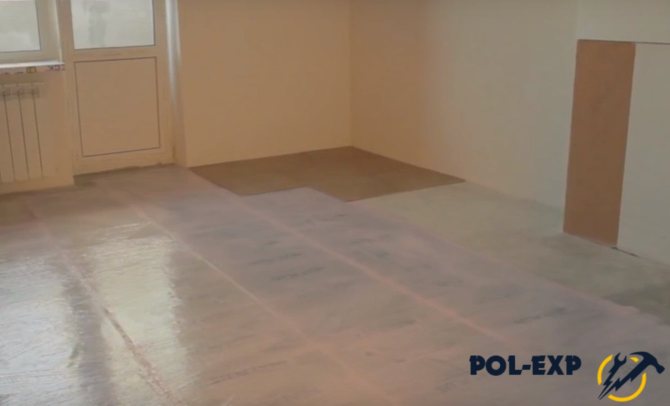
Step 1. Before you start installing the underfloor heating system, it is important to prepare the rough foundation for subsequent work. Thus, floors must be cleared of debris, leveled as much as possible and treated with waterproofing. To level small differences and defects in the base, it is recommended to use self-leveling mixtures. If the floor screed is in perfect condition, then you can simply clean it of debris and carry out waterproofing work.
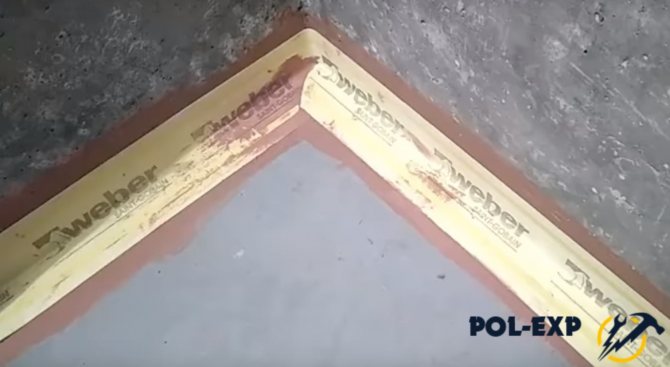
It is advisable to take care of waterproofing
Carrying out waterproofing work
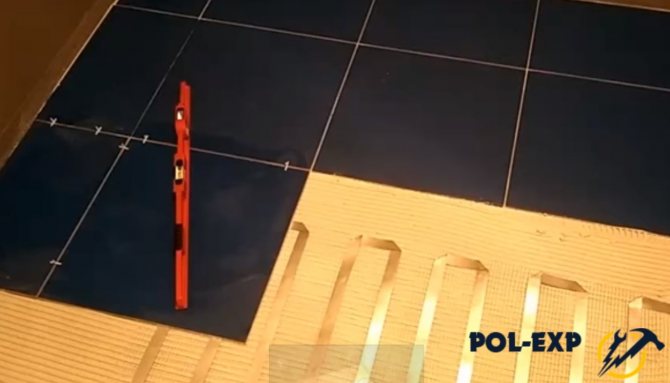
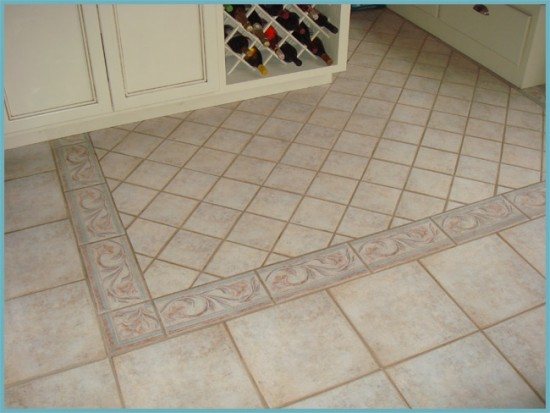
Step 2. When the floors are prepared, you need to mark the places where the tiles will be laid. It is important to consider that all intact ceramic elements are in open spaces, and that those that will have to be cut are not conspicuous. For ease of marking, the tiles can be laid out on the floor as they should be after the work is completed.
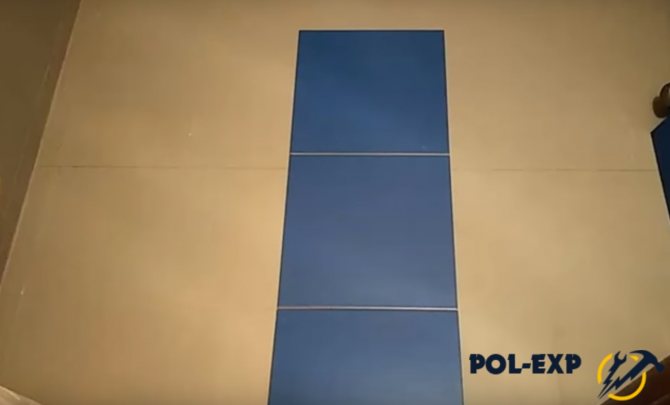
Preliminary tile layout
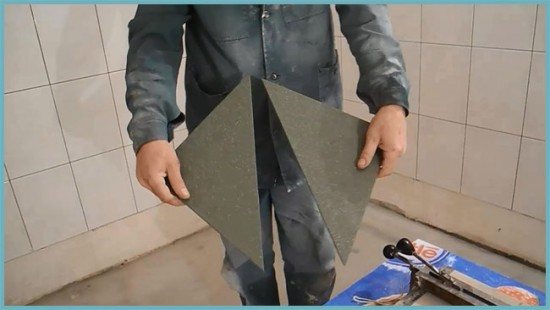
Step 3. It is recommended to cut the tiles in advance if it is necessary to adjust individual elements to cover free areas of the floor, for example, along the walls, where a row of whole tiles simply does not fit.
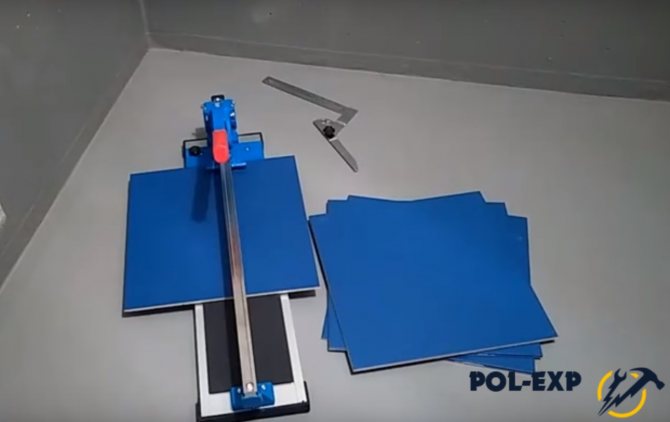
Tile cutting
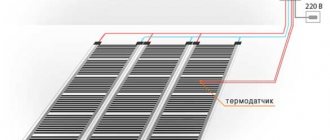
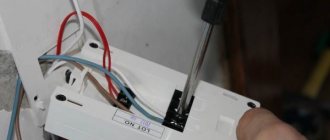
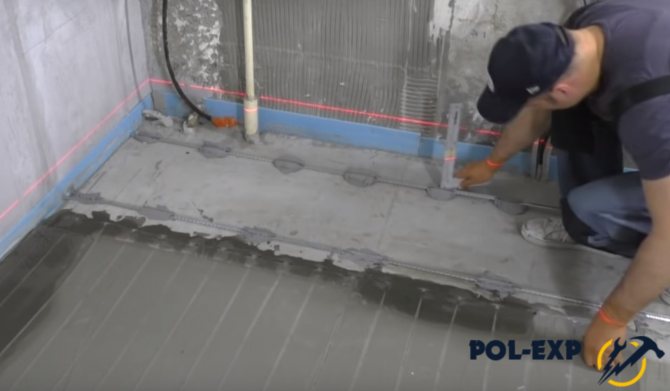
Step 4. On the floor and walls you need to apply markings along which grooves will be made for laying the temperature sensor and wires. The temperature sensor is placed in a groove in a corrugated pipe. After laying the sensor and bringing the wires out, the groove must be sealed with a solution.
The sensor installation location is sealed with mortar
By the way! It is best to groove the walls and do these preparatory work before applying waterproofing to the base. It is best to check the mats for functionality before final installation.
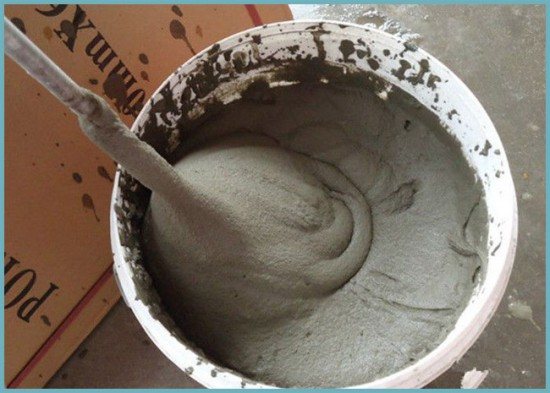
Step 5. Now you can prepare the tile adhesive. It must be kneaded according to the instructions given on the package.

Preparation of tile adhesive
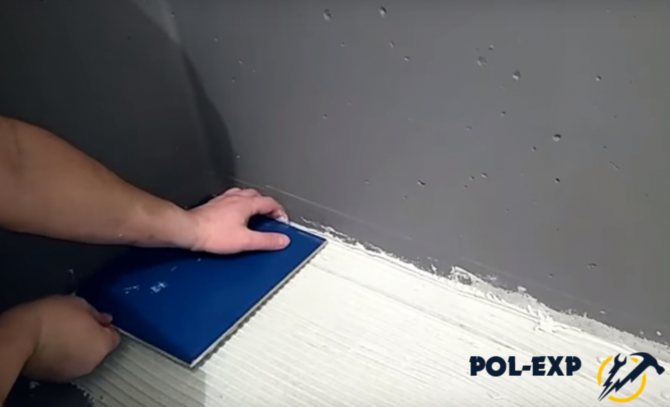
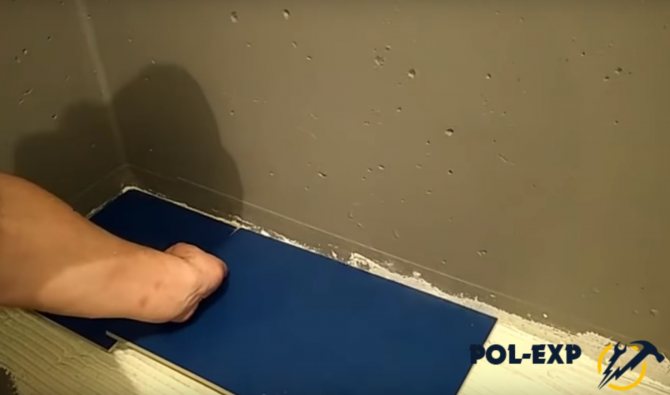
Step 6. Next, you can lay the tiles in the place where the bathtub will stand. There is no need to install heaters underneath. You need to place a little tile adhesive along the wall where the bathtub will be located.
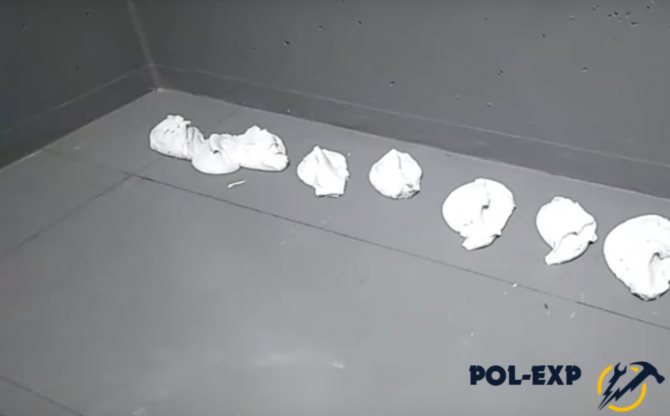
Glue is laid out along the wall
Step 7. Then the tile adhesive should be leveled with a spatula-comb, spreading evenly over the surface.
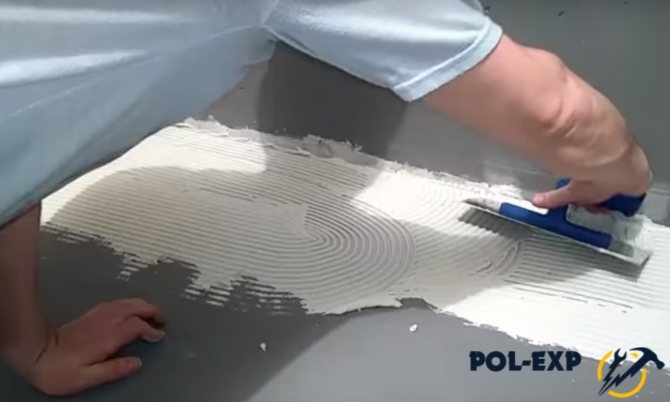
Leveling tile adhesive
Step 8. After this, you need to apply a little tile adhesive to the first tile from the wrong side.
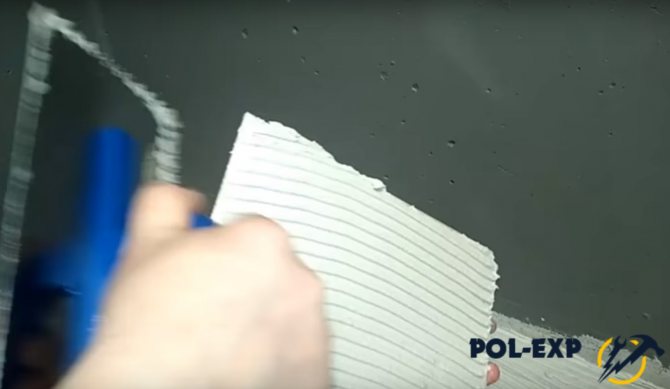
Glue is applied to the tiles
Step 9. Next, the smeared tile must be carefully placed in its intended place and pressed.
The tiles are laid in place
Step 10. In this way you need to lay out the first row of tiles. Don’t forget to use dividers, which resemble crosses in appearance and are installed between the tiles. They will help maintain the same distance between ceramic elements and make neat seams.
Laying the first row
Step 11. Now you need to apply tile adhesive to the base in those places where the heating system will be installed.
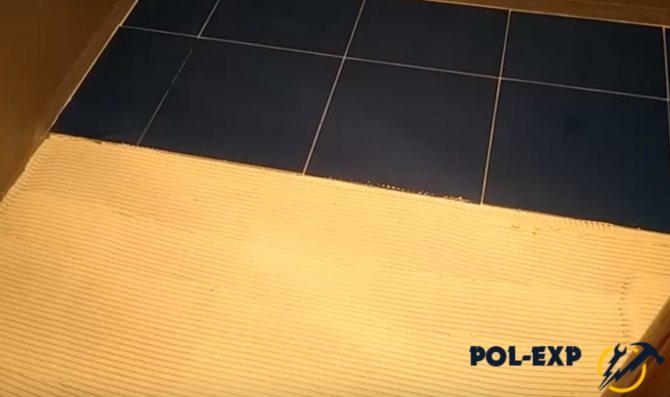
The glue is applied to the area where the heated floor will be
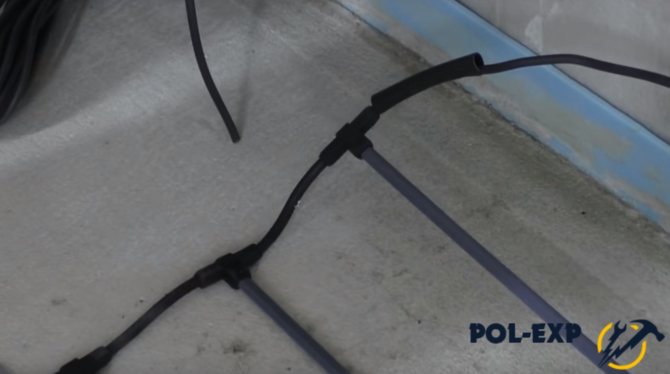
Step 12. Individual heating mats must be connected to a temperature sensor and thermostat using wires. The connection of the cables of individual mats is made using heat-shrinkable sleeves, which just need to be heated with a hair dryer, and they will be fixed. If a larger number of mats are used, then they also need to be connected to each other.

How individual mats are connected
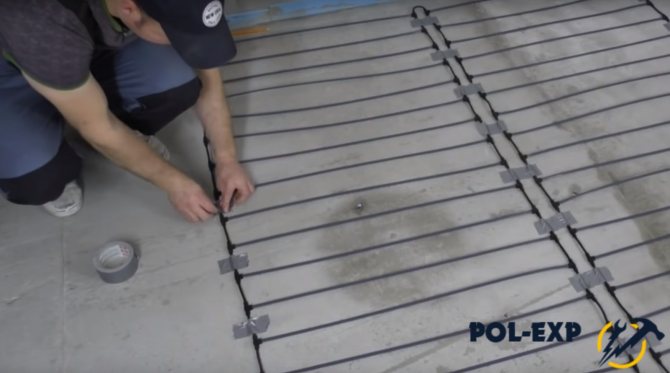
Step 13. Now you can lay the heating mats themselves on top of the glue.
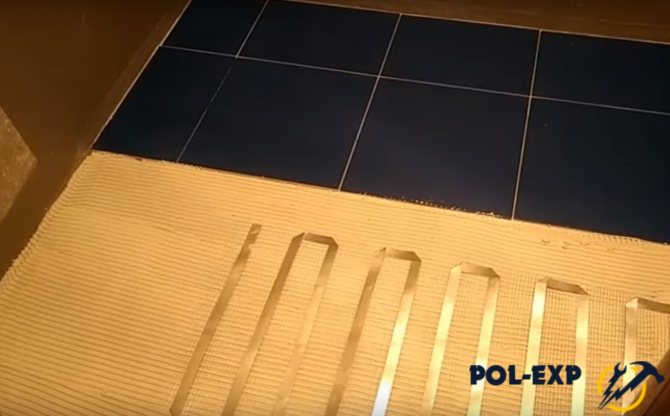
Laying heating mats
Attention! When installing heating mats, you need to ensure that the temperature sensor is located between two adjacent heating strips, and not under one of them, otherwise it will show incorrect data.
Step 14. After the heating system has been laid and connected, you can continue to lay the tiles according to the same principle as before: apply glue to its underside and lay it on top of the heating mat, pressing it. This completes the installation of the tiles. After the glue has dried, the seams between the individual elements can be sealed with a special tile grout.
Laying of floor tiles continues
It is important to remember that heating mats cannot be cut . So when calculating their quantity, it is worth rounding it down.
Calculator for calculating the amount of adhesive for laying tiles
Go to calculations
Video - Installation of heated floors (heating mats)
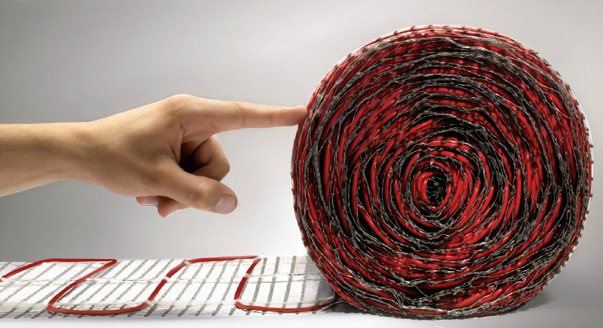
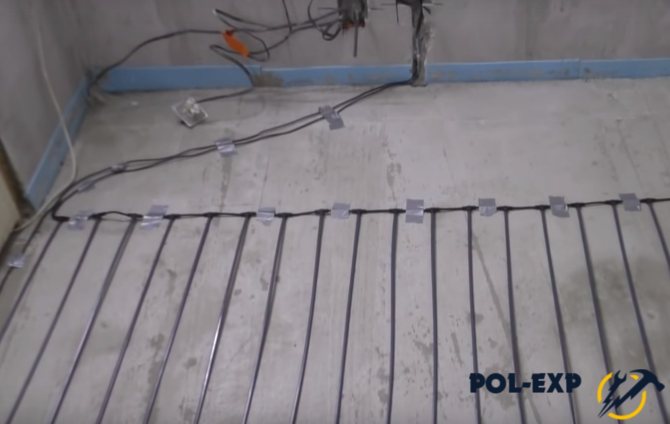
Core floors
There is another option for electric heated floors - the so-called rod floors. They are made of several non-flexible carbon elements connected in parallel to each other. They work on the principle of well-known thin film infrared floors.
Rod floors are not very popular
Such floors are economical, but difficult to install (the process is no different from laying a cable floor, that is, it is necessary to install them in a cement screed). This is a fairly rarely used system, as craftsmen say that it is much easier to install another option or use a simple cable than to mess around with rod floors. However, they still undertake to work with them.
Installation of a core floor
Step 1. First, the rough base needs to be leveled, cleared of debris and thoroughly primed, then allow the primer layer to dry.
Applying primer
Step 2. Then you need to apply markings on the rough base according to the diagram of how the core floor will be laid. It is worth remembering that there is no need to place it under furniture - heating should only be under areas of the tiles on which nothing will stand.

Applying markings to the base
Step 3. If necessary, the mat must be cut into separate pieces according to the size of the room. You can only cut along the power end cable in the middle between the two rods.
Trimming the mat
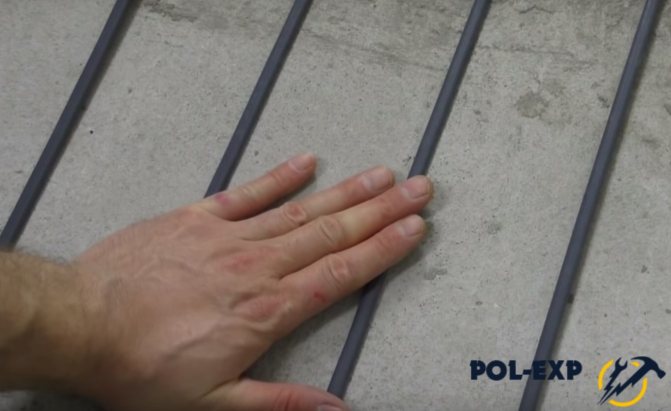
Step 4. Now the mat needs to be spread on the floor as it will lie.
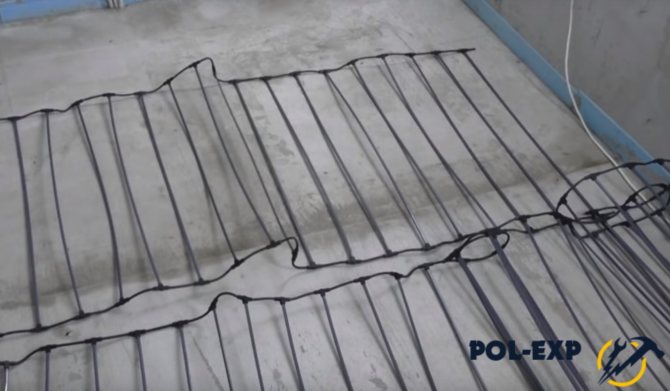
Laying out the mat on the floor
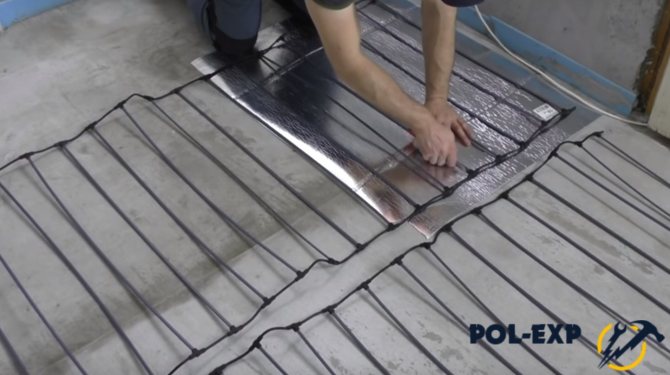
Step 5. It is advisable to place a heat-insulating backing material under the mat, which can be fixed to the base with tape.
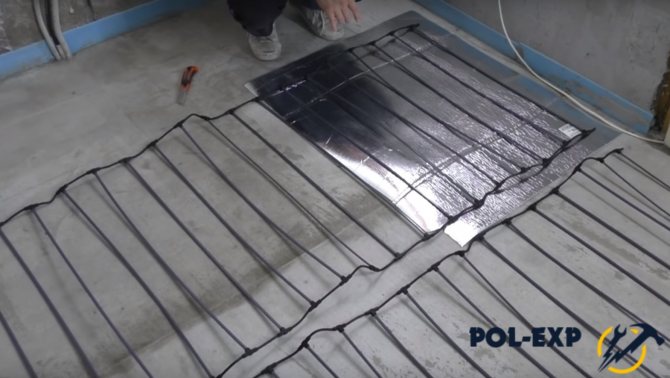
Thermal insulating substrate is placed
Step 6. Next, using a utility knife, you need to trim off the excess substrate so that it is located only under the elements of the heating system. In some cases, you can completely avoid installing the substrate.
Trimming excess backing
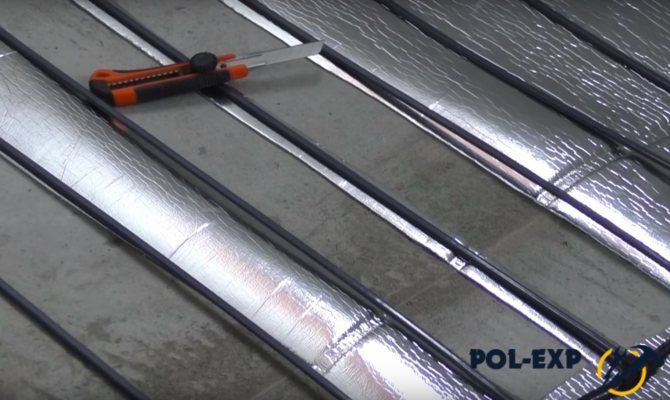
Result of work
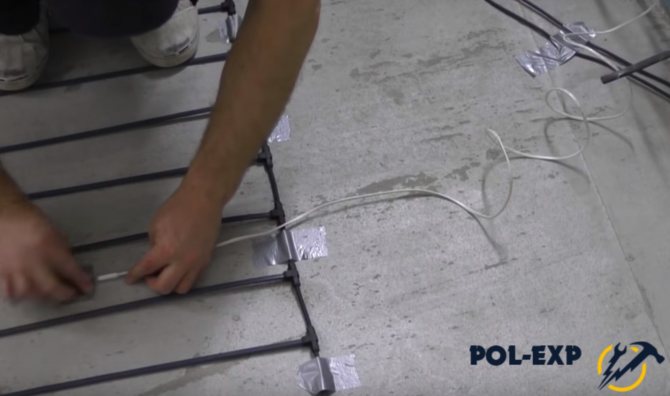
Step 7. The mat must be fixed to the base of the floor using construction tape, gluing it in several places along the power cable.
Fixing the mat with tape
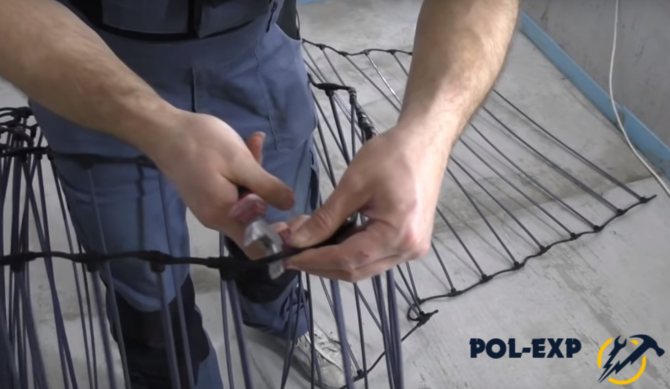
Step 8. Next, the system needs to be connected. From the wire that comes with the system, you need to remove the insulation at its edge and put a connecting sleeve on the free end, and then crimp it. The same sleeve with the other end must be put on the stripped outer wire of the mat and also crimped. Next, you need to put a heat-shrinkable tube on the sleeve and heat it with a hair dryer, it will be firmly fixed to the wires.
Connecting the system
Step 9. The same steps must be performed on the other side of the mat, connecting the wire to it as well.
On the other side of the mat you need to do the same
Step 10. The end wires need to be plugged by putting heat shrink tubing on them and heating it with a hairdryer. They will not play any role in the operation of the system.
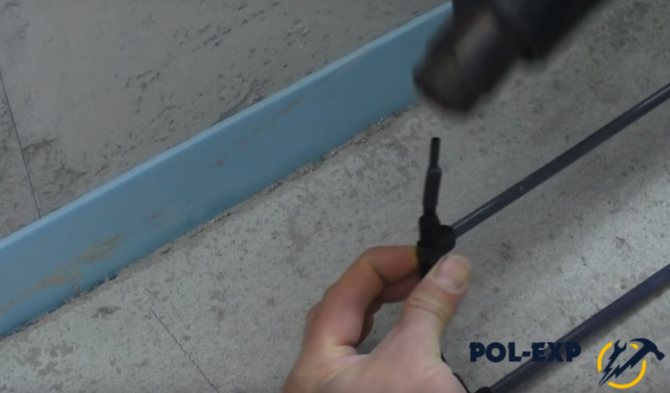
The end of the wire is heated with a hairdryer
Advice! It is most convenient to draw up a system connection diagram in advance and navigate it during operation.

Connection diagram
Step 11. The wires connected to the mats need to be connected to the thermostat. All connections must be carefully insulated.
Wires are connected to the thermostat
Step 12. You need to install a temperature sensor for the thermostat. It is fixed between two rods of the mat near the thermostat using tape. If the sensor is double insulated, then it can be laid without using corrugation.
Installing a temperature sensor
Step 13. Once the system has been assembled and connected, you need to turn it on and check if it works. To do this, you need to touch the mats and make sure that they are heating up.
System health check
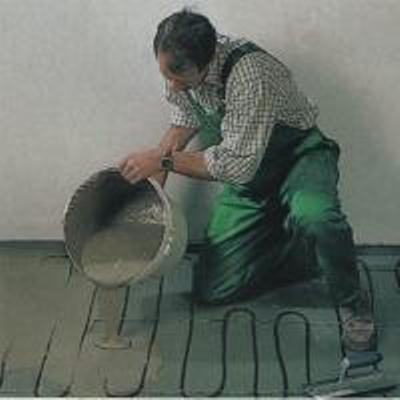
Step 14. Now you can prepare the cement mixture for the screed and continue working. The mixture should be applied in a thin layer over the laid heated floor - this will help fix the mats in place.
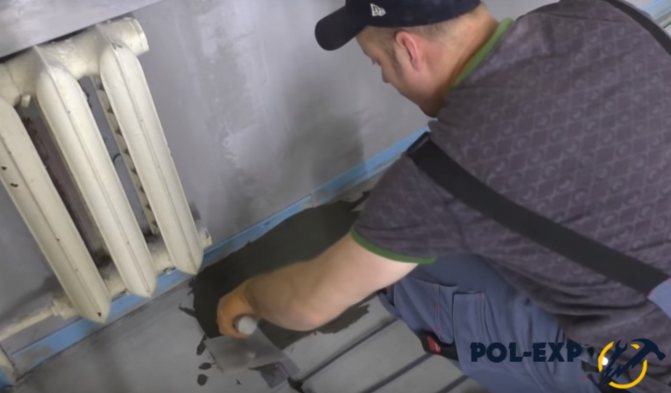
Applying the mixture over a heated floor
Step 15. The screed will be poured on top of the mats. First you need to install beacons along which the filling will be carried out. They must be installed at the same level so that the final floor is perfectly level.
Installation of screed beacons
Step 16. Next, you need to fill the screed in the traditional way along the beacons and let it dry. Drying period – 28 days. During drying, the floor heating system cannot be used and any other work is also prohibited. After the screed has dried, you can install the ceramic tiles themselves in the traditional way.

The screed is poured
Video - Installation of a rod floor
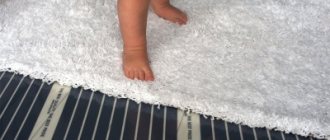
Film floors
So we come to the well-known infrared film floor. Perhaps this option is the best for installing a heating system in apartment buildings. However, it can also be used in a private home.
This floor is called infrared, since heating is carried out precisely due to infrared radiation. But the system still needs to be connected to the mains.

IR film heated floor
This floor is considered the most effective, economical and, moreover, does not emit electromagnetic radiation, which means it is safe for health. Such a system itself is a polymer film with graphite stripes.
Important! An infrared floor is rarely installed specifically under tiles; more often it is installed under coverings such as laminate or wood. The fact is that the materials of some types of systems can react negatively to tile adhesive. At least, you don’t need to buy bimetallic versions of infrared floors, but carbon ones will easily withstand the test of tile adhesive.
Installation of IR floor
Step 1. First of all, the floor surface must be cleaned of debris and dust, thus preparing it for applying a primer.
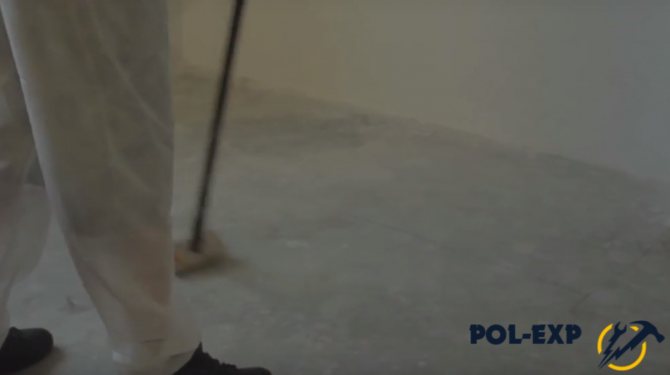
The floor is cleared of debris
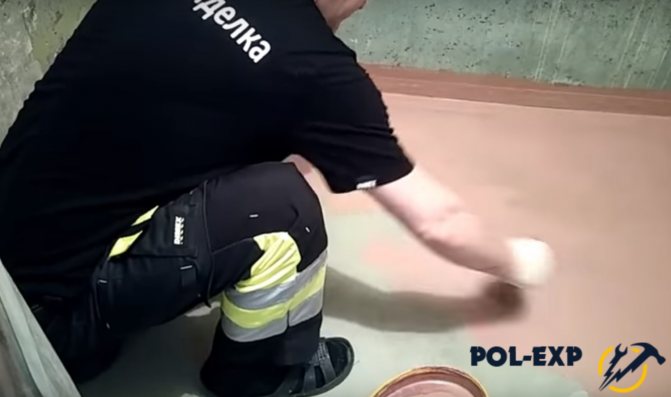
Step 2. Now you need to apply primer to the entire surface of the floor. It is most convenient to apply using a regular roller with a long handle. It is important to coat the entire surface well. Then the surface needs to be dried thoroughly.
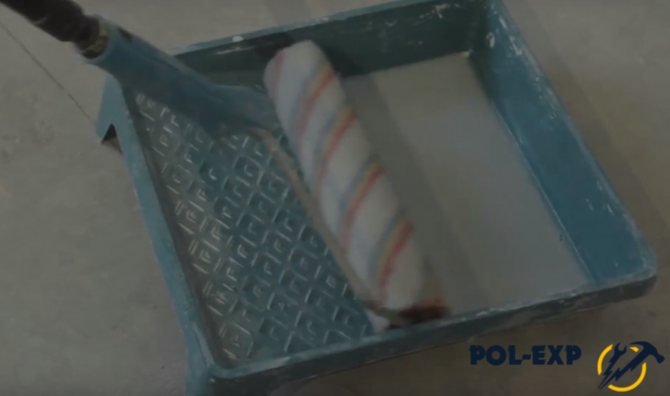
Next you need to apply a primer
Step 3. Next you need to mark the location of the IR film. It is important to note that the film must be laid at a distance of at least 5 cm from the walls. And where the furniture will be placed, there is no need to lay down film at all. These points must be taken into account when applying markings.
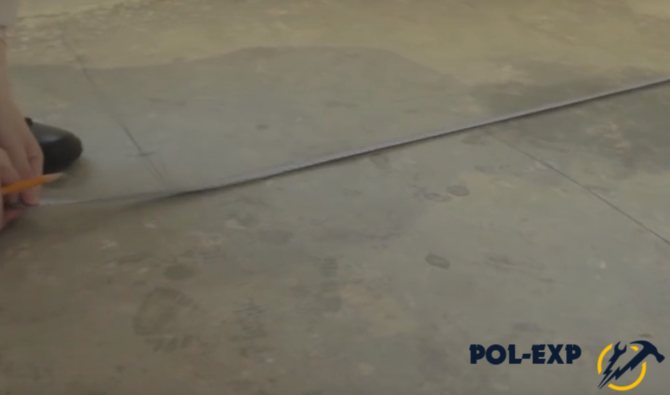
Marking
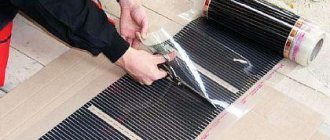
Step 4. Then you need to lay the infrared film on the floor in accordance with the markings. Separate canvases can be laid next to each other, but overlapping them is prohibited.
Laying IR film
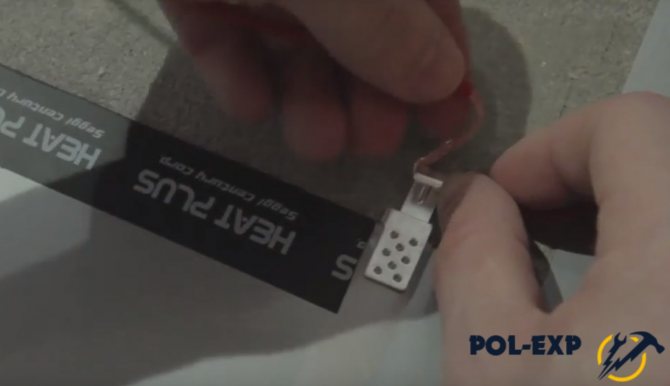
Step 5. You can connect individual film sheets to each other either by soldering or using contact clips. The latter must be inserted into holes specially made for this purpose along the edges of the film, where the copper busbar is located, and clamped.
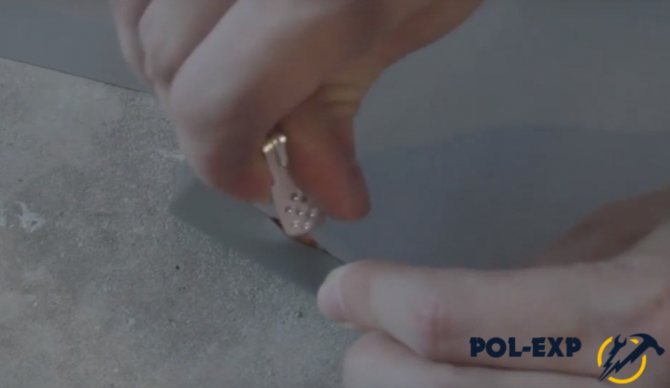
Using Contact Clips
The clip is clamped
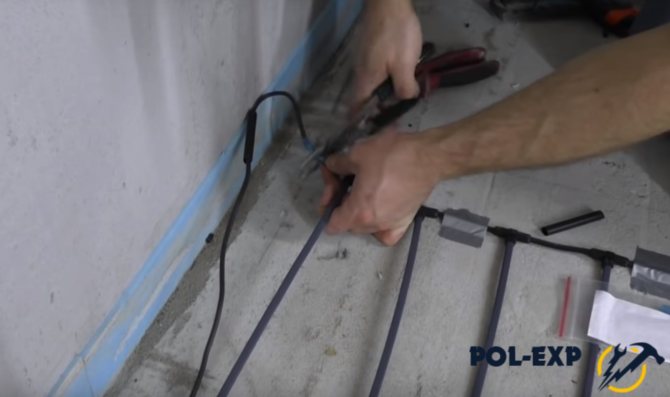
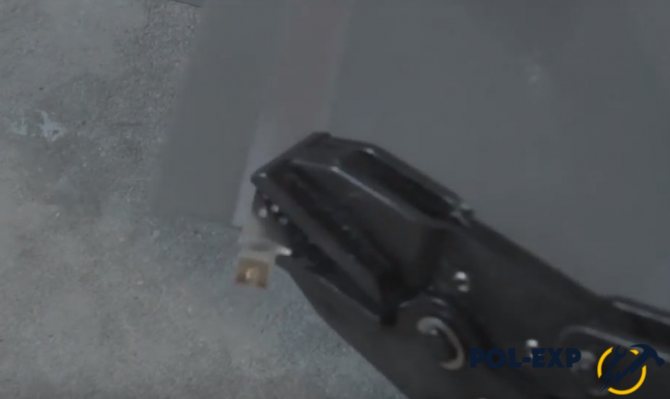
Step 6. Now the connecting wires need to be connected to the clips with areas stripped of insulation and clamped with pliers. The individual strips of film must be connected to each other in parallel.
Connecting wires to the clip
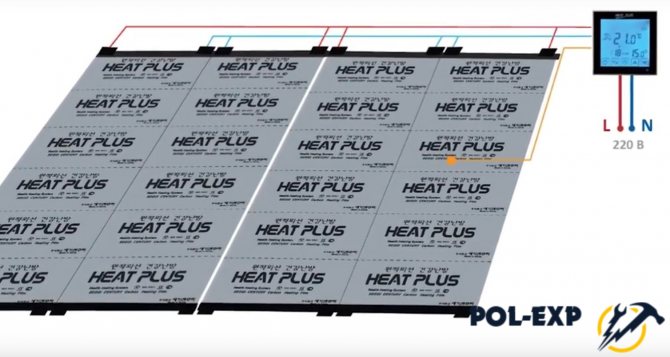
Connection diagram
Step 7. The ends of the film at the cut points (if the film needed to be cut) must be glued with insulating tape. Also, using butyl tape, all connections, contacts and unused wires are glued. It is recommended to glue the butyl tape on top with insulating tape.
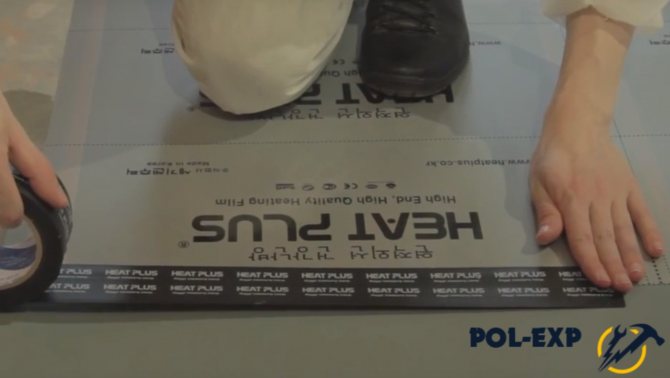
Using insulating tape
The joints are also glued
Another photo of the process
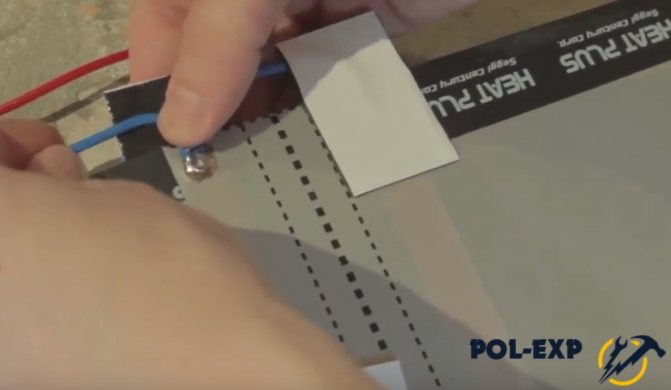
Step 8. Now you can begin installing the temperature sensor. In the floor at its location (under the film), you need to make a small recess and place the backup and main temperature sensors connected to the thermostat in it.
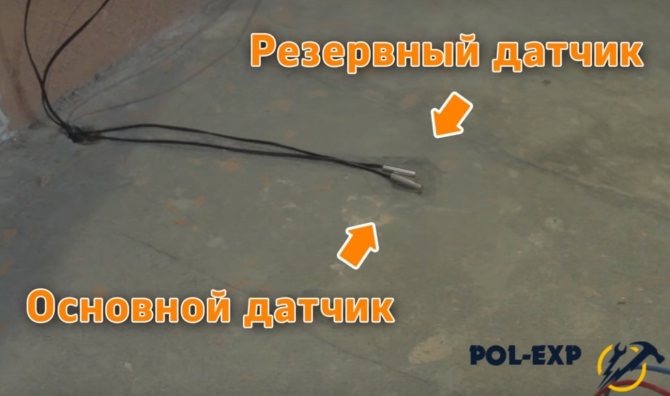
Backup and main sensors
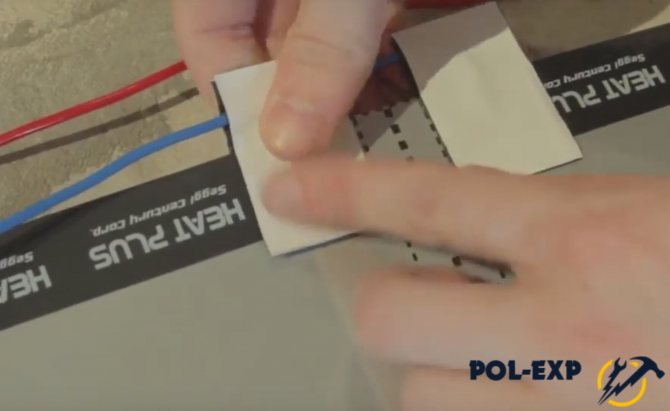
Step 9. Next you need to cover the thermal sensors with IR film. To prevent the sensors from moving, they can be attached with insulating tape directly to the film itself, placing a piece of tape under them with the sticky side up.
Step 10. Now you need to turn on the system for 20-30 minutes and make sure that it works. The floors should warm up.

The system is checked for functionality
Step 11. Next, you need to apply a thin layer of special heat-resistant acrylic glue under the film so that it does not move in the future. Moreover, later the tiles will be mounted on top of it. After gluing, you need to go over the film with a spatula to expel any remaining air from under it and distribute the glue evenly. You need to wait for the glue to dry.
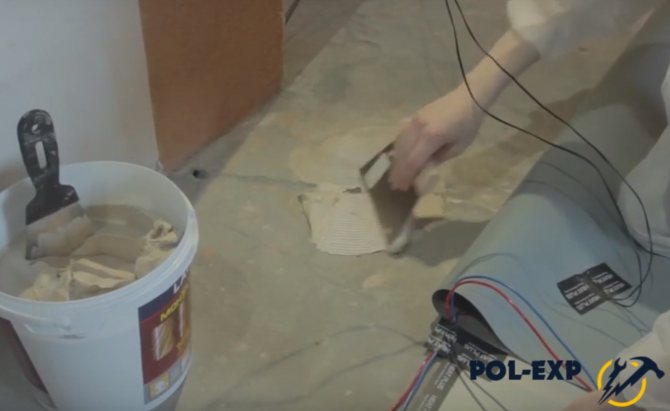
Application of heat-resistant acrylic glue
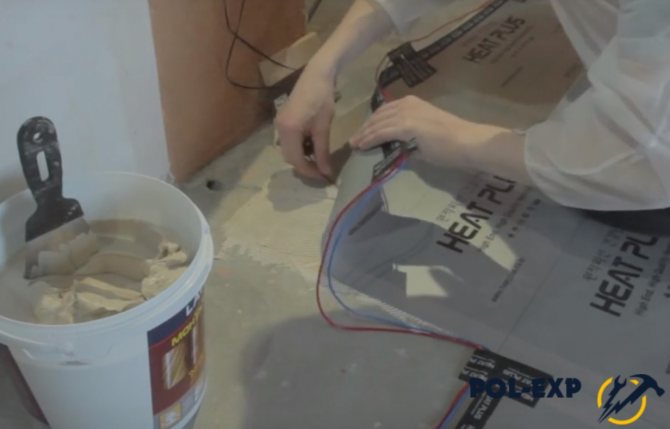
The film is laid on glue
Step 12. After this, concrete contact must be applied to the surface of the IR film and to the remaining uncovered concrete base.
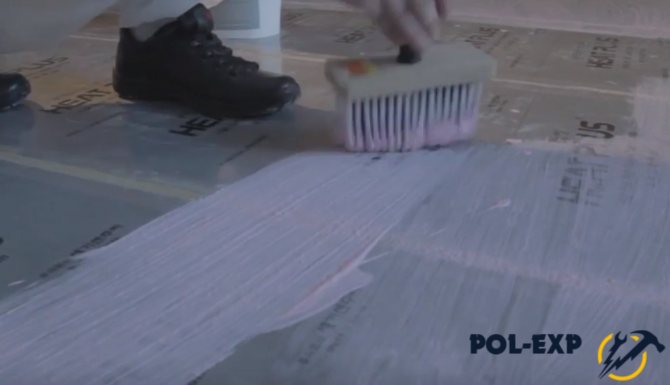
Application of concrete contact
Step 13. When the concrete contact has dried, you can lay the floor tiles in the traditional way.
Now you can start laying the tiles
Laying porcelain tiles on a heated floor
Laying porcelain tiles on a heated floor: features and installation photos
Due to its performance characteristics, durability, good thermal conductivity and external aesthetic functions, porcelain stoneware is the most optimal material for use when installing heated floors. How to lay it correctly and what nuances should be taken into account when installing porcelain tiles on top of heating systems, we will consider further.
The choice of adhesive mixtures and the method of laying porcelain tiles can vary depending on several factors.
Factors influencing installation:
- type of heating element (varieties of film, infrared, water, electric heated floors with cable mats imply the use of various heat-insulating materials and adhesive mixtures due to possible poor adhesion to the surface of the heating element);
- the characteristics of porcelain stoneware itself, depending on the thickness of the tile, water permeability, fire resistance, strength, wear resistance and other features that affect the complexity, quality and durability of installation, also imply the choice of adhesive mixtures (cement-sand, elastic or liquid-plastic adhesives).
Attention!
Before you start laying tiles on a heated floor, you need to make sure that all elements are in good working order, the integrity of the heating pipes, cables, and the markings of the couplings correspond to simplify access to the heating systems for further settings and operational work with the heated floor.
Depending on the type of heating elements, the preparation of the base for porcelain stoneware will depend.
- for a water floor, it provides for the presence of expansion joints rubbed with elastic materials along the floor line, which will avoid cracks on the surface of the tile in the event of expansion of the heating elements under the influence of temperatures. The prepared base consists of heat-insulating material with ranet tape on top of which pipes with harpoon bracket fastening are laid, filled with concrete screed for laying porcelain stoneware;
water heated floor base
- laying porcelain stoneware on a heated floor over electric mats occurs directly on the very surface of the heating element using an elastic adhesive mixture;
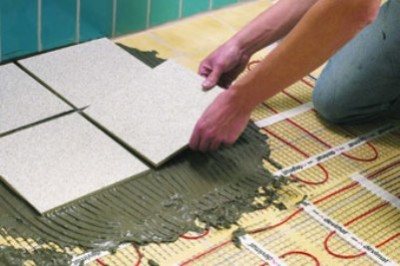
base for electric heated floor
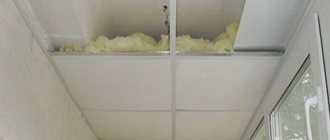
- under the tiles on a film heater occurs using hydrobarriers or polyethylene film and a layer of plasterboard or glass-magnesite sheet, on which the tiles will be attached using a cement-adhesive mortar.
base for film heater
Important!
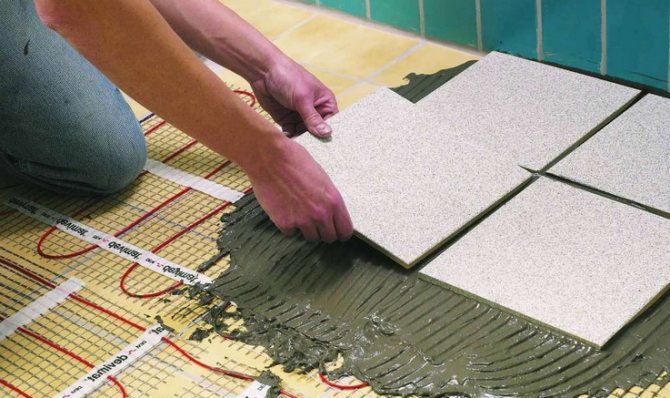
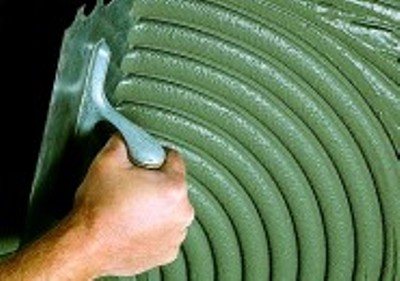
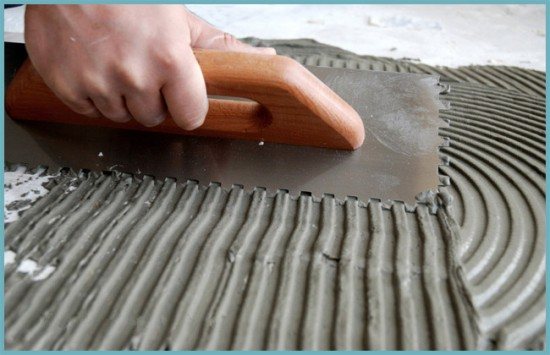
The adhesive should be applied using a notched trowel. This will save glue consumption and avoid the appearance of air bubbles, which can lead to difficulty in heat removal, overheating of the area and failure of the heating system.
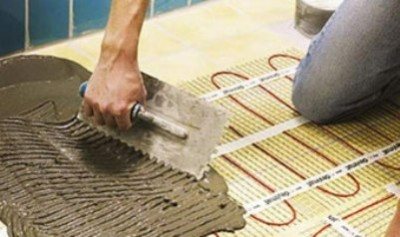
applying glue with a spatula
Laying porcelain tiles
Further laying of the tiles occurs 15 minutes after applying the adhesive. The area covered with glue should not exceed 1 m2 due to its rapid drying. Each tile element must be pressed into the base using a rubber hammer. Check the evenness of the laid coating on the site with a level.
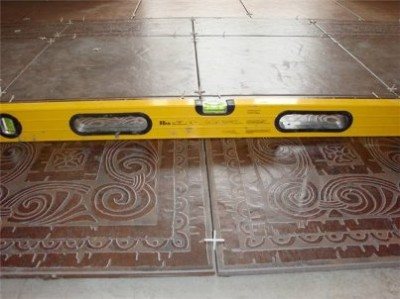
checking the evenness of the coating
It is imperative to leave gaps between the tiles of 2 mm and a distance between the wall and the coating of 4-5 mm, which will subsequently be filled with grout mixture and silicone sealant. The presence of gaps promotes uniform heat distribution over the entire tiled surface.
ready-made base for heated floors with porcelain stoneware
Important!
Due to its high strength and thermal conductivity, porcelain stoneware is also recommended for use when installing heated floors with high power. The material is not prone to deformation under the influence of high temperatures, and heating of the room with increased power will occur faster and more efficiently.
Everything about installing heated floors
Home ‒ Tiles ‒ Laying porcelain tiles on the floor
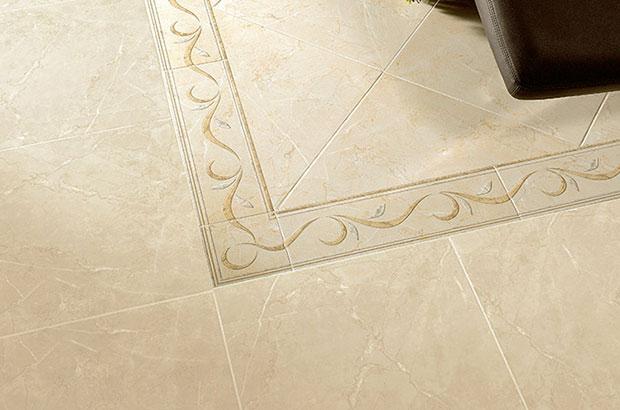
Laying porcelain tiles on the floor
Porcelain tiles are one of the popular floor coverings. It is produced by semi-dry pressing and firing at 1200–1300 °C of a mixture of clay, kaolin, quartz sand, and feldspar. The resulting material is characterized by high mechanical strength, durability, is stable in humid conditions and is not susceptible to chemicals and solvents.
- Content
- Laying methods
- Laying porcelain tiles on the floor price per square meter
- Materials and tools
- Technology for laying porcelain tiles on the floor Preparation of the base
- Marking
- Laying
- Cutting porcelain stoneware
Lay the floor covering on a concrete or wooden base, as well as on a cable electric or water heated floor. The most popular sizes of porcelain stoneware slabs are 300x300, 450x450 and 600x600 mm; there are products of larger and smaller sizes.
Installing porcelain tiles requires experience. If funds allow, it is recommended to invite professional installers. Sometimes their services cost more than the material. To save money, you can lay porcelain tiles yourself. To ensure that the quality of do-it-yourself work does not differ from the work of professionals, all stages should be performed very carefully, with love for the work and slowly.
Laying methods
There are many ways to lay porcelain tiles, the most popular:
- Straight with a seam of varying thickness (most often 2–3 mm);
- Seamless straight or diagonal (tile to tile close);
- Seam to seam;
- Staggered with a shift of half or a third of the tile;
- A combination of tiles of different sizes, seamwise or scattered;
- Diagonal (seam to seam or staggered);
- A combination of diagonal (in the center of the room) and straight laying around the perimeter.
Work begins from the center of the room. The first row is placed in a straight line connecting the middles of opposite walls or opposite corners of the room (if placed diagonally).
Laying porcelain tiles on the floor price per square meter
The cost of laying porcelain tiles depends on the size of the slabs, the complexity of the pattern and the skill level of the installer. The price is different in different regions. In Moscow and the region, the cost of simple installation work starts from 630 rubles/m2. Making a pattern on the floor costs from 840 rubles. and higher.
The average price for simple installation of porcelain tiles of popular sizes is 1000–1200 rubles/m2. Laying porcelain tiles larger than 600x600 mm in size will cost from 1690 rubles/m2. Diagonal ones cost 10–20% more.
Prices for porcelain stoneware vary from 750 rubles. up to 6–7 thousand rubles/m 2. To stick an expensive coating, you should invite specialists, but you can glue an inexpensive one yourself.
Materials and tools
To stick porcelain tiles you will need the following tools:
- tile cutter,
- grinder with diamond wheel,
- metal ruler,
- corner,
- building level 1–2 m long,
- laser level,
- marker,
- measuring tape,
- smooth spatula,
- a notched spatula with a tooth length of 8–10 mm (the larger the size of the porcelain stoneware slabs, the longer the spatula teeth),
- rubber hammer (mallet),
- container for preparing the solution,
- drill with mixer attachment,
- rubber spatula.
- porcelain tiles with a margin of 10% for straight laying and 15% for diagonal laying,
- adhesive for porcelain tiles (selected depending on the type of base, size of the covering slabs and operating conditions of the floor).
- deep penetration primer,
- jointing mixture for porcelain stoneware designed for a specific joint thickness.
- crosses (their thickness determines the size of the tile joints).
Technology for laying porcelain tiles on the floor Preparation of the base
The base must be level. The concrete floor is leveled with a screed; the screed period must be at least 4 weeks. A concrete screed is poured over the wooden base or plywood, gypsum fiber board, gypsum board or other leveling materials are laid.
Before gluing the coating, the concrete base is thoroughly cleaned, stains of grease and paint are removed, vacuumed and impregnated with primer 1-2 times. If the surface of the screed is very smooth, it is made matte using coarse sandpaper or mesh.
You should first think about how the tiles will be arranged and draw a sketch on paper to scale to see what the final result will be. This is important if you are planning a pattern or complex design.
To avoid mistakes, you can first lay out the covering on the floor and see where the rows should be moved if the walls have narrow strips that are inconvenient for cutting.
Next, mark the line of the first row in the middle of the room. To do this, connect the middles of opposite walls. The lines should intersect at the center at right angles. When laying straight, the sides of the tile should be along these lines, and when laying diagonally, its opposite corners should coincide with these lines. If a row offset is necessary, parallel straight lines are drawn to the extent of these offsets from the center of the room.
- The back side of the slabs is covered with a protective layer of technical wax; it is easily washed off with warm water. Tiles with defects are set aside and will be used for trimming.
- In a container, strictly following the instructions, prepare the glue by stirring the mixture with a drill with a stirrer attachment. Leave for 5 minutes, then stir again and get to work. The glue is prepared based on the required amount for work within 3-4 hours.
- Apply glue to the place where the first tile is laid with a smooth spatula and level it with a serrated one.
- A thin layer of glue is also applied to the porcelain stoneware and left for 10–15 minutes.
- Lay the first tile strictly according to the markings, pressing it a little, and check the position with a level (it should lie horizontally along the sides and diagonals).
- Using a smooth spatula, remove excess glue from the sides and apply glue under the second tile in the same way.
- The second one is placed in the same way, checking the horizontal level so that both are on the same level. If the second tile lies a little higher, tap it with a rubber mallet through a flat wooden block; if lower, lift it, add a little glue, level it again and return the tile to its place. You can move the tiles within 30 minutes. When laying seamlessly (it requires very even identical slabs), they are pressed tightly against one another; if there is a seam, crosses of the required size are installed. There should be no glue in the seams.
- Work continues until the end of the first row. The second row is placed starting from the wall or from the center, depending on the pattern.
- After laying, 3-4 days later, the seams are cleaned of glue residues and sealed with jointing mixture using a rubber spatula. Leave for 3-4 days. After this, remove the excess with a damp cloth.
- The seams between the walls and porcelain tiles are sealed with silicone sealant.
- Before laying the floor covering, you should measure the cable resistance and do this periodically during the installation process. The difference between its value and the nominal value should be no more than 5%.
- The heater is turned off and cooled to the room temperature, which should not be lower than that required for the glue. You should use special glue for heated floors.
- The glue is applied in such a way that the cells of the heating cable or mat are completely filled with it, and the teeth of the spatula do not touch the cable. For 300x300 tiles, the adhesive is applied to approximately 0.5 m2. After this, the adhesive is leveled.
- The mixture is left for 15 minutes, after which the tile is laid, lightly pressing it into the glue and leveled.
- The next tiles are laid in the same way, placing crosses between them.
- The glue protruding in the seams between the tiles is removed with a damp sponge.
Cutting porcelain stoneware
Porcelain stoneware is a harder and more durable material compared to tiles. To cut it, use a special tile cutter or grinder with a disc for porcelain stoneware. The cut line is first marked with a marker.
Laying porcelain tiles on a heated floor
Over a concrete screed, porcelain tiles and ceramic tiles are laid directly on cable electric heated floors or cable mats.
Laying porcelain tiles on a wooden floor
Depending on the strength of the logs and the condition of the wooden floor, the base can be leveled with concrete screed, plywood, gypsum fiber board or OSB boards. It is necessary to first calculate the load on the logs; if it is large, install additional logs or strengthen the existing ones.
- Laying porcelain stoneware on a concrete screed on a wooden floor is no different from that on a concrete base.
- Sheets of plywood, gypsum fiber, plasterboard or OSB boards are coated 1-2 times with a deep penetration primer before gluing porcelain stoneware.
- The technology for gluing the plates is further similar.
Adhesive for laying porcelain tiles on the floor
The main indicator of adhesive for porcelain tiles is adhesion - adhesion to the base and coating. The adhesive layer should be no thinner than the tile or slightly thicker, especially when laying on a heated floor.
If the floor will be used in difficult conditions, two-component epoxy-based adhesives should be used. For small-sized porcelain stoneware slabs, basic glue is used, and for large sizes, special glue is used.
When laying tiles at temperatures above 15°C, you need to use glue, which takes longer to dry, and at lower temperatures, which quickly gains strength.
Let's figure out how to lay porcelain tiles on the floor with your own hands
Nowadays, there are several ways to finish floors. The most common types of flooring are self-leveling flooring, tiling and porcelain stoneware. It is less common to find wooden floors, because this material is not suitable for all rooms. But still, porcelain stoneware is considered the most durable coating. How it differs from tiles, what are the advantages of such finishing and how to lay porcelain tiles with your own hands, you will learn from this article.
Advantages of porcelain stoneware
Due to its qualities, porcelain stoneware is used not only for interior but also for exterior decoration. The undoubted advantages of porcelain stoneware include:
- high resistance to loads;
- resistance to household chemicals;
- does not absorb moisture;
Porcelain stoneware is a reliable and durable material with high decorative properties.
- resistance to high and low temperatures;
- durability;
- large selection of shapes and colors.
How to choose a coating
The floor is the basis of any room, so the choice of covering must be approached carefully. The features of the coating depend on the room in which you will be laying porcelain tiles. For example, the floor in the hallway should be moisture-repellent and resistant to chemical influences, while for the kitchen the main criterion will be wear resistance and immunity to frequent temperature changes. Floors in the bathroom should be made of non-slip coating, and in the living room they simply must have a representative appearance.
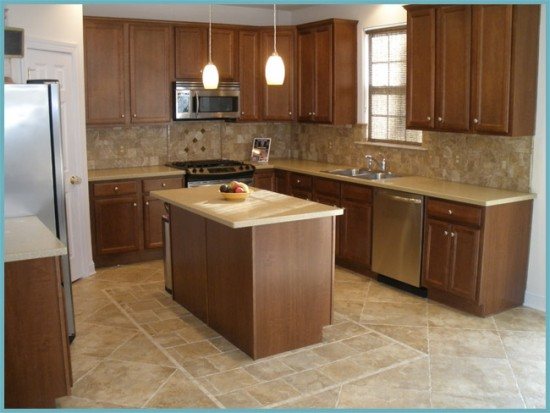
Porcelain tiles on the kitchen floor
It should be noted that porcelain stoneware is suitable in each of the above cases. In addition, it can be used for covering floors in garages, workshops and boiler rooms. For such rooms, matte rough porcelain tiles are often used, which have increased strength and minimal slip.
Floor preparation
The first thing you will have to do is prepare the floor. Porcelain tiles are quite demanding on the base, so it is necessary to approach this stage responsibly. The surface must be flat, smooth and clean. A good option would be to fill it with a self-leveling mixture.
Advice. If for some reason you decide to lay it over old tiles, you definitely need to degrease it with caustic soda.
Before laying, the surface must be treated with a primer and allowed to dry. Since porcelain stoneware does not absorb moisture, installation should be carried out on a completely dry surface.
Before laying porcelain tiles, carefully level the floor surface
If you are installing a heated floor, after installing it you need to warm it up and turn it off. Next time it will be possible to turn on the floor only after the glue has completely dried, which is about two weeks.
If porcelain tiles will be laid on a wooden floor, then it is necessary to purchase a special underlay that will prevent the consequences of expansion and contraction of the wooden base. Without a backing, there is a high probability of damage and cracks. In addition, when laying on a wooden base, it is best to use flexible one-component adhesives.
But the best base option would be a concrete screed. It should be smooth, clean and dry.
Advice. When laying porcelain tiles on drywall, it should be primed, thereby reducing the rate of moisture absorption.
Laying slabs
Before laying the slabs, make sure that you have all the tools and components available. In addition to the tile itself, you need a spatula and crosses. The size of the trowel teeth depends on the size of the tile. The larger the tile, the larger the teeth. Crosses are necessary to strengthen the seams. The sizes of crosses also vary.
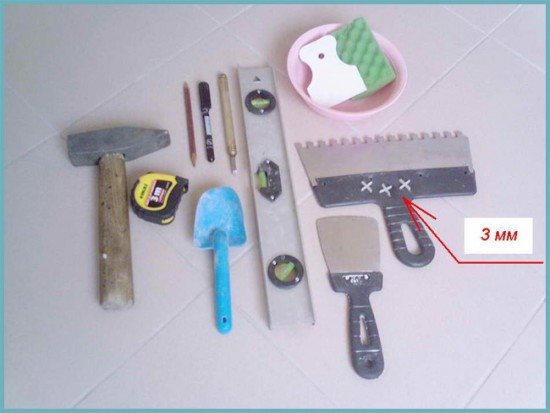
Tools for laying porcelain tiles on the floor
Before installation, you need to decide on the layout. In addition to the classic longitudinal tile laying, there are many more options from which everyone can choose the one they prefer.
When you have decided exactly how your floor will look, you can start marking. To do this, you need to determine the middle. If you start laying out the tiles from the middle, you will get the most aesthetically pleasing and symmetrical appearance of the floor.
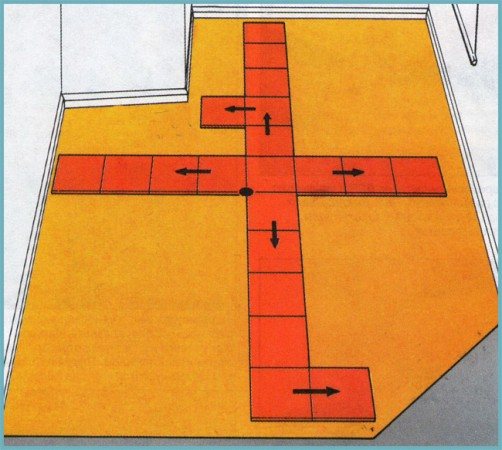
Scheme: laying tiles from the middle of the room
Once the markings have been applied, you can begin laying the tiles directly. The main rule is to use specialized glue. Regular tile adhesive should never be used, because porcelain tiles are heavy and do not absorb moisture.
The back of the tile must be cleaned and the adhesive prepared, strictly following the manufacturer's instructions. Allow the required time and begin applying glue to the floor surface. As a rule, the adhesive layer is 4–5 mm. Apply glue evenly and in one direction. If the adhesive is applied unevenly, voids may form under the slabs, which can cause further damage.
As a rule, glue is not applied to small tiles, only to the base of the floor. In the case of large tiles, experts advise applying glue to the back side of the slab. This will increase the adhesion strength, but will also entail an increase in glue consumption.
The adhesive is applied one at a time to each tile. The first tile is placed on edge according to the markings and carefully laid on the glue. To level large tiles, use a rubber mallet and level. After the first tile lies flat, apply glue for the second tile and repeat all the steps from the beginning. The tiles are aligned relative to each other using seam crosses.
Possible mistakes
We have already figured out how to lay tiles, but sometimes during the installation process some questions arise.
You can level the tiles after laying within 10, maximum 15 minutes. After this time, the adhesive will begin to set and displacement may negatively affect the adhesion of the tiles.
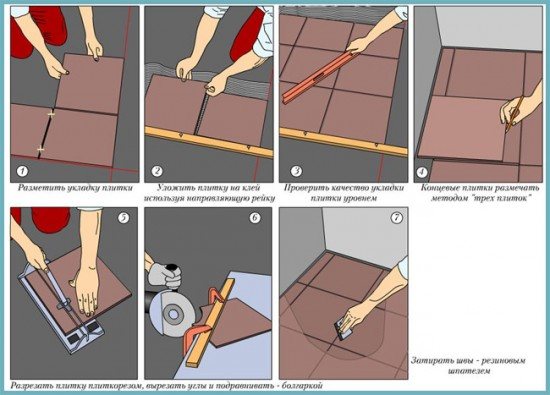
Scheme: step-by-step instructions for laying porcelain tiles on the floor
During installation you will inevitably have to take breaks, so it is worth keeping in mind that tiles laid an hour ago will be slightly lower. This is natural shrinkage. Usually it does not exceed 1 mm, but it can be noticed. Therefore, when laying new tiles after a break, remember that if you align the new tile with the old one, without taking this nuance into account, then after shrinkage you may get a small gap.
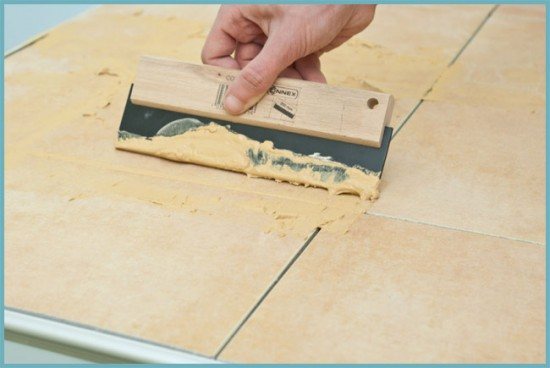
Grouting joints
After your tiles have dried (usually this takes from two days to two weeks), you can begin the final stage - grouting. Make sure that the adhesive solution has completely cured and clean the seams from any remaining adhesive and dirt. If the floor is large, then it is better to roughly divide the space into several parts.
You can buy grout in the store. Grouts come in different colors and have different qualities, such as resistance to household chemicals, moisture resistance, etc. Please pay attention to this when choosing.
The mixture is applied diagonally with a special grater. Do not use metal trowels for grouting - this may ruin the appearance of your tiles. After finishing grouting, immediately remove the residue with a damp cloth.
Glue selection
High-quality glue is produced on a cement base with the addition of synthetic resins, polymer additives and the necessary mineral plasticizers. Nowadays, asbestos and other substances that can harm health are no longer added to glue, therefore glue for porcelain tiles is environmentally friendly.
To be highly effective, the adhesive must have a sufficient degree of adhesion (adhesive strength).
The larger and thicker your tile, the higher the bonding properties of the purchased adhesive should be.
Preparing adhesive for porcelain tiles
Another criterion that you need to pay attention to when choosing an adhesive is resistance to temperature changes. This is especially true in cases where the tiles will be laid in rooms without constant heating. Frost resistance can be determined by the numbers next to the Latin letter F. The larger the numbers, the higher the frost resistance. Two-component adhesives are considered more resistant to temperature changes.
Also pay attention to the lifetime of the adhesive, because this is the same time during which you need to lay the tiles after preparing the adhesive.
Tips for laying out tiles
Porcelain tiles come in many colors and sizes. Using tiles of various sizes and shades, you can create intricate patterns that will give your floor individuality and uniqueness. In the schemes below, you can combine tiles of the same color or use different shades. But there are some subtleties that you need to know:
- the size of the tile influences the visual assessment of the room: a large tile visually reduces the area, while a small one increases it;
- to “expand” the room, it is best to place tiles across, while tiles laid lengthwise will visually lengthen the room;
Porcelain stoneware pattern on the floor
- using a through pattern will help to combine different areas of the room into one;
- the use of a single pattern is suitable for delimiting zones of the room;
- a floor made in light colors will visually enlarge the room.
Attention. If the tile is laid at an angle of 45°, its edges should be located parallel to the diagonal of the room.
How to cut porcelain stoneware
When laying tiles with your own hands, the question of cutting arises. The strength of the tile does not allow it to be cut with a simple glass cutter, as is the case with tiles, so it is necessary to use a special tile cutter, a tile cutter, a grinder and a machine for wet cutting of tiles.
Cutting porcelain tiles using a tile cutter
Many experts consider the use of porcelain stoneware for flooring to be the best way to make a “lasting” renovation. But this process is more labor-intensive than laying conventional tiles. In general, there is nothing impossible about laying porcelain tiles with your own hands. Follow the rules and everything will work out for you.
Laying porcelain tiles: video Laying porcelain tiles with your own hands: photo
- How to calculate the number of tiles for the floor How to calculate the tiles for the floor using different installation methods Getting started with the repair and installation of flooring…
- Adhesive for linoleum on a concrete floor How to glue linoleum to a concrete floor? 4 ways to choose In small spaces, it is enough to fix…
- Laying tiles on a wooden floor - advice from the experts Half the success of a bathroom renovation is the long service life of a floor covered with ceramic tiles...
- Laying laminate flooring on a warm water floor Is it possible to install a heated floor under a laminate? Question about home heating and health hazards...
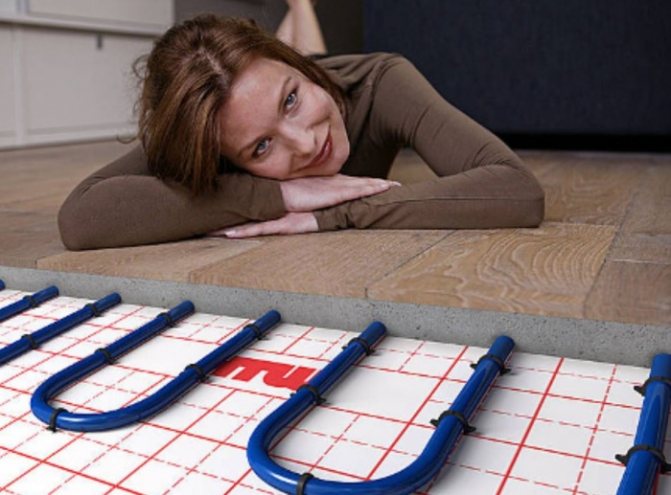
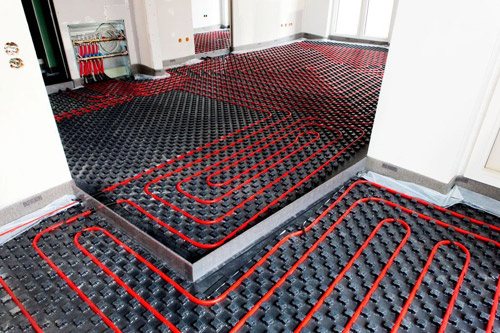
Water floors
Water floors are rarely used in apartments, but in private houses they can be used quite often. They are highly economical, and therefore many people continue to use this seemingly outdated floor heating system. In an apartment, especially in an old house, it will not be possible to create such heating - it will have to be connected to the heating system, which means that one of the neighbors will lose heat in their own apartment. Another danger is the possibility of a pipe burst and flooding of neighbors.
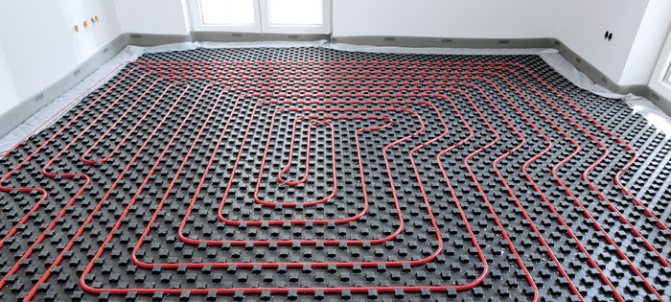
Water heated floor
On a note! It is possible to make water floors in an apartment only in new buildings, where a separate heating circuit is provided for connecting heating. Such conditions do not exist everywhere.
In a private house, you can organize your own water heating, especially if there is a heating boiler. The system is installed in a concrete screed using a metal or polymer pipe, inside which water will circulate. And even if you don’t take into account the fuss with the screed, the work of performing water heating still turns out to be more troublesome and labor-intensive than installing any other system. The fact is that you will also have to connect special distributors that will direct the water in the right direction.
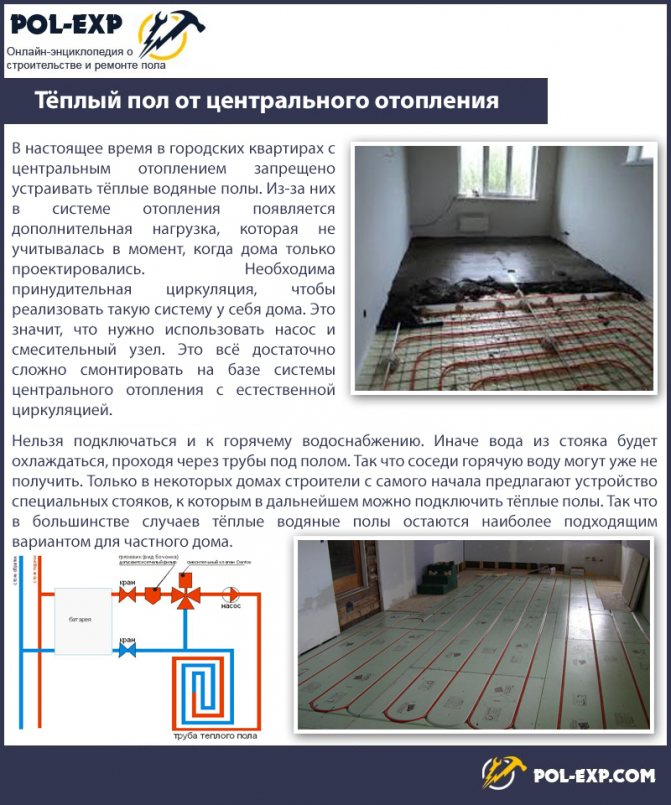
Warm floor from central heating
In general, it is quite possible to create a water floor under the tiles. But it is still strongly recommended to choose any other option from the above if the renovation is planned in an apartment rather than a house.
Prices for heated floors Caleo
heated floors Caleo
Electric heated floor
If we talk about electric heated floors under porcelain stoneware, there are significant differences. For example, the heating circuit itself is not as thick as a water circuit. Moreover, some types of underfloor heating can be installed in a screed, while others can be installed exclusively under the floor covering. If we talk about the disadvantage of this system, it is the use of a screed, which reduces the height of the room. Where it is fundamental, this minus is considered one of the most important. Now let’s look at the question from exactly this angle, namely how much the floors rise when installing two types of electric heating.
Thickness up to 50 mm
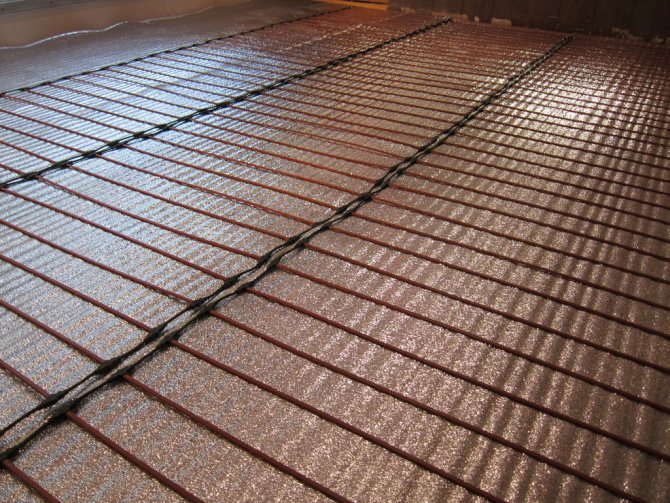
In this case, we are talking about using a heating cable, which is laid in the screed. If we talk about the advantages of using a heating cable under porcelain stoneware, it is the ability to change the laying step. As a result, you can easily set one or another heating power for a separate area of the room. At the same time, such heating may well become the main one; at the same time, it can be used as an additional source of heat. To reduce heat losses, an additional thermal insulation layer and reflective film are laid under the porcelain stoneware. This not only reduces energy costs, but also improves the quality of heating.
This heated floor system for porcelain tiles has a number of installation requirements. If the thickness exceeds 50 mm, then energy consumption will increase significantly. Moreover, warming up will not be as effective. If the screed has a thickness of less than 30 mm, then in this case you will get a thermal zebra, in which cold and hot areas of the floor will alternate. The finished screed should be smooth without any sharp protruding stones or air pockets. Otherwise, the heating cable under the porcelain stoneware may be damaged, which will interfere with its normal operation.
Important! To achieve uniform heating of the entire floor, the entire heating cable must be securely fastened. In this case, when pouring the screed, it will not move.
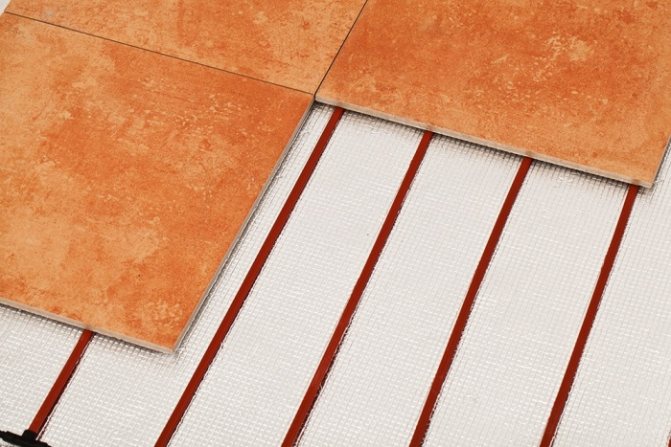
Thickness about 3mm
This is one of the modern developments of heated floors. The thickness of the heating mat is so thin that the entire heating cake can be up to 3 mm thick. This is especially true in cases where it is impossible to raise the floor level. The heating cake should look like this. First of all, a smooth rough screed is made, on which porcelain stoneware can be laid. The heating mat is placed directly on the floor, and porcelain stoneware is laid on top. In this case, it is very important to choose the right adhesive for porcelain tiles on the heated floor. That is, in the end it turns out that the heating mat will be located directly in the layer of tile adhesive.
Important! Heating mats are the same as a heating cable. Only in this case it is located directly on the self-adhesive mesh. It is laid with a certain step. Very convenient for installation.
As for installation under porcelain stoneware, it is better to give preference to a two-core heating mat, which has a power of 140 W/m2. In this case, it will be quite enough to provide the room with the required temperature. In some cases, the power per square meter can be increased to 180 W. Especially when you doubt the quality of insulation of a particular room.
Optimization of dimensions for water floor screed
Let's consider what the minimum acceptable and optimal screed layer should be. In each specific case, the thickness of the screed for water heated floors varies depending on the final finish of the floor. There are two universal sizes:
- For ceramic tiles, taking into account the diameter of the pipes, a minimum of 5 cm for domestic premises, for industrial premises it can reach up to 20 cm;
- For laminate up to 30 mm, due to the low thermal conductivity of the material.
Knowledge of the SNiP standard on static and maximum permissible load, depending on the general purpose of the room, will help you achieve the optimal screed size. The average static load on the interfloor floor, based on sq. meter of cement floor with water pipes is close to 90 kg. The final size of the screed is set from the top level of the tubes; in practice, 1 to 3 cm should be added to the minimum size. This is the optimal size without heat loss.
Methods for laying a water floor under tiles
Depending on where the underfloor heating system is installed, for a warm water floor under the tiles, there are several ways to install the pie:
- with laying a concrete screed - the most common option;
- flooring system - performed without screed, the tiles are laid on gypsum fiber board or other suitable material;
- laying on joists or wooden subfloor.
A certain method is chosen taking into account the design features of the building and premises. Thus, the option with a concrete screed is suitable for houses with a reliable and durable foundation that can withstand weight loads well. The flooring system is used in rooms with weak foundations or low ceilings, since in this case the height of the pie is minimal. Laying on logs is carried out in private wooden buildings.
The fundamental difference in the listed methods lies in the material used as the basis for laying the tiles. The lower part of the pie has a similar structure - first a layer of waterproofing and thermal insulation material is laid, on top of which a heating circuit is mounted.
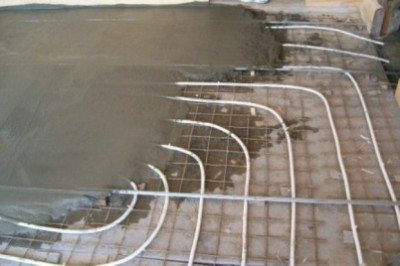
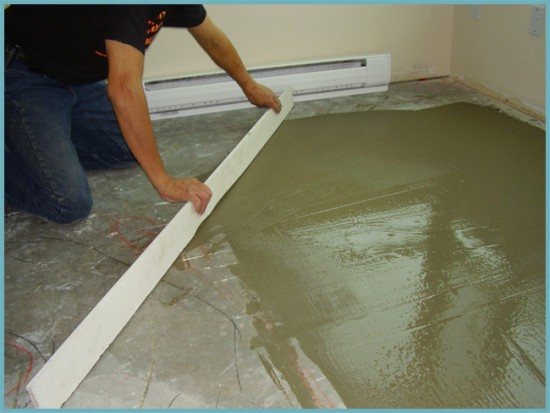
Heated floor pie with screed
The structure is filled with cement mortar or self-leveling compound. In order not to damage the circuit pipes, they must be secured to the base, reinforcing mesh or thermal insulation slabs.
Laying system
In this case, durable polypropylene foam boards that can withstand heavy weight loads are used for the heat-insulating layer. Or, special plates with grooves for installing pipes are mounted at equal intervals, on which gypsum fiber sheets or mounting mesh are laid.
Laying on joists
A suitable thermal insulation material - polystyrene or mineral wool - is placed between the joists. DPS modules with ready-made grooves for pipes are installed on top.
Laying a pie with a screed is considered the most labor-intensive, so we will tell you how to install this type of water-heated floor under the tiles with your own hands. In addition, this system is the most common due to its durability.