What to look for when purchasing
Guns differ in the method of application (domestic and industrial), fuel consumed, method of air heating, power and performance.
In order to choose the right device, you need to clearly understand for what purposes it will be used. Gas guns are used for industrial buildings. Diesel engines are purchased for heating production facilities with good ventilation.
Electric heat guns are always a priority for home use. There are many facts confirming this:
- – electric heat guns do not take up much space, are mobile and versatile;
- – safe because they do not use open flames;
- – have virtually no noise;
- – do not require fuel, do not create an unpleasant odor;
- – excellent ratio of efficiency and cost of the product.
The range of thermal power of electric guns is very wide. There are household and technical guns. The power of technical guns ranges from 1 to 5 kW. Industrial – anything more.

Power calculation
To calculate the required power of a heat gun, you need to know the exact volume of the room, the quality of its thermal insulation and the temperature difference between the outside and the inside.
To calculate the volume, multiply the length of the room by its width, and then by the height of the ceilings. The average temperature is the arithmetic average of the climate temperature and the desired temperature inside the heated room.
With the quality of thermal insulation, everything is more complicated. It can only be approximately calculated. If the building that needs heating is made of wood or sheet iron, then there is definitely no thermal insulation there. With an uninsulated roof, a large number of windows and one layer of brickwork, the insulation in the room is called poor. A building with average thermal insulation has many single-frame windows and an uninsulated roof and walls. Good thermal insulation is only available in those buildings whose roofs are insulated and whose windows have double frames.
Next we use the formula:
P(kW/h)= V x ΔT x K/860
V
– volume of heated air;
ΔT
– average air temperature;
TO
– heat loss coefficient.
The resulting number is measured in kilocalories. Next we convert them to kilowatts.
1 kW = 860 kcal/h. If the value you get is more than 17000, then the power of the gun should be more than 10 kW.
Types of “winter work”
Let's consider the technological features of performing the main types of work on constructing a façade at subzero air temperatures:
- Laying facing bricks.
- Plastering and painting works.
- Siding installation in winter.
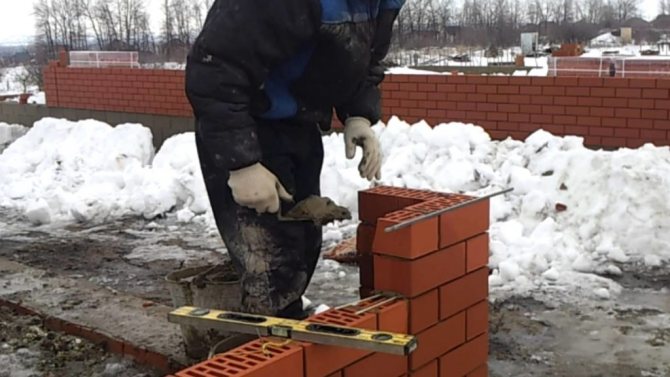
Laying facing bricks in winter
Is it possible to lay brick in winter? In winter, bricklaying is actively carried out. This applies to both roughing and facing. This does not require additional engineering structures, all the trick is in the masonry mortar and preparatory work.
Read also: How much pomegranate can you eat per day?
Brickwork cannot be done with ordinary mortar in winter. At subzero temperatures, it does not have time to gain sufficient strength and simply freezes. In the spring, the solution will thaw and the masonry may fall apart. Therefore, in winter, antifreeze additives are added to the masonry mortar. .
Let's take a closer look at the progress of work:
- First of all, it is necessary to ensure proper storage of bricks in winter. To do this, just cover the pallets with the material with plastic film.
- Winter additives for bricklaying are sold in construction stores; you can also order ready-made mortar in mixers. Modern reagents allow work to be carried out at temperatures down to -25 0 C.
There is a simple and cheap way to make winter mortar. Salt or hot water is added to a regular cement-sand mixture. It is recommended to use such additives up to -15 0 C.
- Before starting work, the masonry surface is cleared of snow and ice. In the evening, the freshly laid brick is covered with tarpaulin or roofing felt. It is important to check the masonry with a level every morning, since in the cold the solution may “leak”.
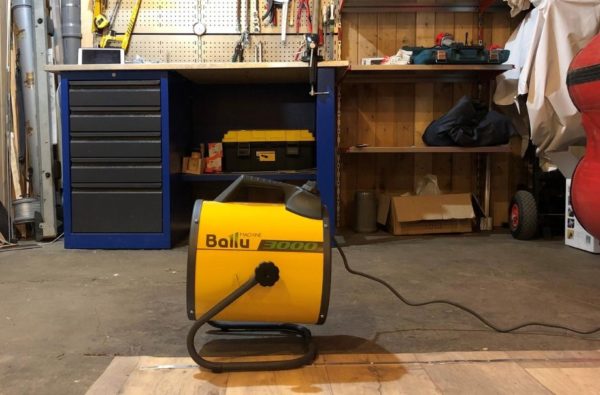
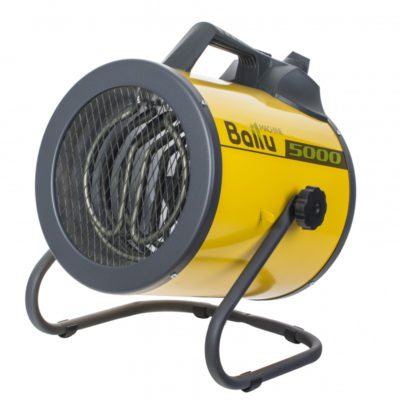
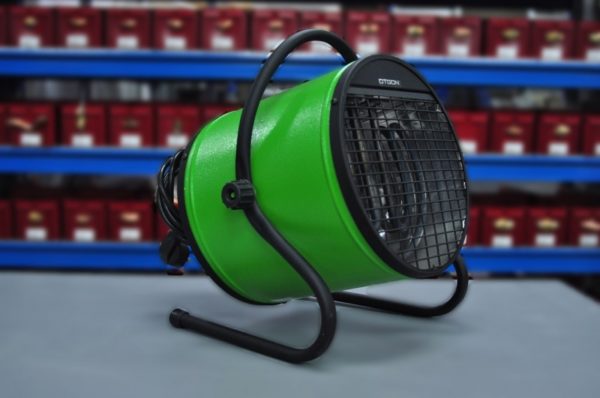
Rating of the best electric heat guns
Let's look at several models that occupy leading positions in customer reviews.
BALLU BHP-P2-5
Power:
4.5 kW
Productivity: 400 m3/hour
The gun can operate in non-heating mode. A stainless steel heating element is used as a heating element. Heat guns have protection modes against overheating and electric shock.
ADVANTAGES:
- decent power
- mobility
- convenient carrying handle
- presence of a thermostat
- normal ventilation mode
- works from a regular 220 V outlet.
FLAWS
- not detected
BALLU BHP-P2-5
PECAHTA TEPK-2000K
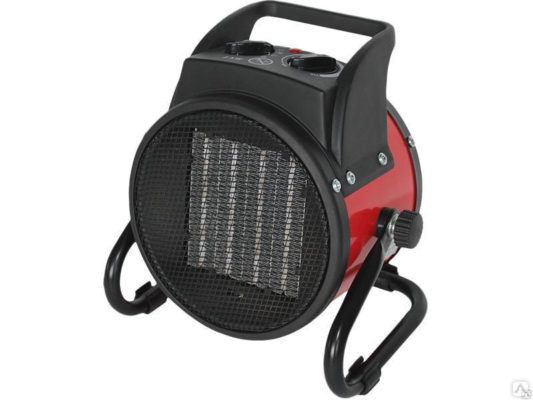
Power: 2 kW
Capacity:
120m3/hour
The gun is equipped with a shutdown system when overheating. Possibility of temperature adjustment. Mechanical control, supply voltage 220V. The recommended heating area is up to 20 m2.
ADVANTAGES:
- compactness (size 20*22*17 cm)
- durable handle for easy movement
- two power levels
- fan mode, temperature maintenance
- not very noisy
- The gun body is coated with an anti-corrosion compound
FLAWS
- short wire (1.5 m.)
PECAHTA TEPK-2000K
BISON ZPT-M1-3000

Power: 3 kW
Capacity:
230 m3/hour
The gun is famous as “the safest on the market.” It is compact and yet equipped with additional security systems. You can switch to fan mode.
ADVANTAGES:
- good power and heating speed
- double body
- vertical tilt adjustment
- quickly heats the room
- not noisy
- The regulator allows you to turn off the gun, turn on the fan mode or select the heating power of 1.5 or 3 kilowatts.
FLAWS
- short power cord (1 m.)
BISON ZPT-M1-3000
PATRIOT PT-R 3S
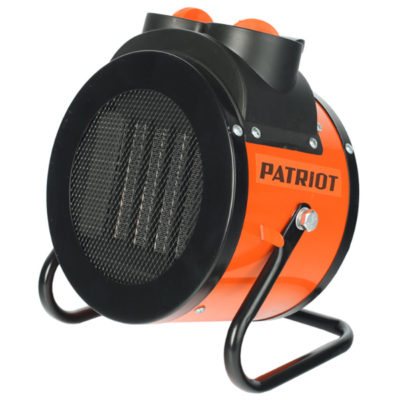
Power: 2KW
Capacity: 160 m3/hour
The supply voltage is standard – 220V. There is an operating mode switch, a thermostat, and a fan mode. Equipped with an overheating protection system. The area of the heated room is up to 30 m2.
ADVANTAGES:
- high build quality
- compactness
- power adjustment
- overheat shutdown
- ceramic heating element
FLAWS
- weak air flow
PATRIOT PT-R 3S
TIMBERK TIH RE8 3M
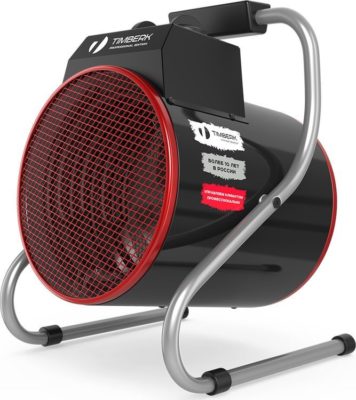
Power: 3KW
Capacity: 230 m3/hour
Heating element heating element. Ventilation, intensive and economical heating mode. Compact size, versatility and ease of use. Overheating protection system.
ADVANTAGES:
- high quality steel case
- power and temperature adjustment
- resistance to falls and shocks
- ease of movement (size and weight are small)
- the air warms up quickly
- works from 220 V.
FLAWS
- not detected
TIMBERK TIH RE8 3M
HYUNDAI H-HG5-25-UI663
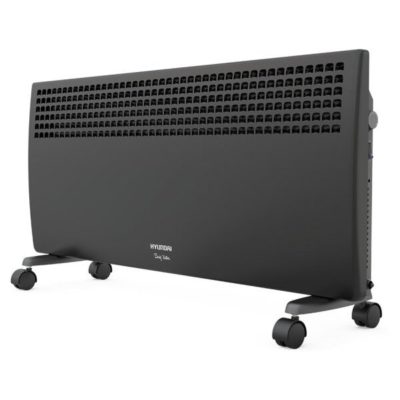
Power: 2KW
Performance:
The gun turns off when it overheats, allowing you to regulate the temperature. Mechanical control. Manufacturers recommend it for rooms up to 30 m2.
ADVANTAGES:
- design
- indication of switching on and operation
- built-in thermostat
- durable wheels for moving
- heats up quickly and evenly
- consumes little electricity
FLAWS
- not detected
HYUNDAI H-HG5-25-UI663
WESTER TB-3000
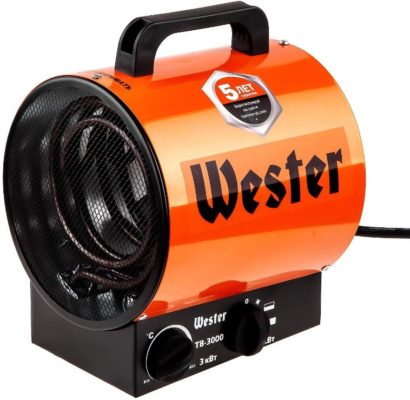
Power: 3KW
Capacity: 300 m3/hour
The body is made of sheet steel and coated with a polymer composition. An emergency system against overheating is installed. The manufacturer promises quiet operation without releasing harmful substances into the air.
ADVANTAGES:
- temperature and power adjustment
- automatic shutdown when overheating
- easy start
- ventilation mode without heating
- heats the room quickly
- not loud
FLAWS
- not detected
WESTER TB-3000
Painting facades: 10 reasons to listen to the advice of masters
The dream of “painting and forgetting” lives in the heart of any owner of a country home. But often even expensive and high-quality paint after a few months begins to crack, peel and move away from the base. We buy different paint and repaint the walls. and after some time we see the same picture. So what is the reason?
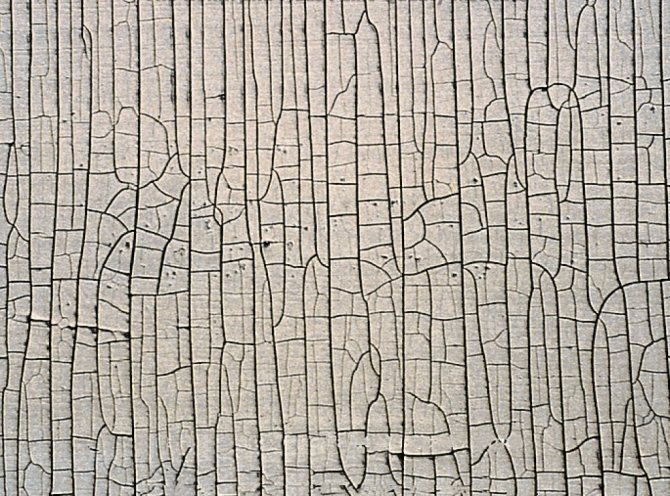
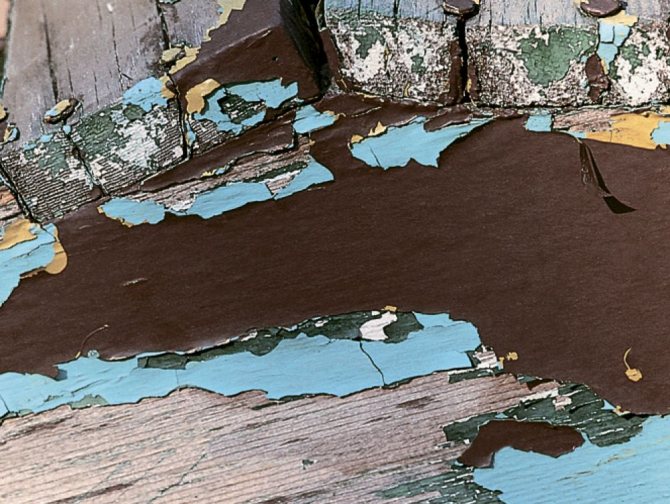
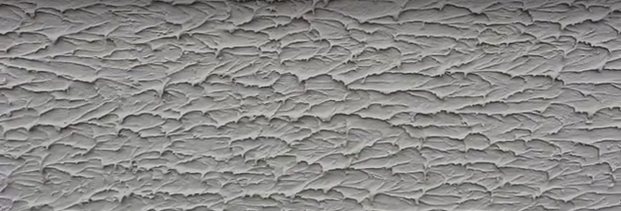
Crocodile skin effect
Possible reasons
— Application of a hard, non-elastic coating, such as alkyd enamel, to a flexible substrate, such as a water-soluble primer. — Apply a second coat of paint before the first one dries. — Natural aging of solvent-borne paints due to fluctuations in temperature and humidity. Alternating expansion and contraction lead to loss of elasticity.
Solution
Old paint must be completely removed using a scraper or sandpaper (on large surfaces you can use a grinder with an emery attachment or a heat gun). Then the base should be primed with a water-based or solvent-based primer and two layers of water-dispersion paint for exterior use should be applied.
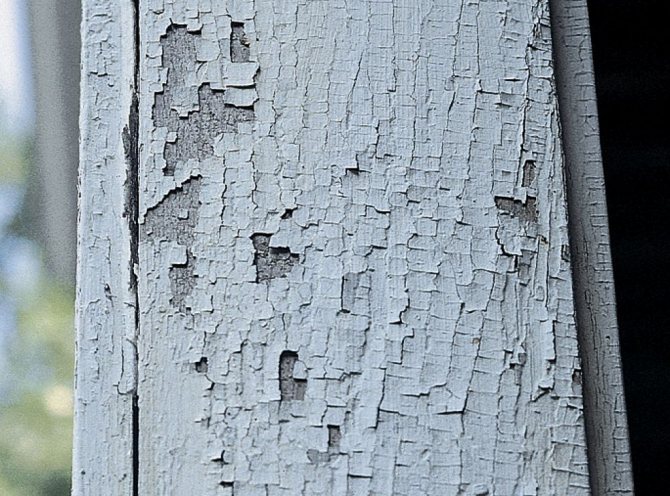
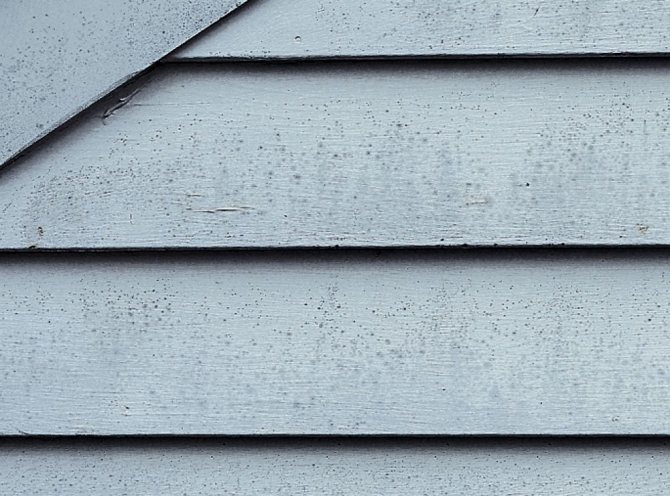
Cracking/peeling
Possible reasons
— Using low-quality paint: inelastic, with poor adhesion. — Excessive thinning of paint or applying it in too thin a layer. — Incorrect or insufficient surface preparation, painting without prior priming. — Carrying out painting work in windy and cool weather. This causes the water-based paint to dry too quickly. The material does not have time to gain the required strength.
Solution
Method 1. If the cracks are shallow, then you need to remove the peeling paint with a scraper or wire brush, sand the raised edges of the film, then apply primer to the resulting bare areas and paint again. Method 2. If the cracks are deep, you will have to remove all the paint. This can be done using a scraper, grinding tool or heat gun. Then the surface needs to be primed and paint applied again.
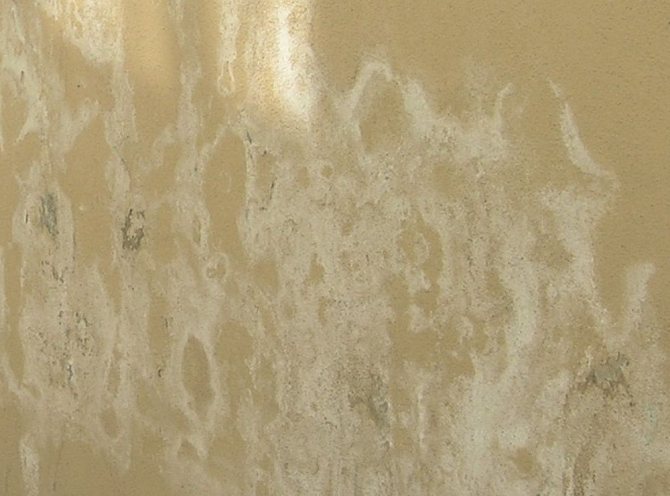
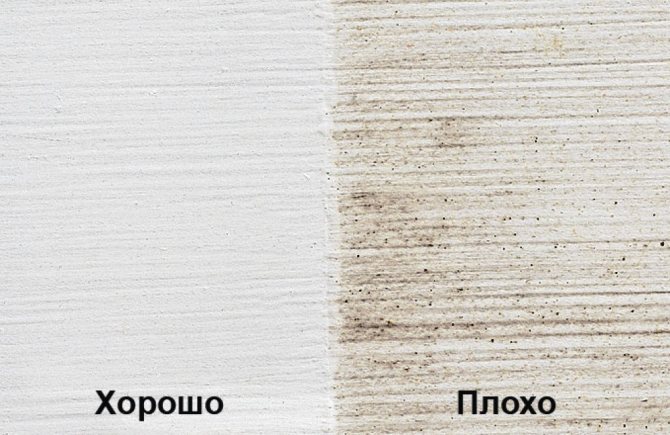
Plaque/efflorescence
Possible reasons
— Before painting, the existing salt deposit was not removed from the façade. — Excess moisture that seeps through the outer walls from the inside.
Solution
If the cause is excess moisture, you need to eliminate its source. Plaque and peeling paint must be removed, applied to the surface with a water-based or solventborne façade putty or primer and left until completely dry, and then covered with a layer of exterior paint, concrete/plaster paint or elastomeric wall compound.
Chalking
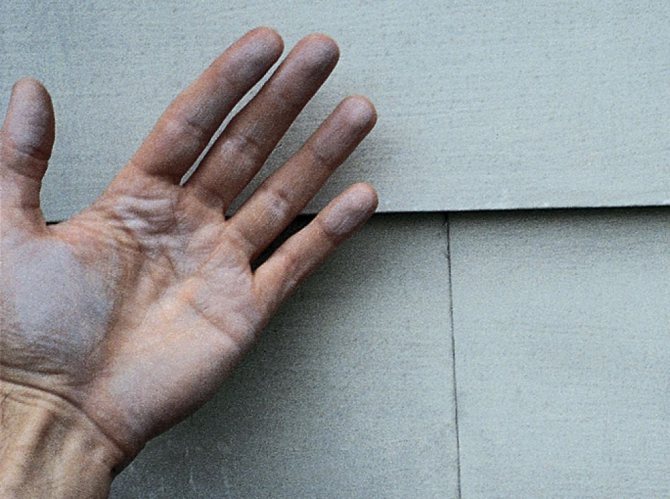
Possible reasons
— Using paint with an excessively high pigment content. — Using paint for interior decoration outdoors.
Solution
First of all, you need to remove the plaque with a stiff brush and rinse the wall thoroughly. After drying, check the surface for the presence of powder by running your hand over it. If it remains, it is necessary to apply an solventborne or acrylic primer (or a suitable façade putty), and then apply exterior paint. If there is no powder, you can do without priming.
Read also How to make a rabbit in the oven
Fungal infection
Possible reasons
The fungus forms in damp places where there is little or no sunlight. Algae appears on damp surfaces when exposed to the sun. — Poor quality paint containing insufficient fungicides and algaecides was used. — The wood was not primed before painting. — The paint was applied to a base or coating from which pre-existing algae and fungus had not been removed.
Solution
The affected areas should be treated with a fungicidal remover or a mixture of bleach and water in a ratio of 1:3 (it is advisable to carry out this work with gloves and safety glasses) and leave the product on the surface for 20 minutes. If it dries faster, it will have to be reapplied. Next, the wall is wiped with a brush and rinsed. This is followed by impregnation with primer for exterior finishing and new painting. It would be wise to give preference to water-based materials.
Incompatibility of paints
Possible reasons
— Applying a layer of water-based paint over three or more layers of solvent-borne paint. This causes the old coating to begin to peel away from the base.
Solution
When repainting, only similar paint can be applied over solventborne paint. The best solution is to completely remove the old coating, prepare the surface by cleaning, sanding, spot priming and applying a new coat of paint.
Bloating

Possible reasons
— Application of solvent-based paint on a damp surface. — Moisture leakage through the outer walls of the building. — A wall coated with water-based paint was exposed to moisture shortly after painting (the problem is exacerbated if the surface was not properly prepared before finishing). — Applying an acrylic composition over several layers of alkyd or acrylic paint.
Solution
If bloating occurs from excess moisture, you need to eliminate its source. If the swelling comes from the substrate itself, it is necessary to completely clean the surface of the old paint, prime and repaint the surface. If bubbles have formed only in the top layer of paint, they can be removed with a scraper. Then the damaged areas are sanded with sandpaper, the surface is re-primed and new exterior paint is applied.
Tannin seepage
Possible reasons
— The surface was not properly primed. — Use of a tannin-resistant primer. — Leakage of tannins from wood with moisture, which carries them into the paint layer.
Solution
Eliminate sources of moisture. After thoroughly cleaning the surface, apply a high-quality organic or waterborne stain-resistant primer. For wood with a high tannin content, it is better to use an organic primer (in special cases, re-priming may be necessary after the first coat has dried). Repaint.
rusting
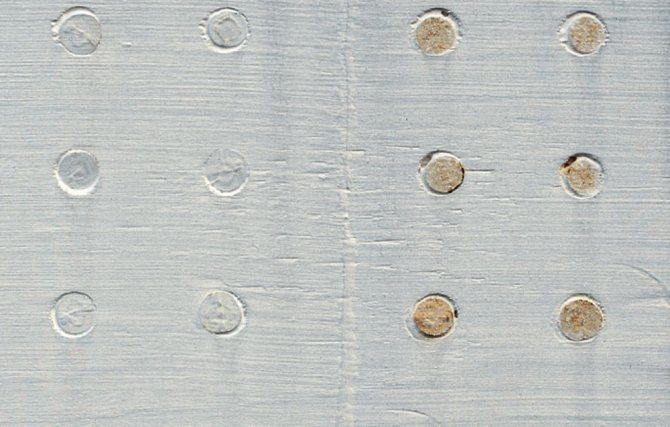
Possible reasons
- Using non-galvanized iron nails, which began to corrode and rust seeped into the top layer of coating. — Non-galvanized nail heads were not driven deep and sealed. — The heads of galvanized nails began to rust after sanding or exposure to atmospheric agents.
Solution
When painting new buildings, it is recommended to drive the nails deep and treat the heads with a water-based sealant based on pure acrylate or acrylate with silicone. Prime the area around each cap and coat it with water-based paint. When repainting a surface that already has rust, you need to wash off the stains and drips, sand the nail heads and start priming.
Peeling
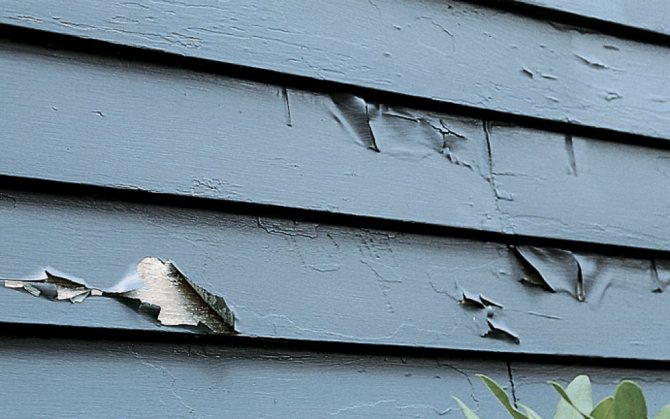
Possible reasons
— Swelling of wood due to rain or moisture penetrating from the inside. — Poor surface preparation. — Use of low-quality paint that does not provide the coating with sufficient adhesion and elasticity. — Application of latex paint under conditions that prevent good film formation: for example, on a very hot or cold day, in windy weather. — Applying oil paint to a damp surface.
Solution
If the cause of the defect is moisture oozing from inside, it is necessary to eliminate its source by carrying out repair work, creating vents, and installing exhaust fans. Then the peeling paint must be removed with a scraper or wire brush, the surface must be sanded, primed and painted. It would be wise to give preference to acrylic latex paint, which allows moisture to evaporate without damaging the coating.
Which heat gun to choose?
The main differences between guns on the market today are their power and performance. This is the reason for the global price difference. When using a gun at home, it is advisable to look for the presence of a fan function and temperature control.
If the gun will operate constantly, then an overheat shutdown function is necessary for safety reasons. Each of the options presented above is durable and is the undoubted leader among its category. All that remains is to choose the appropriate one according to the parameters.
The most important factor when choosing a heat gun is the volume of the room for which it is intended. Calculate the volume of the room using the formula above, read reviews for each of the specific options, choose a device “by size”. If you choose a gun whose power is less than necessary, then most likely you will not be satisfied with its productivity.
When choosing a gun whose power is higher than required, the gun will do the job faster, but its price will be noticeably higher. Pay attention to compactness, safety, quiet operation and ease of use, then you will find the best option at a competitive price.
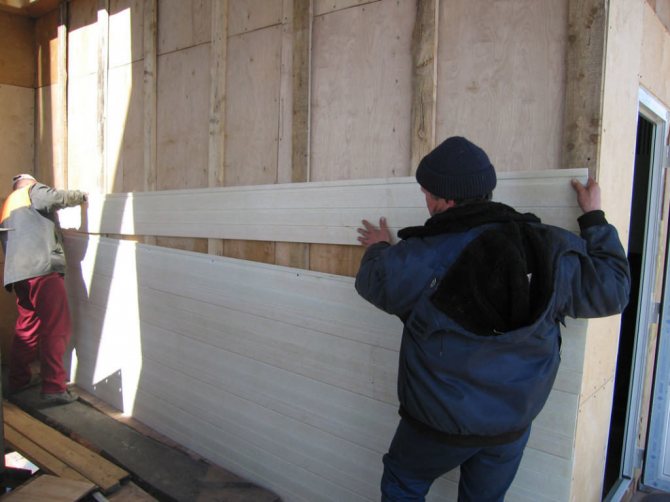
Siding installation in winter
Is it possible to cover a house with siding in winter - there are no obstacles to this. Installation of vinyl or metal siding is classified as “dry work.” No water is used during the façade cladding process. The facade cannot freeze.
Another problem arises. Siding is mounted on a metal or wooden frame. In metal, to a greater extent, and in wood, to a lesser extent, the geometric dimensions change depending on the air temperature.
At negative temperatures the frame contracts, at positive temperatures it expands. The same thing happens with vinyl panels. This must be taken into account during installation. Temperature deformations are leveled due to incomplete tightening of fasteners.
Read also Fried champignons with onions recipe with photos
Another risk factor is the fragility of the panels. In winter, the material becomes brittle and harder to bend. It may break.
There are no significant contraindications for finishing the facade in winter. Negative temperatures affect the technology of performing work, but not critically.
If you follow the instructions and use modern additives and reagents, it will be difficult to distinguish a winter facade from a summer one.
Plastering the walls of a house is a special coating for the external and internal walls of a building that protects them from adverse atmospheric influences and has additional heat-shielding properties.
What do we know about the essence of installation
ventilated
facade
? That this is a prefabricated structure with a facing screen and an air gap.
Many owners of new or old living space at least once think about how well the insulation of facades
.
Facade
private house.
Front
fur coat . When designing a house, special attention is paid to choosing the method of its exterior decoration. After all, the appearance of the building reflects.
What is a liquid facade
.
Thermal insulation of walls is an important step towards a solution. Installation of
a heat-insulating layer from the inside is carried out in the most extreme cases.
Ways to install
a façade in winter
are here.
. I would definitely choose siding, it is more durable and installation
will require less cost. But again, it’s a matter of taste and everything depends on the characteristics of the structure itself.