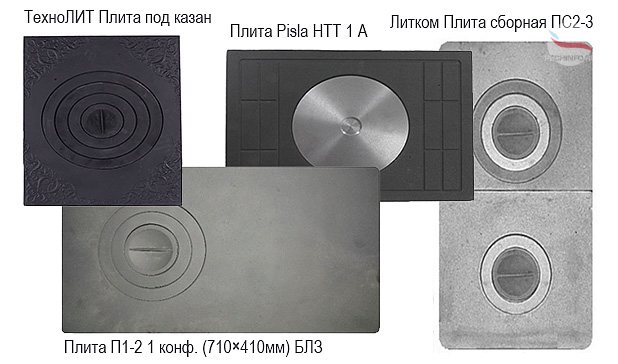
Types of cast iron decking
The hob for a cast iron stove can be produced in two types: prefabricated and solid. The differences between these types are insignificant, because both perform their main functions: heating and cooking.
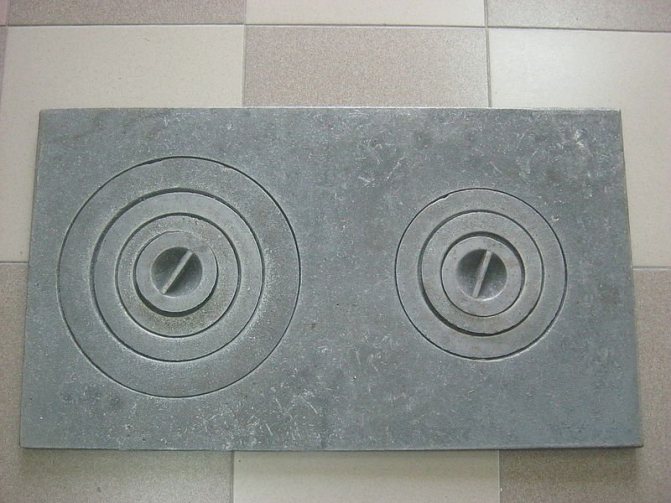
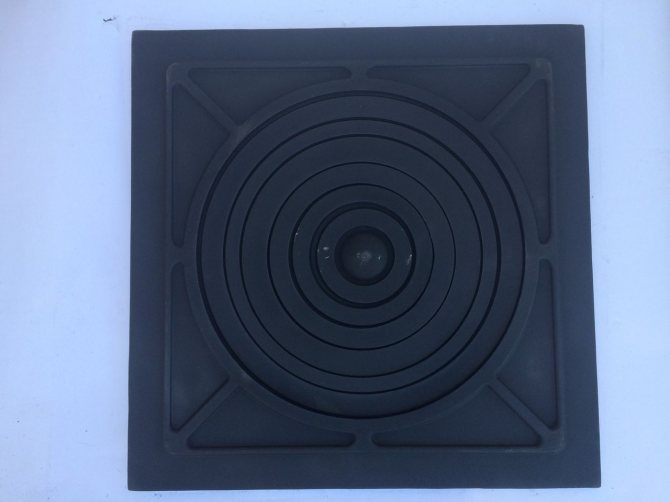
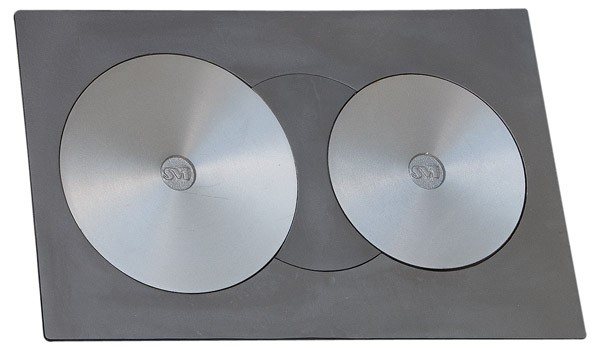
Prefabricated slabs
These structures consist of a sheet of cast iron and several round parts of different types. Cast iron stove rings fit into each other like a puzzle. Due to the fact that the surfaces have gaps, the metal does not deform under the influence of high temperatures.
And the different diameters of the rings allow you to cook food in different dishes as quickly as possible. After all, to heat a large pan of water, you can use a circle with the largest diameter, and it is more convenient to place an iron mug on the smallest part.
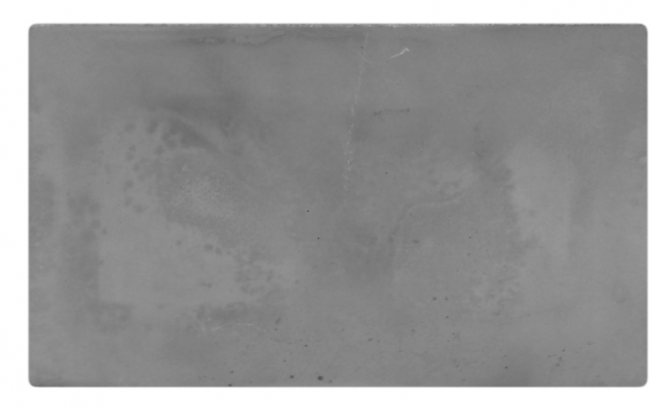
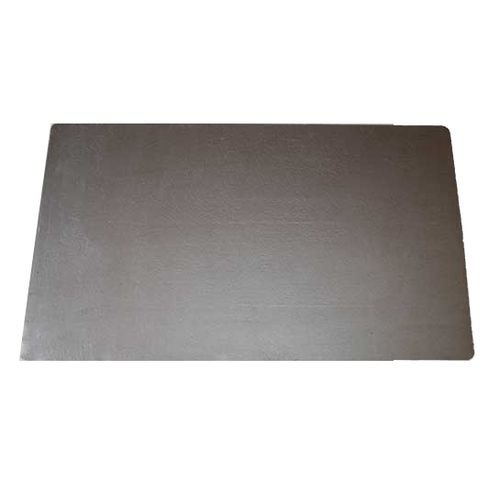
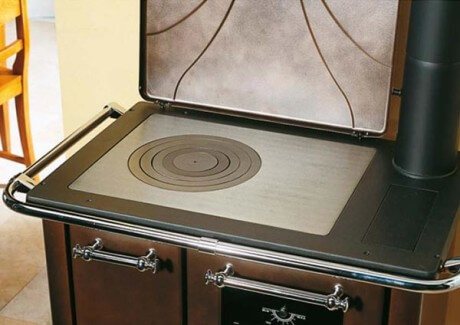
Solid slabs
A cast iron sheet for a stove with a solid surface or burners of standard diameter belongs to the category of solid decks. Due to the integrity of the structure, they do not have any gaps for the narrowing and expansion of the metal.
This feature reduces the practicality and durability of such products. But they also have their advantages. Easy installation and relatively low price due to the simplified design are liked by many buyers.
Which is better - steel or cast iron?
The hob for the stove is made of cast iron or metal. Which product has more advantages: cast iron or steel stove plate?
There are a huge number of manufacturers of these products who insist on the advantages of cast iron over steel.
Advantages of cast iron decking:
- strength and durability. A cast iron stove will reliably serve you for decades.
- heat dissipation Due to the presence of certain chemicals in the cast iron used for casting sheets, it has better physical characteristics compared to steel.
- resistance to deformation and corrosion.
- resistance to temperature changes. Due to this, the cast iron hob for the stove retains its original appearance throughout its entire use.
Some manufacturers focus on some other advantages of cast iron compared to steel: cast iron does not dry out the air as much. You don't have to use humidifiers or other devices to maintain indoor humidity.
The main advantages of steel plates are:
- fast heating. In just a couple of minutes the surface heats up to the desired temperature. But such a stove cools down much faster than a cast iron one.
- light weight. Typically, steel plates weigh ten times less than cast iron. This allows for quick installation without much effort. But due to their low weight, such products are able to withstand a small load. If you will be using fairly heavy cookware, it is better to give preference to a cast iron stove.
- low cost. Prices for cast iron stove stoves are higher than for steel stoves. But their service life is much longer.
Conclusion: If your budget allows, use a cast iron surface, it will last longer. If your budget is limited, buy a steel plate.
about the author
Greetings to all visitors to my website “Stoves and fireplaces. Projects of stoves and fireplaces." My name is Nikolai Zolotarev. I live in the city of Grodno, which is located on the western outskirts of the Republic of Belarus.By profession I am a signalman with almost 45 years of experience. Now retired. It was retirement that became the reason for my trying my hand at creating websites. At my former job, of course, I dealt with computer technology, but I never tried to do anything for the Internet.
Now about the stoves. I built my first stove at my dacha in 1996. Before this I had no idea how this was done. But I like to do everything with my own hands and therefore this kind of work did not really frighten me. A long time ago, while still in school, I received the specialty of a draftsman and detailer. I knew how to read drawings, including the order of the stoves, and based on these drawings I could imagine how it would all look in volume.
And so I got down to business. What I got works to this day, and there hasn’t been a single major repair. It was a small-sized heating and cooking stove with a drying chamber by Yu. Proskurin, published in the popular science series “Do it yourself” for 1989. The choice of this stove turned out to be so successful that, despite all the gross mistakes I made during construction, it turned out to be functional.
After that, I had a big break in the furnace business. I didn’t consider myself a stove maker, and by the way, I still don’t. Everything was quiet and calm until one of my friends started building a stove for himself. Moreover, he wanted to repeat what I did for myself, taking into account all my mistakes. In short, he got to work, and I acted as a consultant for him. It turned out that he knows how to work with the 3D modeling program - SolidWorks. When I saw the results of his work, I wanted to study the same thing.
Subsequently, many of the things that I did for myself, or ordered on the side, I initially tried to work on in this program. In the end, my brother asked me to design a stove for his dacha. When the project was ready, we decided to do it ourselves. Meanwhile, friends from neighboring areas were deciding where the smoke would come from this stove. Smoke came out of the chimney, and with such good draft that applications for the same stove and others like it immediately began pouring in.
As a result, I started not building stoves, but preparing their projects. Thank God, there are enough descriptions and instructions on the Internet for various types of stoves and fireplaces. The main drawback of these publications is that most of them contain a lot of errors. There are, of course, good projects, but they are paid, and this is not suitable for everyone.
So, when I was sent on vacation, I had a need to put my strength and abilities somewhere. And since going somewhere or going to work didn’t really make me smile, I remembered that there is the Internet. And here I am, asking for love and favor.
I have already mentioned that I am not a professional in stove construction. Therefore, your feedback and wishes will always be taken into account in the further development of the site. This is a very important point in our communication with you. I understand that you can only do something worthwhile by relying on the experience and knowledge of other people, both amateurs and specialists.
I apologize for pouring a lot of water and taking up your time; in the future, if possible, I will try to be more brief.
How to choose?
Choosing a cast iron deck for your stove is not difficult. To buy a quality product, the installation of which will not require much effort, it is enough to take into account several nuances.
What are the sizes of cast iron sheets?
Cast iron sheets can be square or rectangular. The most popular are rectangular slabs. The surface dimensions directly depend on the size of the oven.
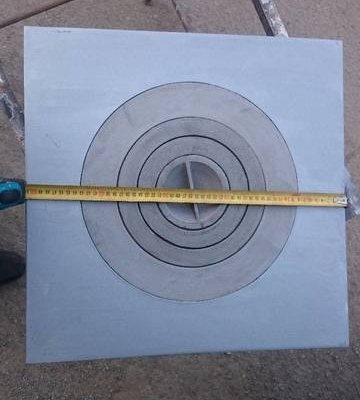
The standard dimensions of a cast iron stove for a stove are:
- 34 by 41 cm,
- 71 by 41 cm,
- 66 by 41 cm,
- 51 by 34 cm.
For a non-standard stove, you can order the service of manufacturing a cast iron sheet with individual parameters in a specialized store. But it will cost significantly more than standard products.
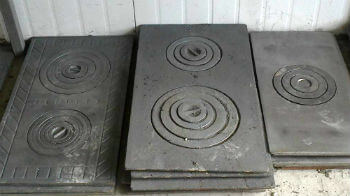
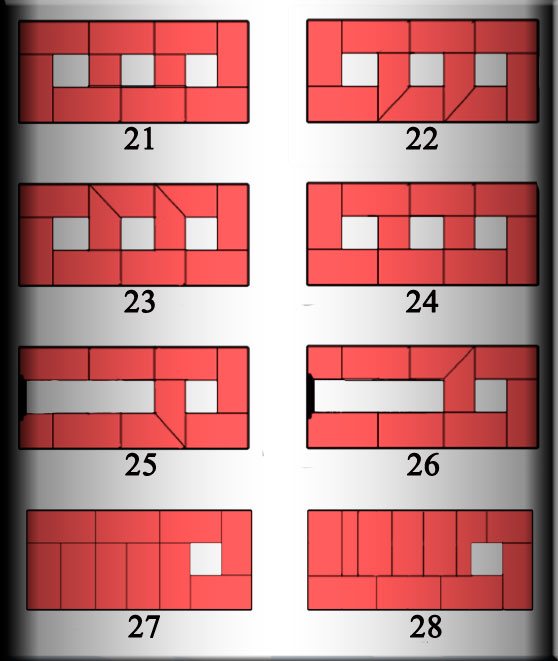
Number of burners in different models
Typically ovens have two burners. But their number can vary from one to six (it all depends on the surface area). Solid cast iron sheets may have no holes at all. But the cooking time on this type of stove can be long due to the slow heating of the cookware.
Other criteria for choosing a quality product
You should pay attention to the quality and composition of the material from which the stove is made. If you find chips, scratches and other various defects on the surface, then it is better to refuse the purchase. A high-quality product has a smooth surface and its weight is quite large. There are no lightweight cast iron stoves.
It is worth taking the time to study the composition of cast iron. Cast iron, which is used for smelting, is a combination of 2% carbon with iron. But if it contains any components unknown to you, be sure to ask the seller about them. After all, some chemical elements are not environmentally friendly and can harm your health.
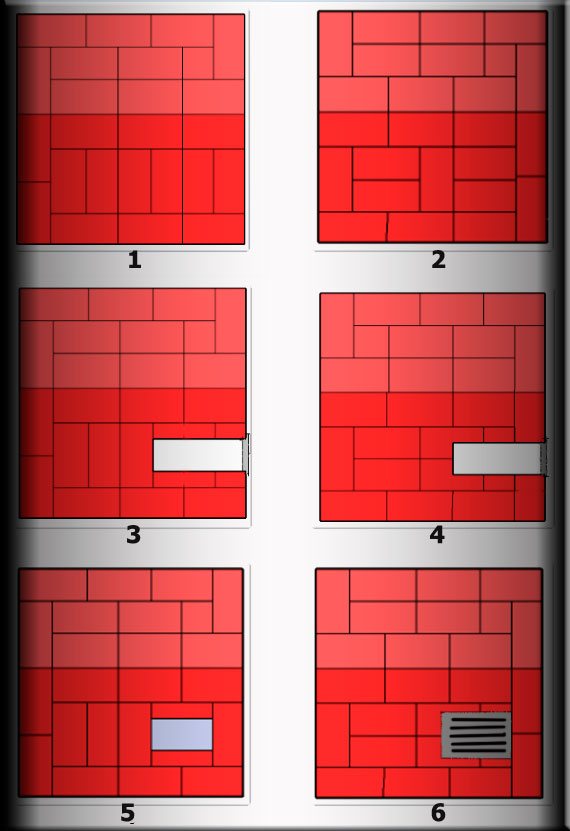
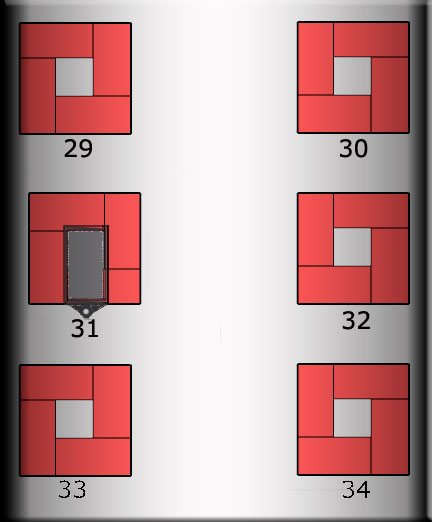
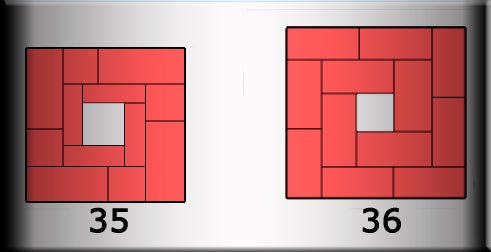
Peculiarities
In essence, the order is a specific scheme according to which the stove will be built or modified. It is possible even for people who do not have much practice to do this without the help of experienced specialists.
It is enough not to deviate from clear instructions, as well as step-by-step recommendations and diagrams developed by professional stove makers. As a result, the consumer will receive savings and an efficiently operating heating and cooking unit.
During the ordering process, every step of the stove maker is recorded, from the sequence of laying to taking into account the necessary materials. This way you can achieve the highest possible accuracy and safety of the unit.
Experienced stove builders remember such diagrams by heart, but if you plan to build a stove with your own hands for the first time, then you can’t do without a high-quality ordering diagram.
In most cases, the drawing does not have dimensions, because the stove can have any dimensions depending on the configuration of the house. It only shows the stages of stove laying sequentially. It has been experimentally proven that they carry a significant information load and also help in practice.
Advantages of ordering:
- Saves money on gas heating. If the stove is built according to the rules and without obvious defects, then the house will be fully heated.
- Anyone can do the job, resulting in significant cost savings.
- Ordering has established itself as a proven method of arranging high-quality stoves, accompanied by benches, fireplaces and hobs.
- The ordering scheme is quite clear, and it does not require knowledge of construction nuances from a novice stove maker.
- The choice of modern orders is quite large (they can be downloaded from special websites or purchased from experienced practicing stove makers).
Installing a stove on a stove with your own hands
The installation process should begin by studying this issue on specialized sites, and only then start working.
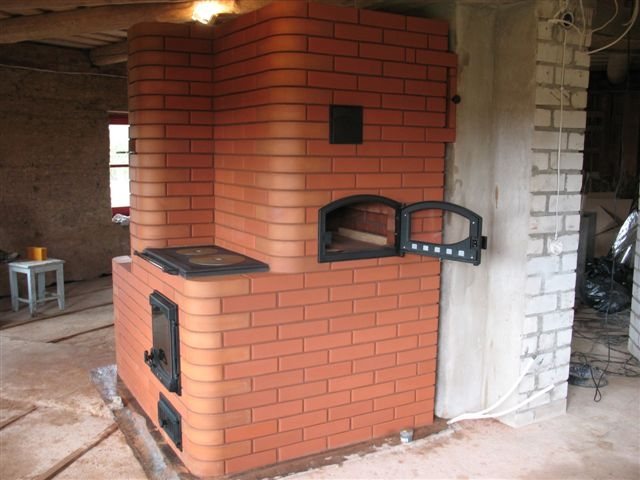
For a brick oven
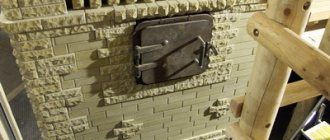
Installing a cooktop on a brick oven requires some effort. How to properly install a stove on a brick oven?
The following recommendations should be followed:
- There is no need to embed the slab end-to-end. You need to leave a gap of 5 millimeters around the perimeter of the panel. After all, when heated, cast iron tends to expand, and thanks to this installation, the brick oven will not collapse.

1 - During installation, you can use a solution of clay and asbestos.
2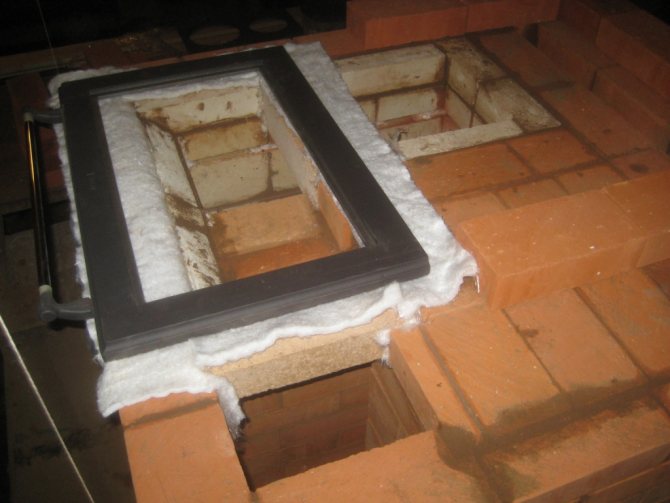
3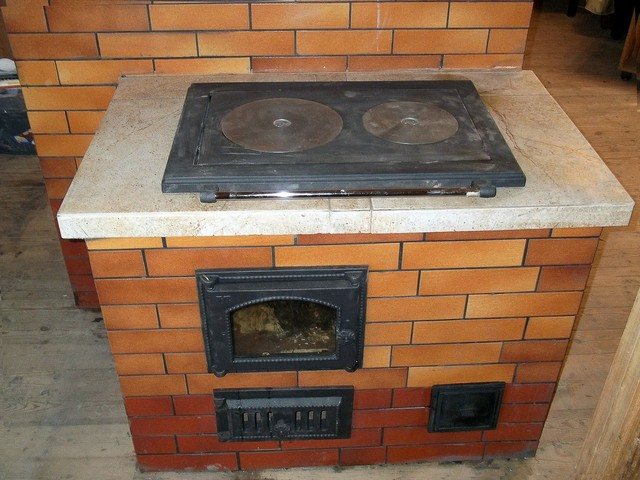
4 - A level should be used to lay the slab. This way the cast iron flooring will lie perfectly flat.
- The largest burner in diameter should be installed above the firebox.
- For structural strength, the top row of bricks must be equipped with a piece or angle of steel.
- To increase the strength of cast iron, the first lighting should be done as follows: heat the stove for a long time (7-8 hours). Every hour the temperature should rise by about 70 degrees. Use small logs for the fire, then you can throw in larger ones. After this, the oven should be allowed to cool naturally. This procedure is the key to successful and long-term operation of the entire furnace.
5
Metal
Installing a cast iron surface on a metal stove has the same steps. But it should be taken into account that the cast iron stove has quite a lot of weight.
The steel structure may not withstand it. It is necessary to strengthen the stove additionally: with a corner made of cast iron or other stable metal.
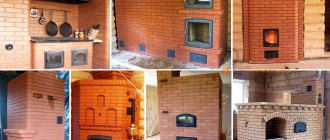
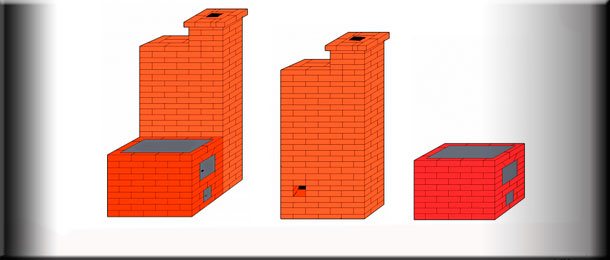
Popular models
To independently install a stove with a hob, use a ready-made project that describes in detail the sequence of actions. It tells you what solution to use and how to prepare it. But before you start installing a fireplace, you need to evaluate its appearance, because functionality largely depends on the relative position of the main elements. All models differ from each other in the way they are installed in the house.
Compact Swedish stove
- The “Swedish” model is considered the simplest in terms of functionality and installation method. The firebox, oven and hob are located along the same vertical axis. This allows the design to be completed with maximum space savings. Excellent for use in small country houses.
- The comfort and warmth of the Russian stove are not a thing of the past. Ideas of combining all options are being implemented to this day. A stove with a warm stove bench can be called an improved copy of a Russian stove.
- All the capabilities of the oven must be used to the maximum. Thus, T-shaped furnaces perform energy conversion with each of their faces. In addition, such models can serve to highlight zones in a large room space.
Multifunctional, T-shaped stove
Overview of cast iron decking
The most popular are Finnish models. But domestic production also produces decent and high-quality goods.
- Pilsa (HTT) Plate 3A. Material: cast iron. Black color. Size: 985 x 650. Diameter of burners: Ø 32, 393 mm. Weight: 51 kg. Price – from 49 thousand rubles.
- 2-burner stove “Russian casting”. Cast iron stove 710x410. Weight: 25.08 kg. Price – from 3000 rub.
- 2-burner stove "R". "Furnace casting Russia". Cast iron stove for oven 700 cm by 400 cm. Weight: 25 kg. Price from 3 thousand rubles.
- Cast iron stove for cauldron H2521 “HALMAT stove casting”. Dimensions: 505×455. Weight: 21 kg. Price from 15,000 rub.
- PLATE 5A SVT 301. Manufacturer: SVT. Dimensions: 460 x 700. Price 0t 17,000 rub.
Main manufacturers
If you decide to buy a cast iron hob, contact a specialized salon or use an online store. The minimum price for a product is 500 rubles. It depends on the size, material and manufacturer. The most common sizes are slabs of 34*41 cm, 71*41 cm, 58.5*34 cm, 66*41 cm, 51*34 cm.
The most popular and sought-after foreign manufacturers include the Finnish brands
Pilsa and HTT. But domestic manufacturers also produce products that are worthy competitors to foreign ones. These are the trademarks NMK, Litkom and SibStalShar, which create durable, high-quality models with an attractive design.
Instructions for use and care
Careful handling of the product will increase its service life.
- The correct first firebox is the key to the durability of the flooring. It is necessary to gradually light the firebox (shavings and small logs first) and allow it to cool for several hours.
- Mechanical damage should be excluded: chips, scratches.
- Rust may appear during storage of the stove. You should not rip it off or try to remove it in other ways. It will disappear during use.
- Do not overload the device.
- It is necessary to ensure that moisture does not fall on the heated flooring.
With proper use and proper care, your stove will last for many years.
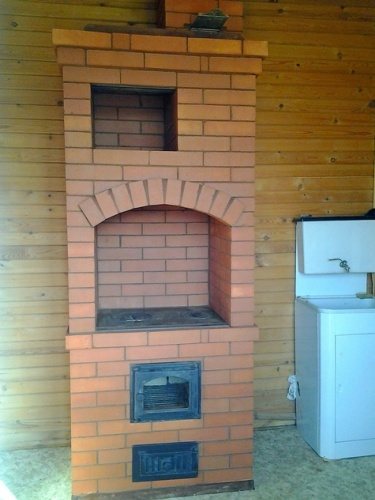
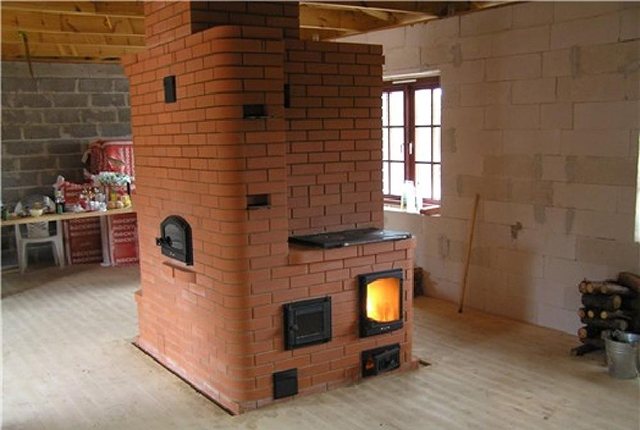
Construction of a furnace with a heating panel
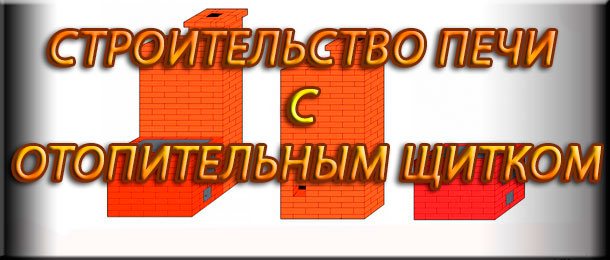
Construction of a furnace with a heating panel
Now many people want to get their own stove. In order to do this, you can choose the most attractive option from the catalog and order a construction service from the appropriate company. However, there are not always funds available for such expenses. It is much easier and cheaper to build a stove with your own hands .
Heating shield
Preparing for work
In order to do everything yourself, you don’t need professional education, you just need to know what to do and carefully follow the instructions. To begin with, you should select a stove design, based on which the consumption of the necessary materials is calculated - bricks, mortar, stove fittings, etc. In advance of laying the furnace, its future location is clarified and the location for the chimney is determined. Ceiling and attic floors are also assessed, whether there is enough space between the rafters and floor beams, and whether all fire safety standards are met. Naturally, the load-bearing floor beams cannot be touched even so that the chimney passes well. It's better to redo the original project a little. Also, experts do not recommend carrying out all work in the fresh air. It is advisable that the air temperature during construction be 10 degrees Celsius or more. Before starting work, you also need to choose the future base for the stove or fireplace. The most suitable bricks and mortars and other auxiliary materials are selected. During the construction of the stove, there will be a lot of construction debris and dust around, so you should first remove the furniture or cover it with covers - film, paper or fabric. It is also best to cover the walls and ceiling with plywood, boards or fiberboard. After the foundation for the stove is ready and all preparation work has been completed, you can begin to bring in and stack bricks nearby. However, you should not carry everything at once, so as not to accidentally make a hole in the floor from the heavy weight. You need to prepare a container for the solution. A simple trough or several buckets will do. In addition to the usual construction tools, you may also need tools for mixing the mortar.
Start of construction
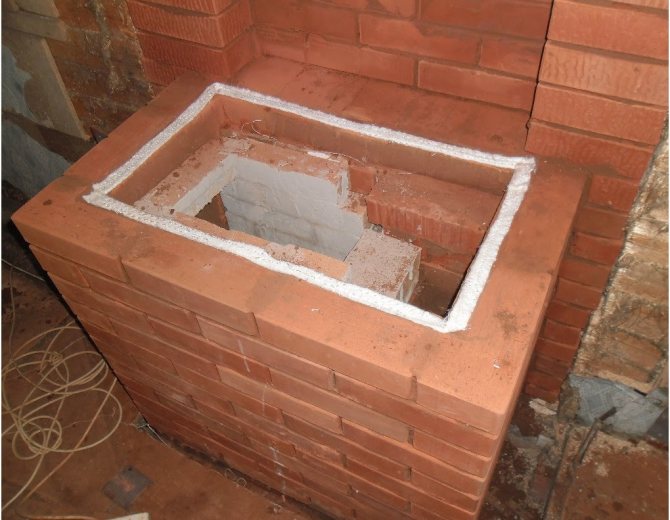
After preparations, you can begin laying the first row. According to the furnace design, markings are carried out. Since each person has his own project, it is easiest to take the simplest one as an example - a kitchen stove with a three-channel heating panel. The length of the future furnace is ± 0.9 meters, the width is also ± 0.9 meters, and the height of the heating panel excluding the pipe is ± 1.7 meters. Already ready you need to have a standard type of brick 250x120x65 millimeters, as well as a standard cast iron slab 710x410 millimeters and a seam thickness of no more than 5 millimeters. The stove must not have an oven. The heating shield is not connected to the stove, but is made side by side, but they are not tied together. Despite the fact that this method is rarely used in practice, it is undoubtedly very good.
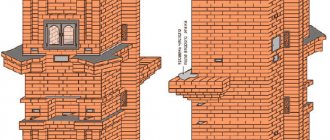
As you can see in the figure, the shield and the plate are specially separated. In this way, but they are not bandaged. This is a common practice in multi-story buildings: only a riser / heating panel is located on the foundation, the slab is attached to the side directly into the floor. This is very convenient because, if necessary, the stove can be redone without disturbing the main body of the stove. However, it is desirable that the foundation be common.
Photo: Laying the first row
In the project you can see that there is one base for the stove, but the riser and the stove are separated from each other. It is necessary to put waterproofing on the foundation. Most often, roofing felt acts as such waterproofing. After this, you can begin laying the first row.
Each side should be placed according to its size. In this case, it is important that the angles are right, for which you must first measure the diagonals - the distances from the corner to the other angle should be equal to each other. The masonry is done in a solid pattern, completely filling all the seams. Using a level, you can check the quality of horizontalness. In the picture you can see how the stove and heating panel have different colors.
Photo: Verticality of corners
In order to maintain strict verticality of the corners and walls of the stove, you need to control this throughout the entire construction process, starting from the first row. To do this, use a level.
Even better is to pull ropes from each corner up to the ceiling and securely fix them. In this case, the verticality of each of them is set strictly according to the plumb line. Instead of ropes, you can also use boards. Particular attention is paid to the masonry of the first row, since it is this that determines what kind of stove will turn out in the end.
Continuation of masonry
Photo: Fire door
The easiest way to use the order is to continue working. We are talking about a scheme for laying bricks in a kiln, in which it is done in ascending order, row by row. The second row after the first is also laid out solid. By the way, these two rows are considered the minimum until the ash pan, which, according to this project, begins in the third row. After laying the second row, a blower door is installed in the place where the ash pan will be.
Both the stove and the heating shield are usually laid out together, but again they are not tied together. They can be seen in the picture in different colors. The blower door is placed directly on the second row and is closed already on the fifth. The lower wires, which are fastening, go into the seams between the second and third rows, the upper wires - between the fourth and fifth rows.
Starting from the third and ending with the sixth row, an ash pan is made. In the sixth row, above the ash pit opening, it is necessary to install a cast iron grate. It is advisable to select planting sites according to the size of the grate in the bricks. It is important to consider its thickness, since it should not protrude beyond the plane. This is under the stove, that is, the lower part of the firebox or the floor in the firebox. Most often, everything inside the firebox is lined with refractory bricks, which are placed on edge. This is done in order to protect the clay brick from fading and this process is called lining. This project does not provide for this and the firebox is quite narrow. Actually, therefore, from the sixth row, in order to lay the hob, you need to use fire-resistant bricks or ceramic heat-resistant bricks.
Installation of the combustion door
After six rows have been laid out, the blower door, grate and ash pan are ready, you can begin installing the fire door. This is a very important element of the furnace, which heats up the most, expands and is subject to physical impact. This project uses a cast iron door measuring 250x210 millimeters.
During installation, it is necessary to create a thermal gap between the door body and the bricks, which is filled with basalt wool or asbestos. The door can be installed as a flood door or in a slightly different way.
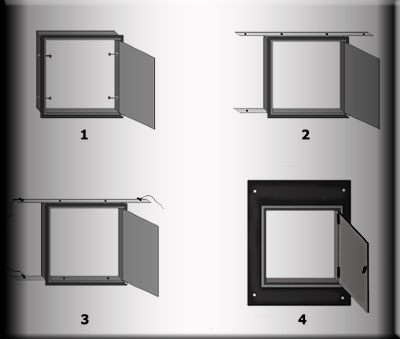
Another way is to fix the door into the walls of the firebox opening, directly into the brick, through the side holes that are in the door frame using special screws or knitting needles. This method is usually used in the case of doors with a wide shelf. In addition, you can use bolts to screw a strip of stainless steel to the frame, and secure its ends in the seams of the brick. In order to achieve greater reinforcement, wire is often tied to the ends of the bar. Another option is to weld the furnace door into a steel sheet, which is attached with dowels and nails directly through basalt cables or asbestos to the wall on which the door is located.
Photo: Fire door
This project uses a different method. The door is placed in the place where the firebox opening will be located. Before this, a strip of cotton wool or asbestos is placed there. Then, vertically, focusing on a level or plumb line, the door is fixed. At the same time, the fixation must be very rigid.
Heating and hob
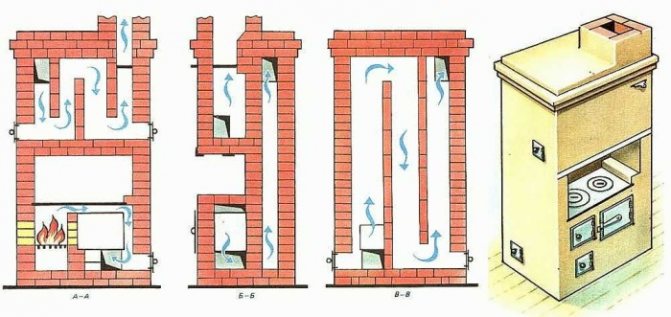
After the combustion door is installed, you can begin working on the heating and cooking stove. It begins on the seventh row of masonry, in which the chimneys also begin to be laid out. In this project you can see a heating and cooking stove, a heating panel with three vertical chimneys - two ascending and one descending. In addition, there are three more horizontal chimneys - one from the firebox into the chimney, as well as upper and lower channels connecting the vertical chimneys to each other.
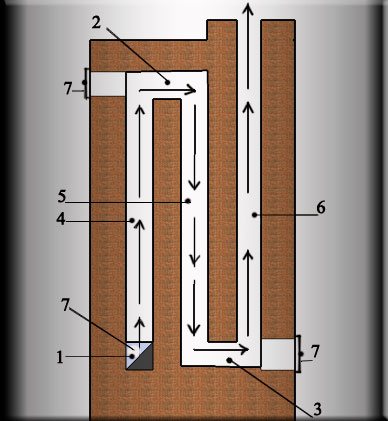
Heating panel channel diagram: 1.2.3 - horizontal channels, 4.6 - ascending vertical channels, 5 - descending vertical channel, 7 - cleaning doors
In the seventh row, three doors are usually installed - a firebox and several cleaning doors. The masonry must be strictly horizontal and vertical in certain places. In addition, the thickness of the seams should be no more than five millimeters. The fire door must be lined with basalt or asbestos. It is covered with several bricks end to end. On the eleventh row you can begin installing a standard cast iron slab.

Heating shield
The heating panel begins to lay out on the twelfth row. The internal walls of each chimney must be laid very smoothly - maximum filled joints and bricks without chips, as well as carefully distributed mortar. The top horizontal chimney should be covered with at least two rows on top. As can be seen from the figure, the heating shield is laid out very simply.
Trumpet and fluff
Photo: 1 – oven. 2 – cutting
If the stove is located in a wall partition, or if it is adjacent to walls, especially wooden ones, then it is imperative to leave a distance to the walls of 25 centimeters or more. This distance is usually filled with bricks, which are laid out on the mortar in a pillar the width of a brick. As for cutting, it is usually carried out after the main work is completed.
Photo: 1 – Furnace valve, 2 – Grooves in brick
How high the stove and the ceiling are will determine how many rows will be laid out near the chimney. The figure shows six, but this is a situational individual moment, and therefore you need to look at the place of work. In the thirty-first row there is a stove valve, but this is also a rather “floating” arrangement. In some cases, another valve is placed across the row, which adds greater tightness and thermal insulation.
In order for the pipe to pass through the ceiling and comply with fire safety, fluff is laid out. The distance from the chimney to the ceiling should be at least fifty centimeters. The fluffing is done by releasing a quarter of the brick outward relative to the row in front of it. This is done around the entire perimeter. There should be three such rows. However, you can walk under the ceiling in two rows, and make the third inside. Thus, the overall look will not be so bulky due to the fluff.
Photo: 4 -asbestos
Places where bricks adjoin the ceiling should be lined with asbestos sheets. The last row of fluff is placed in the overlap. Then the pipe is tied, as in rows 29-34. The space between the pipe and the walls of the opening in the ceiling is filled with broken bricks, and the seamless space is filled with clay mortar. The pipe is most often laid out with bricks, although it is also possible to install sandwich or asbestos cement pipes.
Thus, by spending a little time and effort, you can build a stove completely independently . To do this, you should carefully monitor the horizontal and vertical levels, and also follow all instructions and safety precautions.
Photo 1
Photo 2
Photo 3
Photo 4
Photo 5
Photo 6
Photo 7
How to make a stove with your own hands + photo / Kadka-kamina.ru
Conclusion
A cast iron stove stove is an excellent option for cooking and heating the room. A large selection of these products will satisfy even the most fastidious buyer.
Cast iron material is characterized by heat resistance, durability, and ease of use. A high-quality cast iron stove will serve you reliably for several decades.
But its purchase should be made in a specialized store. Experienced consultants will help you choose between a prefabricated or solid slab, and will also select the right size at an affordable price.
Attention must be paid to the quality, absence of defects and weight of the product. You can even install this flooring yourself. To do this, it is worth considering only a few nuances.
When melted and used, cast iron decking will remain in its original condition throughout its entire use. It will become not only a functional item, but also a decoration for your interior.
Cast iron stoves
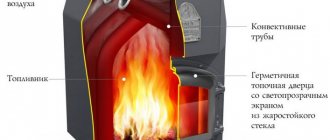
A practical approach to the creation of furnaces made it possible to introduce the idea of an all-metal structure into production. Cast iron models became a reflection of this idea. They have a fairly simple device and, according to the principle of operation, resemble an ordinary “potbelly stove”.
Good to know: How stoves without a chimney are implemented in practice, what they are like
In terms of design, the designers did a great job. It should be noted that cast iron products are not visually attractive. The gray and gloomy tone alone lowers the mood. But with all this, the finished structures are designed as stylishly as possible. In addition, there is the possibility of external finishing of a cast iron stove using decorative stone.
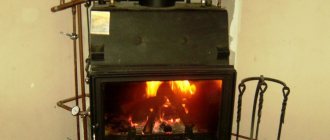
The entire device is schematically divided into two components: the ash pan and the firebox. On top of the firebox there is a hob for the fireplace. Thanks to its high thermal conductivity, a cast iron stove breaks records in terms of efficiency, which, by the way, is not its only advantage.
The compact size of the oven, even when equipped with a hob, expands the range of applicability of the oven. It can be installed only with reference to the convenience of installing the chimney. The mass of the fireplace is quite large, but, unlike brick devices, it does not impose restrictions on floor coverings. So, a concrete slab under a fireplace stove can be used as a base.
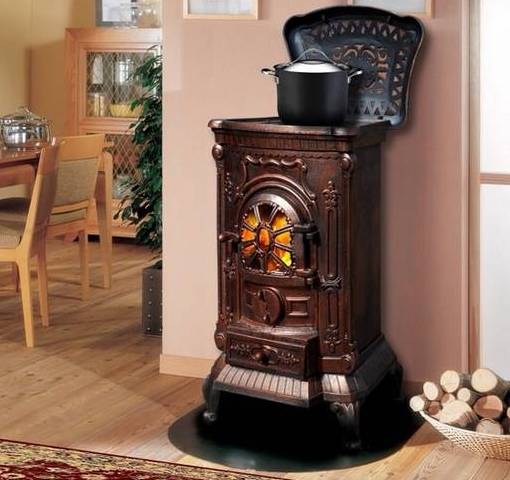
A true piece of art
The fact that firewood can be used as fuel still makes a cast iron stove an indispensable assistant in a country village that has passed the wave of gasification, and its high efficiency helps to save money on the family budget.
Cast iron stoves are autonomous, energy-independent devices. Apart from fuel, they do not require any external energy supply. This is very rare, since many modern designs use electricity.
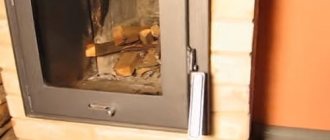
A hob installed on top of the firebox will delight housewives with excellent performance, and a high degree of safety does not require isolating the device from accidental touch, especially by children.