Preparation
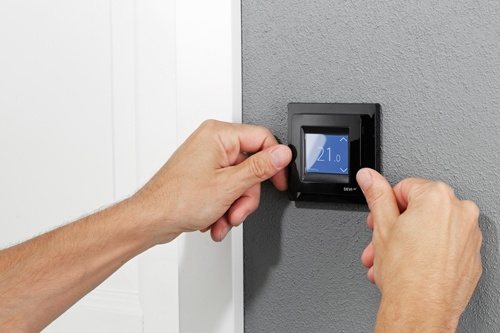
- We start by checking the presence of electricity in the house and the supply of electricity to the thermostat, i.e. whether the indicator light or panel is lit (for programmable thermostats).
- If, however, there is electricity in the house and it is supplied to the thermostat through which the heated floor is powered, then you need to check the temperature settings. How many times does it happen when children spin the “wheel” out of curiosity, or when a housekeeper inadvertently “accidentally touches” the buttons on the device?
- After making sure that the electricity is flowing, the thermostat is on, the temperature is set correctly, and the floor is still cold, then you need to make an important decision:
- show “who is the boss of the house” and call an electrician. End. All that remains is to prepare the money and wait.
- show “who is the master and unsurpassed master of the house”, identify the malfunction and, heroically eliminating it, receive the admiring look of his beloved wife.
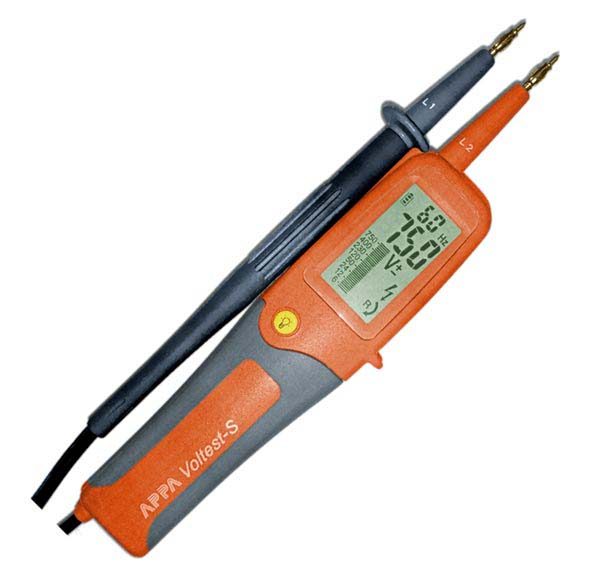
If you are no longer sitting in front of the TV and decide to act on your own, then you will need a screwdriver and a tester (a device that can measure resistance and voltage) or, at worst, a voltage indicator.
Detecting a heated floor malfunction using an example
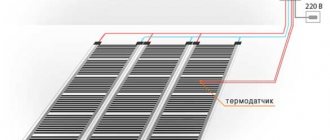
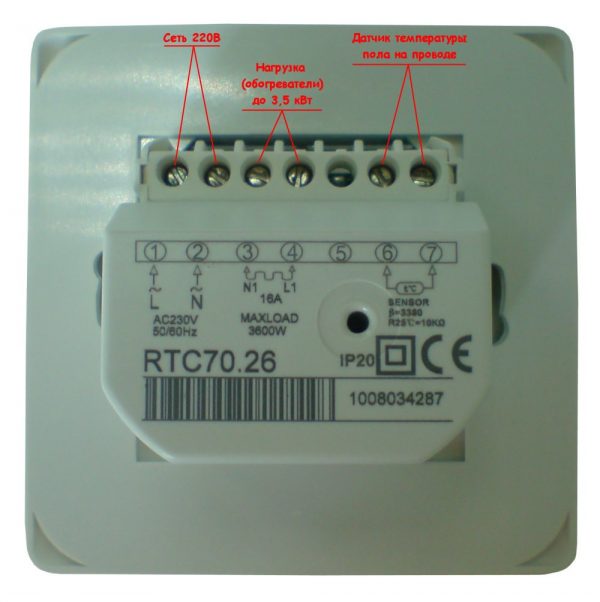
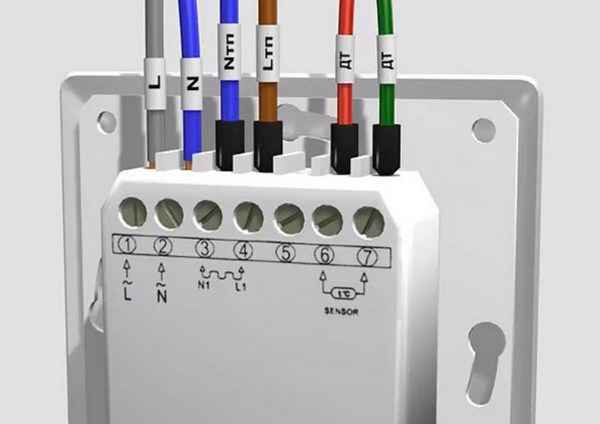
Since a heated floor must be connected through a thermostat with a remote temperature sensor, we will consider the connection diagram using the example of a thermostat for a heated floor RTC 85.26.
- We disconnect the voltage supplied to the thermostat from the network.
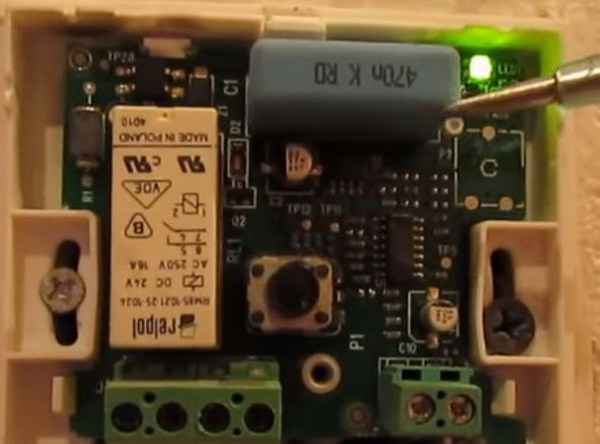
- We gain access to the rear panel of the thermostat.

We already know that the heating cable (cable floor) or heating film (infrared film floor) is a load and is connected to contacts No. 3 (N-zero) and No. 4 (L-phase load). — we measure the resistance, it must correspond to that stated in the passport *.
* If you have lost your passport, then you can calculate the resistance value using the formula R=U/P, knowing the voltage value is 220 Volts and the power, for example it is 1.2 kW, we find the resistance R=U*U/P=220*220/1200 =40.3 Ohm.
If you do not know the power of a heated floor, you can calculate its approximate value. Room area (m2) multiplied by 150W/m2).
For example: toilet room 6 m2 *150 W/m2 =900 W. Hence the resistance is 220/900 = 53.7 Ohms
In the case of using infrared film heated floors, you can check the resistance of each individual heating element. To do this, disconnect the wires (see connection diagram) and take resistance measurements. Compare the readings with the calculated values.
Note
- if the instrument reading is zero, this means that a short circuit has occurred in the system, more often it is a short circuit of the wires due to overheating (the cross-section is incorrectly calculated).
- if the instrument reading is infinity, then this means that a break (burnout) of the heating element has occurred in the system, most often in the coupling.
If the resistance measurements correspond to the data specified in the passport, then you can breathe a sigh of relief - the heating elements of the heated floor are in good working order!
This means the reason is in the thermostat, you will agree that checking and replacing it is much easier and cheaper, but this is discussed in a separate article, checking the functionality of the thermostat.
** heated floor, no matter what it is, cable, film, Chinese or according to the passport “made in Denmark”, but in fact in China - is a load.
The second way to check the performance of a heated floor
If you are far from electricians (i.e. you are strong in the field of philology or other sciences no less valuable to humanity) and did not understand anything from what you read, then you can check the serviceability of heated floors in a simple old-fashioned way: checking the functionality of a heated floor by connecting a heating element directly to the 220V voltage, bypassing the thermostat.
- Turn off the electricity (turn off the machine on the distribution panel)
- We connect the electric wire coming to contact No. 1 with the wire connected to contact No. 3, and the electric wire coming to contact No. 2 with the wire connected to contact No. 4. This means that we connected the heated floor directly to the panel, bypassing the thermostat.
We turn on the machine on the control panel for 30-40 minutes and wait for the floor to heat up. If the floor becomes warm, that's good. The heated floor works. This means the thermostat is faulty, but if even when connecting the heated floor directly, bypassing the thermostat, it does not heat up, then you need to look for the place where the wire burned out.
Attention. If you connected the heated floor directly and when you turn on the electricity, the machine knocks out, then there may be a short circuit or a malfunction of the machine, check the resistance of the heated floor, it should not go to zero.
Did you manage? FINE! you can go and receive a reward from your beloved.
If you can’t cope and have questions, it’s also not a problem, look at the QUESTION-ANSWER section or call the numbers listed on the website, we’ll figure it out together.
Warm floors are truly a blessing to civilization. It is especially relevant if it is installed on the first floors of residential buildings or in apartments located above the basement. Warm floors can make your home feel cozy. Unfortunately, like any other electrical system, such floors can also fail, at one point ceasing to heat the room. Of course, the system needs careful testing and troubleshooting. And immediately after installation, even before pouring the screed and laying the finishing touches, it is important to find out its performance. How to check a heated floor?

How to check a heated floor
Types of electric heated floors
How long does the heated floor heat up when first turned on?
We will not provide formulas for calculating the heating of electric floors below; you can see this in any textbook. The reason is that the calculation formula contains variables that are very difficult to calculate in everyday conditions. So, let's begin.
Infrared film: price 230 UAH/m2 (under carpet, laminate, carpet and other floor coverings)
When turned on for the first time, the electric heated floor will warm up from 15 minutes to 12 hours.
What does this depend on?
- up to 15 minutes
- if you have an infrared heated floor (often called infrared film) and the installation was directly under the floor covering itself (under a carpet, rug or rug). You will immediately feel warm. Of the minuses: it heats up quickly and cools down quickly. - up to 30-60 minutes
- if the infrared electric floor was installed under linoleum or parquet. What is this connected with? The reason for prolonged heating will be the density of the material from which the floor covering is made. - from 60 minutes to 3 hours
- these indicators will be if you put a heated floor under the tiles (directly in the tile adhesive). This can be either a heating mat or a thin heating cable. Why? After the first switching on, the warm floor will first heat the tile adhesive, then the tiles, and only then warm up the air. This time is calculated provided that the cable has a power of at least 150W/m2 (there is a huge selection of manufacturers of these electric floors on the Ukrainian market). There are also high-power electric floors (more than 150W/m2). So how much does the heated floor under the tiles heat up when you first turn it on? Answer: from 1 to 3 hours. - from 3 hours to 12-15 hours
- such indicators are the norm for a cable tie. Why? According to the recommendations of the manufacturers of heated floors, the screed should be poured from 3 to 5 cm. To warm up concrete of this thickness when the heated floor is first turned on, in some cases it takes more than 15 hours. Of the minuses: it heats up slowly and cools down slowly.
Cable designs and placement
A floor heating system, created from an electric cable or infrared film, in any case has certain elements. This is the heating cable itself, which is the source of heat, a temperature sensor that takes readings of the heating temperature of the wire, as well as a thermostat, which is responsible for connecting all the floor elements into a single whole and regulates the processes of turning it on/off depending on the heating level of the cable.

Cable heated floor
Heating speed of heated floors
According to their characteristics, heating systems can be divided into two types:
- Water, where the coolant function is performed by water, antifreeze or ethylene glycol solutions;
- Electric, where carbon rods, electrical cables or infrared film act as the coolant.
Each system has its own advantages and disadvantages. The heating time of such floors depends on the design of the coolants and the depth at which they are laid.
To heat one square meter of surface with a screed depth of 5 - 6 cm, an average of 1.5 - 2 hours is required.
Warm-up speed of water floors
A water heated floor takes a long time to warm up. The heating time can be 20 - 30 hours; the rise in temperature for the feet will be noticeable after about 5 hours. Most of the time and energy is spent on heating the screed, which on average reaches a thickness of 5 cm. Only after it is heated does heat release into the room. After switching off, a comfortable temperature of the surface and room can be maintained throughout the day. As a rule, the total heating and cooling time depends on the thickness of the tie elements. A significant disadvantage of such a coolant is the difficulty of installation.
Malfunctions of heated floors
And now, it would seem, the system is installed, everything is connected, but for some reason the floor does not want to become warm. If heating does not occur, it means that somewhere during installation an error was made or faulty equipment is used in the system.
Table. The main causes of floor heating malfunctions.
| Floor element | Malfunction |
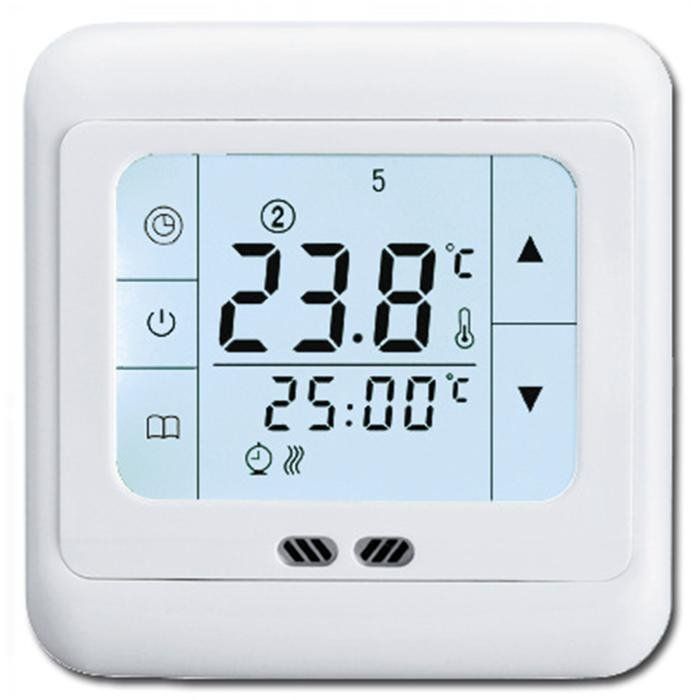
Electronic thermostat for heated floors
Advice! To avoid having to frequently repair the underfloor heating system in your apartment, it is recommended to purchase reliable equipment from trusted manufacturers.
Water floor malfunctions
When the heated floor stops working, the room becomes cold and uncomfortable. However, the opposite situation also happens. Heating occurs more intensely than users would like. The discomfort from the heat is further enhanced by the awareness that the floor covering is suffering. If you delay the repair, you may need to re-lay the parquet or laminate flooring.
Most often, heated floor malfunctions are “laid in” during the installation and adjustment process. If the assembly of the structure was carried out with errors, after some time the defects appear. However, there are also breakdowns that occur during operation. If your water heated floor does not heat well or does not work at all, the reasons may be the following:
- the tightness of the pipeline is broken;
- one of the controls has failed;
- the fluid supply to the circuits is incorrectly adjusted.
Pipes
Quite often, a heated floor does not heat up well due to depressurization of the pipe through which hot water circulates. If the system is installed in an apartment building above the first floor, such a breakthrough can lead to serious material losses and litigation with neighbors. Due to this risk, such systems are recommended only for heating autonomous buildings. If you think that the heated floor is not heating due to a leak, carefully inspect all surfaces, especially at the joints. If there is significant depressurization, stains may appear there.
The absence of sputum does not mean anything. To understand why the heated floor stopped heating without removing the covering, a device such as a thermal imager is used. If the inspection helped determine the location of the leak, you can try to repair it. It is necessary to dismantle the covering and screed (if any) in this particular area. The damaged pipe is replaced with a similar new one, after draining the water from the system and turning off its supply. If the water-heated floor does not heat even after this, and you are sure that the remaining lines are sealed, then you should check the condition of the electrical equipment.
Electrics
The coolant coming from the boiler or central pipeline is controlled through a manifold. This unit consists of a circulation pump, mixing valve, thermostats, thermostat and other auxiliary devices. The answer to the question why a water-heated floor does not heat may be due to the breakdown of one of the key elements.
For example, the circulation pump may fail. This can be easily determined by the absence of the usual noise. If the floor heating thermostat does not work, the cause may be a lack of voltage. The condition is checked using an indicator screwdriver or a multimeter. You should also make sure that the temperature sensors are working properly. If you are not sure that you are able to independently eliminate the reasons why the heated floor has stopped heating, since you have little understanding of electrics, contact a professional. Illiterate manipulations are dangerous not only for the equipment, but also for the health of the performer.
Uneven heating
Sometimes, some areas of the house may be significantly less heated than surfaces in other rooms. If water heated floors heat so poorly, the reason may be the uneven length of the contours. When hot water is supplied to all loops at the same speed, it takes longer to travel through a longer pipe. Accordingly, the liquid cools down faster there. In order to no longer worry about why the heated floor in some room is not heating, you need to adjust the supply valve drives. This setup requires patience. Here, too, it is better to trust a specialist equipped with the necessary equipment.
Methods for checking the serviceability of a heated floor
There are only two ways to check the functionality of the underfloor heating system. One of them is a visual inspection of the cable and components for damage . But it will allow you to identify only those defects that can be seen - burnt (blackened) equipment, a broken cable, lack of electricity in the house, etc. The method is the simplest and does not require the use of any devices, but it is not very informative and will not always be able to help in identifying the reason for the lack of floor heating.

Inadmissible rotation of the heating mat after the factory coupling. During cable operation, constant deformation of the outer sheath occurs
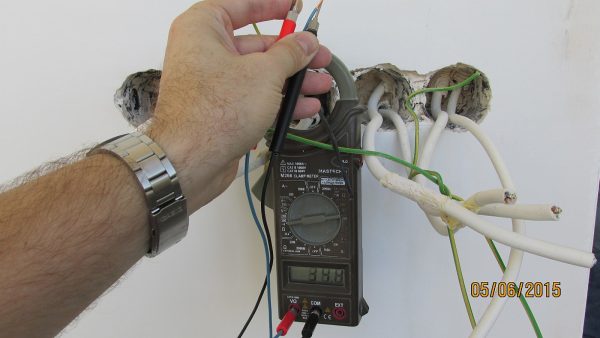
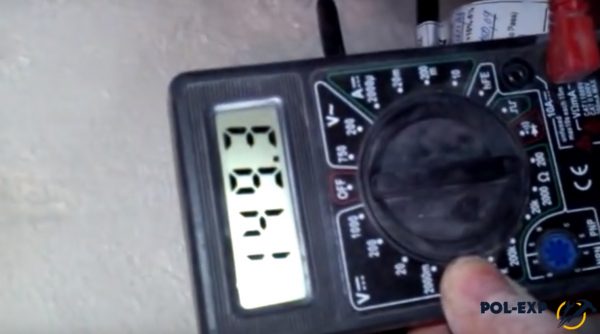
The second method is to determine the basic parameters of the system power supply using a multimeter . It will help you find out more precisely what is the reason for the lack of performance of the floor. Using the device, you can measure the network voltage - just remove the thermostat from the wall and, using special probes on the terminals, measure the network voltage. It should be 220 V. If the indicator is normal, it means that the culprit is definitely one of the elements of the entire floor heating system.
The first step is always a visual inspection. It is important to make sure that the reason for the lack of heat is not a lack of electricity throughout the house. Next, you can look for the presence of melted or burnt parts of the system. If nothing suspicious is found, then it’s time to pick up a multimeter.

A multimeter is also used to diagnose the underfloor heating system. The cable resistance is measured and divided by the value of 220 V (this is an indicator of the voltage in the electrical network). The resulting figure shows the master the amount of current flowing through the floor system. Next, this indicator is multiplied by the voltage - this is how the power consumption indicator is determined. It is this that must correspond to the power of the system, which is usually indicated in the passport. If the power value is greater than needed, then there are short circuits in the system - the cable insulation is damaged somewhere.
Attention! This type of malfunction can also be noticed due to excessively heated areas of the floor in some places.
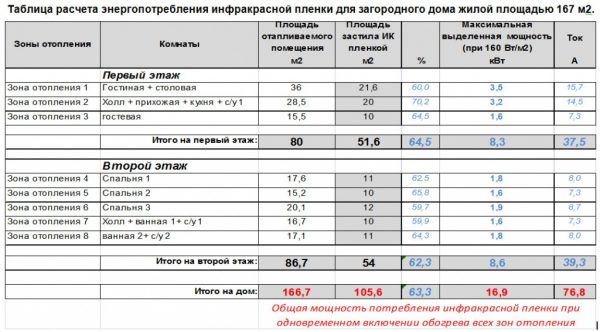
Infrared heated floor - electricity consumption
If the power value is less than indicated in the cable passport, it means that there is a wire break somewhere. Because of this, the system is unstable.
Advice! If all documentation regarding floor heating equipment is irretrievably lost, then the power according to the passport is assumed to be conditionally equal to 150 W/m2.
Let's look further: if the resistance reading on the multimeter is 0, then, most likely, it was disabled by a short circuit that occurred somewhere. Repairing the equipment will be extremely difficult and expensive. And it will be difficult to find the damaged area if we are talking about a cable field. If infrared flooring is used for heating, then it is enough to lift the finish, find the damaged area and change it.
Types of heated floors
All built-in heating systems are installed in the internal floor space. Their surface becomes a kind of large panel that distributes heat evenly.
Water floor
An individual water floor heating system is based on the principle of circulating hot water underneath through a system of plastic pipes. It comes there from a specific source, which can be central heating, electric or gas boilers.
Hot water supply from the central heating system is possible only on the first floors of high-rise buildings; it is not calculated for the upper floors. Therefore, a water floor is most suitable for private individual households.
Electric floor
This floor heating system is equipped with special electric heating cables. They are installed under laminate, tile or porcelain stoneware floors in living rooms, bathrooms or toilets. The floor surface is heated through high-resistance wires connected to a temperature sensor and a thermal control system.
All elements, after appropriate installation on the concrete floor, are filled with cement mortar with further installation of the main floor covering. The temperature controller and part of the power cable are located outside the floor. The temperature settings are adjusted by the thermostat according to the specified modes.
Infrared floor
Infrared radiation of an individual heating system is an innovative solution to issues related to heating people indoors.
The main film elements of this heating system have:
- Excellent heat dissipation.
- High reliability and durability.
- Cost-effective and convenient installation.
- Harmless and safe impact on human health.
Such elements are laid in a concrete screed, followed by installation of any floor covering in the form of tiles or linoleum, parquet or boards.
How to check the temperature sensor
If the floor itself is working, but the system still does not work, then the reason lies elsewhere. You can try to check the serviceability of the sensor. It is a resistor that has its own resistance, and this can also be measured using a multimeter. But the performance of the latter varies greatly depending on what the floor temperature is at the moment. For example, with a temperature reading of 5 degrees, the multimeter will show a value of 22 kOhm, and with a temperature reading of 40 degrees – only 6 kOhm. In general, the indicator should correspond to the factory resistance. If it differs from the indicated value by more than 5 kOhm or is equal to 0, then the sensor does not work and needs to be changed.
Warm floor sensor
On a note! Modern thermostats equipped with a display often indicate a sensor malfunction on their own.
Thermostat diagnostics
The thermostat is also checked using a multimeter. To make sure that this is the cause of the malfunction, you need to turn off the floor heating element itself. Next, the floor heating level regulator is turned to maximum. After this, the terminals without wires are diagnosed with a conventional multimeter. According to all the rules, in this case the relay is activated and the device shows the voltage level. When the regulator is set to the minimum heating level, the relay will turn off and the voltage will disappear.
Checking with a resistance tester
How to check a heated floor
Checking the floor for defects begins with some preparation. It includes checking the presence of electricity in the house, determining whether it is supplied to the temperature controller (usually it is enough to look at the indicator light that is on the device).
Next, if there is electric current, the temperature settings are checked. It happens that the regulator is simply set to minimum and it seems that the system is not heating. The position of the regulator should be carefully assessed to rule out this option. Only after you can make sure that everything is in order with the electricity supply, and the temperature is at the desired level, but the floor still does not heat up, you can move on to more serious diagnostic methods.
How to connect a thermostat
Attention! If a person is completely unfamiliar with electricity, then it is recommended to call a professional electrician for diagnosis to avoid injury.
If you have at least some knowledge about electricity, then you can try to diagnose it yourself. To do this you will need to purchase a multimeter and a screwdriver. A voltage indicator helps replace a multimeter, but it is not always informative enough for accurate diagnosis.
Sometimes newly purchased equipment also needs to be checked. But it is important to remember that an electrical cable that is not covered with a screed (especially one that is wound) cannot be turned on in the air. Of course, you can check it before filling it, but power is supplied for no longer than 5 minutes, and the wire must be completely unrolled.
How to check the functionality of the thermostat?
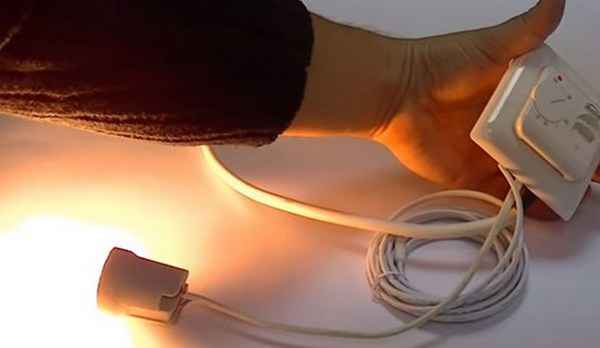
Let's look at an example of how you can check whether the thermostat is working using an ordinary light bulb.
Step 1. The thermostat is connected to the network in compliance with all rules. That is, the phase wire is connected to terminal L, and the zero wire is connected to terminal N. A temperature sensor and a regular light bulb screwed into the socket are also connected. It will serve as a load indicator.

The light bulb will serve as a load indicator
Step 2. The thermostat connected to the network is turned on using a toggle switch.

Step 3. The lever responsible for increasing the temperature is set to maximum.
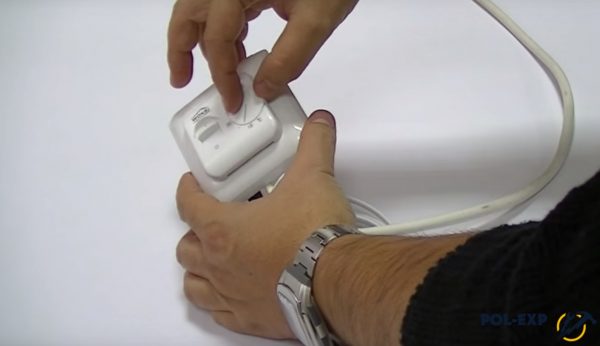
The maximum temperature is set
Step 4. If the thermostat is working properly, the light will light up.
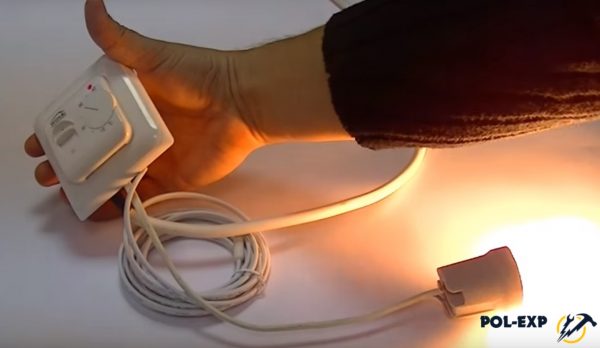
Step 5. Using this circuit, you can also check the temperature sensor. To do this, take it in your hand, and the temperature regulator is set to the average value.
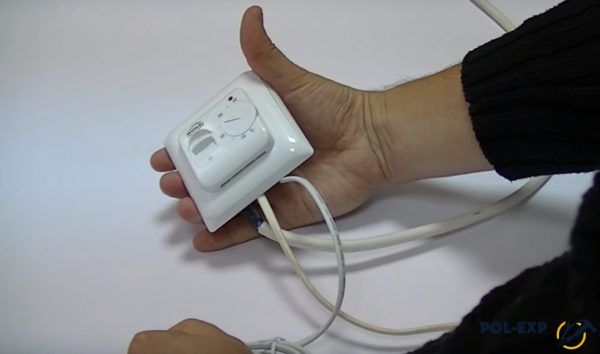
Using this circuit you can also check the temperature sensor
Step 6. The temperature control is turned again to higher values. The light will come on again. But when the sensor heats up to the temperature of the human body, it will go out.
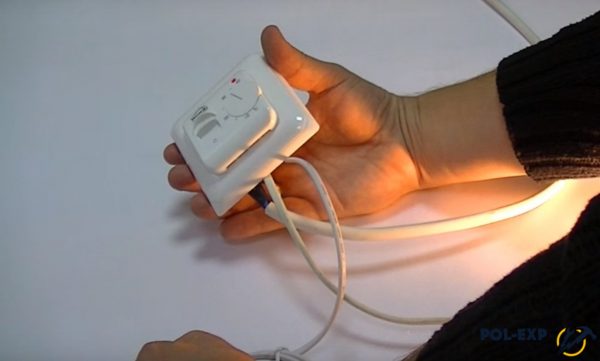
The light came on again
Step 7. After this, the system can be left alone. After some time, the light will light up again when the temperature sensor cools down and sends a signal to the thermostat.

The light came on again
Video - How to check an electric heated floor
Resistance measurement
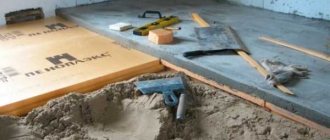
Before starting work on pouring the screed during the installation of a heated floor system, it is recommended to check the resistance of the heating cable.
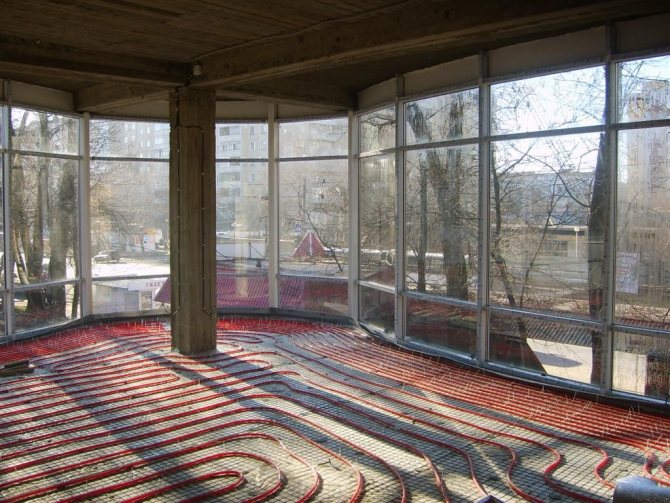
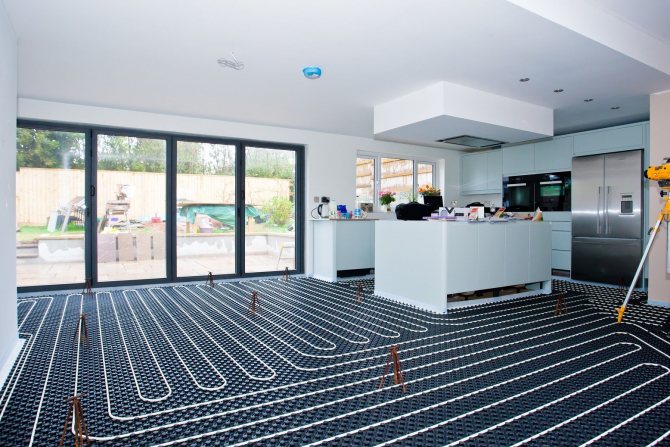
Step 1. As we see in the image, the heated floor is installed and ready for further work.
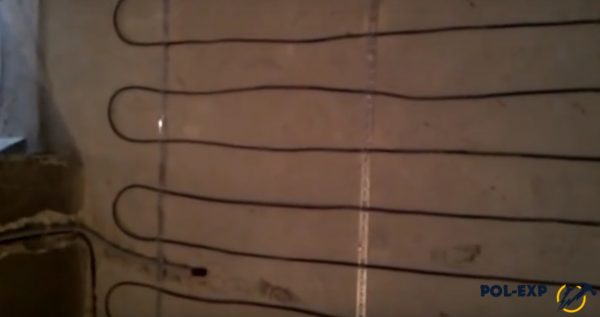
Installed heated floor
Step 2. Next, you need to find the resistance value in the cable passport or on the label attached to it. In this case it is equal to 150.9 Ohms. It is allowed to increase or decrease it by 5-10%.
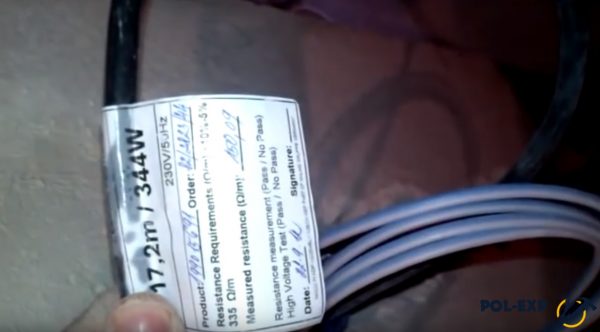
The resistance is indicated on the tag
Step 3. After this, the multimeter switches on to measurement mode.
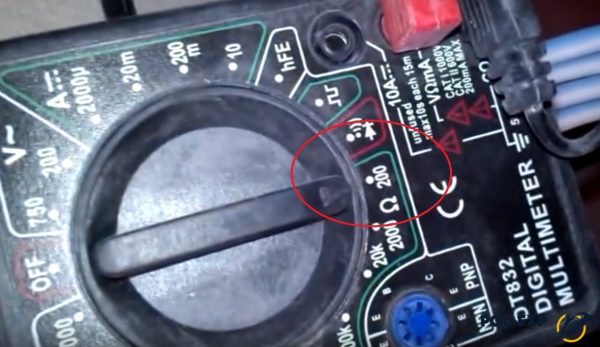
The multimeter switches to measurement mode
Step 4. The probes of the device are installed on the wires coming from the heated floor.
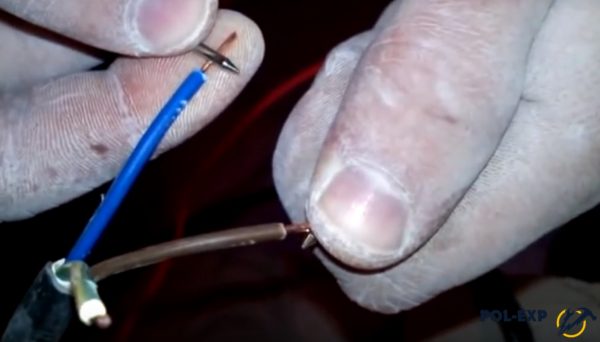
Probes are installed on the wires
Step 5. The multimeter will show an indicator that should be approximately equal to the value indicated in the cable data sheet.
Using these methods, you can check the performance of individual elements of a heated floor, both before installing it and already installed. A multimeter device can be useful in the household, so it is recommended to purchase it and not regret the money spent.
Anton Svistunov chief editor
Author of publication 10/08/2017
Did you like the article? Save so you don't lose!

It happens that after installation or a long break in operation, the heated floor does not heat well . There may be several reasons for such a malfunction, as well as options for eliminating it, so we will consider the possible versions in order.
The simplest and most reliable, but at the same time the most expensive way would be to call specialists. They will diagnose the heated floor, identify the cause of the malfunction and eliminate the problem.
It is also possible to analyze the underfloor heating system yourself. Of course, all cases are individual and it is difficult to list every reason for a malfunction in the operation of a heated floor, but among them the most common ones can be identified:
- Incorrect heating cable or insufficient thermal insulation layer. The cable power is selected based on the technical conditions of the room where the heating system will be installed. An incorrect calculation of the power or area of the heated floor, as well as a thin layer of thermal insulation, can cause poor heating of the heated floor. To resolve this problem, you should contact specialists who will check the system and give recommendations on how to fix it. Incorrect calculations are one of the main reasons why electric underfloor heating does not heat well. When purchasing this heating system, you should listen to the advice of specialized consultants.
- Incorrect installation of heated floors. If, when starting the system through the thermostat, the heated floor turns off almost immediately after turning it on, most likely the problem is in the location of the temperature sensor. Often during installation, the sensor is installed adjacent to the heating cable or heating mats, or located too close to them.
- Mechanical damage to the heated floor. It is possible to damage the heating cable during installation, for example when pouring screed or installing the finishing floor covering. To determine if there is a cable fault, you should disconnect the heated floor from the thermostat and measure the resistance of the wires. Compare the obtained indicator with the data given in the operating instructions; the deviation from the norm should not exceed 5%.
- Technical parameters of the electrical network. The reason for weak heating of the heated floor can also be low voltage in the home network. The operation of a heated floor may be ineffective if a cable with an insufficient power density reserve has been selected.
- Interruptions in the operation of the thermostat and heated floor sensor. Often the cause of a cold heated floor is faulty control equipment. It is necessary to check the correct connection of all cables and the functionality of the regulator.
Types of heated floors
Today, the three most well-known types of heated floors are:
- warm water floors;
- cable floor heating;
- film infrared heating.
Warm water floors
Water floors are covered with cement screed and do not warm up immediately.
Water floors are a pipeline system connected to a gas boiler through a manifold block. By supplying hot water, the boiler “forces” the floor coverings to heat up.
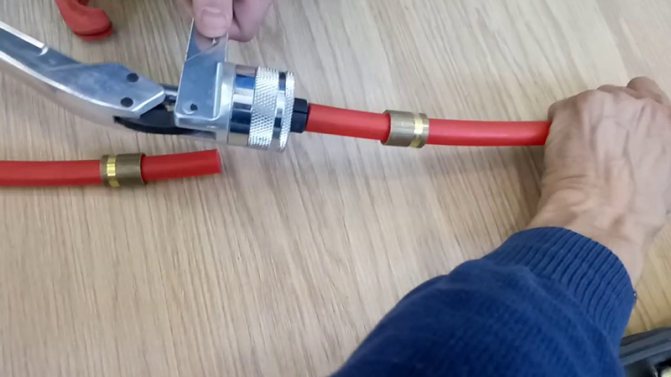
Pipes for the water system are used from cross-linked polyethylene, polyurethane, metal-plastic and copper. The most popular pipes are made of cross-linked polyethylene. Polyurethane products require special welding equipment for installation.
The best quality copper pipes. At the same time, these are the most expensive pipelines.
Warm water floors are hidden with a cement screed. How long the floor coverings will take to warm up largely depends on the thickness of the cement screed. Pipes for underfloor heating are usually used with a diameter of 16 mm. This size, confirmed by accumulated operating experience, was determined on the basis of thermal engineering calculations.

The copper pipeline begins to release heat most quickly.
Through the collector unit, a certain number of heating circuits located in several rooms are heated with hot water.
Heating engineers recommend making the length of the 1st circuit about 70 m with a pipe diameter of 16 mm. The height of the screed is recommended to be no more than 50 mm. In this case, the thickness of the screed over the laid pipes will be about 30 mm.
The floors will reach the required temperature no sooner than in half a day
How long does the heated floor warm up when first turned on under such conditions?
Practice shows that the heating time of a heated floor when first turned on can last from 12 hours to a day and a half.
To do this, the water leaving the boiler is brought to a temperature of 90°C.
After the floor has warmed up, the initial temperature of the coolant is reduced to 70°C.
If the floor takes a long time to heat up, then the reason must be sought in improper installation and connection of the heating circuits or the equipment was turned on with a “damp” screed.
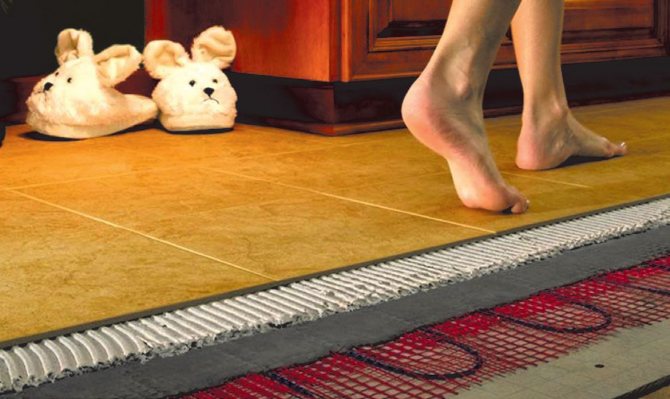
Cable floor heating
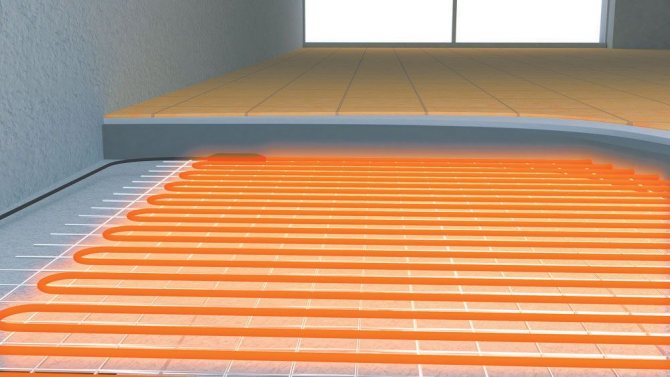
Cable floors warm up quickly and cool down slowly.
The cable is laid in the form of a spiral and a snake. The spiral shape is used in small areas (up to 20 m2). On larger bases the cable is secured in the shape of a snake.
The electric heating element will quickly heat up and begin to release heat into the body of the floor. A screed thickness of 70 mm or more will significantly increase the inertness of concrete. In this case, the longer it takes for the floor to heat up, the slower it will cool down. At the same time, energy consumption will increase significantly.
For the first heating it takes 6 to 8 hours
How much warm floors warm up when the cable is first turned on largely depends on the power of the wire.
With proper installation of electric heating and compliance with building codes when laying the screed, the time for the first heating of the base of the room can be from 6 to 8 hours.
When a cable coated with bitumen coating mastic is laid under a ceramic tile layer, the heating time of the floor covering is significantly reduced.
Film infrared heating
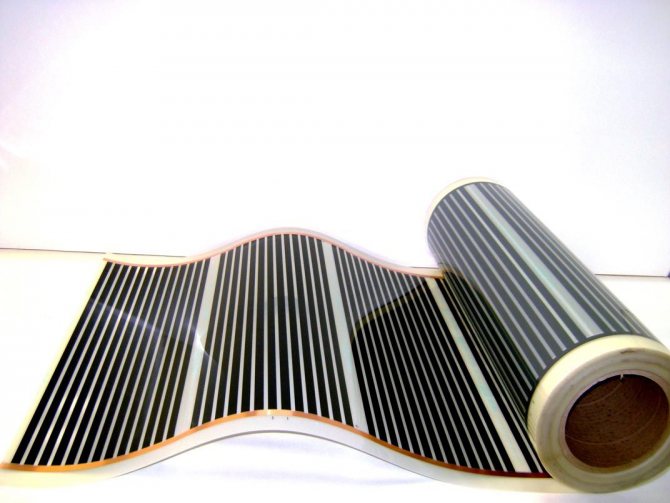
Heating after the first switch-on occurs within 2 - 3 hours.
Film infrared heated floors are attracting increasing attention from consumers. An electrode grid is soldered into the polymer layer of the film, which, under the influence of electric current, emits heat rays in the infrared range.
Many people are interested in how quickly the floor covering heats up from IR film. This question cannot be answered unambiguously. It all depends on the coverage area, the technical parameters of the IR film, and the method of laying out the connection diagram to the electrical network. But one thing can be stated that where the floor was heated under the IR coating, the first heating time was 2 - 3 hours.
Due to their design features, IR coatings can be easily and quickly installed under any floor covering, except ceramic tiles. An exception is the IR heating device under the tile. For more information about connecting and heating the floor, watch this video:
An example of an infrared heating device for laminate parquet
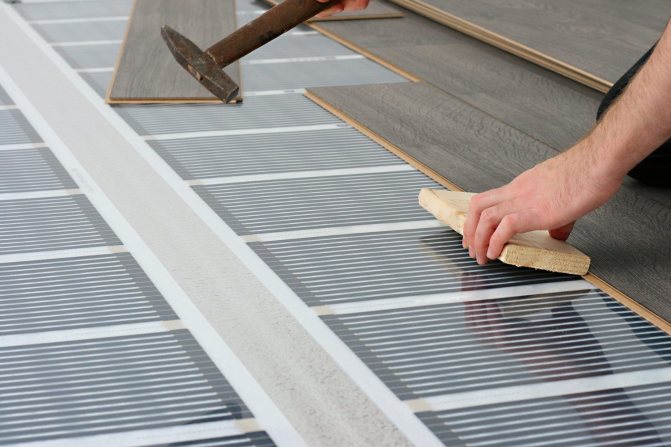
The installation of a heated floor of this type consists of several stages:
- A vapor barrier made of thick polyethylene film is laid on the finished floor base.
- Then thermal insulation is laid from slabs of polyurethane, polystyrene foam or other similar material.
- In some cases, the thermal insulation is covered with a layer of bitumen coating mastic.
- A foil backing is laid on top of the mastic or thermal insulation layer, which is laid with the reflective surface pointing upward.
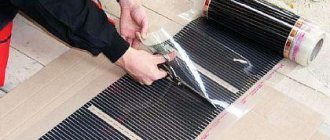
- Rolls of IR film are rolled out over the surface of the substrate. Fragments of the IR coating are connected to each other using contact clips.
- Install a temperature sensor.
- The IR heating is connected to the mains via a control unit equipped with a display.
- Conducting tests. Identified defects are eliminated. The test is repeated.
- A soft substrate is spread on top of the IR coating.
- Laminate parquet is laid on the substrate. You can watch detailed installation of the film on the floor in this video:
Let's show in the table examples of the time required until underfloor heating systems are fully heated when first turned on:
| № | Floor heating system | Time until full heating |
| 1 | Water heated floors | 12 hours or more |
| 2 | Cable heating | 6 – 8 hours |
| 3 | IR film coatings | 2 – 3 hours |
Thermostat malfunction
If the thermostat malfunctions, voltage from the network is not supplied to the heating cable or heating mat, therefore, no heating occurs. There may be several reasons: failure of the thermostat itself, breakage of the temperature sensor, switched off circuit breaker in the power panel. To eliminate this malfunction, we need to measure the ohmic resistance, for this we will need a multimeter.
If there is no indication or LEDs when you turn on the thermostat, you need to check whether the controller has power. If there is power, but the indicator does not work when the thermostat is turned on, then you need to remove it from the wall, pulling it out of the installation box to access the rear panel of the device. The wires remain connected to the regulator. Using a multimeter, we check whether voltage is supplied to the regulator and whether all wires are connected to the contacts correctly, checking the diagram in the instructions for your thermostat model.
If the fault has not yet been detected, then you should check the load created by the heating cable or heating mat used in the underfloor heating system. To do this, you need to measure their resistance by connecting the contacts of the multimeter with the contacts of the thermostat. The load resistance indicators must match the data specified in the technical data sheet of the device. If the resistance is 0, then the cause of the malfunction is the thermostat, which should be sent to a service center for repair or replaced.
If the electric heated floor does not heat
If such a problem appeared with electric heated floors, and they stopped heating, then there may be several reasons for this:
- The thermostat may have failed. It is this element of electric floors that is responsible for the “start” of putting the heating film or cable into operation. If the thermostat fails, then the heated floor will not work.
- Temperature sensor burned out. This is such a small thing that is located directly in the warm floor itself. The temperature sensor transmits data to the thermostat, and it, in turn, “thinks” whether it is necessary to turn on the heated floors. If the temperature sensor fails, electric floors will also not work.
- Problems with the heating cable, it may be damaged. Think about when exactly the heated floor stopped heating. It is possible that before this problem occurred, some repair work was carried out, and the heating elements of the heated floor were damaged.
Let's consider what can be done, in this case, to “revive” the heated floor, and it begins to warm up. If the electric heated floor stops turning on, then you need to look for the problem in the thermostat. First you need to remove the thermostat from the mounting box, and then see if all the wires are connected to its terminals.
How to check a heated floor thermostat
If you have a multimeter at hand, check whether the underfloor heating thermostat is receiving voltage. You can also check the voltage with a regular indicator screwdriver, but it is still better to use a multimeter, since there may be a phase, but there may be no zero.
In some thermostats, it is very important to observe the polarity of the connection: L is phase, and N is zero. It is also necessary to check all other terminals to which the wires go; they must be securely covered.
If the power supply to the thermostat is suitable, but there are no problems with the terminals, then the underfloor heating temperature sensor may have failed. Therefore, before taking the thermostat in for repair or buying a new one, be sure to make sure that the temperature sensor is working.

To check both the thermostat itself and the temperature sensor without dismantling the heated floors, just connect a regular light bulb to them. To do this, connect the contacts from the light bulb to the terminals for connecting the underfloor heating cable, and then turn on the thermostat. If, after changing the temperature on the thermostat, a click is heard and the lamp lights up, then the thermostat is working.
How to check the temperature sensor of heated floors
In order to check the functionality of the heated floor temperature sensor, you will need a hair dryer, and also know where exactly the sensor is located. Without turning off the lamp, take a hair dryer and heat the area of the heated floor where the temperature sensor is located.

When the floor temperature rises, the sensor must send a command to the thermostat, and it will turn off the lamp.
If this is exactly what happened, then most likely the heating elements of the heated floors are damaged. This is often what happens due to interference from third parties or due to the statute of limitations. Often, after five years of using a warm electric floor, the temperature sensor wire falls off, or other, no less serious problems arise.
Temperature sensor malfunction
If all wires are connected correctly, the thermostat works, but there is no voltage at the heating cable connection contacts, you need to check the operation of the temperature sensor. To do this, we measure its resistance indicator and compare it with the data specified in the technical data sheet. It should also be taken into account that the resistance of the sensor decreases when it is heated and may not correspond to the declared data in the passport. If there is a large difference in measurements, the faulty sensor should be disconnected and replaced with a new one.