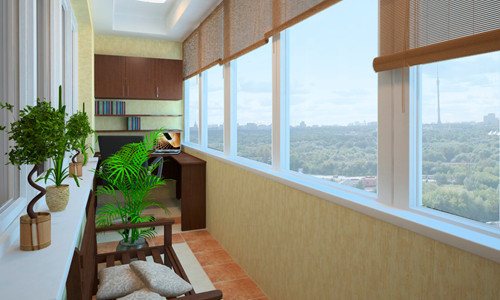
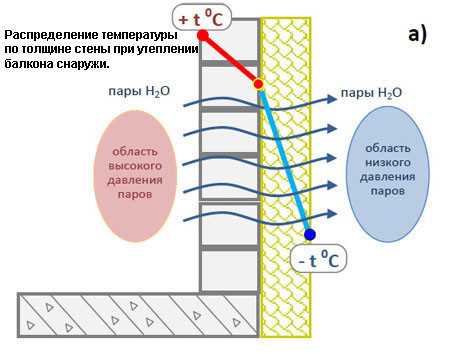
Both a balcony and a loggia are additional living space, which, as you know, cannot be too much. But to make the use of this area as comfortable as possible, it is better to insulate the balcony or loggia with polystyrene foam, and you can do this yourself.
If you live on the top floor, then the task becomes more complicated: first you need to start building the roof. If it already exists, then you need to start insulating it.
Today, there are many types of insulating materials to choose from. But still, insulating a balcony with polystyrene foam is the most common. This technology is associated with the high performance properties of the material and its low cost.
Some time ago (and in some places even today) there was confusion in the definition of a loggia and a balcony. There are important differences in the design of these additional square meters that directly affect the insulation process. The main element of the balcony is the load-bearing slab, which is held in the brickwork by only one edge. The loggias are located inside the building and have 3 points of support at once. The degree of load on the balcony and loggia in the process of “improving” them (including insulation) should be different. It’s easier to insulate the loggia with foam plastic (after all, there are already 3 walls!), but what about those who have a balcony?
Balcony insulation

To ensure high-quality insulation of the loggia, you should build a frame that will run along the entire perimeter of the slab and serve as additional reinforcement for the entire balcony.
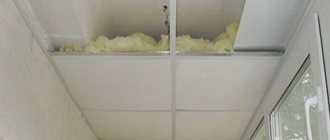
If you live on the top floor, then the task becomes more complicated: first you need to start building the roof. If it already exists, then you need to start insulating it. A well-insulated canopy roof is a multi-layer “pie”, which includes:
- the roof itself (if it is metal, then it is advisable to glue a soundproofing film to the bottom, which will save you from booming sounds during precipitation);
- Next comes waterproofing: because the coverage area is small, then instead of traditional roofing felt you can “splurge” on a higher quality material (this could be a special film based on polyester or PVC);
- anti-condensation film: a special material with a fleecy surface on the bottom side (prevents vapors from reaching the insulation);
- ventilation space between roof supports;
- windproof membrane that allows vapor to pass through from below and does not allow moisture to pass through from above;
- material for insulating the balcony (foam plastic, mineral wool);
- a film that protects the insulation from moisture from entering the home.
Calculation of the required amount of polystyrene foam
Builders recommend purchasing expanded polystyrene, the dimensions of which are 50x100 centimeters. If the balcony or loggia is small, then you can, in principle, use a whole sheet in height. But the length will most likely have to be reduced, but this will not pose any difficulties for you. This material is very easy to cut.
It is worth noting: this insulation material crumbles quite heavily. You need to be extremely careful when cutting it, and also immediately remove its crumbs.
As for the thickness, the greater it is, the better the thermal insulation. If you plan to make your balcony as an extension of the room, then it is better to choose the thickest polystyrene foam.
READ MORE: Insulation of balcony and loggia ceilings
We can come to the conclusion that for good thermal insulation you need to purchase polystyrene foam 20 centimeters thick. For the floor - 16, and for the ceiling ten centimeters is enough.
Materials for insulating a loggia or balcony
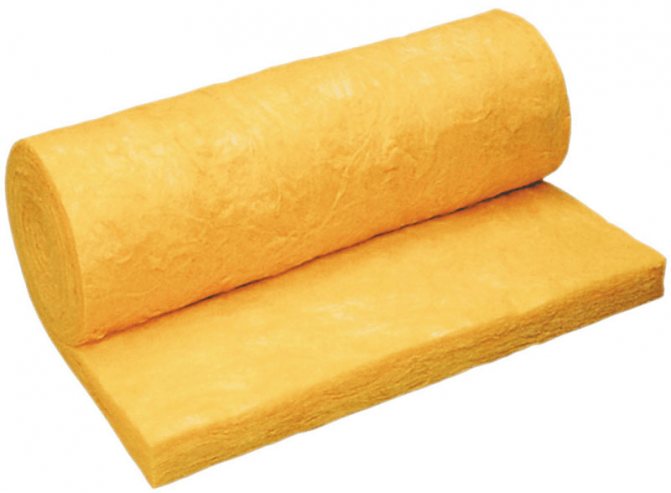
Mineral wool can be sold in rolls or sheets measuring 117x60 cm. It has a thermal conductivity of 0.036 W/m*C.
Manufacturers now offer a considerable amount of insulation materials. But, taking into account the specifics of the space to be insulated, the following materials are most often preferred.
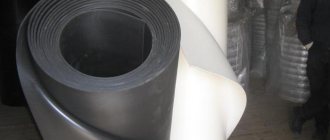
- Penofol. This is foamed polyethylene, with a thickness of 3 to 10 mm and a width of 120 cm. It is produced in rolls, covered with foil on one or both sides. The thermal conductivity coefficient is 0.037 W/m*C.
- Penoplex 35 (refers to extruded polystyrene foam). Supplied in sheets measuring 1.2x0.6 m and 2-10 cm thick. It has a thermal conductivity coefficient of 0.03 W/m*C.
- Mineral wool (the brightest “representative” is ISOVER). It can be sold in rolls or sheets measuring 117x60 cm. Thickness is in the range of 5-10 cm. It has a thermal conductivity of 0.036 W/m*C.
- Technoplex. Also applies to foam plastics. They are sold in sheets measuring 240x60 cm or 120x60 cm. Thickness is 4-12 cm, has a thermal conductivity of 0.036 W/m*C.
Materials and tools for insulating a balcony
Before starting work on insulating the ceiling and walls, it is necessary to prepare tools and prepare materials. We calculate the area of the room, purchase the material with a reserve of 10-20%.
- Extruded polystyrene foam, preferably with a stepped edge, so that the sheets fit better together;
- Vapor barrier material (foiled polyethylene foam penofol or dense polyethylene film);
- Special adhesive for polystyrene foam;
- Polyurethane foam that does not contain toluene;
- Wood beams or metal profiles for installation of sheathing;
- Plastic dowels with disc head;
- Scotch;
- Construction level, stationery knife;
- Drill, hammer drill, screwdriver, stapler, electric jigsaw, grinder.
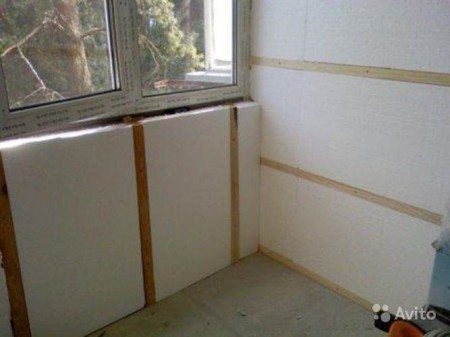
Foam insulation
The foam can be additionally secured with special mushrooms (one per sheet in the center is enough).
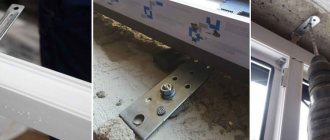
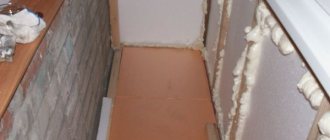
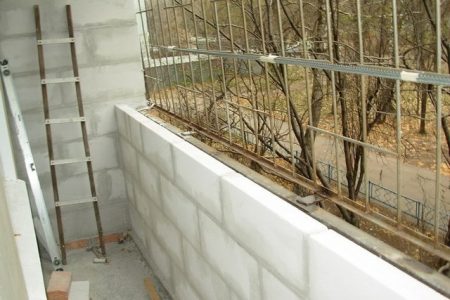
If you do not have a loggia, but a balcony, then you will have to strengthen the parapet so that it can withstand the weight of the glazing. On the other hand, the parapet should not be heavy so as not to put pressure on the floor slab. Typically, gas silicate or foam concrete blocks are used to construct a parapet, which are much lighter than brick and are easy to lay with your own hands. But the blocks have a serious disadvantage: they “remarkably” absorb moisture. Therefore, insulation technology involves protecting the balcony from the outside with hydrophobic impregnation or siding panels. After the parapet is built, you need to start gradually insulating the balcony with polystyrene foam. Polystyrene foam is most often used as insulation material. Its “competitor” - mineral wool - is rarely used, because it is more sensitive to moisture.
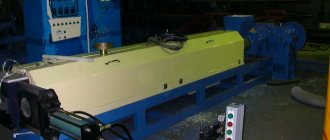
Extruded polystyrene foam for balconies and loggias
Extruded polystyrene foam is the same foam, but made using a different technology. The raw material is fed through a molding machine (extruder), which compacts the slab. In this way, a homogeneous dense structure with increased mechanical strength is achieved. Extruded polystyrene slabs easily withstand loads from walking and other mechanical influences, and practically do not shrink.
The advantages of extruded polystyrene are as follows:
- excellent insulation even with small thicknesses - 2-3 cm.
- zero hygroscopicity;
- vapor tightness;
- ease of installation.
Thanks to these features, the material is suitable for thermal insulation of rooms from the inside. Often this type of turnkey insulation of balconies and loggias is carried out by craftsmen. Although simple installation technology allows you to do it yourself.
There are quite a few manufacturers of XPS polystyrene. Despite this, it is possible to insulate a balcony with Penoplex or Technonikol equally well if the material was purchased from a reliable supplier and has certificates confirming its quality. We recommend using for thermal insulation:
- TECHNONICOL CARBON ECO 1200x600x20 mm - for rooms with a small area. Due to the small thickness, high-quality wall insulation is achieved without “eating” the area. These plates are mounted end-to-end. For better thermal insulation, it is recommended to foam the joint.
- TECHNONICOL Technoplex 1180x580x50 mm is a good choice for insulating both walls and floors with ceilings from inside the balcony. The increased thickness makes it possible to enhance the thermal insulation effect and further increase noise absorption from the street. The presence of a tongue-and-groove lock allows you to avoid cold bridges across the joints.
- TECHNONICOL CARBON ECO 1180x580x100 mm is the choice for spacious and heated rooms. If your block has been demolished, and the balcony or loggia is part of the room or kitchen, this brand of extruded foam will be the best option. This foam ensures that there is no penetration of cold from the outside and no heat leakage from the room. If you follow the instructions for insulating balconies from the inside, it will ensure a guaranteed high result.
How to insulate a floor with your own hands?
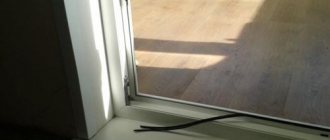
At first glance this is not difficult to do; It is enough to lay wooden logs, foam insulation and cover it with a finished floor. However, the laws of attraction are still in effect and all the moisture that forms on the balcony will inevitably rush to the floor. Therefore, you need to arrange a double layer of waterproofing. The first is laid directly on the supporting slab. The second is between the insulation and the finished floor. Moreover, the waterproofing must be laid so that it overlaps the walls.
At the last stage, it is necessary to fill all the cracks with cuttings of thermal insulation and polyurethane foam. According to the relevant instructions and regulations, it is strictly forbidden to place heating radiators on the balcony or loggia. If you still need heat, you can install a heated floor (electric) with your own hands, install an electric fireplace or a convector.
Preparatory work
Before insulation, it is imperative to prepare the surface that will be insulated, as well as the balcony itself. To insulate a balcony with extruded polystyrene foam, you will need to thoroughly clean it of construction and any other debris, remove clotheslines (if any), as well as shelves and various fasteners that stick out. After this, you need to dispose of the garbage and vacuum the room well.
READ MORE: Insulation of a panoramic balcony
The second stage will be dismantling the old finish. If cracks or holes are found on the floor, they must be removed using a wet or dry screed.
The last operation will be to treat the walls with an antifungal primer that penetrates deeply into the wall. It will help strengthen the walls and protect them from various types of moisture and mold.
This insulation can be fastened in two ways: fasteners or glue.
Glazing and insulation with removal
The balcony itself has a small area. And if you also carry out high-quality insulation and glazing, then the already small volume of this space will be significantly reduced. Increasing the width even by 20 cm gives a very noticeable effect. And it is completely doable! It is unlikely that you will be able to carry out such an operation with your own hands. The problem must be solved at the glazing stage. You should order glazing with extension outside the balcony on one or all 3 sides. As a result, you will have window sills on which you can place, for example, flowers or just lean on your elbows. With such insulation, one should not forget about the newly formed additional planes: the window sill below and the canopy above.
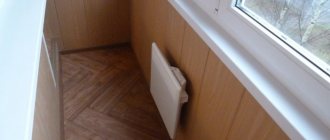
Insulating a balcony or loggia with your own hands is the transition of an unorganized and usually cluttered area into a cozy and functional room. You can relax there, admire the sunset while drinking tea, or even have a romantic dinner. Even if it is small, but your own “house”, made with your own hands, is full compensation for the money and labor spent.
Technology for insulating a balcony or loggia
When doing the work yourself, you can be absolutely sure of the quality of all stages and at the same time reduce repair costs. Having studied the technology in the video, you can easily insulate the loggia without outside help.
Advice! Before insulating a loggia or balcony, make sure the quality of the glazing. Slots in balcony windows will lead to cooling of the room. The best option is to use plastic windows with double glazing.
Preparatory stage
Before starting work on the loggia, you need to carefully prepare it from the inside. To do this, remove everything that was there, leaving clean walls and floors. All surfaces are checked for cracks, chips, rust on metal parts, and crumbling plaster. Remove nails and fasteners protruding from the walls. Cracks and holes are sealed with polyurethane foam or cement-sand mixture. Metal elements are treated with an anti-corrosion compound.
It is advisable to treat all surfaces with an antiseptic to prevent the appearance of fungi. If necessary, the surfaces are covered with a layer of liquid waterproofing, which can be applied with your own hands using a brush or roller. Before starting insulation, all surfaces must be clean and dry. For work you will need the following materials:
- sheets of expanded polystyrene (it can also be extruded);
- vapor barrier film;
- construction tape;
- polyurethane glue;
- plastic dowels “mushroom”;
- polyurethane foam that does not contain toluene;
- wooden beam for lathing for finishing;
- for the floor, dry mixture for screed or wooden logs;
- finishing materials for ceilings and walls.
Laying thermal insulation
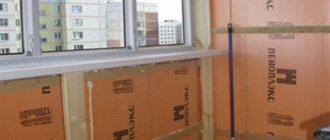
Insulating material must be placed on all surfaces from the inside of the loggia: external and internal walls, ceiling and floor. It must be laid in the following order: