Do-it-yourself mobile sauna: 3 popular options for a camping steam room
A DIY camp sauna is one of the easiest options to implement.
Having built a small sauna tent, you can take a steam bath while hunting or fishing, as well as while hiking. If desired, such a structure can be built even on a suburban site, if the traditional option is still at the design or construction stage. DIY camp sauna
Do-it-yourself camp sauna - photo
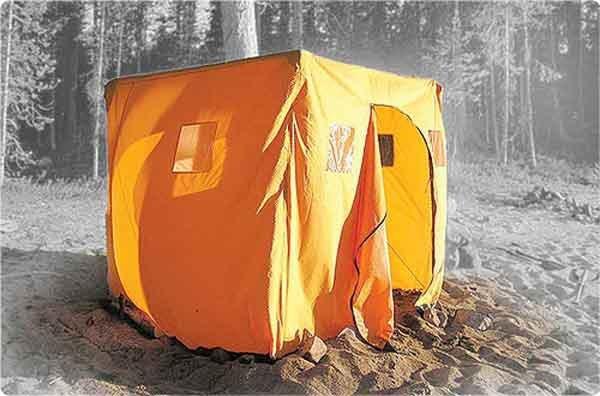
There are many manufacturing options. You can purchase a ready-made portable tent - entirely or in parts (stove, awning, frame).
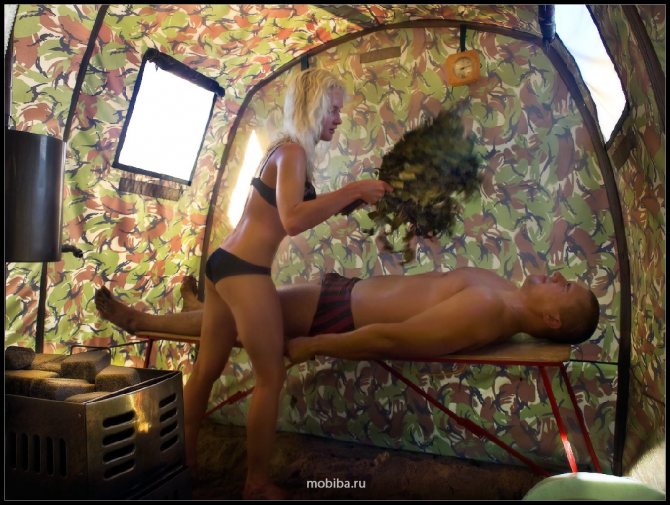
Mobile sauna
Mobile portable bathhouse Mobiba
Mobile sauna Mobiba
Mobile sauna inside
There is an alternative option - to make a bathhouse from a tourist tent, but exclusively of the Soviet type, that is, made of tarpaulin. This is explained by the fact that modern tents are made from fabrics that are not only not designed for high temperatures, but are also capable of releasing harmful substances when heated. As for the old canvas models, they are quite suitable for this: there are no harmful fumes and the thermal insulation is good.
Canvas tent
If we talk about creating a camp bathhouse from scratch, then this will require a frame, thermal insulation material and a stove.
Features of the design of a camp bath Description
Frame | It is better to make it from aluminum posts (for example, from a sales tent), since this material is safer than wood. In the absence of such, you can make supports from young trees, but in this case you will have to carefully ensure that the wood does not ignite. To fix the frame elements, you can use both rope and soft wire. |
| Covering material | The simplest option is thick polyethylene film, but due to its disadvantages - low thermal insulation qualities and density - it is preferable to use tarpaulin. It is important that it is a large and solid piece of material. The size of the covering material depends on how many people will be steaming at the same time, but if there are no more than four or five people, then a piece of 6x6 m will be enough. |
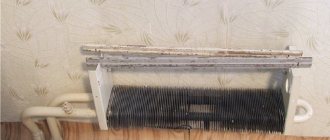
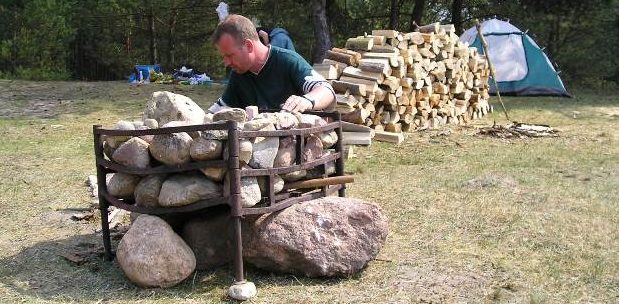
| Walking heater Portable metal heater | Here the choice is also quite wide: you can install a factory-made stove-heater, you can make it yourself in the form of a mesh metal box made of metal rods or thick wire, or you can simply build a well of rounded stones and line it with firewood. |
Note! A camping sauna can be made “white” (that is, the heater is built separately, and the hot stones are transferred to the tent) or “black” (the stove is installed directly in the steam room). Today we will take a look at each of the options.
Important Terms
A camp sauna can be made only under certain conditions. The resting place must meet the requirements below.
PhotoConditionsDescription
| The presence of a body of water is an important factor | First of all, there must be water there. | The ideal option is to choose a place on the bank of a river or other body of water. |
| Stones for the stove | There should also be stones there. | Layered cobblestones should not be used, as when heated, they can fly apart into pieces, causing serious injuries to steamers. The stones should not be too small or too large, the optimal size is 100-120 mm, the shape is somewhat elongated. If the stones are smaller, they will not be able to accumulate the required amount of heat and will cool down very quickly; Large specimens will take a very long time to heat up. Although, if you have time, you can build a kind of foundation from large stones for a future fire. If there are no boulders, then it is quite possible to use pebbles. As for the quantity, for each person who will steam, you will need 1 bucket of stones. Therefore, each participant is required to collect a bucket of boulders for themselves. |
| Frame material | Near the resting place there should be thin young trees (or better yet, dead wood), which will be used to construct the frame (if the aluminum posts were not prepared in advance). | From these trees you need to make poles with a diameter of about 30-40 mm, and you should also think about the method of attaching them in advance. |
| Firewood | A fire will require firewood, and in large quantities, because it will burn for at least 3-4 hours. | Excessively thick logs are not suitable for this, as they do not burn well. The maximum diameter of the firewood should be 100-150 mm - this way they will quickly burn out and transfer all the heat to the stones. |
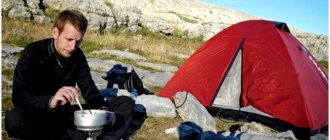
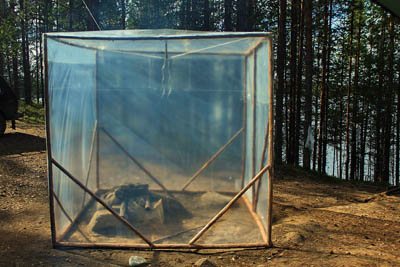
First, we will consider the simplest option, for which only adhesive tape and film (and possibly clothespins) will be required from special materials. We are talking here about a sauna-tent “in white”, i.e. the stove will be located separately from the steam room.
Making a camp sauna
We start with the construction of a camp bathhouse.
When we talk about a bath, we understand first of all not that it is an opportunity for a quality wash, but also that it has huge health benefits. When we go on a hike, we know for sure that we get rest, improve our health, and recharge with energy. And if there is a camp sauna made with your own hands, then all the beneficial effects are multiplied many times over.
Photo of a simple camp sauna
Winter, forest and bathhouse!
On a long hike, sometimes problems arise with washing yourself. But if you imagine that you can go to bed not only clean, but also relaxed and unfrozen after visiting an excellent bathhouse. The difference will be felt immediately, and your rest at night will allow you to fully enjoy the next day.
DIY camping bathhouses come to the aid of those summer residents whose main bathhouse is under construction. In addition, it is an excellent option for construction teams who are tied to a construction site for a long time.
Schematic distribution of zones in a camp bath
There are no fundamental differences between this design and a conventional bathhouse: you will need to organize a closed space that performs the functions of a steam room and manufacture a stove for such a camping bathhouse. Sometimes, during a camping trip, a special stove is not used, but using stones, something similar to a fireplace is built, where a fire is lit.
Stones are later placed in such a fireplace, and the main task is to heat these stones to the temperature necessary to produce the required amount of hot steam.
When installing such a homemade sauna “stove,” they try to use rounded stones, due to the fragility of flat and layered ones. When heated, they become covered with cracks, fragments are formed, which fly apart, which can lead to damage to others. Therefore, there are two options here: stay away when heating stones, or there is another, more civilized way - buy either a ready-made stove, or the entire structure.
In addition to the stove, there is a frame that is covered with some material that prevents heat leakage. In order for the heat to be constantly present while in the bathhouse, firewood must be constantly added.
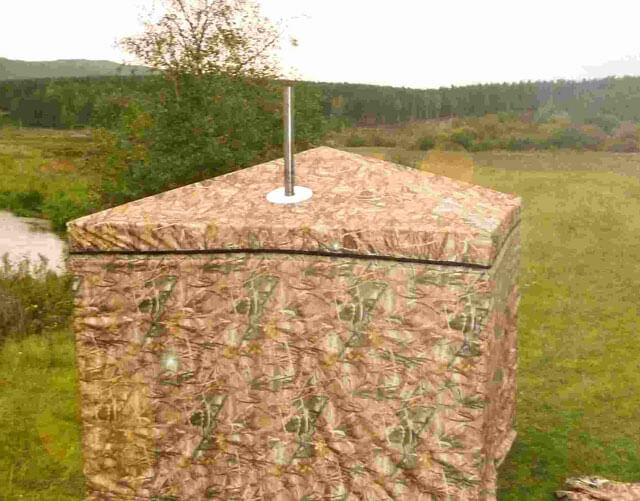
A purchased camp sauna takes up little space
When it comes to ready-made mobile structures for camp baths, it must be said that the choice is quite large. You can buy just a tent for organizing a camping steam room or complete with a stove. There are only awnings, without a frame, which is assembled independently.
After purchasing a ready-made kit right away and if the stove is included, then problems associated with organizing a steam room in the so-called field conditions will not arise. True, the price will be much higher.
The only negative is that all the elements, although they are as lightweight as possible, are still not easy to carry. Therefore, it is necessary to have some kind of vehicle. Although for builders or summer residents it will be an ideal option.
It is possible to purchase a special tent, knowing that you can find material for the frame locally, or it could be a sauna tent, complete with frame.
Be that as it may, this is quite convenient, because the problems of heat preservation are solved much easier, since such awnings perfectly retain the temperature. After constructing the stove, you get a full-fledged steam room - warm, cozy and, most importantly, hermetically sealed.
So, you are faced with the task of how to make a camp sauna with your own hands. There is nothing complicated, the first thing is to clearly plan what actions we will perform and what materials will be needed.
Many people believe that in order to take a steam bath in camp conditions, you need special equipment and special skills and knowledge. In fact, a camp bathhouse with a stove is very simple to build, and does not require practically any tools other than those that you already take on a hike: an ax, a shovel and, in some cases, a hammer.
The easiest way to arrange a bathhouse
This chapter is a kind of instruction on how to make a sauna in camping conditions, and by following each of the stages, you can easily take a steam bath even far from the benefits of civilization. The requirements are quite simple, but the reliability and convenience of the structure depend on their implementation.
The tradition of taking a steam bath on the weekend goes back a long way. But not everyone has the finances necessary to purchase a plot. And even more so, to build on it, in addition to housing, also a good bathhouse. The way out of this situation will be a mobile design.
Considering all possible models, we can highlight several designs offered on the market.
A tent sauna is the simplest of the possible sauna options. A camp bathhouse will allow you to relax during a long hunt or fishing, on a hike or during a jeep safari. It can also be installed on a summer cottage (if a “stationary” bathhouse is being built or is still at the design stage).
A camping sauna tent is an excellent option for relaxing in the country, fishing or hunting
There are many options for making a sauna-paltaki. You can buy a ready-made tent with or without a stove, or you can build everything entirely from scrap materials. It is not recommended to use regular camping tents. Firstly, such fabrics are not intended for high temperatures and you will soon have to buy a new tent, and secondly, when heated they can emit harmful substances.
Portable
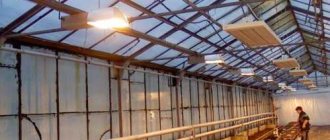
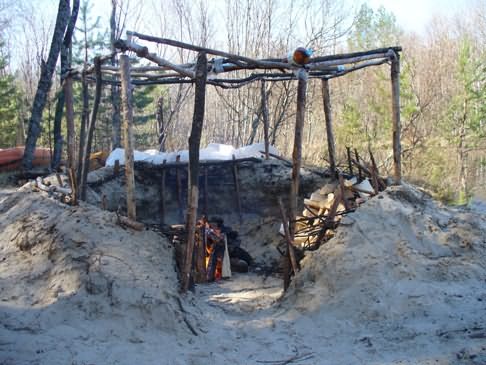
Stages of building a camp bathhouse on a solid wooden frame - an ideal low-budget option for a summer residence
What types of camping baths are there?
There are several options for making a tourist camp bath:
- based on the purchased stove and tent;
- made entirely from improvised means;
- combined from specialized and improvised materials.
The first method of building a camp bath is the simplest, however, it has several significant disadvantages:
- acquisition costs;
- transportation of a large stove and frame;
This option is suitable for tourists who often travel outdoors in their own car. If the installation of a camp sauna tent is planned very rarely, then there is no particular point in purchasing specialized products.
Completely different types of baths are used on husky trips and on ski trips to Kazakhstan.
Attention! It is not recommended to use synthetic tents to build a sauna. They are not intended for high temperatures (even if they are fireproof) and can quickly deteriorate and release toxic substances during heating. It is possible to make a tourist bath using tarpaulin tents.
Choosing a place to install a camp bath
To install a camp sauna, you need to choose a place where there will be enough stones to build a stove. The most suitable option would be a forest river, since in such an area you can find stones, materials for kindling and building a structure. The presence of water nearby also plays an important role, thanks to which you can get steam without extra effort.
What you need for a camp sauna
Before you make a camp sauna with your own hands, you need to arm yourself with a tarpaulin or plastic film, as well as a frame, or make one on site from sticks. To construct the frame on site, you need to take adhesive tape or twine. An indispensable attribute on every hike is a camping knife, which does not take up much space, but has a wide range of applications in nature.
Arrangement of a portable bathhouse with your own hands
In order to make a regular version of a camp bath, you will need:
- stove-stove;
- tent;
- special frame.
Previously, a bathhouse awning was made from film, installed on a frame, and the gaps could be glued together with ordinary tape. And why not a bathhouse?
But unfortunately, the required amount of film for the steam room is very voluminous, and such a load will take up half of the backpack. This material takes a very long time to dry, and it will be quite difficult to fold the film into the initial package.
The sauna, set up in wild conditions, consists of three sections:
- Waiting room.
- Steam room.
- Kamenka. A stove made of stones should be built in this section.
A portable camp sauna in its modern form is made of special nylon fabrics. Even though they are very light, the nylon material is much stronger than film. And most importantly, you will save space in your backpack.
Of course, a mobile bathhouse is more expensive, and only four people can carry out procedures in it; if you have room, five people. But what if there are more people willing to take a steam bath? Unfortunately, in stores you will not find an option for a larger number of people. Here you will be saved by a hand-made mobile sauna, and you can control the quality personally. If a mini sauna option suits your company or family, you can purchase a “warm place” in any travel store.
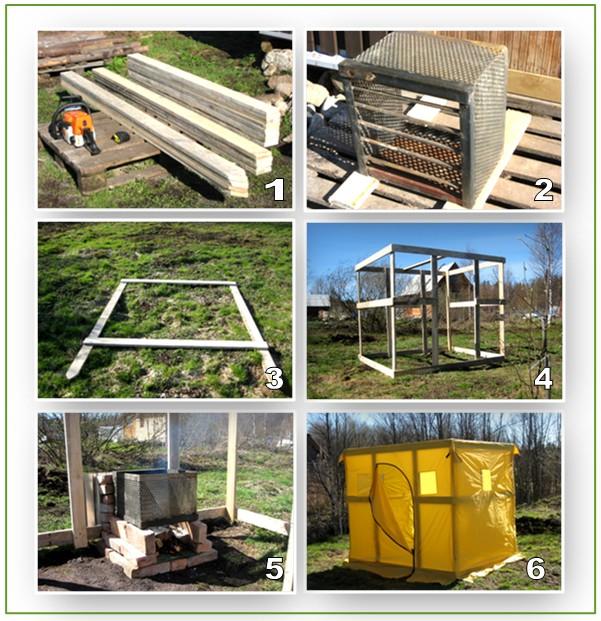
- wooden beams or boards for constructing a bathhouse frame;
- a metal perforated box with a grate that will serve as a container for coals. This is necessary in order to pour water on the hot stones, and hot steam will come out through all the holes in the box;
- bricks for laying an improvised stove with a firebox;
- an awning or oilcloth with holes for entry and ventilation to cover the prepared frame.
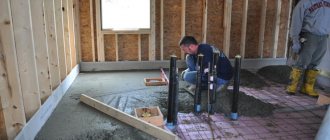
2. Assemble the frame from the prepared boards and lay out the stove with space for firewood.
3. Place a container with coals on the stove and cover the structure with an awning or film.
By following these instructions, you will get the ideal budget option for a holiday in the country.
An ordinary camping sauna with a stove is the simplest and most tourist-tested option. It is not only reliable and convenient, but also not expensive: sewing a tent and purchasing accessories will cost several times less than a ready-made structure purchased in a store. Use the money you save to buy a good camping stove, stones and other pleasures.
This type of bathhouse is very spacious: it can easily accommodate a group of 8 people and still have some room left over. It can serve as a canopy in rainy weather. A store-bought bathhouse will not provide such comfort.
Such a bathhouse is 2 m wide, 2 m high, 2.5 m long. Its weight is approximately 2 kg, if folded - 40 * 20 * 20 cm.
To build such a bath you will need the following materials:
- a set of slings 50 mm thick and 0.5 m long, as well as blanks 25 mm thick, 2 m long;
- 2.5 m of tape 15 mm thick;
- elastic band 2 cm wide approximately 2 meters;
- spool of thread (nylon or lavsan);
- zipper with a dog on both sides 2 meters long and 7 mm wide;
- polyester cord – 16 meters.
All parts cut out according to a special pattern are sewn together with thread using a double seam (first of all, the walls of the future bathhouse, then the dumps, which do not need to be sewn in the corners).
Lastly, we attach the roof, zipper and tape. In order to make guy loops, we fold a cut piece 50 cm from a 25 mm wide sling and 12 cm of a board, the width of which is 5 cm. Then we attach a cord for subsequent stretching and installation of the awning. We attach it to the outer loop.
We make loops on the lower corners of the tent using elastic that needs to be folded in half. When installing the bathhouse, insert the ends of the pillars into the middle upper loop. Rubber bands can be attached directly to the pegs.
To be finally ready for a hike, make a cover for your new camping sauna for ease of movement.
Mobile sauna
Canvas tent
The construction of an ordinary camping bathhouse is quite simple - a primitive stove, tent, frame. But once upon a time, a bathhouse awning was made of ordinary polyethylene film, which was fixed on a frame of thin poles, and the seams were glued together with adhesive tape like adhesive tape. It would seem, why not an option?
It turns out that in terms of weight, such a volume of film, which takes up half of the backpack, is not very pleasant for long hikes. And drying it after bath procedures is a whole problem. However, as well as carefully putting it back into your backpack.
That is why modern mobile baths are made mainly from lightweight nylon fabrics, which are much stronger than film, lightweight and take up very little space when folded. True, they are more expensive than previous versions, but only 4-5 people can enjoy bath procedures in them at the same time.
What to do if the whole family or the whole company needs to steam at the same time? There are no such options in modern stores. Then it’s time to think about how to make a sauna with your own hands - portable, reliable and mobile. If a mini-bath is enough, you can look for a suitable model from those on sale.
Other types of industrial mobile baths are already less popular due to their instability in the wind - these only need to be pressed down well with stones so that they do not blow away at all. In general, they, like Mobiba and Novotoruska, are an easy-to-transport tent tent, and that’s all.
The bathhouse made according to this project can accommodate 8 people - and there will still be a lot of space left due to the inflating of the bathhouse with hot air. And such a bathhouse can even be safely used as a quickly deployable rain shelter, which cannot be done with a store-bought version.
So, its width is 2 m, height – 2 m, length – 2.5 m, weight – 1.9 and dimensions when folded – 40x20x20 cm. And here is what you will need from materials:
- Slings 50 mm 0.5 m long and 25 mm 2 m long.
- 2.5 meters of 15 mm braid.
- Reznik (2 cm) – 2 meters.
- Lavsan or nylon threads - 1 spool.
- 7 mm zipper with two-way pawl, 2 meters.
- Polyester cord - 16 m.
So, all the pieces according to the pattern need to be sewn together with nylon threads with a double seam - first the wall parts, then the lower moulds, which are not sewn together at the corners. The last thing you need to do is attach the roof, zipper and connecting tape. To make guy loops, you need to double fold a 50 cm piece of sling with a 25 mm diameter and 12 cm of sling with a width of 5 cm - as shown in the diagram. A cord should be tied to the outermost loop, which will stretch and secure the bath tent.
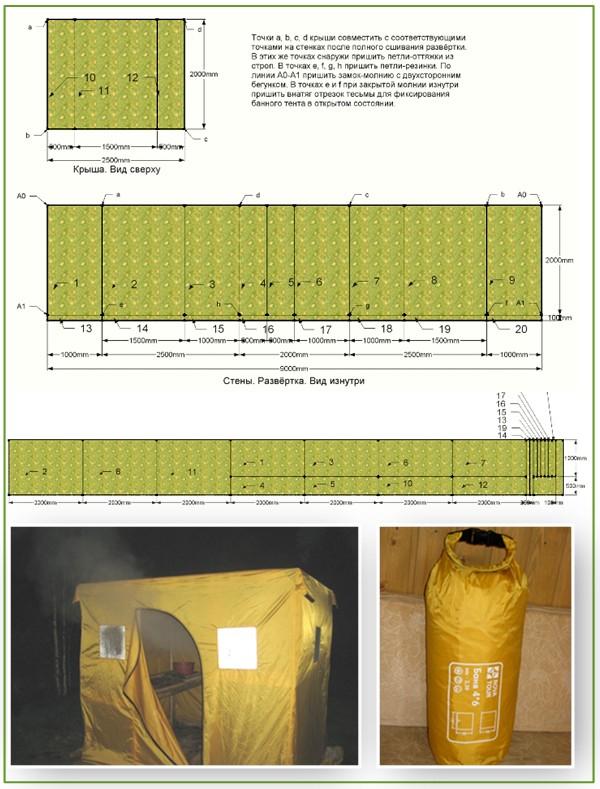
Cutting fabric for making a camp bath
Now you need to make elastic loops - from a piece of elastic folded in half and sew them in the lower corners of the awning. In the resulting middle upper loop, when installing the bath, the upper ends of the columns will be inserted. In addition, the elastic bands themselves can be pulled directly onto the pegs, without even threading the posts through them.
All that remains is to sew a beautiful and comfortable cover for the new camping bathhouse, and you can go camping.
Portable
The total weight of all components is 20 kilograms. All of them fit in a hiking backpack. The sauna can be assembled in literally 15 minutes and 2 to 3 people can take turns taking a steam bath in it.
Transportable
An analogue of portable baths, but these are larger structures. They are transported in car trunks. Even 6 people can steam in such baths at the same time. Depending on the chosen type, they also differ in components. The frame can be assembled from wooden slats, covered with cellophane or nylon.
For lovers of extreme winter recreation, there are transportable frame baths. The walls are assembled using a tongue-and-groove system, and the entire structure is covered with tarpaulin. These types of mobile baths take about one or two hours to assemble.
Baths made of timber
A transportable version of the bathhouse, but only in a non-dismountable form. This is a small structure made of 2 by 2 meters timber, mounted on a chassis. The mini-trailer is transported by car to the desired rest point. There are options without a wheelbase. They are transported on trucks.
For a small family, this is an ideal option. Let's say you have a summer cottage. There is simply no point in building a permanent bathhouse, but a mobile structure with or without wheels will come in handy.
The type of stove has a huge impact on comfort. Since the bathhouse is not permanent, it must be able to provide the required level of heating. Having a welding machine and the skills to work with it, you can make a good potbelly stove, with a built-in water tank and a place for laying stones.
Modern portable camp baths are made from special nylon fabrics. Even though they are very light, the nylon material is much stronger than film. And most importantly, you will save space in your backpack.
As a rule, a camp sauna consists of:
- skeleton;
- awning;
- stoves;
- heaters.
If you do not have enough available funds to purchase a finished product, then it is better to start arranging a bathhouse with a stove yourself. However, it is worth remembering that to assemble such a sauna tent in camping conditions, preliminary preparation is still required.
First of all, you should take care of assembling the frame. It can be made of strong hollow pipes that can be easily assembled into a single structure and disassembled after use. However, strong sticks are also suitable - they are secured with strong ropes or wire. The size of the frame should be sufficient to accommodate steamers and a stove with a heater.
You need to start by choosing a place. You will need a flat piece of soil near a pond. It is better to arrange such a bathhouse on the banks of a river, stream or lake: it is good to plunge into cool water after the steam room, and you will need to wash somewhere.
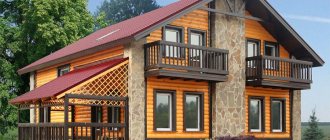
The least expensive and at the same time functional solution is a budget bathhouse - built with your own hands on a summer cottage.
A bathhouse is a useful building!
Unfortunately, almost all budget projects are characterized by rather low quality of material and, accordingly, fragility, since the low cost of the design initially implies this drawback. Not many people will like this circumstance, since, despite the reduced cost, the price of construction still remains quite significant and few people will want to throw money away.
Do-it-yourself camp bathhouse with stove, diagrams, drawings
You need to start by choosing a location. You will need a flat piece of soil near a pond. It is better to arrange such a bathhouse on the banks of a river, stream or lake: you will need to wash somewhere, yes, it is good to plunge into cool water later after the steam room.
Collecting materials
After this, you will need to worry about finding frame material, firewood and stones. If you have a ready-made awning or an old canvas tent, there will be less hassle; if you don’t have anything like that, you can get by with a piece of plastic film. Its dimensions depend on what size you are going to set up a tent. And for 4-6 people you will need a piece of polyethylene 6 x 6 meters (the thicker the film, the better), if a couple of people will be steaming, then a fairly small one structures.
Poles for the frame can be found in the nearest forest or planting, where you also need to find dead wood for the stove (or bring a couple of bags of coals with you). And one of the important activities is searching for stones, thanks to which you can take a steam bath. When they heat up, they accumulate heat and allow the steam room to maintain the required temperature for some time. It is advisable to pick up stones on the banks of a river or lake. They should be smooth, without foreign particles and inclusions (mica sparkles, layers of quartz, etc.), they should be homogeneous.
Bath stones can be picked up on the river bank
Equally important! The stones should not be very large, but not very small either. Having caused serious wounds, layered stones can break into small pieces when heated. The most optimal size is 10-20 cm and a slightly elongated shape. Although, if you have enough time, you can also lay large stones as the basis for the hearth. They will not accumulate much heat and will quickly cool down, and it takes a lot of time to warm up large specimens, if you take smaller stones.
_
Size
— geom. the numerical value of the linear quantity in the selected units of measurement. (GOST 21778-81)
Don't forget to make a broom for the steam room. When the main part of the work is done, and you wait for the stones to heat up, however, you can do this not very much later. Fortunately, there are plenty of materials for it both in the forest and in the field.
_
Weight
— BRUTTO (from Lat. massa – lump, piece + IT. brutto) – total weight of the cargo.
Stages of making a camping sauna tent
When all the materials have been collected, you can proceed to constructing the steam room. To do this, first of all, you build a hearth/fire/fireplace out of stones - whoever has the skill or desire to do it.
How to fold a stove for a sauna tent
After this, light a fire, one of the simplest options is to lay firewood and stones in layers. Until the stones turn red or white (depending on the degree of heating and the type of stones), then you only need to maintain intense combustion until then.
When constructing a fireplace, you can use an iron sheet on which to lay stones
When the stove is folded and the fire is lit, you can proceed to assembling the frame. And if the height of the iron posts is not enough, and they are hollow (as is usually the case), then they can be extended with the same poles. If you have an iron frame from an old tent, that will also work. So, you need four corner posts that need to be driven into the ground. From above, along the perimeter, it is necessary to tie poles that will connect everything into one structure.
Making a frame around the hearth/fireplace/stove
It is advisable to tie a few more sticks on the roof - they will prevent sagging. You can secure the poles with rope, wire, tape, etc. It is necessary to add more strapping around the perimeter approximately at the middle of the height (do not forget to leave room for entry by raising the harness higher on one side), if the tent is high. The main thing is that the design is sufficiently reliable.
Real tourist bath attendants have a ready-made frame for a camp bath in their arsenal. Most often, such frames are made of light alloy tubes.
You can use a ready-made prefabricated frame for a sauna tent
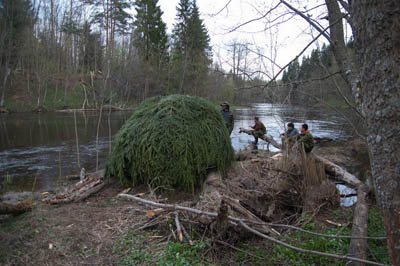
Later, after installing the frame, you can flood the heater. And on top - the foliage of birch, oak, linden - any trees that are nearby; the best option is to lay coniferous spruce branches underneath. While the stones are heating up, start laying out the floor.
We insulate the floor of a sauna tent using pine spruce branches
Set the water to heat, and while it is heating up, you can begin to pull the awning and secure it when the stones begin to heat up. Or the roof - taking into account the design of the awning/film, you can leave either one of the sides open. Just until all the wood burns out, there is no need to seal the tent hermetically - you can inhale smoke, or, which is much worse, carbon monoxide.
Leaving only the heated stones, when all the firewood has burned out, the ash and coals are raked out and taken out of the tent. The air in the camping steam room will warm up well by the time you seal everything up. Now you can seal everything hermetically. After pouring water or brewed herbs onto the hot stones, all you have to do is add steam. The camp sauna tent is ready. You can steam!
The heat will not be enough for a long time and you need to steam quickly, if you use plastic film. And this is almost a real bathhouse, if you used a tarpaulin, then the heat should be enough for 3-5 full sessions.
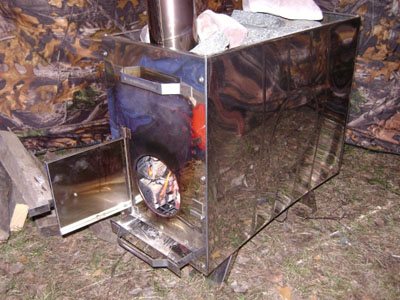
Features of creating camp stoves
For a mobile bathhouse, you can make a stove directly at your resting place.
If you have a car, you can make a more advanced version from a pipe and a potbelly stove. Where can you get stones? It is better to purchase them in advance in the store, and find a few more cobblestones of not very large size on the spot. Stones bought in a store heat up instantly, but also quickly give off heat. Therefore, the stones you find will help retain heat longer.
There are three masonry options:
- Solid.
- Vaulted.
- With jumper.
It is worst to use the “solid” option, since the fire does not reach the top stones. The easiest way is to fold the stove with a jumper.
You can heat hot water for the bath on the stove using a metal bucket. It will boil within 3 hours. All that remains is to take a broom and pour water over the stones. Enjoy Your Bath!
A camp stove for a mobile sauna can be made right on the spot - just repeat what you see in the photo below.
If you have something to transport it on, then a more substantial stove can be made - from an old metal pipe or potbelly stove. But as for stones for a mobile sauna, the easiest option is to purchase a package of ordinary and inexpensive ones, and get a couple of medium-sized cobblestones in the area. The advantage of purchased stones is that they heat up well and quickly - however, they cool down just as quickly. That’s why it’s a good idea for them to transfer warmth to their larger wild “relatives.”
In order to get hot water for a mobile sauna, just place a bucket of water on the stove - after 3 hours it will start to boil. All that remains is to soak the broom, apply water with aromatic herbs to the stones - and with light steam!
Despite the fact that you can buy heating elements for a mobile sauna in a store, many people prefer to create a stove with their own hands. The main feature is the correct choice of materials. This will make the bathhouse not only practical, but also safe.
How to light a camp stove
| View | Peculiarities |
| Increased attention should be paid to stones. | If some need to be heated to white, then others should be red hot. And only after this you can begin bathing procedures. |
| Be careful about what kind of firewood you are going to use. | As for firewood, the use of construction wood or sleeper scraps impregnated with special agents is prohibited. Such actions will lead to the release of harmful substances during vaping and, accordingly, poisoning of the body. |
To better retain heat in the tent, you need to lay a sheet of iron under the heater.
Camping sauna with stove - how to assemble it yourself, types of structures
The easiest way to make a tourist bathhouse is to equip a tent for it. In this case, you can use any model according to the number of seats. Only it should be a tent based on a plug frame. There is no need to invent anything, buy aluminum tubes, design a frame and cut the material.
The only drawback is the lack of space for the chimney from the stove. Self-assembly of a mobile bathhouse begins with this element. You can make a hole by cutting out a certain section of fabric and equipping the place with grooves for attaching insulating material, which can be plywood or aluminum sheet.
A corrugated hose used for kitchen hoods is used as a chimney from the stove. A chimney deflector is not needed in portable structures. The draft is supplied due to a small pipe bend. The stove is made of sheet iron. During operation, the metal can warp at high temperatures. To prevent this from happening, sheets must be purchased with a thickness of at least 5 mm.
Collapsible benches sold in tourist shops are used as flooring. Having decided to equip an old tent for a mobile bathhouse, consider the possibilities of replacing the tight-fitting material. Nylon or tarpaulin is suitable for this.
This design is mostly used in the courtyards of houses, but if necessary, it can also be taken to recreation areas. The disassembled frame is transported on the trunk of a car. Since this design is dependent on transport, there is no need to worry about the dimensions of the heating apparatus. You can build a full-fledged stove-heater and load several cobblestones into the trunk.
The manufacture of a transportable mobile bathhouse proceeds as follows:
- 20 boards of 2 meters are prepared for the frame;
- fastenings are made for fixing at the top and diagonally;
- the frame is assembled and adjusted to size;
- the awning is cut and sewn to the size of the structure;
- The bath is assembled and checked.
Fastening of frame elements is bolted. A separate shield, assembled from even boards, is laid under the feet. It is made from several elements so that they fit in the trunk of a car.
The entire structure is packaged like a bundle of firewood. It is fastened with a tie and placed on the trunk of a car or in a trailer. The elements must be stored in a dry place.