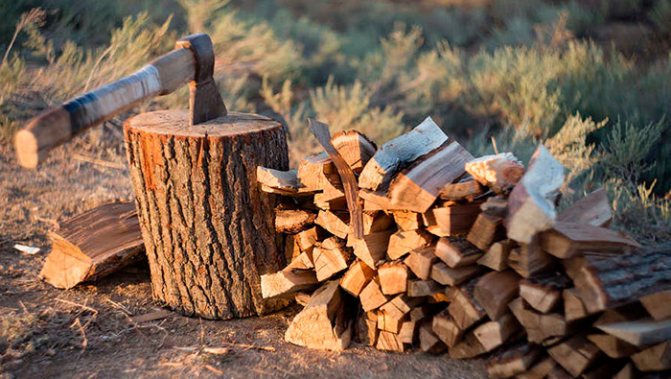
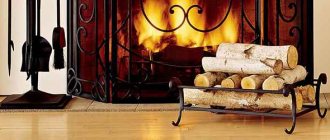
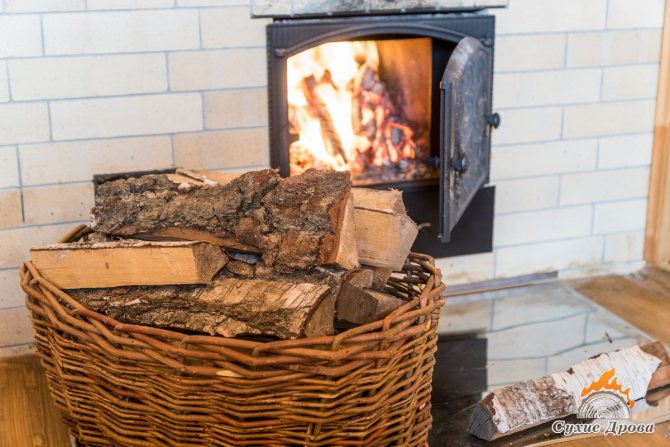
What kind of firewood is suitable
Before preparing the fireplace for fuel, it is advisable to understand the rules for igniting it and find out which firewood is best for the stove. For classic Dutch and Russian stove designs, the type of wood is selected depending on the following factors:
- level of heat transfer from one bookmark;
- duration and intensity of combustion;
- smoke production indicator;
- the amount of ash produced during combustion.
Good firewood should melt quickly, have high heat output and burn almost to the end, without leaving a noticeable amount of waste. All these indicators of “wooden” fuel depend on the type of wood and the quality of its drying.
Completely fresh, freshly cut combustible material is not suitable for heating a stove, since when it is disposed of, a lot of smoke is generated and it will take a very long time to burn.
Another unpleasant consequence of using damp or insufficiently dried firewood is the possibility of severe burns from the saturation of the air with carbon dioxide. To get rid of accumulated moisture, the firewood must first be thoroughly dried. To check the readiness of firewood for use, there is a very simple technique: just knock one log on another and listen to the sound made. Well-dried wood logs, unlike raw logs, have a sonorous sound.
When choosing firewood, it is important to consider the time of its preparation (winter or summer). The highest quality dry fuel is obtained from trees cut down in winter, when the internal movement of sap occurring in them is greatly inhibited. It is strongly not recommended to stock up on inexpensive aspen firewood harvested in the spring and summer months, since the wood during this period has high humidity and requires long-term drying.
The best tree species for making firewood
To light a stove, hardwood is considered the most suitable. Firewood made from them has a high density of fiber structure. They guarantee long burning and high heat transfer. The following types of wood belong to the category of deciduous varieties:
- oak;
- Linden;
- willow, ash and a number of other trees, including rare and expensive alder in most regions of Russia.
The listed types of firewood are suitable for a stove, a garden smokehouse, as well as a fireplace or fireplace installed in a country house. Due to the special properties of these deciduous trees, when they are burned, a unique aroma is felt.
The second place in quality is occupied by coniferous wood - pine and spruce logs. As a rule, they burn well, but they smoke very often and during combustion they form a large amount of soot - this is explained by their high resin content. Other disadvantages of spruce and pine wood include its high rate of burning, which limits the amount of heat received.
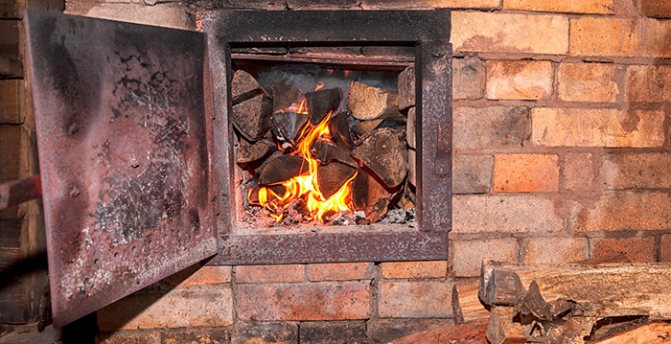
Stacking and lighting firewood
The traditional approach to stacking firewood and lighting the stove involves preparing a pyramid of logs with a crumpled piece of dry paper placed in the center. Finely planed wood chips are added there, and then the whole thing is set on fire.
When the paper is lit, the wood chips ignite first, after which the fire spreads first to small and then to large logs. The disadvantage of this kindling method is the inability to control the combustion process. The firewood “seizes” all at once and burns entirely, and the process itself proceeds unevenly and quickly. After some of the logs have burned, new portions of firewood are thrown into the stove, which also quickly catch fire and immediately burn out.
The burning time can be artificially increased by changing the method of placing firewood in the firebox. One way to light your stove involves the following procedure:
- The bottom row of logs is placed in the firebox.
- A second row is placed on top, offset to one side by 5-10 cm, forming a small protrusion in relation to the first.
- Next, the third and all subsequent rows are laid.
- A piece of paper is placed at the edge in the ledge area along with birch chips, after which the whole thing is set on fire.
When laying solid fuel based on sawdust, as well as any other dry fuel, individual pieces are not placed close to each other. A small gap must be left between them for the free movement of air masses.
Rules for additional fuel loading
Regular firing of a brick oven is rarely limited to just one fill, which is usually only enough for 6-8 hours of continuous burning. Therefore, most experienced stokers stock up on an additional portion of firewood before lighting the stove. After the first load burns out, they do not wait for “blue lights” to appear on the coals and begin to reload solid fuel into the work area.
Before lighting the stove, it is important to immediately calculate the number of expected bookmarks and prepare an appropriate supply of firewood. The next time you load them, you will need to follow the rules to preserve the accumulated heat and eliminate the possibility of carbon monoxide entering the living room. To quickly ignite new portions, the remnants of the previous stack, along with smoldering coals, are raked in the central part.
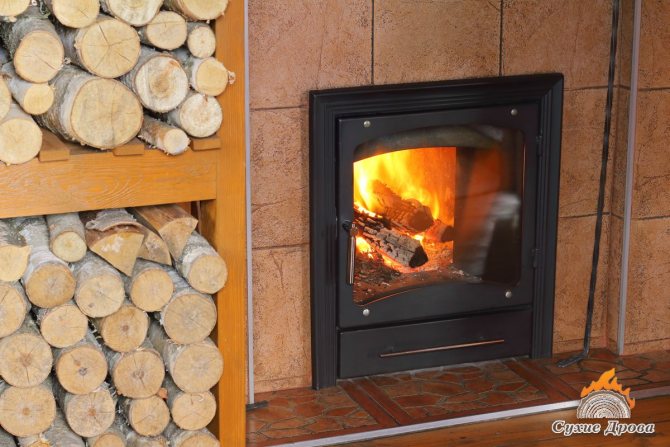
How to heat a stove in a house with wood
Every time, before putting firewood into the stove, it is necessary to clear the ash pan, firebox and grate from blockages. Ash interferes with normal combustion and reduces heat transfer, so it is better to remove it in a timely manner.
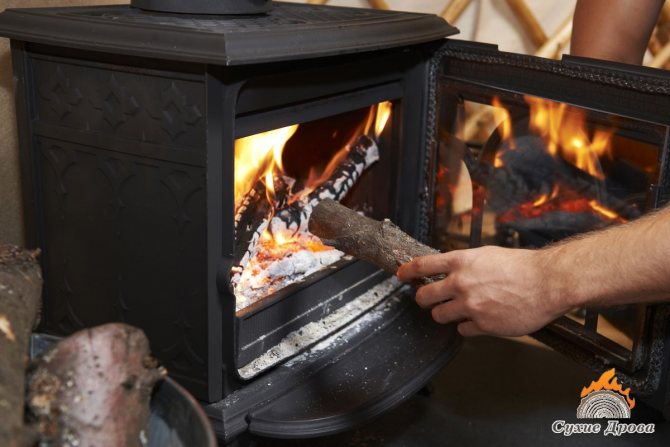
Good combustion is ensured only by dry firewood with a small thickness, about 10 cm. Thinner logs are placed closer to the kindling. The best option is heating with birch, aspen or oak wood. True, oak has a high price, but it has the highest heat transfer.
The first log must be placed diagonally relative to the firebox. It will act as a small support and will allow the rest of the firewood not to scatter to the sides. Other logs are laid evenly, with small gaps.
For kindling, you can use small pieces of birch bark or dry wood chips. Many people dry one log in advance and then split it into a splinter.
Please note: refrain from using various liquids for kindling. This is a fire hazard and may cause an explosion.
You should not completely clog the firebox; it is better to leave a small space for air circulation. If there is not enough firewood, it is easy to add it a little later, when some of it has burned out.
Be sure to control the air flow to the combustion chamber and pay attention to draft. There is a control valve for this. At the beginning of ignition, it opens completely; gradually, if necessary, you can reduce the air flow. If the draft remains too high, then all the heat will simply go into the pipe. You can keep the vent slightly open.
It happens that if the stove has not been used for a long time, the combustion chamber will need to be heated because the draft disappears. In such a situation, be patient and try to prevent smoke from entering the room. Open the valve and the blower as much as possible.
The chimney can be completely closed only after the wood has completely burned out. If you do this a little earlier, you can be poisoned by carbon monoxide, which is released during combustion.
If the chimney is closed and your head suddenly starts to hurt, it means that not all the wood has burned. It is necessary to open the chimney, ventilate the room and breathe fresh air.
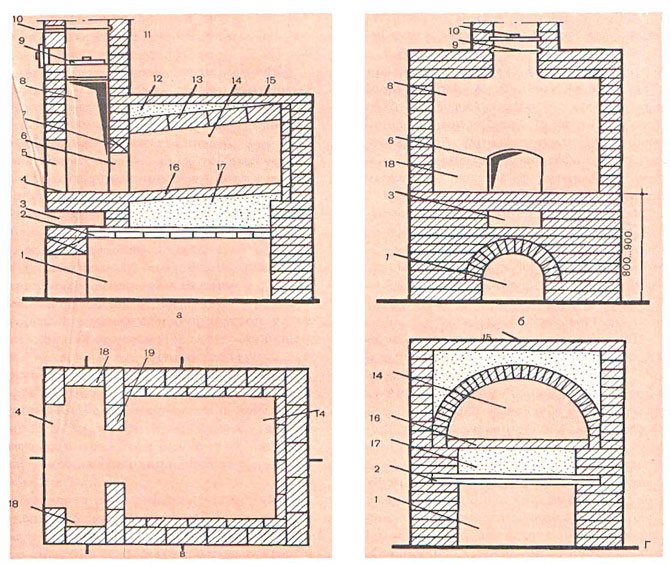
Oven with hob
In the simplest version, this design has small dimensions (width 2 and depth 3 bricks - 78x53 cm). However, even in such a limited area it is possible to place a single-burner stove.
Work goes smoothly when you have everything you need at hand.
Therefore, purchase the following materials and accessories in advance:
- Solid red brick – 107 pcs;
- Blower door – 1 piece;
- Grate – 1 piece;
- Single-burner cast iron stove – 1 piece;
- Fire door – 1 piece;
- Pipe valve – 1 pc.
Fire bricks are not needed for a wood burning stove. Buying it is a waste of money. But red should be chosen carefully, discarding cracked and uneven ones.
Preparation of the solution
The masonry mixture is made by mixing four parts clay with one part water and adding eight parts sifted sand. The normal consistency is determined simply: the solution easily slides off the trowel, leaving no drips on it. When laying, it should not leak out of the seams.
The volume of the mortar is determined based on the amount of brick. With an optimal seam thickness (3-5 mm), one bucket is enough for 50 pieces.
Having prepared the masonry mixture, you can begin laying the foundation. Its width is made 10 cm larger than the width of the oven. The height of the foundation is selected so that the bottom of the first row of bricks is at floor level.
An approximate prototype of a stove
If the underground is deep enough (50-60 cm), then there is no need to dig a hole for the foundation. It is enough to make formwork on the ground with a plan size of 76 x (51 10 cm). Two layers of roofing felt are placed on its bottom to protect it from moisture. Having laid the concrete, it is given a week to gain strength, after which they begin laying.
Read more: 9 ways to clean the oven from grease and carbon deposits
The dimensions of the stove with hob we are considering are 3 x 1.5 bricks (76x39 cm).
The first row is placed on a layer of clay mortar (4-5 mm). Having leveled the base, lay out the second one, leaving space for the blower door.
Before installing the door, you need to screw a soft wire to it and put its ends into the seams for better fixation.
The frame of the cast iron door has four holes for wire, which is used for fixing in the masonry
To compensate for the thermal expansion of the metal, a gap is left between the door and the brick. Before installation, its frame is wrapped with wet asbestos cord.
The third row is laid by overlapping the seams of the second. At this level, a grate is installed in the firebox.
Order scheme from 1st to 8th row
The fourth row is placed on the edge, observing the ligation of the seams, and the walls of the combustion chamber are formed. Behind it will be the first and only smoke circulation (see section A-A in diagram No. 2). To clean its bottom, a so-called knockout brick is placed in the rear wall without mortar, which is periodically removed to remove ash. Inside the chimney, two stands are made from pieces of brick to support the internal partition.
The stones of the fifth row are placed flat, leaving space for the firebox door. In the back of the stove, in order, we see the walls of two smoke channels. During work, their surface must be thoroughly cleaned with a wet cloth to remove any clay protruding from the seams. This is an important condition for ensuring good traction.
Order scheme from 9th to 11th row
Having raised the masonry up to the eighth row, they close the furnace door, placing wire in the seams to secure its frame. At the same level, in the back of the fuel chamber, a brick with a beveled end is placed - a smoke tooth. It improves heat output by preventing flue gases from quickly escaping into the chimney.
Having completed the ninth row, an asbestos cord is laid along it on a clay mortar. It is necessary for sealing the joints of a cast iron slab and brick. On the tenth row, the firebox is covered with a hob.
On the eleventh, a smoke valve is installed in the pipe. It is also compacted along the contour with an asbestos cord soaked in clay.
Rows 12 and 13 - formation of the pipe walls. After they are completed, a lightweight sheet metal pipe is placed on the stove, leading to the roof.
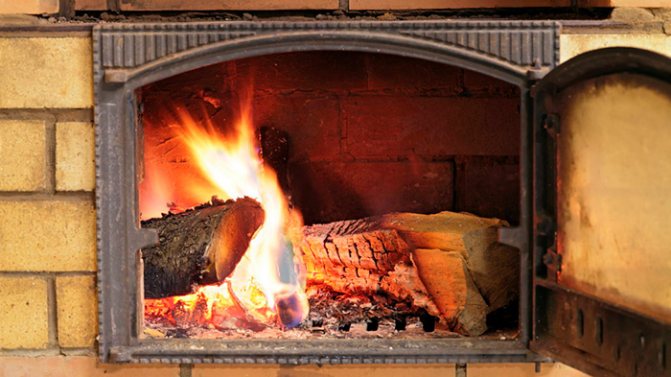
Correct combustion of Russian stoves
The rate of combustion of wood in a brick oven directly depends on the temperature indoors and outdoors. If the draft is bad, then you can wait until the temperature outside becomes lower than at home. When this is not possible, you will have to artificially heat the firebox using birch bark or paper.
After this, you can evenly distribute the firewood into the firebox or crucible. Poor draft can also be caused by a clogged chimney. Therefore, until it is cleaned, the stove will not be able to heat properly. It is better to carry out this procedure systematically.
If you rarely heat the stove in your house with wood, you will need to carry out the process gradually. At the same time, once or twice is usually enough to warm up the room well. Do not forget to remove all excess from the container before ignition and also clean the ash pan and firebox from blockages. Only after this can you safely start heating the stove.
For a Russian stove, there are two generally accepted heating options. The first is using a firebox. This method is economical and allows the wood to transfer heat well.
It is necessary to pack the firewood tightly into the firebox and leave a small space for air circulation. After they burn out, another portion is added. In this case, it is better to move the coals deeper into the firebox so that sparks do not jump out of the stove.
During the kindling process, the mouth closes tightly, and the valve, on the contrary, opens. This is necessary for good traction. Please note that small amounts of smoke may enter the room. This phenomenon usually occurs if the stove has not been used for a long time. It is easy to remove smoke by opening the ventilation valve.
In order for combustion to be stable, it is necessary to constantly monitor the supply of oxygen. Therefore, you will need to periodically turn the firewood with a poker. This ensures air flow to the lower layers of the masonry, and the wood burns evenly.
The second method is ignition on a hearth. In this case, you need to close the valve tightly and open the ventilation. The firewood is placed in a neat well at the edge of the furnace, and after ignition it is slowly moved deeper. It is strictly not recommended to use wet or spruce firewood, as they smoke heavily.
Features of kindling and preparation
For safe and fruitful charcoal lighting, there are some simple rules to remember. Before ignition, accumulated ash remaining from the last time is removed from the stove and from the grate. Periodic cleaning of soot is also necessary (carried out at least once a year, at the start of the heating season). In the absence of a procedure, soot and combustion products will accumulate on the walls, which will interfere with high-quality heating. A dirty stove requires more heating material and produces less heat. A dirty grate makes it difficult to burn by not allowing enough air to flow through.
Winter kindling after a long break is fraught with difficulties. It is much more difficult to achieve high-quality ignition in a cooled stove in the cold outside than in a warm one. During severe cold weather, you can treat the inside of the structure with a hair dryer before starting heating. In winter conditions, it is recommended to take four-hour breaks between kindlings.
Regardless of the time of year, the following preventive measures are carried out before starting heating:
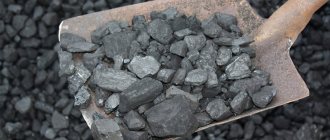
- Inspection and testing of coal fuel. High-quality coal has a dense consistency and does not crumble when squeezed. The fuel mass may contain coal dust. It burns first; To prevent the room from filling with a burning smell, it is recommended to sift the fuel before ignition.
- The furnace masonry is inspected for cracks. They provoke the penetration of smoke and combustion products into the rooms, creating a risk of destruction of the stove structure. If found, damage is repaired with a sand-clay mixture.
- The attic pipe and the part above the roof surface must be covered with whitewash. Before heating begins, bare areas are whitewashed. It is recommended to clean the pipe 2 times a month.
To prevent overheating, kindling is carried out several times a day with breaks. You cannot start heating if damage is found on the stove until the problem is fixed.
Scheme of a stone oven
The stove in the house is smoking: all the possible reasons and what can be done about it, read here.
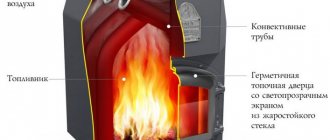
Firebox of long-burning furnaces
Before installing a long-burning stove, you should familiarize yourself with the heating features. Before ignition, you will need to thoroughly clean the ash chamber of any blockages. After this, paper and several dry splinters are placed on the inner grill of the chamber. Then several small logs are placed on top in a house shape. It is necessary to leave approximately ⅓ of the total space free so that air circulates well.
Before ignition, the view and the blower are opened slightly. Afterwards, you can set fire to the paper with torches and close the firebox. to light a long-burning stove with the door ajar during the ignition stage, if it is not transparent. This allows you to control the ignition process.
The air supply is regulated by the ash pan, which can be opened completely in case of poor draft.
Heating recommendations
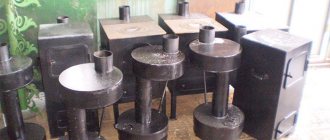
Even a heating device designed exclusively for coal is fired using paper and a layer of wood. Coal is added only when the temperature in the firebox reaches a level sufficient for burning the rock. The first layer of coal material should be at least 6 cm. If the optimal size of the layer has not yet been determined by the owner of the stove, it is worth starting with this volume and increasing it to 15 cm if necessary, when the fuel burns well.
For heating boilers adapted for coal, the ideal shaft design includes vertical walls and a grate. The firebox is located at a sufficient height to ensure safe operation and the combustion process is not disturbed. During kindling, the coal is placed on the grate, with the valve slightly opened until the rock begins to burn well (then you can open it to maximum).
Dry fuel is best suited for kindling. Filling the stove with wet material is acceptable, but then the amount of soot on the walls will increase, and cleaning the grate and walls will be required earlier. The fuel, which is supplied after the first portion, is added only when the material poured in earlier has ignited efficiently.
Before supplying coal, always close the ashpit - this is a safety requirement first and foremost.
How to properly heat a sauna stove with wood
If you have no experience heating a bathhouse, then it is better to find out in advance how to properly heat the stove with wood. First, dry firewood is prepared. They can be placed closer to the stove, as long as the door is not located next to the logs.
Before ignition, you will need to thoroughly clean the firebox and ash pan so that the wood burns evenly. If there is a water tank adjacent to the stove, check that it is not empty. You also need to make sure that there is traction. To do this, you need to open all the doors and light a match, which is placed in the fireboxes. If the flame flares up well and moves deeper into the oven, then everything is in order. If there is no draft, you will need to forcefully warm up the combustion chamber with paper or a torch.
After the stove is prepared, you can begin to lay birch bark or a piece of paper on the inner grate, on top of which are placed small chips and firewood. The main thing is not to completely clog the fuel chamber so that air can circulate. Then the main door closes. If the burning stops, you need to try to light the wood again.
As soon as the first batch of firewood has burned, the firebox door opens and the remaining coals are evenly distributed with a poker. A small amount of dry logs is placed on top. Firewood can be added at intervals of 10-15 minutes or as needed.
The readiness of a bath is usually determined by several indicators:
- in the steam room the temperature rose to 60 C⁰ or higher;
- the water in the tank began to boil;
- the last stack of logs burned and left behind red coals;
- The stones become hot and when water drops hit them, they form steam.
In winter, heating the stove in the bathhouse takes a little longer, it will take an average of about five hours, and in summer only 3 hours. You can close the damper only after all the wood has thoroughly burned and the coals have begun to become covered with a gray coating.
Proper heating of the stove provides warmth and comfort in the house, as well as economical fuel consumption. Operating a furnace cannot be considered an overly complicated process, but neglect can lead to unnecessary problems and reduced service life of the structure.
Proper combustion of a stove is the key to its longevity.
How to build the simplest brick oven?
First you need to decide what you want to get from your future stove. If you only need to heat the rooms, and use bottled gas or electricity to cook food, then choose an option without a stove and oven. Anyone who loves soft healing warmth chooses the option with a bed.
Read more: 8 best proton pump inhibitors
For regular cooking of large quantities of food and pet food, a simple oven with a hob will be just right.
We will look at three examples of stoves with step-by-step guidance on how to lay them:
- Simple direct flow;
- With hob;
- Heating.
Let’s say right away that you cannot expect high heat transfer from a simple design devoid of gas circulation. For this reason, such stoves are installed in garages and other small rooms with an area of no more than 16 m2.
We will consider this option so that beginners get their first simple lesson in practical masonry.
Direct-flow heating design is designed to heat a small room
Such a stove does not require a strong foundation. Having poured large crushed stone in a layer of 15-20 cm, filled it with cement mortar and leveled the surface, after a couple of days you can begin laying.
Stove dimensions in plan: width 2 bricks (51 cm), depth 2.5 bricks (64 cm). Since there is no blower chamber in it, holes for air intake are drilled directly in the combustion door.
The sixth row covers the combustion chamber door. The top view helps to better understand the brick laying method.

The procedures for this design are simple. The main condition during work is to ensure that the seams are bandaged so that the top brick covers the seam between the two lower ones.
On the eighth row, the firebox is narrowed, using halves and “three-quarters” - ¾ of a whole brick. The exit from the firebox is thus obtained with a cross-section of 1 brick (125x250 mm).
The next row (ninth) is laid out in the same way as the seventh, using a whole brick.
After this, the brick tier is placed on the edge flush with the inner edge of the bottom row. The new tier is laid flat, using two whole bricks and four “three-quarter” bricks. In this way, the smoke channel is again narrowed in order to trap gases and increase heat transfer.
On the next tier, the stones are placed on edge. A brick is placed in the middle of the smoke channel. In this way, the oven is raised another five rows (one tier on an edge and a brick in the middle, the other tier flat).
The remaining four tiers are laid flat. With the last two rows of masonry, the smoke channel is narrowed to a size of 12x12 cm (half a brick). At this level, a smoke damper is placed in the furnace. A steel pipe is inserted into it from above.
How to properly heat a stove with wood
The heating efficiency and fuel consumption in solid fuel stoves significantly depend on the correct start and maintenance of the combustion process in the firebox. The process of burning wood is conventionally divided into 2 stages - ignition and combustion. At the first stage, the wood is heated, causing the release of flammable gas (pyrolysis). It is this gas that ignites first, and the thermal energy from its combustion raises the carbon-based temperature to combustion levels.
Attention. Most of the thermal energy in a wood-burning firebox is provided by the combustion of released gases. For efficient operation of the furnace, it is necessary to ensure optimal gasification and saturation of pyrolysis gases with oxygen.
The problem is that gases tend to burn quickly and escape through the chimney. The correct combustion of a furnace depends on: the type of wood, ensuring gradual gasification, maintaining an optimal temperature in the furnace, sufficient oxygen saturation, and complete combustion of pyrolysis gases.
The combustion process consists of the following stages:
- Fuel preparation and storage.
- Cleaning the ash zone from ash accumulated during furnace operation.
- Furnace inspection. Particular attention is paid to the operation of valves and dampers, and the condition of the chimney.
- Kindling the stove, i.e. provision of primary pyrolysis gas.
- Loading firewood into the stove firebox.
- Setting the operating mode of the furnace and regulating the process.
- Additional fuel loading when it is necessary to replenish its volume to ensure complete consumption of the first load or when the degree of heating is insufficient.
- Stop the oven.
Features of kindling
After completing the preparatory stage (fuel procurement, inspection and adjustment of the furnace), you can begin operating the furnace. Its operating mode is set by proper kindling.
Important. It will not be possible to ensure optimal operation of the stove if you try to ignite a full load of fuel at once. The task of the first stage is to create the desired temperature in the furnace using pyrolysis gas.
There is an important rule for lighting a wood-burning stove - it must be carried out at maximum speed so that the flammable gas does not have time to evaporate, otherwise it will not be able to ignite the bulk of the fuel. The speed of the process depends on the regulation of the air supply and the creation of draft, for which the furnace valves (views) and the ash door are designed.
Proper kindling is ensured with the valve open and the ash pan closed. Lighting will speed up when using flammable materials. You can use paper (usually half a sheet of newspaper), wood shavings, and several small splinters. Such a bookmark must be placed under the firewood, in the middle part.
Stacking firewood
When flames appear above the kindling wood, the bulk of the fuel can be loaded. Firewood must be stacked in horizontal rows or in a cage. There should be a distance between the logs for pyrolysis gases to escape and oxygen to enter the masonry.
The firebox should not be filled to capacity with firewood. There must be a space of at least a height to the top of the chamber.
The stowage height depends on the size and quality of the fuel. The following recommendations should be taken into account:
- firewood harvested more than years ago and pre-dried indoors -
- one year's worth of firewood or old fuel without drying -
- recently harvested firewood - no more than 14 cm.
Safety regulations
Safe methods for igniting a stove will allow the user to avoid unpleasant consequences, the most harmless of which is burning through the floorboards in the house. Particular attention is paid to safety issues in buildings associated with high temperatures. These include bathhouses, where ideal conditions are created for an accidental fire.
Before you start heating the stove with wood in flammable rooms (including the dressing room), it is important to understand the following safety requirements:
- the entrance near the stove must be covered with a metal sheet measuring at least 50x70 mm, which is recommended to be painted with a high-quality fire retardant;
- the distance from the combustion chamber door to the nearest unprotected objects and walls should be maintained at least 1.25 meters;
- It is not allowed to store flammable materials and combustible substances near a home or sauna firebox;
- solid fuel is stored in a separate room or in areas designated for these purposes;
- the furnace is completed at least two hours before going to bed or leaving the room completely;
- It is prohibited to operate the stoves if there is the slightest suspicion of their malfunction.
It is best to place the sauna heating tank with controls on the side of the stove (they are usually placed in the washing room). This technique will prevent accidental contact with hot parts.
During combustion it is strictly prohibited:
- use kerosene, diesel fuel, gasoline, as well as other flammable and combustible liquids for ignition;
- store a supply of firewood in a heated room that exceeds the daily requirement;
- leaving a burning stove unattended;
- dry and store firewood and other flammable materials on it;
- to burn furnace structures unsuitable for their use with coal or coke;
- use logs of firewood whose length is significantly greater than the size of the firebox, and also operate the stove with the doors completely open.
It is forbidden to fire a stove if there are cracks or other damage on its base or chimney pipe.
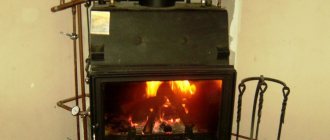
Standard stoves and fireplaces that heat with wood are not a rare occurrence today. They are especially often used for baths or private houses. At the same time, it is important to know how to properly heat a metal stove with wood in order to obtain maximum heat transfer.
Firewood selection
Firewood made from different types of wood behaves differently in the stove. The best fuel is considered to be hard deciduous trees (oak, birch, linden, aspen). Birch gives more heat compared to aspen or pine and does not spark when burning. The aspen burns through, leaving virtually no ash. Wood from fruit and coniferous trees is not recommended for kindling.
In terms of heat transfer during combustion, oak fuel is considered the most efficient. If we take the volume of oak firewood as 1, then to ensure equal thermal energy it is necessary to burn the same volume of firewood of other species: birch - 1.33, pine and alder - 1.6, spruce - 1.73, aspen - 2.
- the wood is sawn into logs and logs;
- logs are split into logs, their cross-section approaches a sector of a circle with a height
- logs up to 5 cm in size are left untouched, and logs up to size are split in half or into quarters;
- Firewood is stored in woodpiles under a canopy or indoors (shed); It is best to use firewood that has been air-dried for at least years;
- preliminary drying of firewood before stacking is carried out near the stove or in the woodshed;
- The stove's firewood is constantly replenished to provide the necessary kindling material.