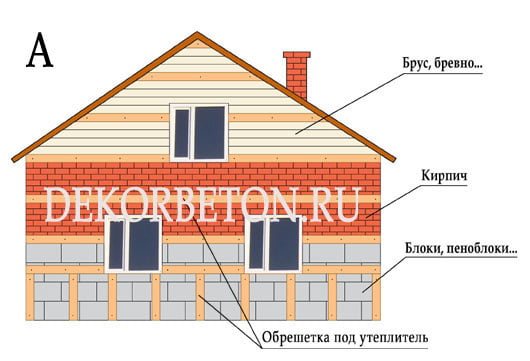
Type of fastener
The type of fastener for the sheathing is selected depending on the material from which the house is built. Installation of sheathing on wooden houses is done using self-tapping screws. Self-tapping screw sizes from 76 mm to 127 mm. Finishing a frame house also requires the use of wood screws. We use a dowel-nail on brick facades. For houses made of foam concrete, special “screw” dowels for foam blocks are used. For houses built using permanent formwork technology, a frame anchor is used.
Advantages and disadvantages of installation
Before you start laying facade tiles, you are advised to familiarize yourself with a number of advantages and disadvantages of this process.
Advantages that laying gives to the building:
- maintainability;
- resistance to mechanical damage;
- resistance to external atmospheric phenomena;
- insulation of facades;
- variety of appearance;
- possible reuse.
- the need to prepare the walls of the building;
- the need for mesh reinforcement;
- high price of work and material;
- physical wear and tear of the glue used;
- labor intensity.
Nuances of the facade finishing process
The process of cladding a building is far from an easy task, requiring certain skills and knowledge. The technology for laying facade tiles can be simplified by taking into account some nuances, which allows you to achieve the desired result.
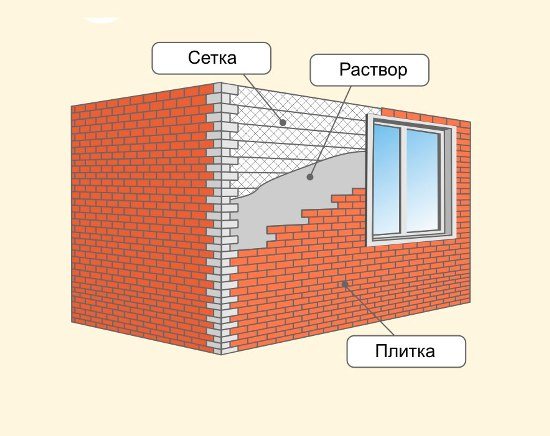
Experts recommend that tiles be laid in the warm season, and the temperature should, if possible, not go beyond 5-25°C. When increasing the specified temperature limit, it is necessary that the warm tile on the back side is slightly moistened. When working in bad weather, discoloration may occur. Before laying building materials, the walls need to be prepared, in particular leveled, which means plastering. For this procedure, professionals advise using a reinforcing mesh.
In order to achieve the planned results, we suggest that you familiarize yourself with the following video 2. This material will briefly and clearly outline the essence of the work of cladding using the example of a separate section. The video colorfully describes the entire procedure.
Do-it-yourself exterior finishing of the walls of a house can be done using different installation techniques. If specialists install facade tiles, the price of the work will be quite high, so if you try, you can create an individual facade yourself, taking into account your requirements. A little desire and hard work - and the result will definitely please you. The video will also show us how houses can be transformed using tiles.
A large number of facing building materials are produced for façade finishing. Each of them has its own characteristics and advantages. But many are often stopped by the cost of the material.
Therefore, they resort to an alternative solution - making facade tiles with their own hands. This allows you to save money and give the facade of the building the appearance that you will like. In this article we will tell you about some of the secrets of the process of making tiles at home.
Tile installation
Brick-look tiles and stone-look tiles are pre-prepared for installation. Using an angle grinder, the edges are processed and removed with an abla. The tiles are installed using galvanized self-tapping screws and a 4.2×19 mm press washer. The first brick tile in the row “Old Brick”, “Cracked Brick”, “Facing Brick” is attached to 4 self-tapping screws into galvanized plates.
Each subsequent facade tile is inserted into the lock and secured with two self-tapping screws. Each subsequent row of facade tiles is turned over 180 degrees to preserve the brickwork pattern and is checked for level.
When installing base tiles with metal fastenings under the stone “Large Chipped Stone”, “Small Chipped Stone”, “Rock”, “Slate”, “Rubble Stone”, each tile of the first row is fastened with 4 self-tapping screws. The lower plates of the tiles of the upper and subsequent rows are inserted behind the fixed tiles of the lower rows. Only the 2 top plates are attached with self-tapping screws.
Guide to façade cladding with clinker tiles
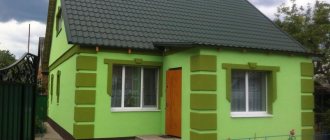
Reading time: 4 minutes(s) Cladding facades using clinker tiles today is a modern and convenient way to improve houses and give them individual design features.
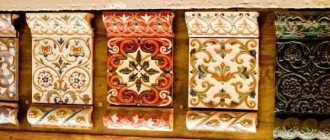
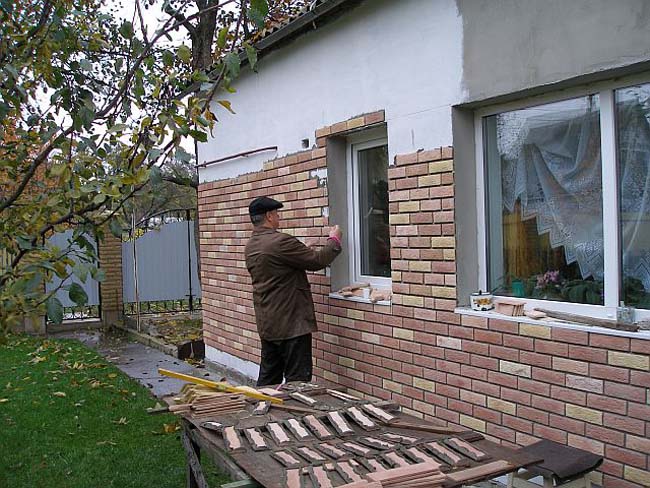
The photo shows the process of laying facade clinker tiles
Laying facade clinker tiles
Correct laying of clinker tiles occurs in several stages:
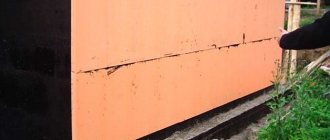
- Preparing the base. It needs to be cleaned and leveled.
There should be no cracks or any remnants of previously used plaster.In addition, experts recommend treating the surface of the building with a primer to prepare it for future loading;
- Preparing the tiles. It is better to mix all the elements that are in the box and are necessary for paving. This will avoid inconsistencies in color shades;
- Preparation of glue and its application. The glue must be prepared according to the instructions included with it. It is applied using a special small spatula. The thickness of the layer should not be more than 1-1.5 cm;
- Installation (laying) of tiles. Clinker tiles are always laid in rows, starting from the corner element. To do this, it is better to use special starting corners. During installation, each tile needs to be slightly embedded in the adhesive. Installation can be carried out in various ways:
- Row;
- Tychkov;
- Flemish masonry.
- Forming seams and filling them with mortar. The width of the seam will directly depend on the masonry and design. Most often, the distance between the tiles can be from 7 to 12 mm. To fill the joints, a special clinker grout is used, which can be selected by color;
- Cleaning tiles after installation. You can start cleaning the tiles only after the adhesive on which they were attached has completely dried. This will help avoid the appearance of shifts and surface irregularities.
When finishing wooden houses, in most cases thermal panels are used, as they can give the building a more aesthetic appearance, while at the same time insulating the walls using a thermal insulation layer. However, if you want to finish the facade with tiles, then you will need the following set of elements:
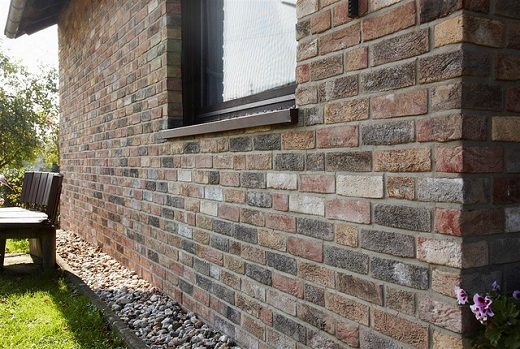
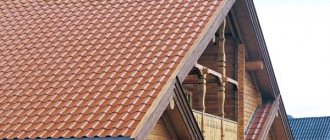
The photo shows clinker tiles on the facade of a house
- Clinker tiles;
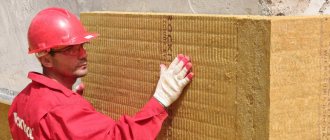
- Mineral wool (facade, which has the same vapor permeability as wood);
- Grout;
- Several CBPB boards;
- Tile adhesive.
Technologies for facing clinker tiles
There are two main installation technologies:
- For interior decoration (cladding), it is better to use the “wet method”, when the tiles are laid either on insulation or on expanded polystyrene;
Such a structure must be additionally reinforced with reinforced mesh. This method will ensure long service life and increase strength. - Laying directly on the base. In this case, insulation is not used, and it is recommended to use this technology indoors, since there is no need for additional wall insulation.
After completing the installation work, it is imperative to treat the seams with a special grout. However, there are some nuances of such work that are important to know in order to do everything correctly:
- Even at the preparation stage, be sure to read the instructions included with the solution and follow them exactly until the end of the work;
- If you need a fairly large amount of grout mixture, it is better to mix all available specimens together.
This way you can make the shade uniform and avoid color changes; When working with grout, it is better to use both glue and grout from the same manufacturer. Today the most popular products are “Quick-mix”. - It is better to apply the grout mixture with a spatula or a special syringe gun. After all the seams have been processed, excess mortar must be removed with a wet sponge;
- If the solution cannot be completely removed the first time, you should use special cleaning products based on alkali and acid.
In the process of preparing and laying clinker tiles, like any other, you may need special cutting tools. These include:
- Manual or electric tile cutter;
- Glass cutter (roller);
- Tile cutter;
- Bulgarian;
- Hacksaw for metal (you need to choose a diamond section);
- Wire cutters;
- Ring tiles.
Elements and materials for clinker tiles
The main elements that may be needed for façade cladding include:
- Grout for joints “Quick-mix”:
- Weatherproof;
- Frost-resistant;
- Water repellent;
- Plastic;
- Has good adhesion to the side parts of the tile.
- Frost-resistant glue:
- Resistant to temperature changes;
- Can be sold ready-made and in powder form;
- Created only from artificial elements;
- Provides high-quality fastening;
- Apply directly to the surface of the building.
- Corner elements for clinker tiles:
- Provide aesthetics;
- Protect from external environmental influences;
- Provide durability;
- Can be used as thermal panels;
- Resistant to natural aggressions.
- Crosses for clinker:
- Thickness can be from 1.5 to 10 mm;
- When choosing the width, it is important to consider the size of the tile itself;
- Used to ensure that all seams are the same size.
- Facade insulation for clinker tiles:
- Has very low weight;
- Reduces heat consumption by more than 50%;
- Has high sound insulation;
- Does not require special skills during installation.
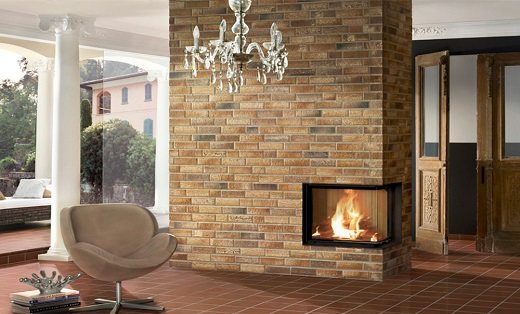
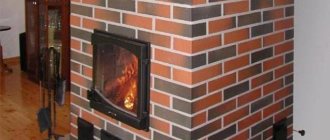
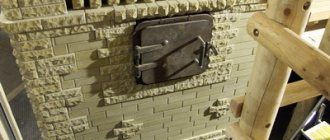
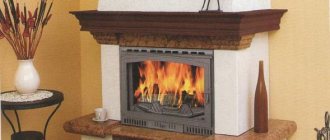
Fireplace decorated with clinker facade tiles in the image
Using the above list of additional materials and elements for clinker tiles will simplify the installation process and achieve the desired effect. The tiles will be laid correctly, evenly and efficiently, even without the help of professionals.
Video
The video instructions for installing façade clinker tiles will help you see all the key points of this process.
In order to improve the facade of your own home or any other room, today most specialists use clinker tiles, which are easy to use, have fairly high technical characteristics and add aesthetic beauty and individuality to the facade.
Did this article help you? We would be grateful for your rating:
0 0
Grouting joints
Facade tiles are sawn and polished using an angle grinder. In situations where the fastening plates had to be sawed off (near windows, doors, on corners, on gables), the facade tiles are drilled into the seam and secured to a galvanized self-tapping screw, and the head is rubbed down. Colored grout is provided free of charge.