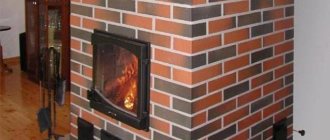
What is a corner fireplace?
This unique and very attractive structure is used to heat one room or a small house. It is mainly built to save space. Brick is most often used for construction, and various modern materials are used for cladding. A well-designed corner fireplace will fit perfectly into any style room.
Scope of use of the structure
Previously, fireplaces were attributes of luxurious ancient castles and mansions, but today they are built in modern country cottages and country houses. Since they require smoke exhaust equipment, it will not be possible to install them in a city multi-storey building. But you shouldn’t be upset: there are electric fireplaces for apartments that help create a warm, cozy environment. Since living rooms often do not have much space, a corner design is usually used, which takes up less space.
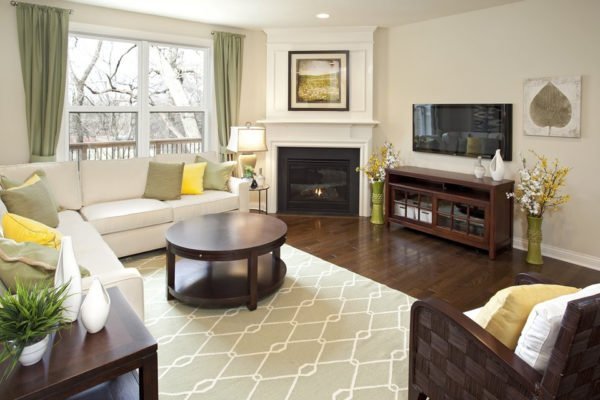
A corner fireplace takes up less space than a standard design located along one wall
Options for placing corner fireplaces in the room
It can be installed on the outer or inner wall of the house. The specific location is determined taking into account the construction of the chimney.
- If you plan to place it on an external wall, you must obtain permission from the appropriate authorities.
- When placing a heating device near an internal wall, it should be taken into account that the chimney must rise above the ridge of the roof.
In private houses, the angles between the walls are sometimes more or less than 90°. Corner fireplaces built between such walls also look quite interesting. In this case, it is important that the firebox opening is located symmetrically to the center line of the corner. It is more expedient to build a corner fireplace between adjacent blank walls. If at least one of them has a window opening, the dynamic circulation of air flows due to the generated draft will contribute to the appearance of drafts. A fireplace can be built at any time, but experts recommend erecting it at the stage of building a house, when the finished floor has not yet been laid and the final finishing of the premises has not been completed. You can create a place to relax in front of the fireplace using a row of armchairs arranged in a semicircle or a cozy sofa.
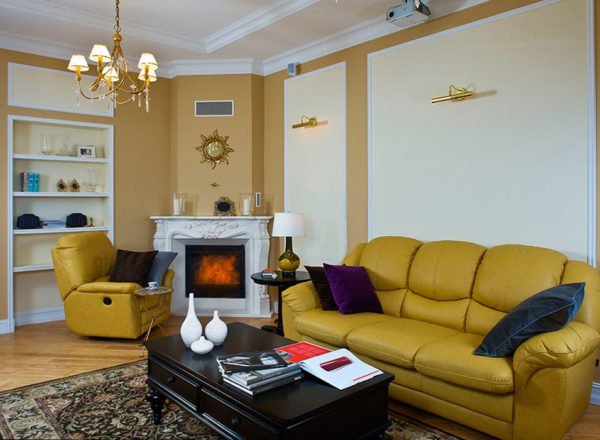
A cozy place to relax can be arranged near the corner fireplace
Advantages and disadvantages of a corner fireplace
Such designs have many advantages:
- attractive appearance;
- various finishing options;
- combination with any interior styles;
- space saving;
- opportunity to build with your own hands.
But there are also disadvantages:
- dependence on the chimney when choosing a location;
- the need to obtain special permission when installing a chimney on an external wall;
- fire hazard due to improper installation and operation.
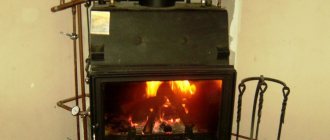
Stove-fireplace
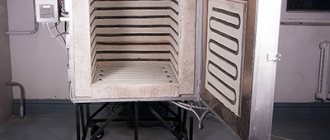
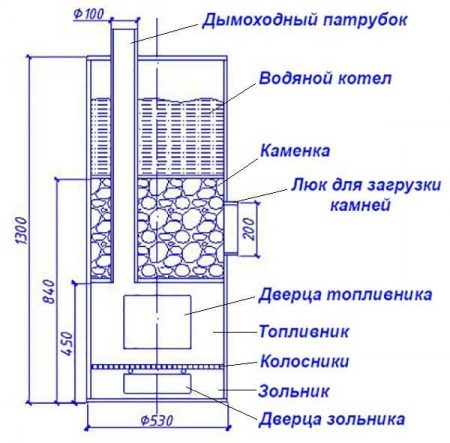
The main function of a fireplace stove is to heat the room. Such models come in stone or metal. If you plan to use the structure for cooking, you should install a fireplace stove with a stove when a special hob is built into the equipment. In addition, there are options with an oven, or combined models. Of course, it is not recommended to install such stoves in the living room, even if there is a powerful hood, but for a large kitchen-dining room this option is quite suitable. Most modern fireplace stoves are small metal fireboxes. They have high heat transfer and are capable of heating a room up to 80-90 sq.m.
Features and Benefits
Corner fireplaces have many positive qualities that help you make a choice in favor of this device. Among the advantages, the following properties should be noted:
- A corner fireplace saves free space in the room. The portal occupies an empty corner, the chimney is also located in the corner of the room, without occupying the entire wall;
- this type of portal can provide heat to several adjacent rooms in a private house or apartment at once, since both walls with which the fireplace is in contact will be heated;
- you can admire the fireplace from anywhere in the room, which makes it possible to create the perfect interior;
- Installation of a corner fireplace can be done after the building has been designed. You can install the chimney from the outside of the wall, without interfering with existing structures.
Among the features of the model, it is worth noting that the firebox may not have an angular shape. You can choose a front design that will be located in the center of the device. There are several types of fireboxes:
- panoramic;
- with three glasses;
- with visibility from both sides
- with two glass walls at the corners.
Depending on your preferences, you can purchase an open or closed firebox. To prevent soot from settling on the glass, the design includes an included option for blowing the glass with air. The technology is called “clean glass”.
A corner fireplace can operate on different types of fuel, it all depends on the design features. There are wood, gas, bio fireplaces and even electric portals.
Fireplaces can be positioned symmetrically or asymmetrically. For the last option, you need to turn the fireplace towards the furniture. Asymmetrical designs have a rectangular shape, which allows them to fit into the corner of the room.
Where should the fireplace be located?
When choosing a place to build a fireplace, determine where the chimney will be located and where it will go out through the roof. The height of the outer part of the pipe depends on how far it is located from the roof ridge (see Connecting to the chimney).
If this distance is more than 3 meters, then the angle between the horizontal line passing through the ridge and the line connecting the ridge and the top of the pipe should be 10 degrees. If the chimney is located close to the ridge, then it should rise above it by at least half a meter.
Determining the height of the chimney
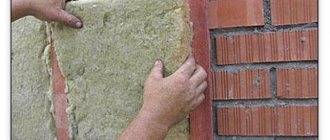
You can place the fireplace either in the outer corner of the room or in the inner one, but if the walls are wooden, they must be protected from the very hot back wall of the fireplace.
Tools and materials for construction
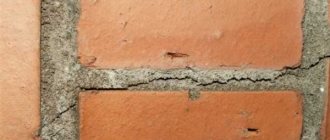
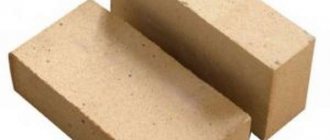
The main material for the construction of fireplace walls is brick. For construction, 2 solid varieties are chosen: red and fireclay (heat-resistant). The stones should not have obvious defects, cracks or burn marks (dark areas).
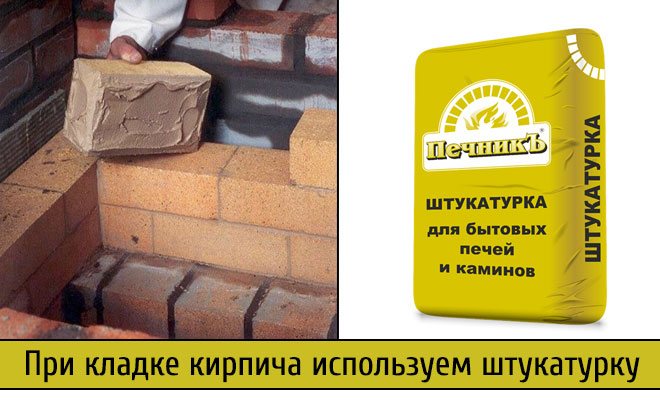
We use “Pechnik” plaster for laying bricks.
In addition, you need to find clay and sand for masonry. If possible, it is best to buy a ready-made dry mixture (for example, Pechnik) for stoves and fireplaces, as well as a special mixture for preparing a heat-resistant solution. The latter is used when lining the walls inside the firebox together with fireclay bricks.
For a brick fireplace you will need the following:
- red and fireclay brick;
- clay, sand or ready-made mixture;
- cement, PGS and crushed stone for the foundation;
- corner 5x5 cm;
- latch (view);
- solution container;
- trowel or trowel;
- a pick for splitting bricks;
- plumb line and building level;
Material calculation
The required number of bricks is calculated in strict accordance with the drawings of the fireplace and the order of the masonry. Such schemes are developed in advance, and strict adherence to them is required when performing work.
When counting the number of pieces, the halves and three-fours indicated in the diagram are counted as a whole brick. The resulting number is multiplied by a factor of 1.2 to take into account defects and damage during transportation.
The seams are made no more than 3 mm; such masonry requires a bucket of mortar for 100 bricks.
Sand
Quarry sand is used to prepare masonry mortar for the firebox, roof and lower section of the chimney. For the construction of other parts of the fireplace, it is allowed to use river and sea sand.
Before adding sand to the solution, it must be sifted through a mesh with holes no larger than 3 cm and washed under water pressure through a burlap sieve.
Brick
For critical areas of the fireplace, such as those that heat up to high temperatures, fireproof material is used. The rest of the masonry requires the use of ordinary ceramic clay bricks.
If an arched vault is provided, wedge bricks are purchased , which can be made independently from fireclay bricks, turning it to the desired shape.
Sand-lime brick is not used for laying brick fireplaces due to its ability to absorb moisture.
It is not recommended to lay burnt dark brown bricks or insufficiently processed pale pink bricks. Its use in the construction of a piece foundation and the first row of a fireplace is allowed, no more than 20% of the total quantity.
Solution
For laying the firebox and pipe, a clay solution is used, which is related to the composition of the brick and expands with it in the same mode. The addition of sand to the solution depends on the test of the clay for fat content.
For laying the base, side surfaces, and bottom of the fireplace, use a mortar with the addition of cement at the rate of 1 kg per bucket of mortar.
The clay is soaked in water until completely wet for a week, stirring it every day. After this, add sand and mix the masonry mortar with your own hands.
It is allowed to use modern ready-made dry mixtures for bricklaying stoves, which are simply mixed with water. A description of the properties of various dry mixtures, their purpose and photos of the appearance of the packaging can be found in store catalogs.
Brick corner fireplaces
Brick fireplace laying
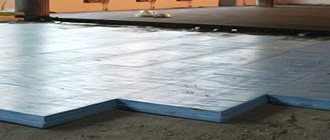
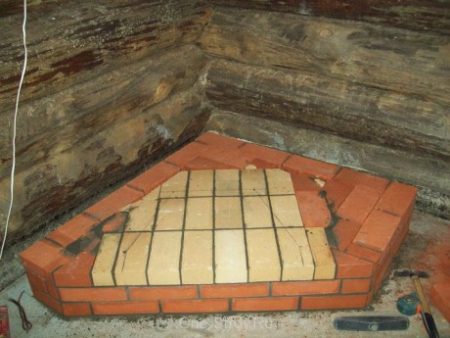
Work on the construction of a fireplace begins with laying the foundation. A separate foundation is laid under the fireplace. We make the dimensions of the foundation area 6 cm larger than the fireplace base.
Foundation
- Dig a hole for the foundation 10 cm larger than the dimensions of the finished foundation and up to 60 cm deep.
- Fill the bottom of the hole with a layer of crushed stone up to 15 cm. Make a compaction.
- Install wooden formwork and treat the inside with bitumen.
- Lay stones, broken bricks and crushed stone.
- Fill with a solution prepared from cement and sand in a ratio of 1:3. The solution must be thoroughly mixed and have a uniform appearance.
- Level the completely poured foundation and check the horizontal position.
- Cover the foundation with film and let it sit for a week.
Fireplace masonry
Three days before starting work on the fireplace masonry, you need to soak the clay by adding water in small portions so that the solution is not too thick. The quality of the masonry depends on the quality of the prepared mortar. The finished clay pulp is poured into washed, dried sand and thoroughly mixed until it becomes a thick jelly. Small sticks up to 15 mm thick are rolled from the finished mixture. If the quality of the solution is excellent, the sticks will not fall apart and stick to your hands.
Make a careful calibration of the bricks. Lay waterproofing on the finished foundation; this can be roofing felt covered with two layers.
Everything is ready for work and the main stage of work can begin.
To lay the first row, add up to 30% of the bulk of Portland cement to the solution. Keep the drawn up order next to you in order to periodically check the accuracy of the work. Having laid the row and made a check to ensure that the geometry of the planned structure is preserved, you need to put a mark in the project. Laying a fireplace structure is a painstaking job, and such control will greatly simplify the task you have set yourself.
A trowel or trowel is used to lay continuous rows. It is better to lay the firebox and smoke collector manually. The thickness of the seam should not be more than 5 mm. Place the mortar in the middle of the brick in such an amount that it does not extend beyond the edges of the brick.
The laying of the firebox, smoke collector and channels is carried out with special care. Excess solution must be removed
It is very important to remember that these fireplace elements inside cannot be plastered.
For beautiful, high-quality masonry of a curved vault, you need to install a circle - temporary formwork. Having laid the first brick in the middle of the arch, continue laying in both directions.
Chimney installation
check its verticality.
wipe with a cloth soaked in liquid clay. It will be much easier to carry out work related to the installation of a chimney if you use special pipes in the chimney. These can be chimneys made of ceramic pipes, modular ones made of stainless steel, thin-walled structures made of acid-resistant and heat-resistant steel.
Installation of metal elements
During installation of the fireplace structure, metal reinforcement is placed in the seams, leaving gaps of up to 8 mm. It is not advisable to lay a lot of metal elements in the brickwork, but there is no way to do without them. A fireplace insert and a view are a must.
The frames of the firebox and the valves are not secured by anything; they adhere perfectly to the prepared solution. The valve is installed at a height of 2 meters.
Decorative finishing
grouting joints.
If you still want to decorate the fireplace, use special smooth or patterned tiles for cladding that can adhere perfectly to the hot surface of the fireplace.
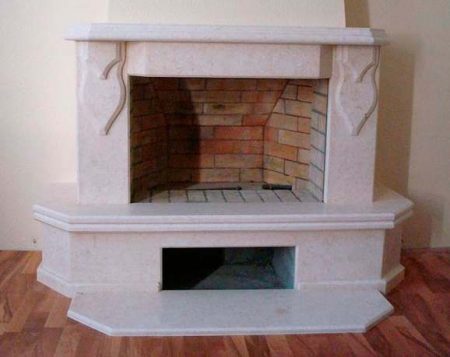
Today you can purchase portals from fireplace manufacturers made from natural materials of varying quality. It could be travertine, marble, stone. Ready-made portals will be able to truly decorate the fireplace you have built and give it even more uniqueness and beauty.
An excellent addition to the fireplace would be a special fireplace set made of non-ferrous or cast iron forged metal. The sets always include tongs, a hook, a broom and a dustpan. A beautiful and practical screen can protect a carpet laid out by the fireplace from accidentally falling embers.
How to properly fold a corner stove
A modern country picnic is not complete without a barbecue. A word that has several interpretations, united by one definition - a method of cooking food over coals or wood. If you have free space on your personal plot, you cannot do without a barbecue oven or fireplace oven. This design will serve as an excellent occasion for family and friendly gatherings at any time of the year.
Features and advantages of a corner oven
Despite the large selection of project drawings or finished models, the corner stove is especially popular. It frees up additional space that can be used for a recreation area.
The shape of the stove allows you to think about a place to store firewood for at least a couple of fireboxes. Ready-made structures fit perfectly into any style of landscape or gazebo. It has one drawback - a more complex construction and installation process compared to other types. In addition, it is necessary to ensure thermal insulation of two walls at once, and not just one, which increases the consumption of materials. However, the compactness of a corner stove for a summer house makes up for all the disadvantages. The main difference between products from each other is functionality, which each owner chooses to suit his needs.
Project
Despite its compact size, a corner stove with a stove is not inferior in its capabilities to a full-fledged stove installed inside the house, and sometimes even surpasses it in functionality.
Its set may include a grill, skewers for roasting poultry carcasses and even small piglets. At the initial design stage, a firewood rack, a place to store kitchen utensils, a sink and other elements for maximum comfort are thought out.
The corner stove is laid using brick or stone. For decorative finishing, the owner's imagination is open to flight. It can be marble, tiles, decorative brick. The main thing is that the cladding is in harmony with the overall landscape design, and the material is not flammable. If financially feasible, the work area can additionally be equipped with a worktop with an electric stove, and so on.
You can build a corner stove for long-term burning yourself if you have the practical skills of a stove maker. At the construction stage, it is important to maintain order. Then the whole process will be significantly easier and the guarantee that everything will be done correctly will increase. Professional craftsmen who carry out custom projects rarely follow order.
Diagrams and drawings, as well as photos of finished projects that can be found on the Internet, will be a good help when constructing an angular slab stove yourself.
Materials and tools
A corner wood-burning stove is built using slab bricks. You can use burnt red brick. Bricks are held together using a mortar consisting of sand and clay, which are mixed in the correct proportions.
Important: You can buy clay in construction stores. In this case, it does not require preliminary soaking to reveal its adhesive properties.
For aesthetic perception of the structure, after the solution has completely dried and hardened, the outer part of the stove is finished. For the design you will need the following materials:
- Brick;
- Cement;
- Sand;
- Crushed stone;
- Water;
- Firebox door;
- Blower door;
- Sheet of steel 5 millimeters thick;
- Corners for jumpers;
- Metal rods.
The amount of materials is calculated at the design stage. The main working tools are a trowel and a shovel.
Construction stages
In general, a wood-burning corner stove consists of only two, maximum three sections, a stove and a firebox. If the model consists of three parts, then food preparation devices are installed on two of them.
Foundation
- Any structure begins with the construction of a foundation. The base area should be at least 10 centimeters wider than the stove itself. The depth of the hole is slightly less than one meter.
- The hole is first filled with 20 centimeters of sand. Then, they are covered with crushed stone or broken bricks.
- Next, the cushion is filled with cement mortar consisting of sand, water and cement in a ratio of 1.5: 0.5: 0.5. Leave the filling for a day.
- Next, the surface should be leveled and covered with waterproofing material.
Bricklaying
The masonry itself is carried out using wet bricks, for which they are first soaked in water. The first row of bricks is laid on the side. The solution is not used at this stage.
- The second row is laid out in half a brick, since the grill in this case does not serve as a heater.
- The third row should provide air exchange in the firebox. That’s why the fuel tank is built with gaps of two bricks
- A few rows later a firebox is set up. Its location is not important and depends on the wishes of the owner. For ease of cleaning the firebox from soot, the recommended height is 3 bricks.
- The fryer itself is laid out without any channels. A grate for coals is required; to construct it, 2 bricks are installed in a vertical position inside the firebox.
- The height of the stove depends on several factors: the height of the person who will cook, the height of the gazebo or summer kitchen. Average indicators: working surface height – 1 meter. The height of the entire structure, including the pipe, is 2.2.5 meters.
To increase the comfort of use and if possible, all necessary communications, water, and light are supplied to the structure. They are installed only after completion of all construction and finishing work and after the solution has completely dried.
Selecting a location
A corner fireplace stove for long-burning summer cottages is basically just an addition to a building in the form of a summer kitchen or gazebo. This arrangement will help protect the fire from the wind. To install the structure outdoors, the minimum area is 2 by 3 meters. Finished projects fit perfectly into any landscape.
Corner design is the best option for small areas; thanks to ready-made designs, you can also equip a recreation area. Corner wood-burning stoves and fireplaces must be installed in compliance with fire safety measures and other criteria that provide comfort in operation. The recreation area is arranged in such a way that smoke does not reach it during cooking.
Stove fireplace
Judging by the positive reviews about fireplace stoves, this model should be considered separately. This is a whole structure with many functions that can be installed in any corner of the site. To build it, you will need knowledge and, preferably, the experience of a stove maker. Therefore, it is recommended to turn this question to professionals.
When solving the problem yourself, you will need installation materials and tools:
- Brick;
- Cement;
- Clay;
- Water;
- Level;
- Shovel;
- Plumb;
- Lattice;
- Metal plate.
The construction of a foundation, as in any massive structure, is mandatory. To simplify the task, you can use a concrete slab. When installing the foundation, the absence of a cavity in the base is monitored, which can cause destruction of the foundation and the entire structure as a whole.
During construction, every centimeter of the future wood-burning corner fireplace stove is taken into account. There are many programs that allow you to create a project with all calculations in 3D format.
Advice: It is advisable to build the upper part of the stove fireplace from stove bricks. For the firebox and heating, you can use fireproof or fireclay material. The brick must be of good quality and not chipped. When you tap it, it makes a subtle sound.
At the time of design, you need to decide on the type of fireplace. Will it be combined with a stove, a decorative type design, what additional functions should it have.
The chimney is very important for the stove. It is built when the fireplace itself is ready. To speed up the work, the best option is a modular chimney. When installing it, the following requirements are taken into account:
- The chimney should start from the structure itself;
- All fasteners must fit tightly to each other, leaving no empty space between them;
- The depth of the compartment should be equal to the cross-section of the entire pipe;
- Fastening elements must be freely accessible;
- The distance from the chimney to the nearby wall must be at least two meters.
Decorative works
For finishing, facing bricks and tiles are often used. The walls are pre-plastered, and if there are any unevenness, they are leveled. To preserve the aesthetic appearance for a long time, it is advisable to consider a canopy over the fireplace stove. Plus, the decorative finish serves as an additional element of structural protection.
Unlike other models of outdoor stoves, a fireplace stove not only has an expanded functional meaning, but can also become an accent in the landscape, emphasizing its individuality.
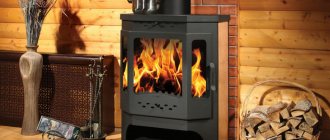
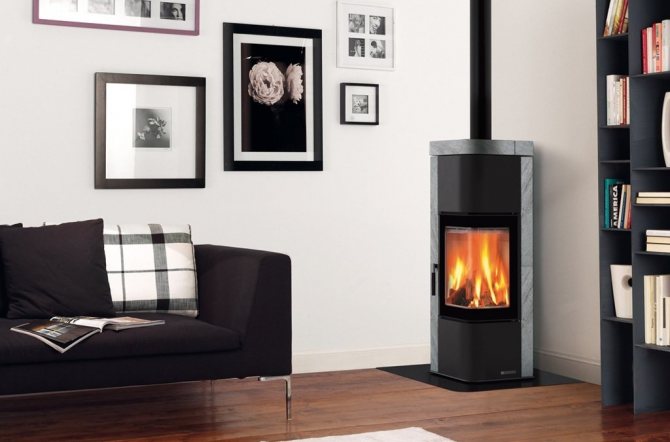
Metal constructions
Construction of a fireplace stove, barbecue or corner grill is a longer process and requires the most accurate measurements. In addition, construction and project development will take a lot of time. Therefore, recently, ready-made metal structures of fireplaces and stoves have become in increased demand.
Due to their light weight, their installation does not require the construction of a foundation. Due to the physical properties of the material, the heat transfer from such stoves is maximum. In addition to stoves with a hob, such buildings can carry a purely aesthetic promise. Plus, their service life is significantly less than massive, durable structures, which, with proper design, laying and choice of materials, can last for more than five years.
Eco-fireplaces using biological fuel. It is impossible to cook food on them; they serve more as decoration. At the same time, all the zest of country picnics with the characteristic aroma of cooking in the open air disappears.
Installation of fireplaces
How to make a corner fireplace with your own hands? First you need to understand its design features, that is, what components it consists of. The most important elements are the firebox, portal and chimney. Apart from the mentioned parts, it is difficult to imagine a fireplace without a reliable and solid foundation. Let's take a closer look at all the internal components of the structure.
Firebox
The combustion chamber is considered the main component. In most situations, it is made of cast iron or heat-resistant metal. In the latter case, cast iron plates, fireclay or vermiculite are placed on the inside.
Fuel tanks are:
- closed;
- open.
The absence of doors reduces the efficiency of the design. That is why closed fireplaces, for example, with a door made of heat-resistant glass, are currently popular.
Chimney
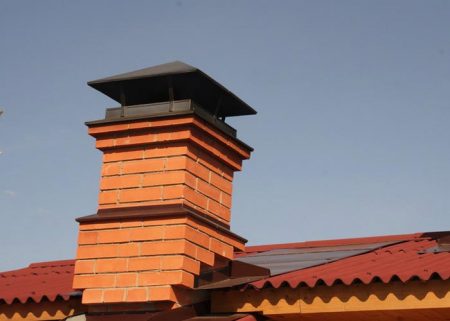
An equally important part of a DIY brick fireplace is the chimney. It is connected to the firebox using a special pipe. In most cases today, thermoceramics and heat-resistant steel are used for the production of chimneys. Such materials are equipped with multi-layer thermal insulation. Therefore, operation is comfortable and completely safe.
Base
The fireplace base is a place that is located directly under the fuel chamber. Before its arrangement, it is necessary to place a two-layer waterproofing on the prepared foundation. Roofing cardboard with special impregnation or roofing felt are suitable for this.
Portal
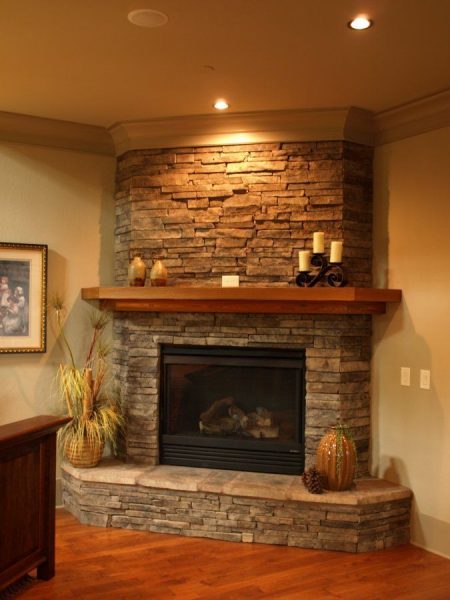
It will not be possible to build corner fireplaces with your own hands without cladding. The portal is considered the exterior of any fireplace; it demonstrates its belonging to the design style. Nowadays, very often fireplace lining is made of expensive granite, tuff, and steel modules. The current solution is mosaic made of colorful glass, masonry, and ceramic slabs.
Do-it-yourself corner fireplace, step-by-step instructions
Before starting laying, the bricks are soaked in water for several minutes.
This process is required before starting work; they absorb water and take less moisture from the solution. After drying, the structure will become solid and strong.
Experienced professionals recommend:
- Print photocopies of the main drawing to verify the stages of chimney construction.
- After completing the laid rows, on a copy of the drawing, you can highlight or cross out the completed work.
This method will allow you not to lose count and save your time.
Laying a corner fireplace
Before erecting a heating structure, two layers of roofing material must be laid on the foundation.
The next step is to draw the outline of the base of the fireplace on the roofing felt so that the first row is laid out along the lines.
Before laying the brick on the mortar, it is advisable to first lay it out dry, without mortar. This action will allow you to see the structure in volume and understand how many whole, halves and quarters of bricks will be needed.
Next you need to prepare a wire with a diameter of 3 mm. It is laid every three rows, with this action you will create a stable and strong structure.
Each row is laid on the mortar and the quality of the evenness of the seams between the masonry bricks is monitored. It is advisable to keep the thickness of the seams between them no more than 5 - 10 mm.
It is necessary periodically:
- consult the drawing, following the order of the bricks;
- Use a building level to check the horizontal and vertical planes.
Look carefully at the photo of the construction of a corner fireplace and complete each row in accordance with this diagram.
The chimney of a fireplace is the same as that of a conventional stove.
The side walls are laid out from the second row, forming a fireplace niche, in which firewood is stacked and dried.
Metal corners serve as reliable support for the bricks of the top row. In the bricks lying towards the outer edge, special recesses are sawn through for the metal corner that you choose yourself. Select the length of the corner in accordance with the fireplace width parameters indicated in the drawing.
The laying of the third row is similar to the previous row, only there is a slight difference: a metal sheet with a thickness of three to six millimeters is placed on a steel corner, or you can independently weld 4 metal corners = 900 and 60 mm wide.
The firewood chamber is covered with bricks of the fourth row.
The bottom of the firebox is laid out in the fifth row. In this space, high temperatures are formed due to fire. Therefore, it is created from refractory bricks.
The master, before erecting rows 6, 7, 8 and 9, stops the sequential bricklaying and turns his attention to the drawing. It indicates how much fireclay brick is included in the lining.
They build the walls with brick, the so-called “well”, placing it not as usual, but horizontally - on the edge.
The back wall is laid like a regular masonry, only it is moved ¼ part forward, so it turns out to be inclined. Thanks to this slope, more heat will be retained in the room. By performing these rows, they create the basis for the “chimney tooth”.
When designing a fireplace, it is necessary to provide for a narrowing in the upper part of the firebox, followed by a sharp expansion with a smooth transition into the smoke space.
The tenth and eleventh rows are laid out as indicated in the drawing, and they continue to build the base of the fireplace stove.
The firebox niche overlaps 12 side by side. To lay bricks along the outer edge, you need to place a corner 900 60 cm long, oriented with its shelves inward.
Lay out the combustion window in rows 13 and 14. To do this, red and refractory bricks are laid in pairs edgewise, without connecting to each other or tying them up. Fireclay bricks are located in the high temperature zone.
Corner stove: materials, characteristics and masonry features
Having decided on the location and purchased a sufficient amount of materials, you need to think about what type of brick oven to build. One of the most popular, rightfully considered, is the corner stove. It differs from the classic design in that it is installed in the corner, which can be concluded from the name. Brick corner fireplaces are also very popular today. They help create a special atmosphere of romance and comfort in the room and make the most efficient use of space.
The material used to make corner stoves is usually ceramic brick. For the combustion part, fireclay refractory bricks are used. The masonry is made using a conventional oven bonding mortar, which is prepared on the basis of clay with the addition of sand and water. Some models are often supplemented with a finished cast-iron firebox, which is completely sealed.
The main advantages of this type are that the design takes up little space and has high aesthetic properties. But it is worth mentioning that laying a corner stove is only advisable if there is additional heating in the room. In terms of heat transfer, it is significantly inferior to other types, due to the fact that only three walls warm up and transfer heat into the room.
How to make a decorative fireplace correctly
Decorative fireplaces are popular among residents of apartment buildings. The design is a dummy of a traditional portal, which can be made of any material: boxes, cardboard, plywood, foam plastic and drywall. Imitation fire creates a cozy and warm atmosphere.
To create a false fireplace, you will need to create a full-size sketch, which is then transferred to the material. The drawing should contain a detailed description of the details of the fireplace.
If you have a cardboard box on hand from household appliances, such as a TV, this item is suitable for creating a future portal. Remove any excess parts that remain after transferring the design onto the cardboard and secure the box with a stapler.
Construction tape will help you seal all joints. A utility knife will be needed to cut out the firebox itself. You can cut out only the top and side sides by bending the cardboard deep into the firebox. This action helps create a mantelpiece, which is also secured with tape.
Then you can attach the future fireplace to the wall. You can decorate the portal with ordinary wallpaper or self-adhesive film. The upper part of the structure is decorated using foam plastic or cardboard.
Most manufacturing methods are similar. Initially, a drawing is drawn, then the image should be transferred to the material and proceed to the manufacture of the base.
Such a fireplace does not require a foundation, because it only performs a decorative function and does not heat the room.
In addition, false carmine is light in weight.
As a decoration, you can use a screen on which there is an image of a flame. Some people purchase special expensive devices that allow them to simulate flames and the sound of crackling firewood.
Some people decide to make a fireplace from an ordinary box of household appliances and cover the structure with wallpaper, while others prefer to use cardboard-based foam and decorate their creation with shelves and battery-powered candles.
Such designs can be decorated in any way, depending on your imagination. With this option, you can create an exclusive version of the portal in your home, remembering labor lessons at school. Use a ready-made option to create a decorative fireplace with your own hands or come up with your own method.
Interesting solutions in interior design
Many manufacturers offer a wide range of corner fireplaces.
You can choose exactly the option that will look perfect in the interior of the living room or bedroom. As previously mentioned, you can choose a symmetrical or asymmetrical portal.
If the main emphasis in the apartment will be on the fireplace, pay attention to symmetrical designs. Such units are visible from any angle and have the best properties. They cope with the function of heating the room with a plus rating.
An asymmetrical type of corner fireplace is suitable for zoning a room. If your room has a large area, this portal will look perfect in any interior. Glass models serve only the role of a decorative object, enveloping the room in comfort and warmth.
When choosing a fireplace, pay attention to its shape. The classic form is a simple open portal made of red brick. This option will look good in a wooden house or in a country house.
If you have a large living room, pay attention to the Empire and Baroque styles. These designs feature lots of curlicues, trims and moldings.
The Rococo style is not as big, but it also has columns and gilded details.
High-tech style is suitable for modern rooms. There are no unnecessary elements or finishing materials here, because all attention is paid to the portal. Its unusual shape can surprise everyone.
The corner portal in the Art Nouveau style is made from modern material. It combines glass and heat-resistant plastic. The U-shaped portal and open firebox are reminiscent of the classic version. If your home is dominated by a modern interior, choose this type of fireplace.
The right style and shape of the fireplace will help make your home unique and chic.