Installing sockets in the bathroom is not as simple a task as it seems, since in this room, by definition, it is not the walls or other objects that can get water. And water, as you know, is a conductor of electricity, which can be dangerous if connected incorrectly. The main electrical appliances that you usually use in the bathroom are: washing machine, boiler, hair dryer, electric razor, electric toothbrush. And this is only the main part of the electrical appliances that can be placed in the bathroom. According to the PUE classification, the bathroom is a high-risk room. This means that the safety requirements here should be more stringent than for the rest of the apartment’s rooms. Sockets in the bathroom come with their own characteristics. Let's look at the basic requirements and rules when installing sockets in the bathroom.
Choosing sockets for the bathroom and a place for them
Danger zones for sockets in the bathroom and GOST rules
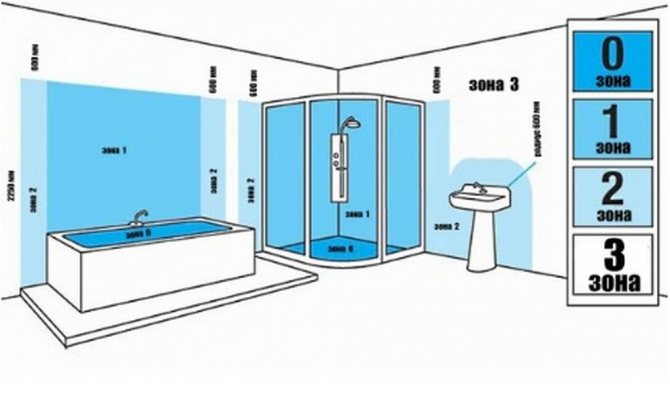
Danger zones in the bathroom and GOST rules
Some people mistakenly believe that sockets should not be installed in the bathroom at all. This may be partly true if the rules for the placement of faucets and the size of shower stalls are not followed. But in most cases, the standard size of this room allows you to place more than one outlet. The thing is that the bathroom is not uniform in terms of the degree of danger from electricity. It is divided into unique zones. For example, there is often water inside the bathroom sink, but almost never on the wall. Bathroom zones indicate the likelihood of water entering in a particular place, which can cause damage to the electrical system.
Zone 0 - the inside of the bathtub, washbasin or shower
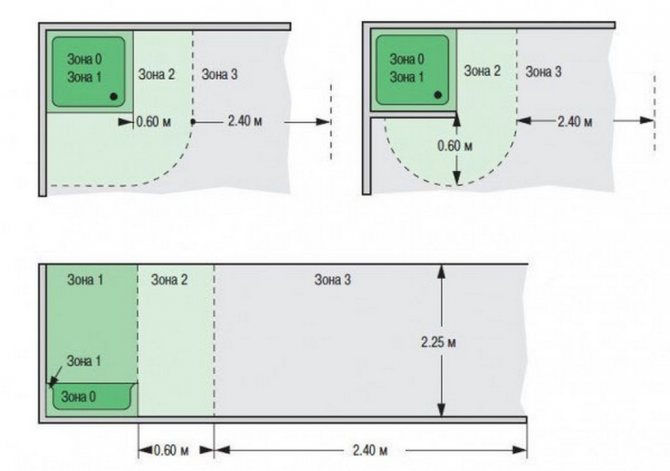
Zone 0 - the inside of the bathtub, washbasin or shower
Any electrical appliances with a voltage of 220V are prohibited here. Only installation of waterproof devices with a maximum voltage of 12V is allowed.
Zone 1 is the area under the sink, above the bathtub, etc.
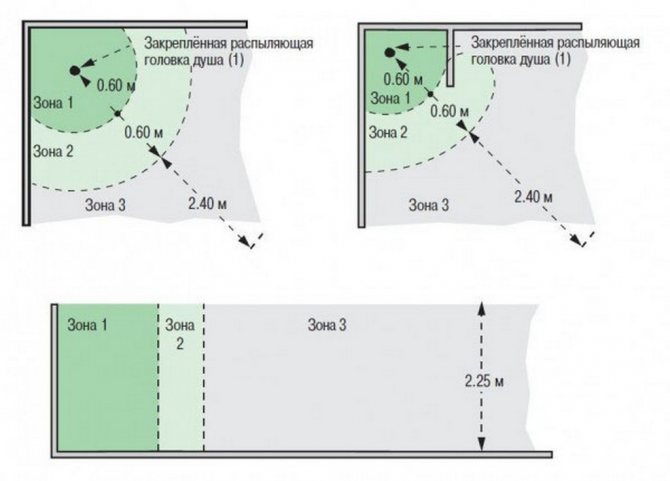
Zone 1 is the area under the sink, above the bathtub
It is allowed to install electrical devices with IPX5 protection here. Mostly water heaters are installed. When connecting, you must use three-core cable with a protective grounding conductor. Bathroom outlets are not permitted in this area.
Zone 2 - everything that is located 60cm or more from the first zone
There is also an area prohibited for sockets, but allowed for water heaters, hoods, and lamps that are turned on not from a switch, but from a cord.
Zone 3 - starts from where zone 2 ends
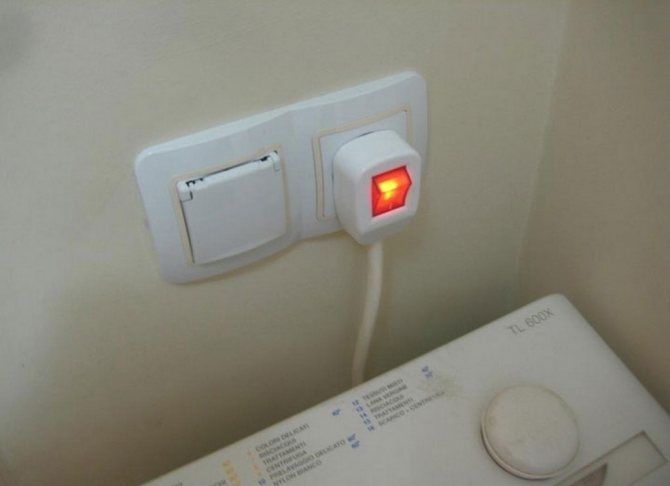
Example of a socket in a bathroom
Its width according to the old GOST is 2.4 m starting from the second zone. The new edition does not regulate and considers all the space beyond zone No. 2. It is in this area that the installation of sockets in the bathroom is allowed. Otherwise, if there is no third zone, it is prohibited to install a plug socket inside. It is allowed to mount only on an external wall, and even then at a distance of 60cm from the door.
In the Code of Rules SP 31-110-2003 , this is stated as follows:
14.40 In apartment bathrooms, washrooms, showers, bathrooms and pre-shower rooms in hostels and hotels, it is allowed to install plug sockets in zone 3 in accordance with GOST R 50571.11, connected to the network through a separating transformer or protected RCD for a current of up to 30 mA.
So, the socket in the bathroom should :
- be no closer than 60 cm from the edge of the bathtub, shower stall or washbasin (in zone 3);
- join via RCD
In GOST, in addition to determining the size of bathroom zones, there are additional requirements for the degree of protection.
701.512.2. Electrical equipment must have at least the following degrees of protection:
in zone 0 - IPX7;
in zone 1 - IPX5;
and in zone 2 - IPX4 (IPX5 - in public baths);
in zone 3 - IPX1 (IPX5 - in public baths).
Where instead of X, the degree of protection is replaced by the number that is suitable for a given zone, for example, for zone 1 equipment with protection IP55 is suitable, for zone 2 - IP44, then by analogy.
Installation Rules
- The most important condition for installing an outlet in the bathroom (see photo of proper installation below) is that it should be located at a distance of 60 cm from the sink, bathtub or shower stall.
- Each electrical outlet must have a grounding switch.
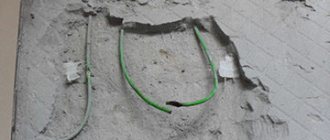
- It is advisable to hide the wiring to create additional safety in case condensation forms on the wires or drops get on it.
- To prevent condensation from accumulating, sockets should not be placed on the outer sides of walls.
- The greatest distance from the socket to the bathtub (vertical) is 1 meter.
- Each place where wiring is connected should be carefully insulated.
- For the bathroom, special sockets are used, protected from moisture and marked IP44. This product has wings and a seal that creates additional moisture resistance, and grounding.
Related article: Mirror tiles in a modern interior: a review of original designs with photos
Selection of sockets, correct and safe location of the socket in the bathroom
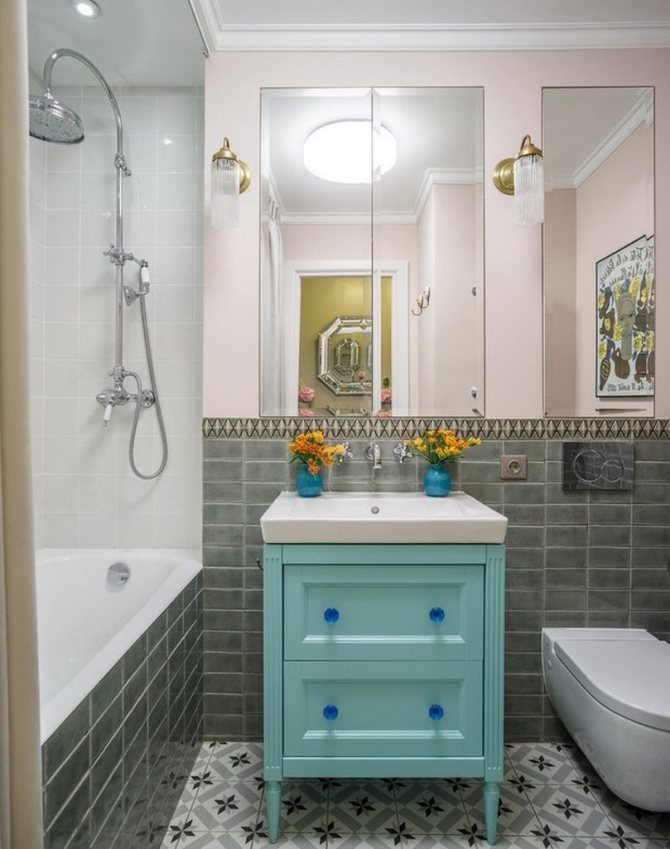
Sockets in the bathroom, where to place them
Some devices you use every day, others you turn on much less often. The number of outlets in the bathroom and the degree of their protection depend on this. For example, to connect a washing machine or electric heated towel rail, you will need two or three special sockets with a cover and a degree of protection of at least IP44, connected to a residual current device (RCD) in the panel. In order to connect a water heater, a regular outlet in the bathroom will not be enough, then you need to directly use the cable outlet.

Degrees of protection
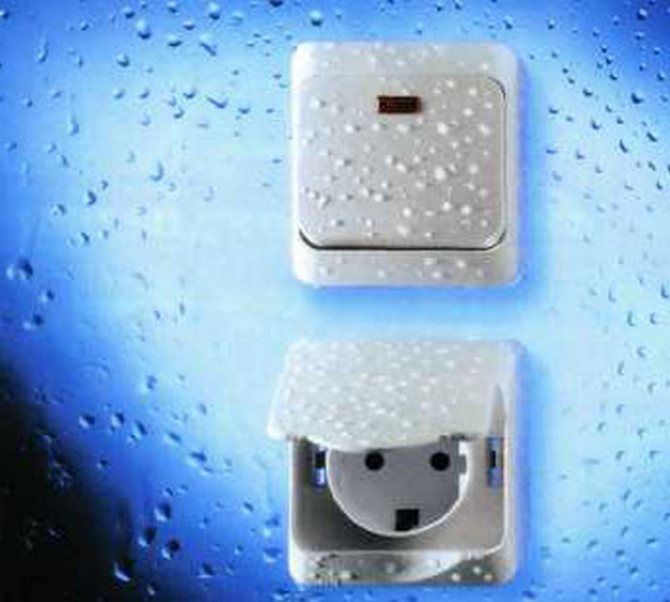
Bathroom sockets can only be placed in zone 3, but they must be IPX4 waterproof. Can be used at least IP44 level. The number 4 means that the socket is not afraid of splashes of water pouring from either side, in other words, such a socket, when installed correctly, is safe and is equipped with rubber bands and a cover. Plus there are curtains on the contact holes for the plug.
Choosing sockets for the bathroom and a place for them
Choosing sockets for the bathroom and a place for them
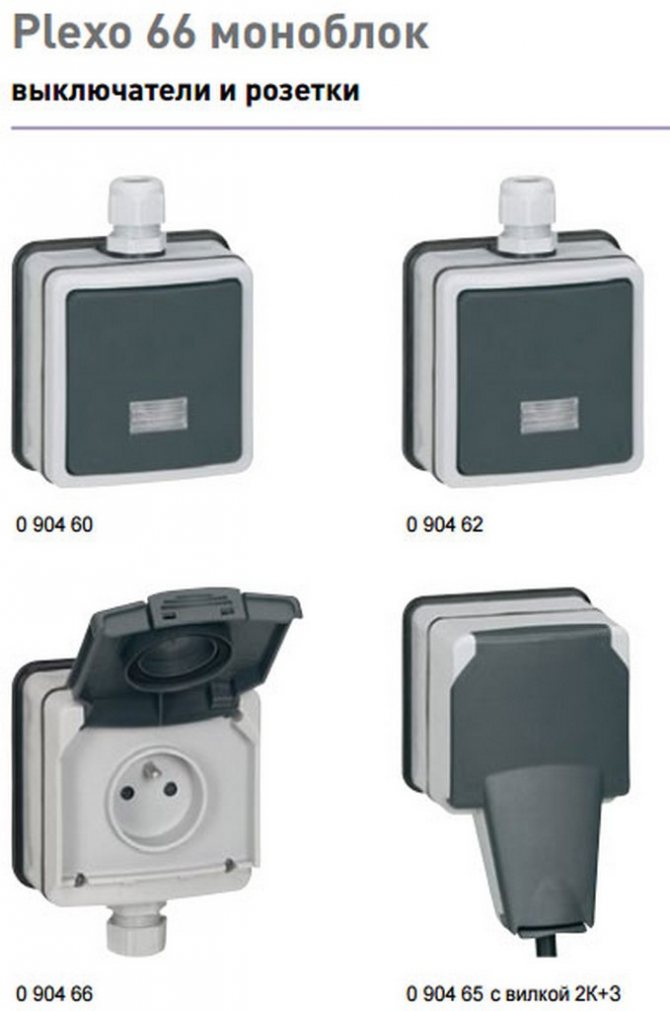
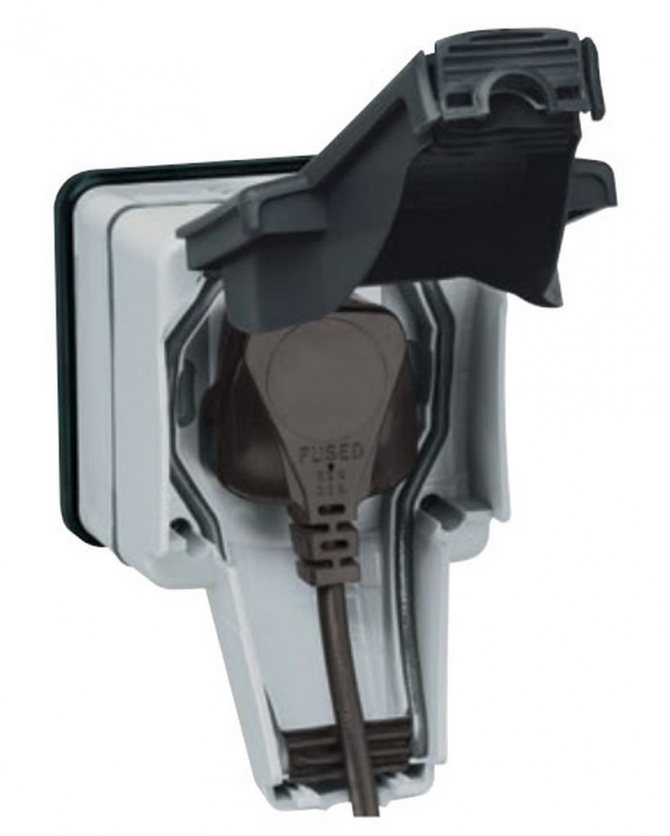
In the modern world, there are even models that, with the plug inserted, are able to completely protect against splashes. They are safe and support IP66 ! For example Legrand Plexo.
Choosing sockets for the bathroom and a place for them
As for electrical wiring, it is recommended to make it hidden. Moreover, it cannot be mounted in metal pipes. It is also prohibited to secure the cable using steel brackets.
Where should there be sockets in the bathroom?
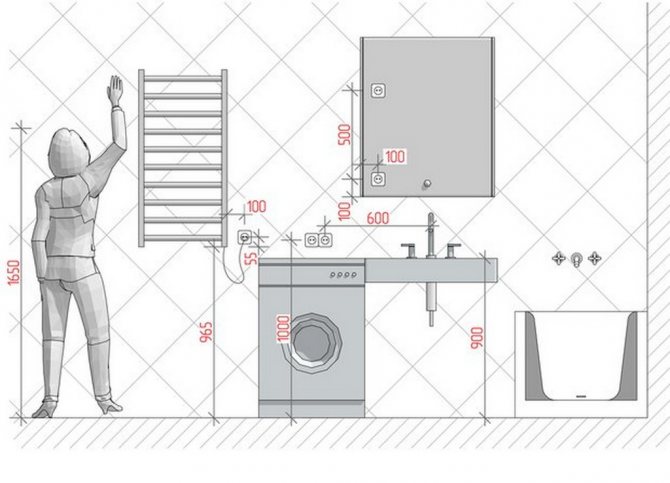
Sockets are placed at a height of at least 25 cm from the floor. Height does not have a specific digital regulation, so a simple principle works here - the higher, the better. The main thing here is to make sure that the wire is long enough. The average acceptable distance from the floor and faucets is selected - 60 cm. Under no circumstances should water reach the level of electrical equipment. Sockets and switches must be special - with a degree of protection not lower than IP44.
Scheme
Socket for heated towel rail
If you have an electric heated towel rail, it is better to make an outlet for it next to it, rather than under it. Otherwise, water from wet clothes will flow towards the outlet.
Socket for washing machine
For ease of operation of the washing machine, the socket for it is located at a height of 100 cm from the floor. There are times when the outlet needs to be hidden, for example, when there are small children in the family. Then the socket is simply hidden behind the washing machine to a height of at least 60 cm. The socket must be special - with a degree of protection of at least IP44.
Cable outlet for water heater
First you need to choose which water heater will be in your bathroom. And only then they draw a cable outlet for the water heater, when its size and the method of connecting the water are already known - from below or from behind.
Additional sockets in the bathroom
To install an outlet in a cabinet (most often in the bathroom there are mirrored cabinets), you need to decide on the choice of this very cabinet. After which it will be clear where it is better to install it.
For beauty and maintaining style, you can play with the color palette. For example: a blue switch for the bathroom, any suitable color to match the color of the living room walls, or a metal socket for the corridor. And so on, you are already guided by your color scheme. How ostentatiously it will look on the walls will depend on the correct selection of the socket for the interior.
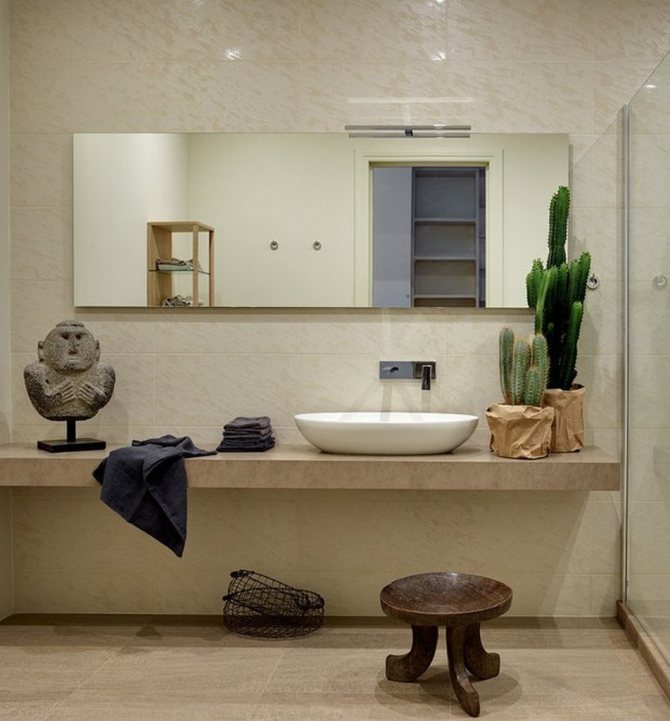
Bathroom interior
Comments:
SKIPT
Minimal splash protection is necessary, but IP 44 in the bathroom is, in my opinion, unnecessary. IP 33-34 will be quite sufficient, because... water vapor will still penetrate inside the mechanism, and in the case of IP 33 it will dry out much faster
Dunhill
In general, I install regular sockets in the bathroom, the main thing is to maintain a distance from the bathtub to the socket of at least 60 cm. The likelihood of getting an electric arc from water even at this distance is practically zero, and additional protection in the form of curtains or sealed enclosures is completely unnecessary.
Stas
What about the height? What height do you recommend for the sockets from the floor?
Dunhill
Stas, I usually install it 90 cm from the floor. In the bathroom, this height is quite justified, because... placement at the bottom is inconvenient and even dangerous, because water may get in there
Leave a comment Cancel reply
Related Posts
We make holes for sockets in concrete and tiles ourselves

How to select and connect a differential machine
What features does the Legrand switch have and how can you connect it?
How to choose the right machine according to load power for an apartment
Methods for connecting sockets, how to install them correctly
You cannot conduct wiring under the bathtub, even in corrugation, as this is also considered an open gasket.
- To connect the socket, 3- core copper cable is used, directly from the protective grounding conductor.
Recommended cable cross-section is 2.5mm2 . Under no circumstances should you use a grounding conductor from another line group or from another cable. According to the rules, the grounding conductor should not be common to different groups.
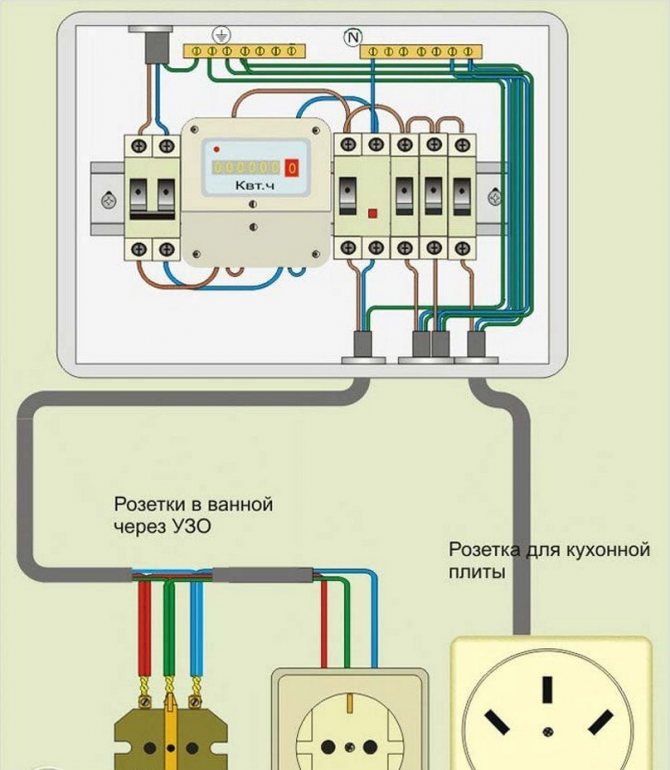
Connecting an outlet in the bathroom
- Sockets can only be connected through an RCD or differential circuit breaker with a current of no more than 30mA.
To connect an outlet, the best way is to use a 10mA protective device. Most likely, you will need to make it to order, since it is not available for free sale in stores. Of course, this will cost more. Moreover, if you also have an old washing machine, then it is possible that the RCD will turn off.
The leakage current of a washing machine, even if it has a working heating element, can be 1.5 mA per 1 kW of power. If the heating element, which is in working condition, becomes damp, its indicator will be a couple of tens of milliamps. An RCD of 30 mA will not work with such a leak, but when washing your hands, it will be very noticeable. In addition, even if only slightly, this affects the corrosion of pipes at the exit points.
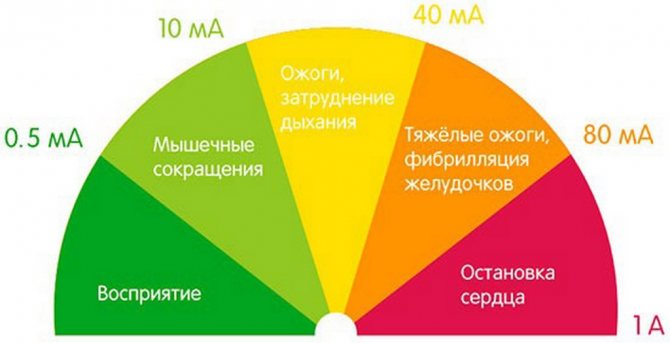
The effect of current on a person
What to do if a person is electrocuted? Everyone should know this, everyone should read this.
Portable RCDs for sockets
Let’s say that you don’t have an RCD in your electrical panel, but you need a socket; in this case, use portable RCDs for sockets.
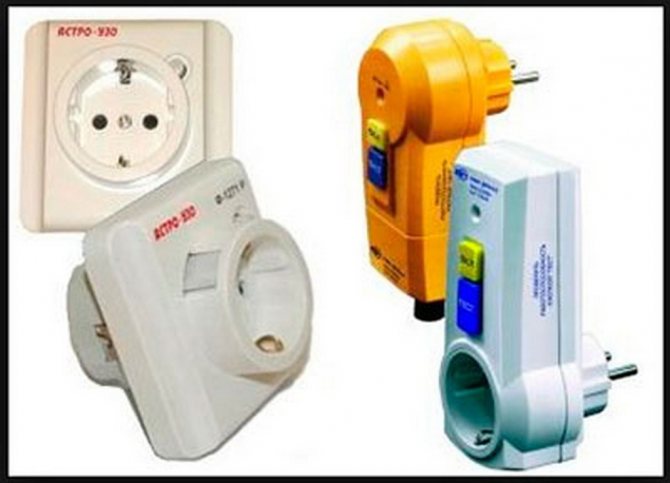
Choosing sockets for the bathroom and a place for them
You can connect the socket through an isolation transformer. But this procedure is actually very inconvenient. After all, imagine a unit weighing at least 10 kg, which will need to be somehow installed in the bathroom. In real life conditions, hardly anyone would bother with this. Then you will have to install a transformer to power, for example, an electrical appliance with a power of 1-2 kW. So installing an RCD is the simplest and most profitable option.
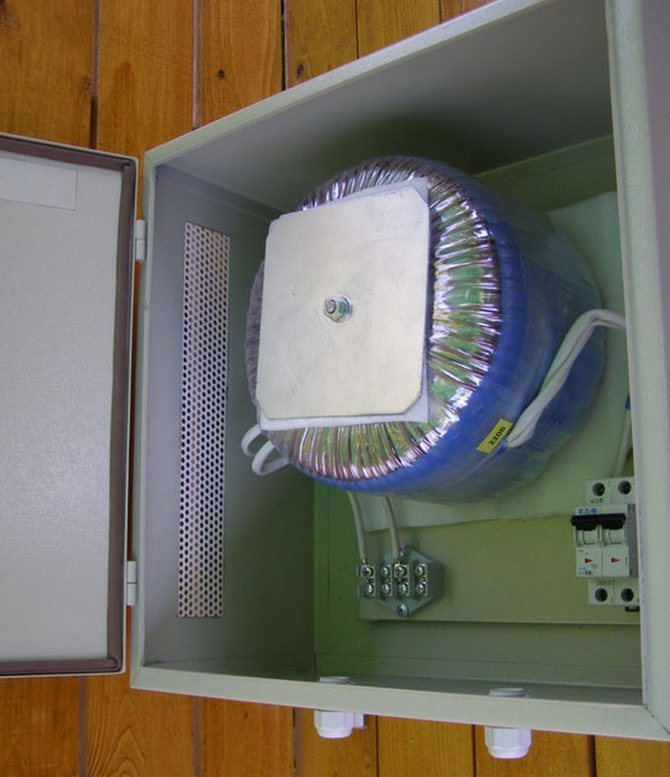
Isolation transformer for bathroom
- It is mandatory to have a potential equalization system in the bathroom. This system does not depend on the presence or absence of sockets in this room. Its meaning is that all metal elements in the bathroom must be grounded (sewage and water supply from metal pipes, cast-iron bathtub, shower, etc.)
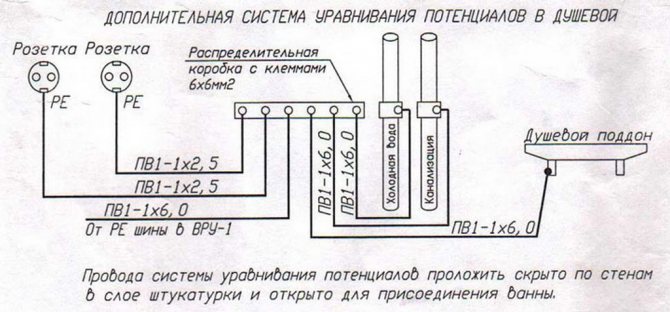
Scheme of a potential equalization system for a bathroom and toilet
Distance when installing sockets
This is an indicator of the permitted distance between the outlet and what it comes into contact with. When installing sockets, the distances are as follows:
- height of sockets from the floor - 1.3 m
- the safe distance of the socket from the washbasin, bathtub or shower is 0.6 m
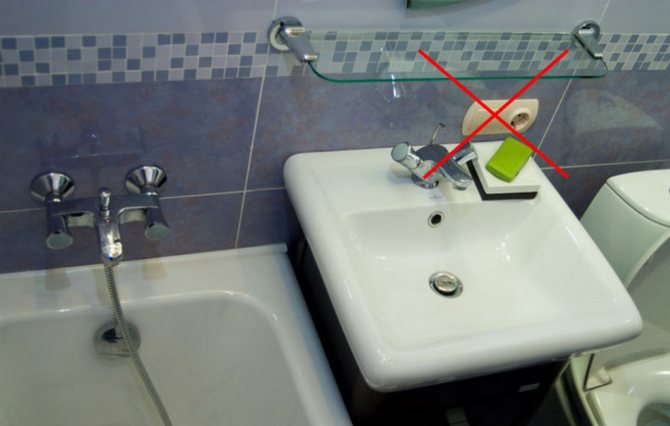
Can't be placed near the washbasin
If the bathroom is too small and it is not possible to adhere to the minimum distance standards according to the specified zones, then you will have to move the outlet to another wall, or abandon it altogether.
This is why experienced electricians tell some owners that installing sockets in their bathroom is prohibited.
A guideline in choosing the location of sockets is the division into zones and a number of additional parameters (PUE). It is necessary to take into account the fact that the correct location of devices in bathrooms is 60 cm from the source of moisture. The optimal level corresponds to the average between the suitable zone and ease of use. Thus, the socket for the washing machine is installed at a height of 40 or 50 cm from the floor. Another factor taken into account is dampness, which at elevated temperatures creates condensation. It forms on the walls. To avoid this, you need to install outlet devices at a height of at least 1.3 m from the floor surface.
The height of the socket for the shower stall should not be greater than its cover (2 m). so you should not place the socket close to the floor, since there is a risk of flooding. If you install an socket according to safety rules in old houses, then you should give preference to semi-hermetic devices marked IP 44 . Their installation should be far from the water source.
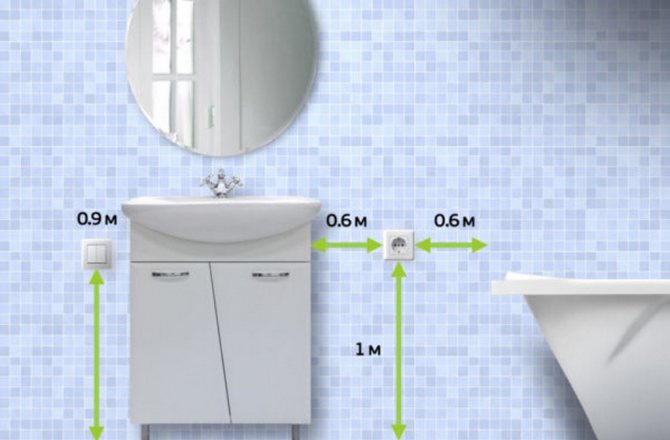
Location of sockets and switches
Sockets in the bathroom - electrical safety rules
Having considered where sockets should be placed in the bathroom in compliance with the bathroom zoning rules, you should now move on to installation rules regarding electrical safety.
- Performing grounding. This factor, responsible for safety, is provided even in old-style houses. Grounding cannot be routed into the bathroom, metal pipelines, or building fittings. It is best to connect it to the entrance panel, where the circuit breakers are located, so that, if necessary, you can quickly de-energize the apartment or distribution box.
- Automatic machines. These switches should be installed when the power of the equipment connected to the sockets is sufficiently high. This situation occurs when a washing machine is installed indoors. If one electric razor operates, it can be connected to a general power supply.
- RCD. If it is possible to install protection, you should not refuse it. It is useful to install a device with a protective shutdown in the bathroom on all wiring. The RCD immediately reacts to the slightest leakage currents and turns off the power supply completely.
What is also important to know is that in bathrooms you do not need any terminal strips with twists or other wire connectors (even under the tiles). An exception is terminals for lamps. Communication of the premises must be carried out outside the premises. When installing distribution wiring, you should do it on the other side of the wall.
Wiring cable
Copper cable is best for securely connecting outlets. Its main characteristics: less susceptible to oxidation; It is flexible, allowing you to easily connect the cable to the corresponding contacts; has the ability to withstand significant loads; have a small contact resistance when connected to sockets and automatic machines.
The cores of copper cables can consist of either a whole bundle of twisted cables or one thick wire. While not much different, the downside to thick wire is that it is less flexible, so it will be somewhat difficult to connect an outlet close to the floor. And twisted wires when connected to an electrical outlet will require coating with solder. Also pay attention to the diameter of the wire, because it will directly depend on the number of devices connected to the outlet.
You can find everything about wires and even more in this detailed article about which wires are better.
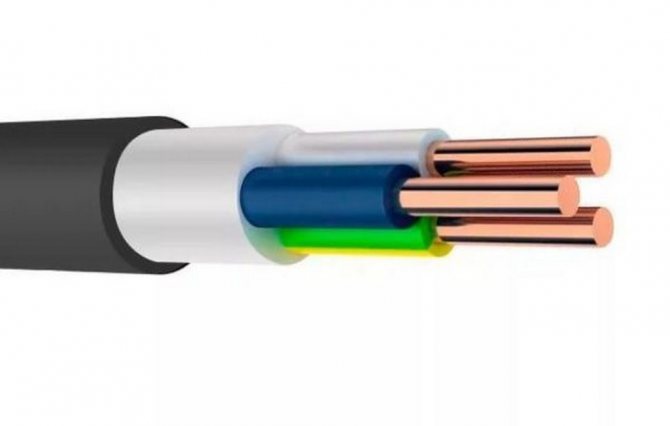
It is better to use copper wiring in the bathroom
Sockets in the bathroom - installation and installation
The installation of electrical wiring is carried out at the rough finishing stage and can be done in two ways:
- Grooving
- Installation in plasterboard
Grooving hides the wiring in the wall, which is why its installation is called hidden wiring. The first step is to determine and place the path on the bathroom walls where the cables are supposed to be routed. They should be placed vertically along a plumb line or under the ceiling, horizontally. Along the way, you should note the installation locations of the sockets. Then you need to move on to direct gating. This procedure can be carried out using a strober or a hammer drill with a special attachment. For large volumes, a disk cutting tool (grinder with a segmented diamond blade) is suitable. Attach cables using aluminum mounting strip or perforated strip. If you don't have them, alabaster will do just fine. You can also use a dowel clamp. Then all you have to do is seal the channel with the laid cables.
Partitions made of plasterboard have not lost their relevance to this day, because they are of high quality, convenient and fast. This is one of the easiest ways to install wiring. The main thing is not to accidentally touch the self-tapping screws or screws that secure the drywall. To prevent this from happening, the wiring is usually placed 20 cm from the floor. However, it is best to install cables in a corrugated pipe that has an appropriate fire safety certificate. The main thing is to do this before sheathing the second side of the partition. It should be pulled through the holes located in the vertical posts of the frame. If the corrugated pipe runs close to the screw, you should move it to the side or bite off the screw. The next step is to fill the void of the partition with soundproofing and cover the other side so that the cables are tightly sandwiched between the partitions.
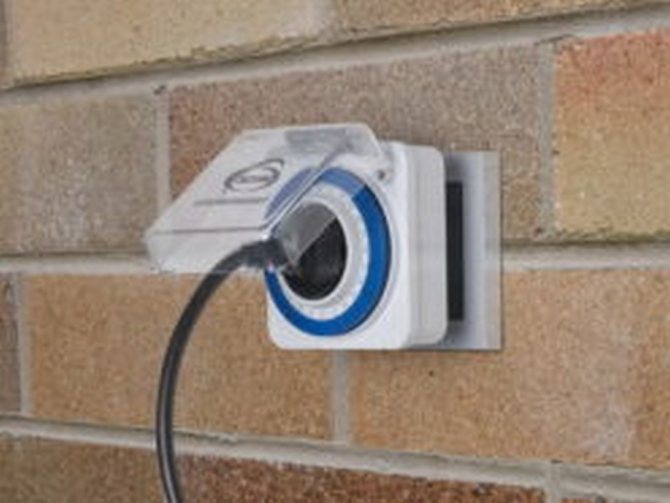
Outdoor socket
Before installing sockets in the bathroom, you should decide how many there will be. You need to think about the number of energy appliances that you will provide power to. Rather than installing several single sockets, it is better to immediately install double or triple sockets. Next you need to move on to installation, which can be done in several ways.
Several ways to install a bathroom outlet
- Overhead installation type. This is done by installing external-type moisture-proof sockets that have a protruding plastic casing. Often used when laying cables in plastic boxes. Fastening is done using self-tapping screws that fix the device to a partition or concrete (brick) wall.
- Hidden installation type. This type is used when laying cables in drywall or pipes. For drywall, you should make a hole in it that matches the diameter of the outlet box. After which it is pressed against the drywall using special screws. Next comes the connection of the wires. The next step is to attach the socket to the box. When the device is installed in the wall, you initially need to make a ring groove so that it matches the size of the socket box. After this, a hole is cut out with a hammer drill or chisel and the box is secured in it. Further installation does not differ from the previous option.
- Mounting inside a protective casing. Following safety rules when installing sockets in the bathroom, you should install sockets with a moisture protection class of at least IP4 . However, there is a way to bypass this requirement if necessary. This can be done by placing the device inside the electrical panel housing with water protection class IP4. Cases in which this design can be used:
- it is not possible to purchase waterproof sockets;
- there is a need to install a built-in lighting switch or a heated floor control unit inside the panel.
4. fasten the shield to the wall using dowel nails. After this, you need to bring the end of the cable inside and connect it to the terminal block using the appropriate terminals. Next, using mounting brackets, the socket is secured in the panel body.
