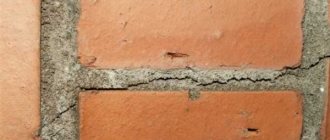
Which brick to choose for masonry?
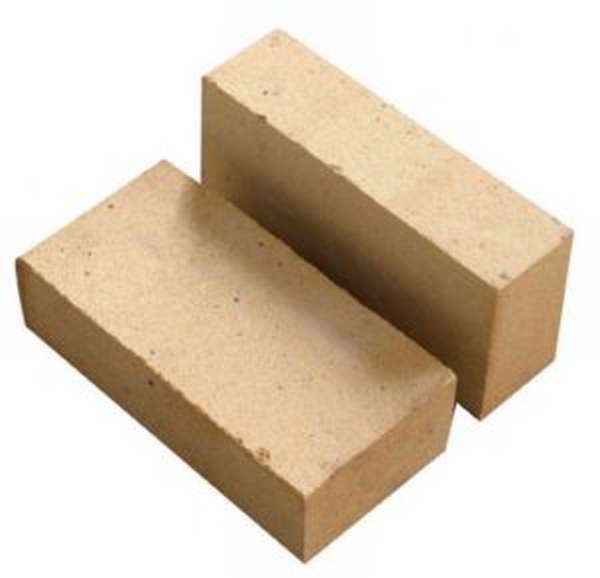
Each section of the kiln uses its own brick. The highest temperature in the firebox. The material must withstand such a load. Only fireclay bricks are suitable here.
All smoke exhaust channels and the firebox area are also subjected to a temperature test, although not so high. Here we will use fire-resistant ceramic bricks. It is cheaper than fireclay and can withstand the load.
As a base we will use frost-resistant bricks that can withstand high pressure. The weight of the entire structure will be distributed on it.
General recommendation for using brick:
- full-bodied,
- qualitative,
- with good heat transfer and heat capacity.
The bricks must have different sizes. Before purchasing, you need to clarify which order is calculated. Below are step-by-step instructions for laying a brick stove with your own hands. There you can use a brick measuring 250x120x65. Also, it is he who is taken into account in the order in photo No. 2 (below, in the section Furnace laying).
If desired, you can use various decorative types of bricks for cladding. This will give the stove a more aesthetic appearance.
In our case, you will need 60 pieces of refractory ceramic bricks and 35 pieces of fireclay bricks (including possible losses).
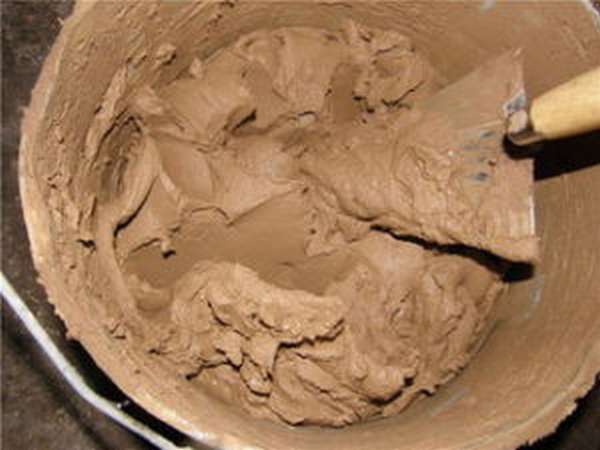
Preparation of the solution
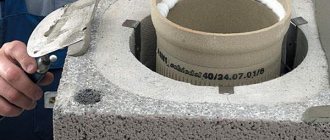
Let's start by preparing the solution. For masonry work we use a special ready-made mixture. Sold in construction stores. It is a yellow-gray powder in 25 kg bags. All that remains is to dilute it with water in the correct ratio and mix. Detailed instructions are always indicated on the packaging; you need to follow them step by step. This solution is the best choice. Its only drawback is its high price.
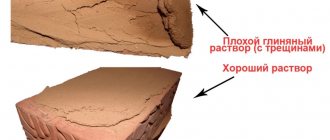
You can prepare the mortar for masonry yourself. For this we need clay and sand. First, let's determine the quality of the available clay and the content of impurities in it. We follow the following instructions:
- Roll the clay into a rope. Thickness - 10-15 mm, length - 150-200 cm.
- Take a rolling pin with a diameter of 50 mm and wrap a rope around it.
- The tourniquet should stretch smoothly and break, stretching by about 15-20%.
Expert opinionPavel KruglovKiln maker with 25 years of experience If the rope stretches more strongly, the clay is “fat”; the clay that is “skinny” breaks first. In the first option, the solution will shrink greatly under the influence of temperature, in the second it will crumble.
The next step is to prepare the sand. First, sift it through a fine sieve. The cell should not exceed 1.5x1.5 mm. Next we follow the instructions:
- using a handle and burlap, we arrange a kind of net,
- pour sand into it and start rinsing it under running water,
- Rinse until the draining water runs clear.
Thus, we have rid the sand of impurities.
We do the same with clay. Now it should be soaked. To do this, pour the clay into a previously prepared container. Pour water so that the entire surface of the clay is covered. After 24 hours, mix thoroughly. We repeat the process until the clay has a consistency similar to toothpaste.
There is no universal proportion for a solution. Everything is installed by trial and error, depending on the characteristics of the materials used. The main thing is that the solution is convenient to work with.
To increase strength, experts recommend adding a little cement or salt.
Expert opinionPavel KruglovStove maker with 25 years of experience
Here is a basic recipe for masonry mortar:
Take 2 parts of clay. Add one piece of sand to it. Using a construction mixer, mix until smooth and thick. We will need approximately 40 liters of solution.
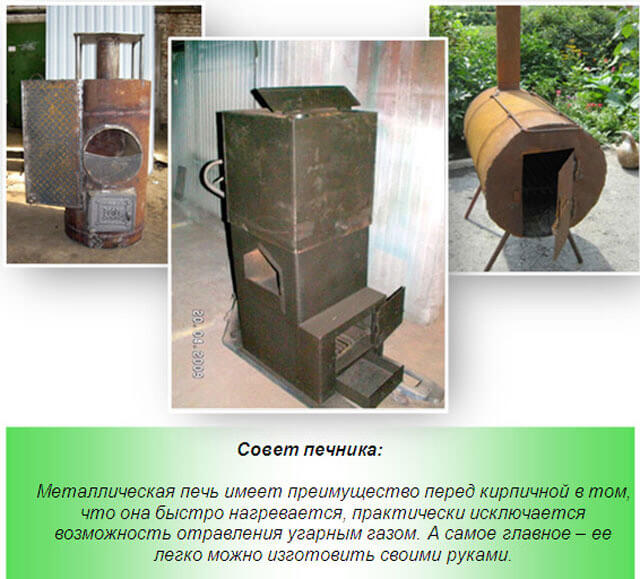
Types of potbelly stoves that can be installed in the country
Such a stove can be made from any metal containers or thick-walled metal. Naturally, you will definitely need tools that will help you cope with this difficult but creative work. To make a potbelly stove, an old gas cylinder or two cylinders, depending on the stove model, a two-hundred-liter barrel, pipes with a diameter of 50 cm or simply sheets of metal 3 - 5 mm thick and a corner are well suited.
The simplest potbelly stove from a barrel
- This model of potbelly stove is made of a metal barrel to which the legs are welded.
- Then a part of the bottom was cut out in the form of a rectangle and placed on hinges - this is how the firebox door turned out.
- At the end of the container turned on its side there is a round hole to which a chimney is welded.
- It is necessary to place a grate on the bottom of the stove so that it does not burn out and the stove retains heat for as long as possible.
- A thick steel wire is welded on top of the barrel so that a saucepan or kettle can be placed - thus creating a hob. This is the easiest and most affordable way to make a potbelly stove.
Classic vertical barrel or pipe design
Another model that can be made from either a pipe or a barrel. It is somewhat more complicated than the previous one, but the efficiency of this stove will be much higher.
- Cuts are made on the container and sections are removed from which the doors for the firebox and ash pan will be made. The hinges are welded and doors with shutters are hung on them.
- Stands for the grate are arranged inside the container.
- If the stove is made from a large-diameter pipe, the bottom is welded and the legs are attached to it. Its top is also welded - a kind of hob is obtained, in which a round hole is made for the chimney.
- If the stove is made from a barrel, it already has a bottom and a cooking surface. Legs and a chimney are also welded to it.
A pipe for making a potbelly stove is preferable to a barrel, as its service life will be longer. The efficiency of a stove made from a pipe with thicker steel walls is much higher than that of a potbelly stove made from a barrel.
Such a stove is perfect for a summer residence, but just like any potbelly stove, it requires compliance with safety precautions and isolation from flammable objects, wooden floors and walls during its operation.
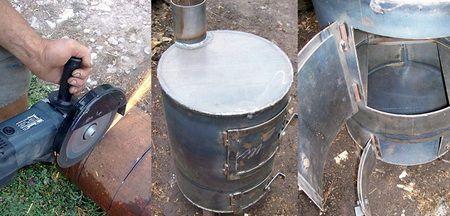
Potbelly stove from a gas cylinder
This version of the potbelly stove is made from a gas cylinder. It does not have a hob, which reduces the functions of the stove to one - heating the room.
- Holes are drilled in the bottom of the future stove to dump ash into an ash pan welded under an improvised grate, which is made from a metal sheet. The ash pan also plays the role of a blower - a small door is installed to close it. Next, the legs are attached to the bottom of the stove using welding.
- From the bottom of the cylinder, which has now become the front wall of the furnace, a part is also cut out that will serve as a door, then it is installed on welded hinges. A pipe is welded on the opposite side of the firebox. It can be installed on top of the cylinder or located behind the stove.
This is also a fairly simple design of a potbelly stove, which can be done independently.
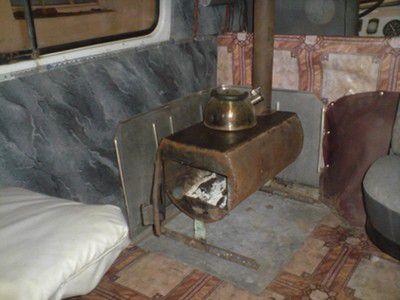
Particularly convenient - wide cooking surface
Another version of a stove-stove from a gas cylinder is made as follows:
- Its upper part is cut off, where the door will be located, and the side part is cut off for installing the hob.
- Next, the legs are welded to the future stove and the door is installed.
- A round hole is cut in the hob for the chimney pipe.
- It is best to make holes in the bottom of the oven and provide an ash pan.
- For safe operation, the potbelly stove must be installed on a non-combustible material, and if the walls of the building are wooden, then their insulation is also indispensable.
This model is quite simple to implement and is well suited for use in a summer cottage or garage. The hob is large enough to accommodate a kettle and a pot or pan at the same time.
You can make the task somewhat more complicated, while increasing the efficiency of your product. So, a potbelly stove for a dacha is made with your own hands from two cylinders, as, for example, shown in the attached video:
Video - The process of creating a potbelly stove with your own hands
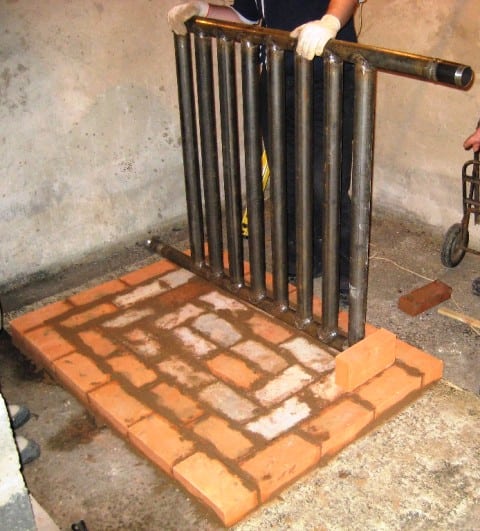
A more complex version of a potbelly stove made from a piece of metal pipe, in the lower part, with which a grate is fixed in the form of a bottom.
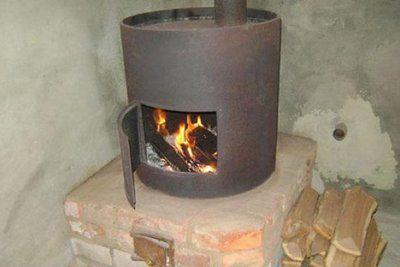
Simple at first glance, but very effective
The upper part is a circle cut out of a sheet of metal, a hole is made in it, then a chimney pipe is welded into it. This entire structure is embedded in a brick box made of four to five rows, which will serve as a blower. Its height is calculated based on the width of the blower door. The stove is installed permanently, the chimney can be discharged through a wall or roof.
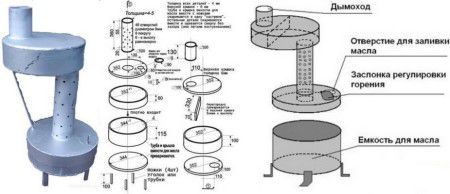
Option for a potbelly stove using waste oil
There is also an option such as a potbelly stove that runs on waste oil, which is poured into the lower tank and set on fire. This stove has several disadvantages - that it can warm a very small room, and that its operation can lead to the appearance of odors from fuel combustion. It should be immediately noted that this option is more suitable for a garage or utility room than for a living space, but you need to take note of it, since a garage may also be present on a summer cottage.
- The necessary elements are cut out of an iron sheet (the shape can be round or rectangular), and a fuel tank is made from them.
- Two holes are cut in the upper part of the tank for the pipe and for refueling. The second should have a sliding lid.
- The legs are welded to the resulting tank.
- A pipe with small round slots is welded into the large hole, through which air enters.
- Then the upper tank is made - a secondary combustion chamber, which is welded to a pipe with slots.
- In the upper tank, the lid must be removable, and there must be a hole in it for the chimney, which leads to the street.
How to properly fold a potbelly stove?
Even a beginner can correctly assemble a brick stove-stove on his own. To do this, you need to know and follow the simple rules that greendom74.ru will provide below.
Scheme and drawing
Below we will look at how to build a potbelly stove out of brick with your own hands. The drawing and dimensions can be seen in photo No. 1:
Photo No. 1 do-it-yourself drawing of a potbelly stove made of brick
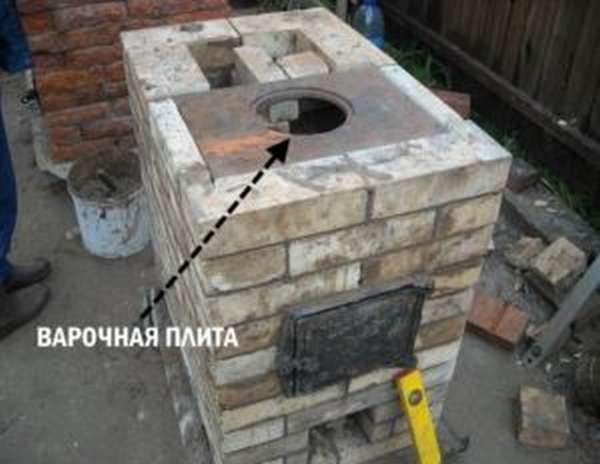
The sequential layout of bricks from a potbelly stove is shown in photo No. 2:
Photo No. 2 sequential layout of bricks (diagram)
We have decided on the materials and design of the furnace, and the solution is ready. This design does not require a foundation. For comfortable and safe operation, heating must be placed in compliance with all fire safety standards. Having chosen a place, lay two layers of waterproofing. On top we make a preparation of sand, 10 mm thick. Let's start laying:
- We lay a brick on top, without mortar (see photo No. 2, first row). We strictly control horizontality using a level.

- We install the door for the blower. We secure it with wire and wrap it with asbestos cord.
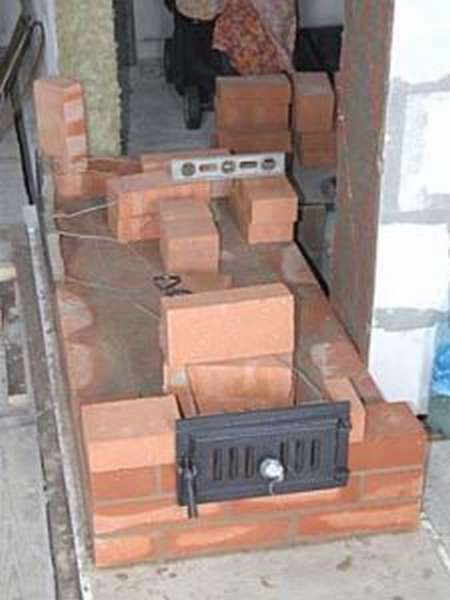
- We continue laying (see photo No. 2, row No. 1).
- Next comes fireclay brick (see photo No. 2). Grate bars will be installed above it.
- We place grate bars directly above the ash pit.
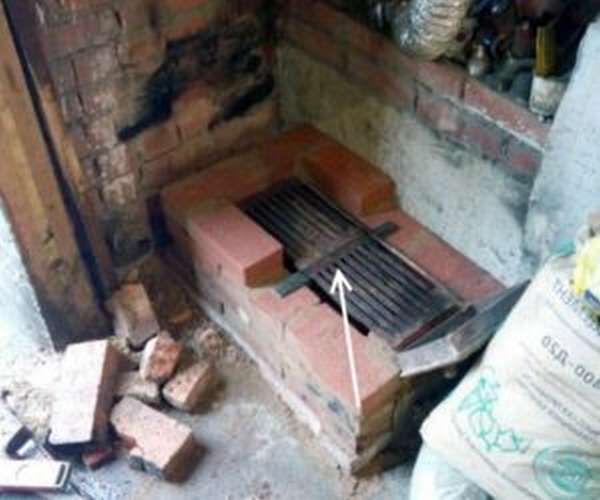
- We place the next row on a spoon. We put the wall at the back without mortar (knockout bricks).
- Installing the firebox door. We secure it with wire and bricks.
- On top we place a row on the bed along the contour of the fourth.
- The next one is on a spoon again. We put 2 bricks at the back.
- The row at the top should overlap the combustion door and end 130 mm above it.
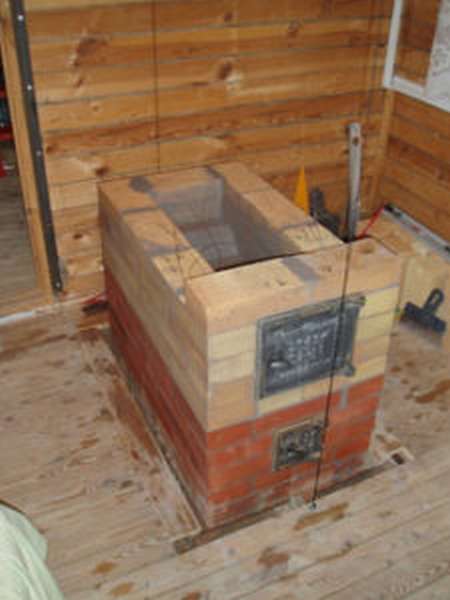
- We continue laying, moving the bricks back a little. Before this, we lay an asbestos cord on which we will install the hob.
- Let's start forming the chimney from the next row. The design provides for the installation of a mounted pipe made of tin or corrugated aluminum. The pipe should not be heavy. Otherwise, the center of gravity may shift.
- On the eleventh row we install a valve to regulate the air flow. Don’t forget to seal it with asbestos cord and cover it with clay.
- Next, we place a chimney pipe in the quadrangle, which we connect to the metal one. The pipe must stand strictly vertically and not lean to the side. For greater stability, it should be covered with three rows of bricks.
- We remove the knockout bricks that we placed on the 4th row and clean the chimney of debris.
- Now the stove should be whitened. Any lime will do. Experts recommend adding blue and a little milk. This way the whitewash will not darken and fly off.
- We install a metal sheet in front of the firebox.
- We install the baseboard.
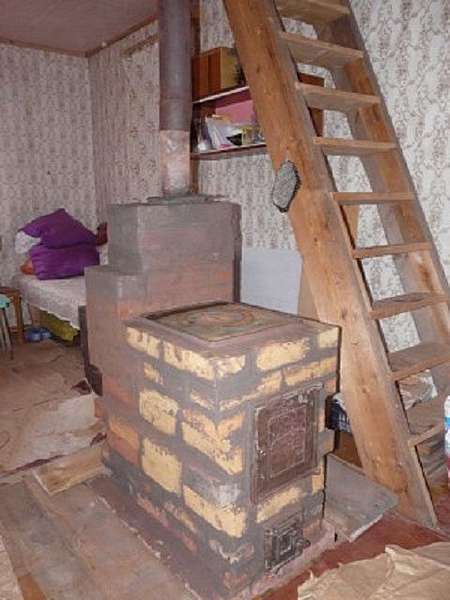
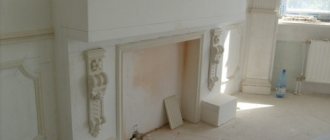
An example of a finished brick stove
Drying
The cause of cracks is excess moisture in the bricks, so the oven must be thoroughly dried. There are two stages of drying: natural and forced.
- Natural drying lasts at least five days. All doors must be fully open. To increase the intensity of the process, place a fan in front of the firebox or stick it into it and turn on a regular electric incandescent lamp (not an energy-saving one). It will not be possible to completely dry the oven using this method, so we move on to the next step.
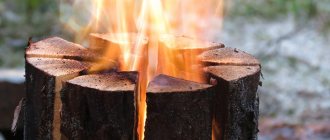
- Forced drying is carried out by burning dry wood. This type of fire is carried out once every 24 hours. You should only heat with small dry logs. Open the blower door slightly and open the plug halfway.
When the wood burns out, loosely cover the ash pit. Close the top plug, leaving 1-2 cm. When the coals burn out, open all channels. Carry out this fire for a week. On the first day, about 2 kg of wood is burned. Then add 1 kg every day.
Making a firebox door
This element is the most complex in the entire structure. The following table shows the standardized dimensions of oven doors:
| Size | Blower, cleaning doors, mm | Openings for fire doors, mm | |||
| length | 25 | 25 | 25 | 30 | 25 |
| width | 130 | 130 | 250 | 250 | 250 |
| height | 70 | 140 | 210 | 280 | 140 |
We make the door for the firebox according to the drawings shown in photo No. 3:
Photo No. 3 drawing of the door for the firebox and cleaning chamber
Metal cladding
A brick potbelly stove can be additionally sheathed with metal. We will get a metal potbelly stove with all the advantages, but without the disadvantages (except for weight). This design will protect the stove from cracking and chipping. This will significantly increase service life. This will require sheet metal 4-6 mm thick. The process is not particularly difficult. The metal sheet is marked, the necessary parts are cut out with a grinder or a cutter. Next, the cladding is carried out and connected using welding and a metal corner.
This design is not only durable, but safer. However, it requires additional costs and labor.
Brick base for potbelly stove
The first thing to do before starting masonry work is to build a solid foundation with a rigid base. If a concrete screed serves as a floor covering in a room, that is enough . For wooden floors, it is necessary to strengthen the base - create a monolithic pad or strip foundation . The width of the foundation should exceed the dimensions of the stove by 10 cm . This issue is discussed in more detail in hundreds of videos on youtube.ru.
The sequence of work to prepare the foundation for a brick potbelly stove for a wooden house:
- dismantling the surface area for the foundation;
- is dug - 30-40 cm and covered with a layer of sand 6-7 cm thick;
- a layer of crushed stone 5-10 cm thick is laid on top of the sand;
- a metal mesh of reinforcement ;
- formwork is made, the height of which should be 10 cm more than the floor level;
- concrete is poured and bayoneted with shovels;
- The screed is leveled and time is given to dry.
2 to 4 weeks for complete drying . On the second day and the next seven, it is necessary to water the screed with plain water to avoid drying out. The waterproofing is installed after the screed has completely dried.
If a foundation is not necessary, a foundation is required . An asbestos sheet is laid on top of the boards, a plastic film is placed on top and covered with sand, 1 cm thick. Now you can start laying.
Installation and connection
When installing the stove, you must strictly follow the fire safety rules:
- The distance to walls and surrounding objects must be at least 800 mm. The walls can also be covered with ceramic tiles.
- All parts of the chimney must be tightly connected.
- The room must be equipped with a supply and exhaust ventilation system.
The chimney is installed like this:
- We fix the first piece of pipe above the chimney opening.
- We increase the pipe bends to the ceiling level.
- We make holes in the ceiling with a diameter of 170 mm. We remove a layer of thermal insulation around the hole to prevent fire.
- First, we mount the pass-through glass, then insert the pipe into it.
- Next, we connect the pipes to the external chimney.
- We apply bitumen to the pipe and insulate it.
If you need to heat a large area, you can connect the stove to a heating panel. This will increase the heat flow and allow it to be retained longer.
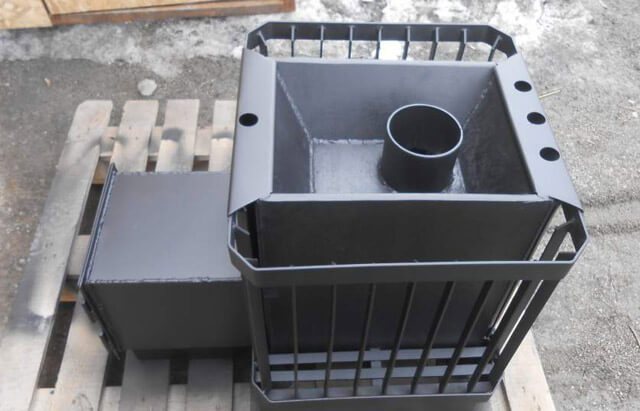
Making a bath unit
One of the best options for a heating device for a bath is a metal stove made of sheet steel, lined with brick. Such a homemade sauna stove is not mobile, but it is fireproof, which means it can be installed in a residential building and even in a wooden sauna building.
To build it, you will need the following tools:
- welding equipment;
- Bulgarian;
- diodes 3-4 millimeters.
You also need to have sheets of iron 2–3 millimeters thick, and reinforcement 8–10 millimeters.
An important point is that when arranging such a stove, it is necessary to choose the correct cross-section for the chimney, since the draft force depends on this, which is also influenced by weather conditions: the warmer and more humid the air, the weaker it is.
If the chimney is not wide enough, gases and air will begin to mix before they have time to escape. This creates a smoke plug. If the diameter of the pipe is too large, then the gases in it will move too slowly, and the surface of the inner walls will quickly become clogged.
Do-it-yourself iron sauna stoves are built like this:
- First of all, the foundation is laid out. For it, a wooden formwork 20 centimeters high is built so that a square measuring 1x1 meter is formed.
- The reinforcement is mounted in one layer, making a mesh of rods with cells measuring 20x20 centimeters. It is necessary that the reinforcement does not touch the ground, so it is supported on pre-installed pegs and tied in weight.
- Prepare a cement-sand mortar in a ratio of 1:3. For it, take 1 part of cement no lower than grade M400 and 3 parts of fine river sand. To add strength, some crushed stone is added to the mixture.
- The solution is poured into the formwork, covered with polyethylene film and left to dry for 4 weeks. Once a day, the concrete must be sprayed with cold water and covered again, otherwise it will begin to crack.
- Next, you need to take the rear wheel rim and weld all the holes on it, leaving only the central one.
- The convex top is cut off from the second rim, the first one is inserted into it and welded. The main thing is to create a tight connection, because there will be hot liquid inside.
- On the inside of the second rim, at an equal distance from one another, reinforcement is welded on three sides. It needs to rest against the pipe to give the structure rigidity.
- A round 25 mm hole is created at the bottom of the first rim and a pipe of the appropriate cross-section is welded to it. A faucet is screwed into it to drain water.
- Next, exact copies of the two rims are made. A copy of the second of them is placed on the pipe, the copy of the first rim is turned over and welded to the end of the pipe. A second copy of the second rim is attached to the top and reinforced with reinforcement for rigidity.
- When the foundation mortar has hardened, the formwork is removed and bricks are laid using a clay-based mixture.
- The location of the furnace is completely covered with bricks to protect against fire.
- The base is made of brick, and from the second row they begin to lay out an ash pit with a blower. By means of it, ash is removed and thereby ensures the flow of air inside, which helps the appearance of good draft. The length of the ash chamber should be less than that of the firebox.
- Install the blower door, line it with bricks and lay another row. A grate is placed on the ash pit shaft.
- After the grate, two rows of bricks are laid out, leaving space for the firebox door. Two more rows are created on top.
- The masonry is allowed to dry for 2 weeks, ensuring air circulation. Then the stove needs to be heated with wood chips for 1.5 - 2 hours.
- The finished pipe is installed on the brick structure. There is a heater and a container for hot water on it.
- The weight and dimensions of the stove are quite large, so it is better to divide it into its component parts and assemble it inside the bathhouse on site.
- The top of the chimney is reinforced with reinforcement rods, welding one end to the pipe and resting the other against the wall. To attach it to the wall, use a metal plate or a steel angle.
Features of operation
Expert opinionPavel KruglovStove maker with 25 years of experienceThe operation of such a stove is similar to a regular brick stove. Although it does not retain heat so well. Therefore, a brick potbelly stove made with your own hands will have to be heated again 4-6 hours after the last coals have burned out.
This indicates the unprofitability of using such a design for constant heating. However, for heating a garage, cottage, etc. periodically, it may well be used.
This stove runs only on solid fuel. This is another drawback.
At the same time, the design is simple to manufacture and operate. This is what determines its popularity.