Materials
During the construction process, materials will be required to build a foundation for the device, laying the structure of the furnace and chimney pipe itself, as well as metal cast iron elements in the following quantities:
| No. | Name | Unit measurements | Quantity |
| Furnace design | |||
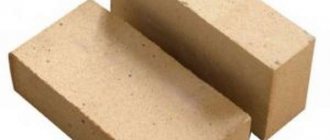
| 1 | Red burnt solid brick M-200 | Thousand PC. | 1,85 |
| 2 | Fireclay brick ShB - 8 | Thousand PC. | 0,02 |
| 3 | Oily clay | kg | 250 |
| 4 | Coarse river sand | kg | 300 |
| 5 | Blower door | PC. | 1 |
| 6 | Cleaning hatches “DP-1” | PC. | 8 |
| 7 | Grate “RD-6” | PC. | 1 |
| 8 | Fire door 25x28cm “DT-4” | PC. | 1 |
| 9 | Cast iron two-burner stove 70x40 cm | PC. | 1 |
| 10 | Gate valve | PC. | 2 |
| 11 | Strip steel | m | 20 — 25 |
| 12 | Angle steel | m | 1,5 |
| 13 | Steel wire | m | 20 |
| 14 | Sheet steel 5 mm thick | m² | 0,5 |
| 15 | Asbestos cord | m | 15 |
| Foundation | |||
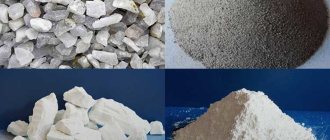
| 1 | Portland cement | T | 0,65 |
| 2 | Construction sand | m³ | 3,5 |
| 3 | Crushed stone | m³ | 4,5 |
| 4 | Ruberoid | m² | 16 |
| 5 | Edged board 40 mm thick | m³ | 0,5 |
| 6 | Nails | kg | 1 |
| 7 | A1 fittings with a diameter of 12 - 14 mm | m | 90 |
| 8 | Steel knitting wire | m | 30 |
| 9 | Bitumen | kg | 10 |
Tools
To lay a Russian stove with a stove and a stove bench, you will need to assemble a set of tools consisting of:
- trowel - for applying oven mortar;
- hammer - pick - for splitting bricks into smaller parts;
- ordering - control of seam thickness;
- jointing - design of seams on the facade;
- rules - for smoothing the surface of the foundation;
- building level, plumb line, square, tape measure;
- measuring strip for measuring the width of masonry joints;
- two containers for the production of concrete and clay-sand mortar;
- shovels - for loading and mixing the components of the masonry mixture.
Drawing and foundation
To build a Russian stove with your own hands, drawings are a fairly important part. Of course, you can do without them, but then there is a high chance of making a mistake during the work, so it’s better to compile them anyway.
The first step of the practical part is arranging the foundation for the structure. Here it is worth mentioning right away that in order to create a good foundation, you will have to dig a foundation pit in the place where you plan to build the building.
Preliminary work
Masonry mortar
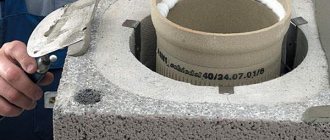
The process of preparing a mortar for laying a furnace is much more complicated than a conventional cement-sand composition. The main component in it is fatty clay. First of all, it is cleaned of large foreign inclusions. Then soak for at least 24 hours. When the clay particles swell, it is rubbed through a metal sieve.
Another component is washed river sand, which it is advisable to calcinate before adding it to the mixture.
On average, for 2 parts of clay you need to measure 1 part of sand, but the percentage of fat content of clay is always different, so it is better to determine the correct proportions experimentally. To do this, mix a solution with different amounts of components in three small jars and roll them into flat cakes.
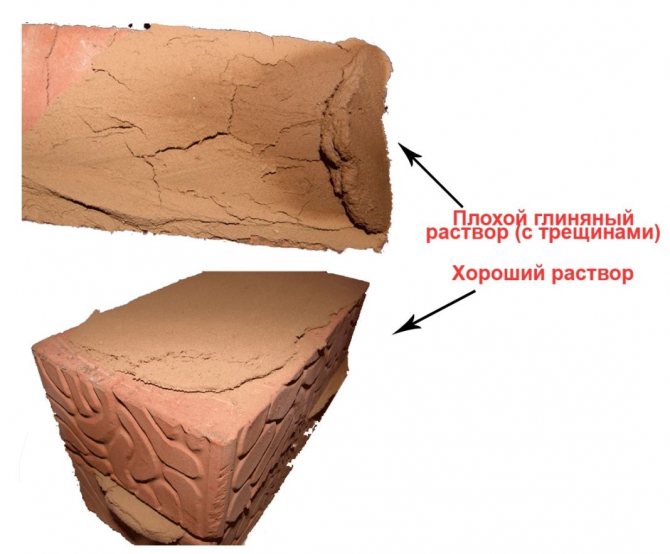
Comparison of solutions
After 3 days, they look at which of the samples has fewer cracks - this means that the entire masonry mixture must be mixed in these proportions.
Making the foundation
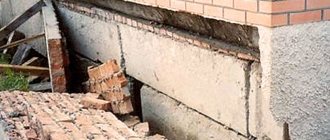
Such a massive structure, such as a Russian stove with a stove bench and stove, must have a reliable support underneath it, not connected to the foundation of the main structure. Therefore, installing the device in an already built house is much more difficult than at the stage of its construction.
The most reliable support for a Russian stove is a monolithic reinforced concrete slab. It is constructed using standard technology. The depth of its base must correspond to the level of the base of the foundation of the internal wall near which the device is installed.
There should be a gap of 5 cm between the walls of these structures, which is filled with sand. The upper plane of the slab should be 15 cm below the floor level. If a place is chosen for the construction of a Russian stove near the outer wall, under which there is a deeper foundation, then the foundation structure for the stove must be expanded.
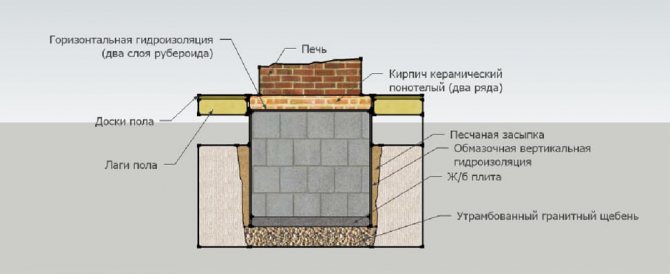
Foundation diagram
The process of making the foundation itself is as follows:
- mark the dimensions of the oven;
- tear off the pit 25 - 30 cm wider from the intended lines on each side and 25 cm deeper than the future support;
- level and compact the bottom of the pit;
- pour a sand cushion 10 cm thick with water and layer-by-layer compaction;
- lay a 15 cm layer of crushed stone and also compact it thoroughly;
- install formwork;
- roofing felt is attached to the inner walls of the formwork;
- the reinforcement frame is knitted along the entire height of the support. The mesh is laid parallel in two rows in the lower and upper parts of the base and fastened together with transverse reinforcement rods;
- pour the concrete mixture into the formwork. Concrete should be laid in layers of 20-25 cm and thoroughly compacted with vibrators. This is done to prevent the formation of voids in the body of the structure. The upper plane is leveled using a rule or a regular board;
- the formwork is dismantled a week after the concrete has set and gained its initial strength;
- to protect against the effects of soil water, after 22 - 25 days the side walls of the structure are coated with hot bitumen, and the top surface is covered with two layers of roofing felt.
Order and description of masonry
Arranging a Russian stove with a stove bench and stove
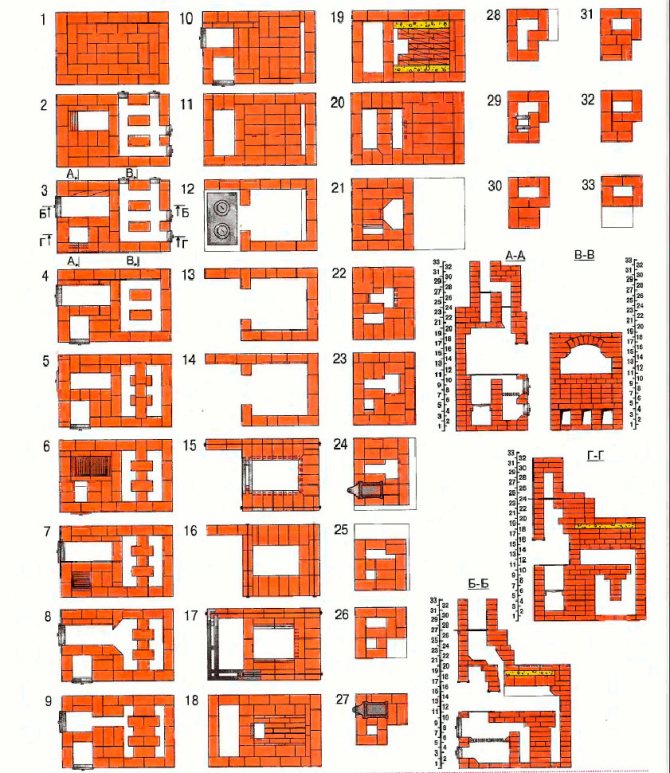
The laying of a Russian stove with a stove bench and stove is carried out according to the order (in the photo above), which clearly shows where each brick needs to be placed in rows and at what stage the stove fittings should be installed.
Description of masonry in rows:
- The 1st row is laid solid in the following order: first, the brick is laid around the perimeter of the structure, and then the middle is filled. This row determines the evenness of the entire structure, so it must be well aligned;
- in the 2nd row they begin to form under. To do this, bricks are placed on edge;
- in the 3rd row, install a blower door and continue to lay out the bottom of the cooking section with bandaging of the elements of the previous row;
- the laying of the 4th row is similar to the 2nd;
- The 5th row is the formation of a clearing passage and laying the foundation under the arched vaults;
- 6th row - they begin to narrow the cleaning channel and install the grate;
- 7th and 8th rows - installation of the combustion chamber door, placement of the steel sheet;
- from the 9th to the 11th row - formation of the firebox, installation of the stove;
- from the 12th to the 16th row - laying a niche on the hob;
- 17th and 18th rows - narrowing of the arches of the niche;
- from the 19th to the 21st row - completion of the laying of the bed;
- 22nd row - formation of a heil;
- from the 23rd to the 33rd - raising the chimney with the installation of valves and cleaning hatches.
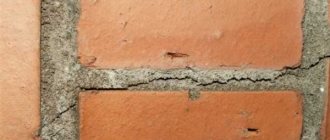
When laying a stove, the seams are bandaged in each row, using bricks that are not full size. For proper dressing, you can also use the poke-and-spoon masonry technology, when the brick of the bottom row is laid flat, and in the next row - with the poke outward.
Ceramic products can draw water out of the joint material, so they are immersed in water for a few seconds before installation. Excess clay-sand mixture protruding on the internal surfaces of the parts of the device must be removed with special care.
Masonry structure

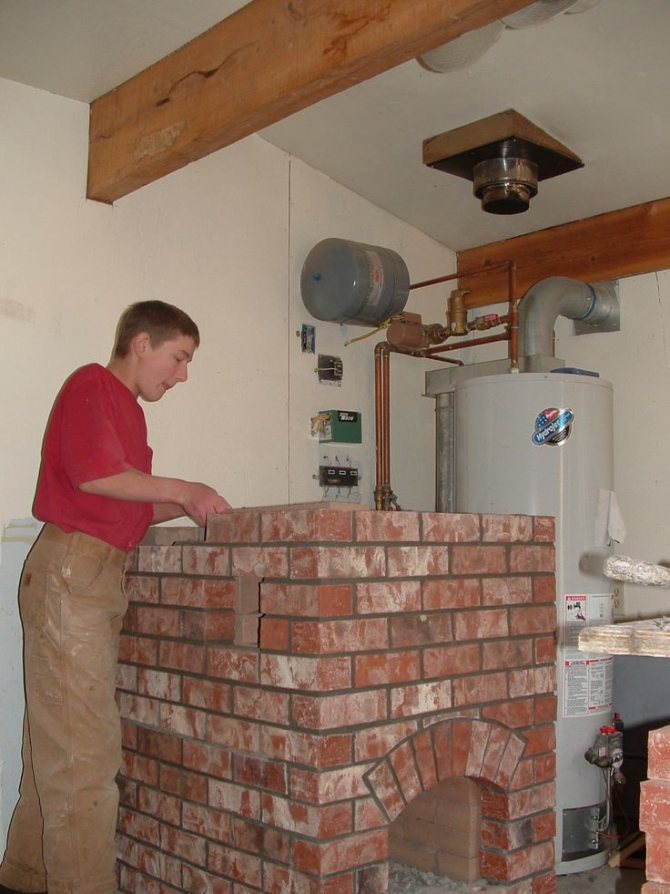
One of the most important stages in building a Russian stove with your own hands is bricklaying. The described design must, first of all, be completely safe for the residents of the house, which means that low-quality bricks with cracks or chips cannot be used. The thickness of all seams is from 5 to 8 mm. In addition, different masonry is used. Some sections must be made in one brick (length of raw materials), half a brick (width) and a quarter of a brick (thickness).
To achieve maximum functionality from the building, it is necessary to immediately remove excess mortar from the walls, not only from the outside, but also from the inside. Do-it-yourself drawings and ordering of a Russian stove should take into account the thickness of the masonry of the external and internal walls. You can use either half a brick or a whole one on the outside, but only half a brick on the inside. However, the thicker the wall, the longer the heating of the structure will take. For this reason, half-brick masonry is considered optimal for any walls.
Drying
To dry a Russian stove with a stove bench and a hob, shavings, chips and small logs are used. The first combustion should be carried out with fuel in an amount of no more than 30% of the maximum volume. With each subsequent firebox, the volume of loaded firewood increases.
The drying time is influenced by the size of the oven, the degree of humidity of the brickwork and the temperature in the room. Typically, drying in the summer season takes a week; in the cold season, this period can last up to 25 days . All this time, the valves and combustion damper must be open.
You need to stop drying the oven at the moment when there are no damp spots left on its surface, as well as condensation on metal parts.
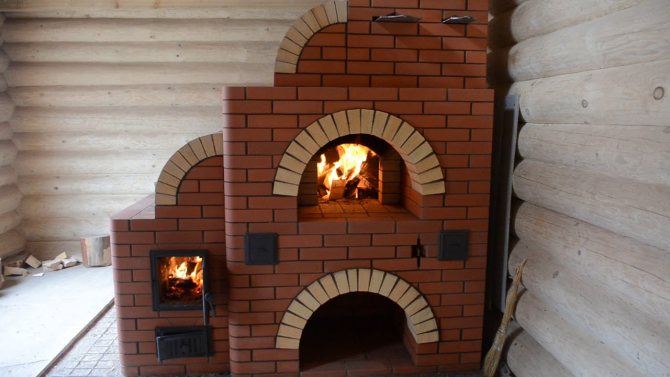
Construction of a Russian stove with flooding
There are many design options for a Russian stove, but its constituent elements are always heating and cooking sections, an oven and at least a small-sized stove bench.
A modern Russian stove is additionally equipped with a flood chamber (an additional combustion chamber), thanks to which it heats up faster and releases more heat into the room. It can also be used for cooking in the warm season, when there is no need to heat up the entire oven.
Construction of a Russian stove with flood:
- Foundation. Stone, brick or concrete are used for its construction.
- Sub-kilns are cavities in the lower part of the stove where firewood is dried for storage.
- Cold stove - recesses in which you can store kitchen utensils.
- The six is a flat horizontal section in front of the entrance hole to the furnace. Cooked food left on the grill stays hot longer. Some stove models have a hob installed in this place.
- The hearth is the bottom of the furnace or cooking chamber. It is located at a slight angle to the pole, which makes it easier for heavy cast iron to move.
- The folds are the transitional plane between the hearth and the hearth.
- Cooking chamber or crucible - a cavity inside the oven intended for storing firewood and placing utensils made of heat-resistant material for cooking. The ceiling of the furnace, like the hearth, has a slope towards the entrance.
- Overtubes are cavities above the pole where smoke collects. It is the base of the smoke exhaust duct.
- Samavarnik (dushnik) - a narrow channel entering the chimney. Previously, a samovar pipe was connected to it. In modern models of Russian stoves, a choke is rarely installed.
- Chimney - a vertical channel above the hearth, designed to remove fuel combustion products into the atmosphere.
- Fluffs are an extended segment of the chimney located close to the ceiling.
- View - a small window with a door designed to completely cover the chimney. Through it there is access to the valve, which is used to adjust the draft in the furnace.
- The damper is a thick sheet of steel with well-finished edges and a handle. Serves as a door for the inlet of the furnace.
- Grate bars are cast iron grates installed between the fuel chamber and the blower.
- The bench is a large horizontal plane located behind the chimney. Underneath it there are channels with circulating streams of hot air, so during the firing of a Russian stove it is always warm, and if you close the necessary valve, it will retain heat for a long period of time.
Russian stove with a trench (right)
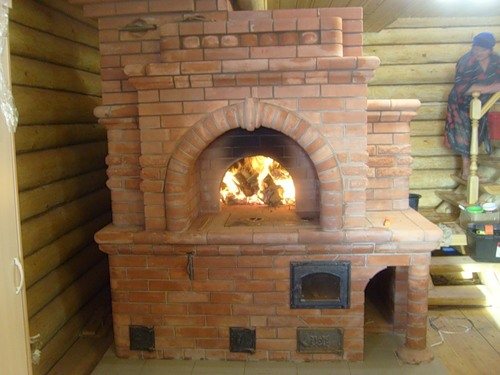
Example 2 (flood below, right)
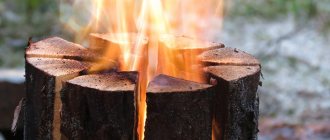
Trial fire
After drying is complete, perform a test fire in the following sequence:
- the combustion chamber is loaded as much as possible with dry wood, laying it in dense rows and set on fire. At this moment, the valve should be fully open, and the wellhead valve, on the contrary, should be tightly closed;
- after the first batch of firewood has burned out, the next portion of wood is loaded, but only 2/3 of the furnace is already filled;
- The intensity of fuel combustion is regulated using a valve;
- Complete closing of the valve is possible after all the firewood has burned out and the formed coals have gone out.
The next fire can be started only after the stove has completely cooled down.