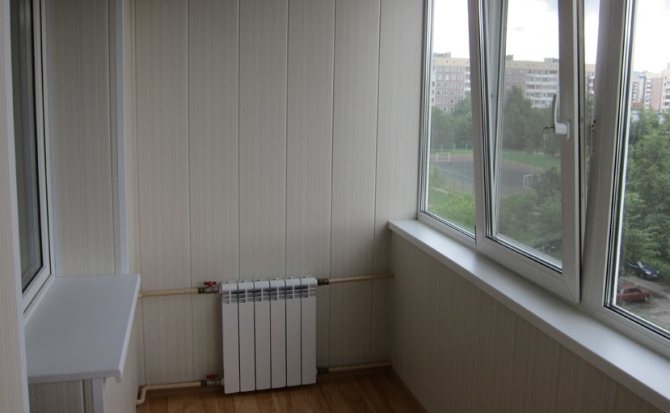
An insulated balcony is the dream of many happy owners of additional square meters. Various repairs are being carried out - expensive glazing, insulation of walls and ceilings, laying heated floors. However, it is difficult to imagine a truly comfortable loggia, which can become your office or recreation room, without a heating radiator.
The process of its installation is long and multi-stage: from developing a redevelopment project and obtaining permission to complex installation work. Let's try to understand this complex system.
An insulated balcony or loggia is the dream of many apartment owners
What should you consider when installing a battery on a balcony/loggia?
Before you take the battery out onto the balcony, you need to consider several serious points.
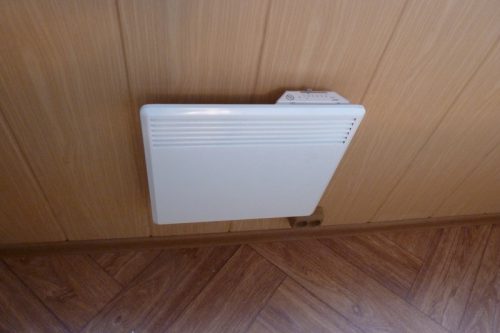
- Getting permission. To legally install a central heating radiator on a balcony, you need to thoroughly run through the authorities and spend a lot of effort, money and time - and more than one month. However, a positive result is not always guaranteed. If you are not ready for bureaucratic sacrifices, it is worth considering other options for heating equipment for the loggia, for example, a mounted electric battery.
- Accurate calculations. It is necessary to think through everything exactly: the number of sections of the balcony battery, the place for it, the temperature of the environment, the pressure in the pipes. Keep in mind that when installing a new radiator, the pressure in the riser will drop, which will affect both you and your neighbors.
- Insulation of the entire room. Moving the battery to the loggia only makes sense when you have thoroughly insulated all other surfaces. Otherwise, the radiator may freeze, and this can lead to freezing of the entire system in the house, rupture of pipes and a major flood.
Important rule! The temperature on a balcony with a battery should never drop below 0 degrees!
Types of batteries for balconies and loggias
After you are allowed to install heating devices in your new living space, you need to choose the optimal type of radiator. Heating device manufacturers offer homeowners the following options:
- Steel batteries - they are inexpensive, but do not have thermal inertia and high thermal conductivity. The main advantage of this option is the ability to withstand the highest pressure (up to 20 atmospheres).
- Cast iron radiators - they have an average cost and high thermal inertia, a service life of up to 50-70 years.
- Aluminum and bimetallic (steel pipe and aluminum fins) batteries - they have the highest heat transfer coefficient, so they squeeze all the calories out of the coolant.
If you want to build inexpensive and reliable heating, choose steel. But if you need to get the maximum temperature for the same money in utility bills, order the installation of a bimetallic radiator.
The main stages of installing a heating radiator on a loggia:
- Calculations of thermal conductivity and the conclusion that the radiator outside the apartment will not freeze.
- Redevelopment project and technical report from the author of the house on its feasibility.
- Obtaining permission from city authorities.
- Making changes to all documents for the apartment.
- Battery installation.
The most important stage is the redevelopment project with a change in the status of non-residential premises to residential, after which - a technical conclusion. If only the author of a house project (usually a design institute) can issue a conclusion, then either a specialized organization or the same institute can develop the project. In this case, the requirements of the standards - construction, sanitary and fire safety - must be fully taken into account, and engineering calculations must be carried out. The last thing is after you have completely insulated the loggia and calculated all the risks.
A conclusion can be issued only if the redevelopment (in our case, moving the radiator) does not affect the condition of the house. In old houses recognized as architectural monuments, installing a battery on the loggia will be very problematic, but in new buildings the chances of modernizing your balcony are much higher.
Then design documentation is drawn up. After all these tedious procedures, you need to coordinate the project with Rospotrebnadzor, fire supervision, the Directorate of the Single Customer and a number of other departments, and obtain permission to install the balcony battery from the city housing inspectorate.
After everything, approve the apartment redevelopment in the BTI, make changes to the title documents and, with a calm heart, install the equipment in the now residential premises.
The battery installation project must be agreed upon with the relevant authorities
Sequencing
So, the legal and technically correct sequence of actions if you want to place a heating radiator on the balcony consists of the following steps:
- insulation of external walls;
- coordination of redevelopment, obtaining relevant permits and conclusions;
- choosing the optimal type of radiator and installation method;
- wall preparation - installation of thermal insulation, finishing;
- direct installation.
If you are firm in your intentions, then for apartment buildings it is recommended to move the radiator from the room to the balcony, and not to install an additional one, which will immediately significantly reduce the efficiency of the general building system - this is unlikely to please the neighbors and will entail inspections.
Risks of illegally installing a battery on a balcony
Some people decide to circumvent the law and take the battery onto the balcony without official permission. However, usually when performing such complex work, mechanics require all the documents, and if they are missing, they simply turn around and leave. If you are not ready to delve into all the intricacies of installing batteries yourself and do not want to spoil your relationship with the law, you need to imagine what the consequences of illegally carrying radiators to the loggia are.
The main sanction for unauthorized transfer of a battery is a fine. According to the Code of the Russian Federation on Administrative Offences, the owner of an apartment will have to pay from 2 to 2.5 thousand rubles, and a legal entity - from 350 thousand. You will also need to either legalize the apartment redevelopment, or return the radiator to its place - if in your city the actions of moving heating equipment are prohibited.
When the owner does not want to pay for an illegal battery, he will face repeated fines; the last resort is a summons to court.
conclusions
Having examined various methods, we can state that the most, at first glance, low-cost way to organize a warm balcony - installing a water heating radiator on it - in practice turns out to be the most difficult to implement due to the direct ban on such a transfer in the housing law of the Russian Federation.
Therefore, you have to choose only from existing electric heating systems: either a “warm floor” or a convector and be content with them.
Insulating a balcony and organizing a heating system on it in winter is a very voluminous and labor-intensive job. The costs are not always justified, since there is no guarantee that the balcony can be used for its intended purpose in severe frosts. In addition, your heating energy costs can increase significantly.
Related article: Waterproofing an open balcony in a private house
Installing a battery on a loggia - preparation
So, permission has been received, and you are ready to move the battery to an insulated balcony. What do you need to consider to install everything correctly and ensure your loggia is warm and safe?
- For a loggia/balcony, experts advise choosing aluminum radiators - they are light, small, maintain high pressure and have excellent thermal conductivity.
- The number of sections is traditionally calculated using the formulas “one aluminum section per 2 sq. m", "one bimetallic section per 1.5 sq. m". Just divide the area of the room by 1.5-2 and get the desired number.
- The balcony radiator must be mounted on three brackets: two at the bottom, one at the top. If it has more than 12 sections, another top mount is required.
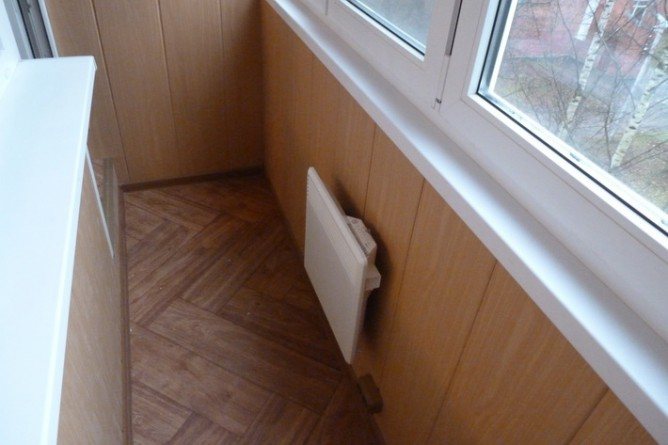
- For maximum heat transfer, the distance from the balcony radiator to the floor should be at least 12 cm, to the window - from 10 cm, to the wall - from 2 cm.
- For the same purposes, it is recommended to cover the space behind the sections with a foil screen - then the battery will definitely not defrost, and the loggia will always be warm and cozy.
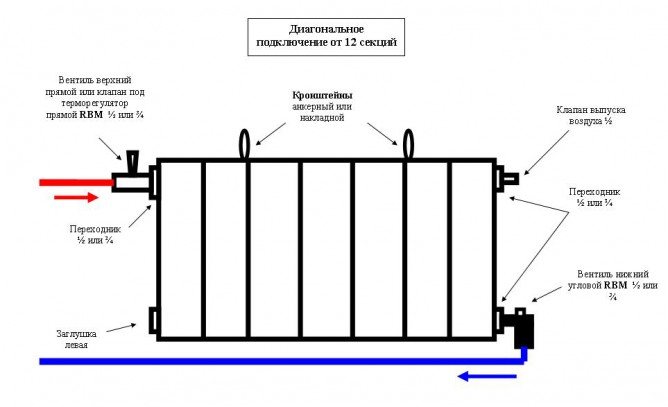
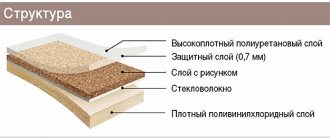
Battery connection diagram
Heating options
So, to avoid fines, think about other options for heating your balcony:
- electric heated floor;
- fan heater;
- oil or infrared heater;
- gas convector.
Related article: How much does it cost to glaze a balcony in a panel house?
These methods do not need to be coordinated, since they do not affect the building's utility networks and are easier to implement than moving batteries. You can use them, and you definitely won’t have to pay a fine.
We will not consider solar panels for a balcony separately, since it makes no sense to use them for a small space. The use of solar collectors and batteries is advisable if you plan to heat water or heat a house, for example, in a country house.
Warm floor
One of the most effective ways to insulate a balcony is to install an electric heated floor yourself. There are several options that are not prohibited by law, and it is up to you to decide which one makes sense to choose.
Heating mats are a material in the form of a mesh to which cables are attached in the form of a snake. You can do the installation yourself. The mat can be cut into pieces if the room requires it. DIY installation procedure:
- Check the system resistance and clean the floor from dust and building materials.
- You need to make a groove in the floor for the temperature sensor and in the wall for the cable and thermostat.
- Prime the concrete floor.
- Lay the mat on the floor and cut if necessary. Step back 5 cm from the walls.
- Place the tube with the temperature sensor and connect it to the thermostat.
- Seal the groove with tile grout.
- Apply tile adhesive to the mats.
- Install the tile. Turn on the heated floor after the tiles have completely dried.
Infrared floors are special elements that heat a room through radiation. This type is safer than the previous one. It also consumes less electricity. It is easier and faster to install than mats.
Cable system is a common type of heating. It must be installed on a layer of insulation, otherwise the heat will go down. The top of such a warm floor is covered with a cement-sand screed. The disadvantages of such a coating include drying: you need to wait three weeks until the screed dries and the floor can be used.
Electric heaters
Methods of electric heating of a balcony also include a fan heater and heaters. These methods are the most obvious, they do not require additional installation, and their transfer does not require the use of special tools. Moreover, they are not prohibited by law. The downside of heaters is that they dry out the air a lot. If you have plants on your balcony, they are unlikely to like it.
A fan heater is a compact device that sucks in cold room air, heats it and releases it back.
It is best to install it on an insulated balcony. It can quickly warm up the entire balcony, but when used for a long time it starts to heat up on its own. Therefore, it must be turned off periodically. Another disadvantage is noise.
An oil heater is an electrical device that uses mineral oil as a coolant. It can be set to one of the operating modes. It will heat up and turn off when it reaches a certain temperature. After it cools down, the heater turns on again. To use this device on a balcony, you need to insulate it, since there will be no effect in case of drafts. Warm air will simply evaporate from the room.
An infrared heater is a lamp that heats a room and objects in it with radiation. It adds its own illumination to the sunlight. The disadvantage of such a heater is the fragility of the lamp, as well as its temperature - 200 degrees. This type of heater consumes less electricity and has the highest performance compared to convector and oil heaters.
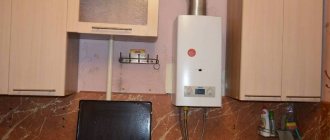
Gas heating
There is no point in installing a gas boiler to heat the loggia - it is expensive and impractical. Therefore, in the case of gas heating, we are talking about installing a gas convector. If you do not want to transfer central heating to the balcony, it makes sense to use a gas convector:
- Suitable for owners of apartments with gas pipelines, since gas is cheaper than electricity. Compact devices consume little fuel and effectively heat the room. If your balcony faces the sunny side, it will be heated by the sun and gas.
- The convector can be connected to the gas network of the entire house (although such redevelopment will also have to be approved) or to a gas cylinder. The gas convector is easy to install.
- It requires only one hole to release exhaust gases to the street. The law allows such manipulations.
- The devices are equipped with gas leakage protection systems.
Batteries on the balcony
If you want to try to coordinate the output of the heating radiator to the balcony, this can be done after installation. First you need to select a battery. It can be cast iron, steel, aluminum, bimetallic.
You can remove the battery yourself, or you can contact a professional plumber. The last method is more reliable if you do not have special skills.
If you want to do it yourself, the next step is to choose the type of attachment of the new radiator to the existing one. After that, buy all the necessary materials: taps, plugs, tubes, sealant. Connect the tubes to the battery and lead them out to the balcony through the holes in the wall. Hang a new radiator. Don't forget to insulate all connections with fum tape.
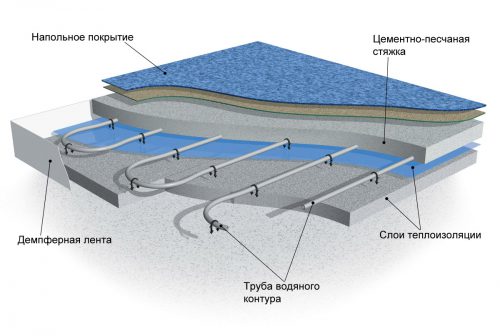
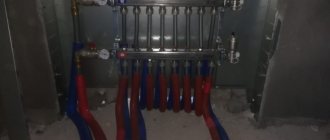
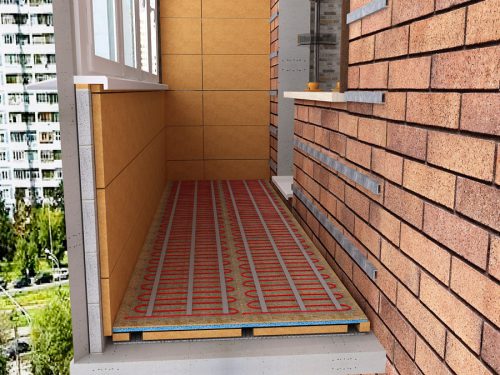
Water heated floor diagram
Water heated floor
Before installing a water heated floor, it is necessary to make a calculation. There are two ways to lay pipes:
- Snail. It is a spiral - pipes stretch from the central element to the walls.
- Snake. The pipes are laid in a snake pattern from one wall to the other. It makes sense to make a snail on the balcony, as it ensures uniform heating.
If the floor is concrete, then the thermal circuit must be drawn deep into the screed. It is imperative to insulate the floor and the entire balcony. Insulating materials, reinforcing mesh, and water pipes are laid on the floor. They need to be attached to the grid. After this, the system is connected to the water supply and the coolant is filled in, turned on, and left for a day for testing. At the final stage, everything is filled with a special solution and the floor covering is laid.
There are several ways to install heating on a balcony. You must decide for yourself whether you will install a heated floor or remove the radiator. But do not forget about the laws and the need for approvals for the transfer of batteries. Think about whether it makes sense to go through all these procedures, or whether it is better to use household appliances that do not require special installation.
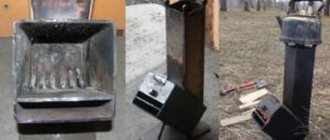
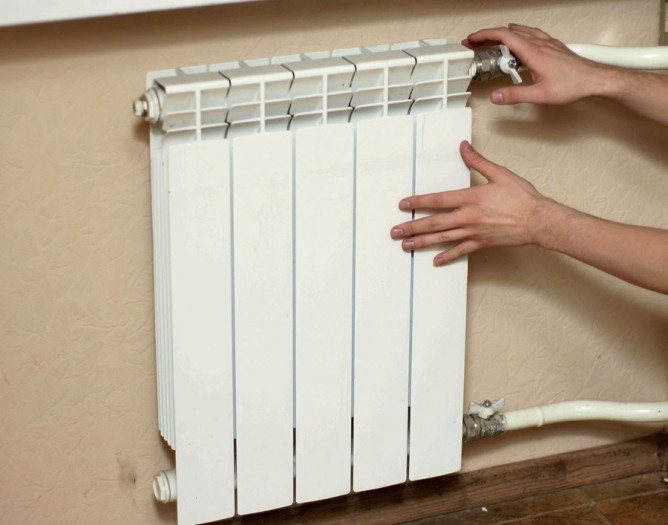
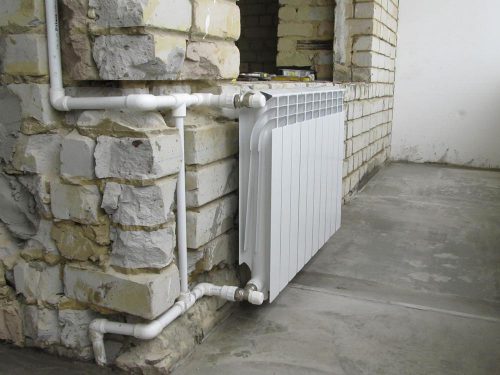
Installation of the battery on the balcony
Installing a battery on a loggia and balcony begins with dismantling the old radiator in the kitchen, then installing a new one on the loggia and connecting it to the heating system. For all the work you will need:
- radiator;
- pipes (copper or propylene);
- brackets;
- perforator;
- accessories;
- special soldering iron;
- Bulgarian.
First, they cut off the kitchen radiator in two places: near the radiator to remove it, and the pipes, 10 cm from the future connection points. Then carefully drill holes in the wall with a diameter of 18-19 mm to bring the riser to the balcony. First of all, the roll is removed, the connections and fittings are installed, then the riser is installed.
Experts advise choosing polypropylene pipes for radiator installation - they have better technical characteristics, and in this case you can organize the installation of a balcony battery yourself.
After this, attach the radiator to the wall and mark the locations of future fastenings using a level. They install brackets, hang up a brand new radiator, put plugs on it, then put on the Mayevsky tap. Then there is a line of taps, then the pipes are connected.
For propylene pipes, elements (fittings, connections, etc.) are fastened with a special soldering iron, for metal pipes - with solder and a gas torch. After installation, we connect everything to the heating and check the tightness of the pipes.
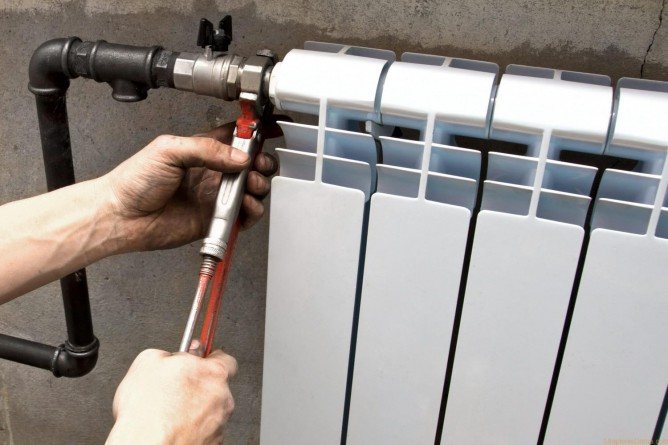
The final stage of connecting the heating radiator
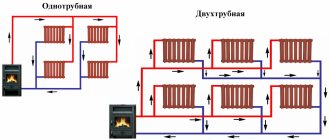
Installation options for a balcony battery
To remove the radiator of the heating system, you will have to use one of two technologies for connecting to the existing wiring:
- Sequential removal - pipes are connected to the ends of the room radiator, after which they can be taken out to the balcony.
- Parallel removal - pipes cut into the supply and return channels, they are also led out to the installed battery.
If you route the pipes according to the first scheme, you will need to connect the upper ends of the old and new heat exchanger with one line, and then repeat these steps with the lower ends. Before installation, the side plugs are removed from the old battery, so work is carried out in the summer or spring, when the water has been drained from the central wiring.
If you want to remove pipes according to the second (parallel) scheme, you will need to cut a tee into both the supply channel and the return of the central heating system. After this, install the pre-purchased radiator on the balcony and connect its upper pipe to the supply line tee. A pipeline is connected to the lower branch pipe, stretched to the return tee.
The installation of heating devices and the arrangement of tie-in points into the pressure and return lines are carried out by the utility workers themselves or by specialized companies. If you dare to take the heat exchanger out onto the balcony yourself, you will have to be responsible for all the mistakes and miscalculations made in the event of flooding of your neighbors.
Options for connecting batteries on the balcony
- With tap and jumper. This is the best option for a loggia - all the heat goes through the radiator and there are no losses.
- Without tap with jumper. You can turn off the water in the radiator at any time if it is too hot on the balcony.
- With tap, but without jumper. Allows you not only to turn off the water, but also to remove the balcony radiator in order to clean it, re-stick the wallpaper on the loggia or change the design of the walls.
Installing heating equipment on the balcony will create a full-fledged additional room and make the house even more comfortable and warm. But before you decide to undertake such drastic construction work, be sure to weigh the pros and cons - obtaining permits and installing the radiator will take a lot of time and cost you a pretty penny. Today there are many models of removable batteries and powerful heaters, but if your choice is a traditional radiator, be patient and go for it - the results will be worth it.
Cases when it was possible to legalize the removal of heating to the balcony
There are still exceptions to the rules. There are people who managed to legally agree on the removal of heating to the balcony. Well, or make it so that you can live in peace and not be afraid of inspection.
Sergey, Moscow:
I legalized it three years ago, when this was not so strict in Moscow. But now they may not approve.
Igor Petrovich, Moscow region:
Nikolay Lezhnev, Saratov:
We do not undertake to judge the methods that these people used. Moreover, we print their reviews as a matter of reference.
To summarize, moving the heating onto the balcony, in addition to fines, has many other consequences. For example, he can ruin relations with neighbors. Therefore, if you are not sure that such a reconstruction will be agreed upon, it is better to pay attention to other methods of heating a balcony.
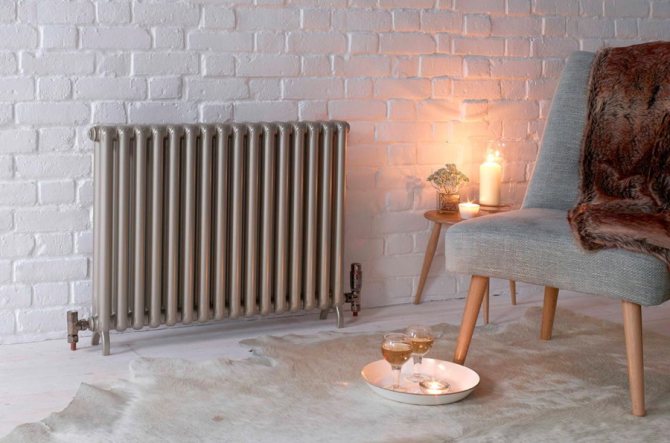
Photos of an interesting balcony design with a radiator
A balcony room, insulated with a radiator, allows you not only to increase the living space due to additional square meters. An insulated loggia can be used year-round as a small office or greenhouse, and can also become part of a common room.
Installing a battery for any style of balcony
Removing the battery to the loggia is only part of the work on arranging the room.
All finishing materials must be harmoniously combined with the heating radiator. Only in this case is it possible to realize a single stylistic solution for the room.
The loft style is characterized by the use of concrete pavement with minor chips and cracks, textured brick, plaster, wood and metal structures in the interior. The basic principle of this style is the use of rough factory parts and decorative elements, devoid of elegance and pretentiousness.
The battery in a loft interior is an integral part of the style
Heavy cast iron radiators are ideal for the loft style, emphasizing the brutality of the interior. If desired, the battery on the loggia can be painted in dark colors or the effect of metal corrosion can be added. This method of treating the radiator will add a feeling of old-fashioned and expressiveness to the interior.
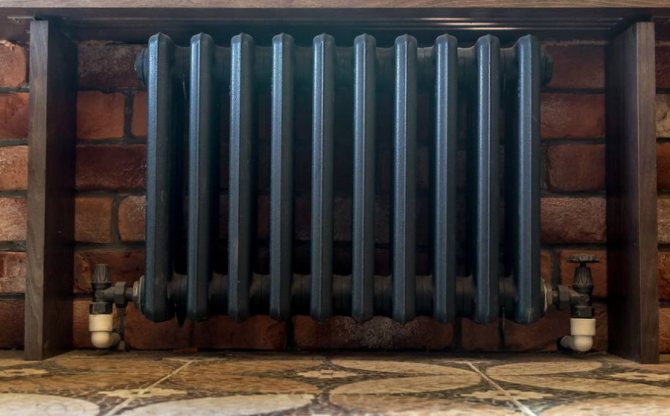
In industrial style, heating radiators are not usually hidden from view
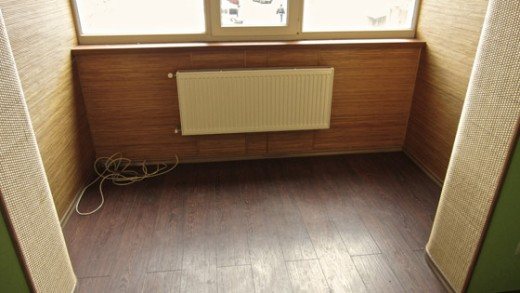
A balcony in a modern style is close to minimalism not only in the design of walls and ceilings, but also in the selection of furniture. This style is suitable for rooms with a small area, because... allows you to visually enlarge the space through the use of a light palette in finishing materials.
The minimalist interior is characterized by an almost complete absence of decor.
Decorative elements that decorate the room are practically not used in modern style. The emphasis is on a harmonious combination of colors and shapes. The battery on the balcony is most often hidden behind decorative facades. If the room is very small, limit yourself to heated floors.
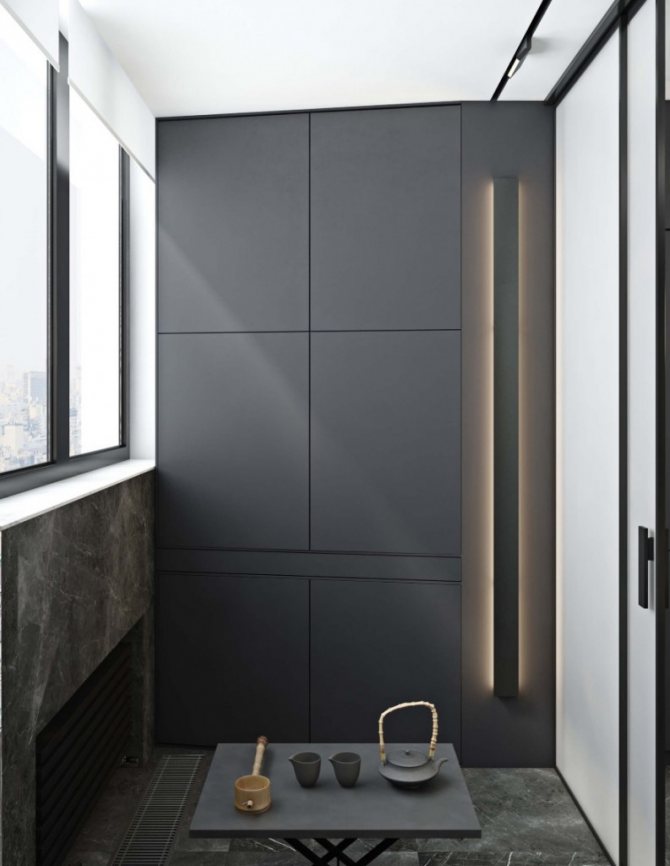
In the decoration of walls and ceilings, plain surfaces and smooth textures are welcome
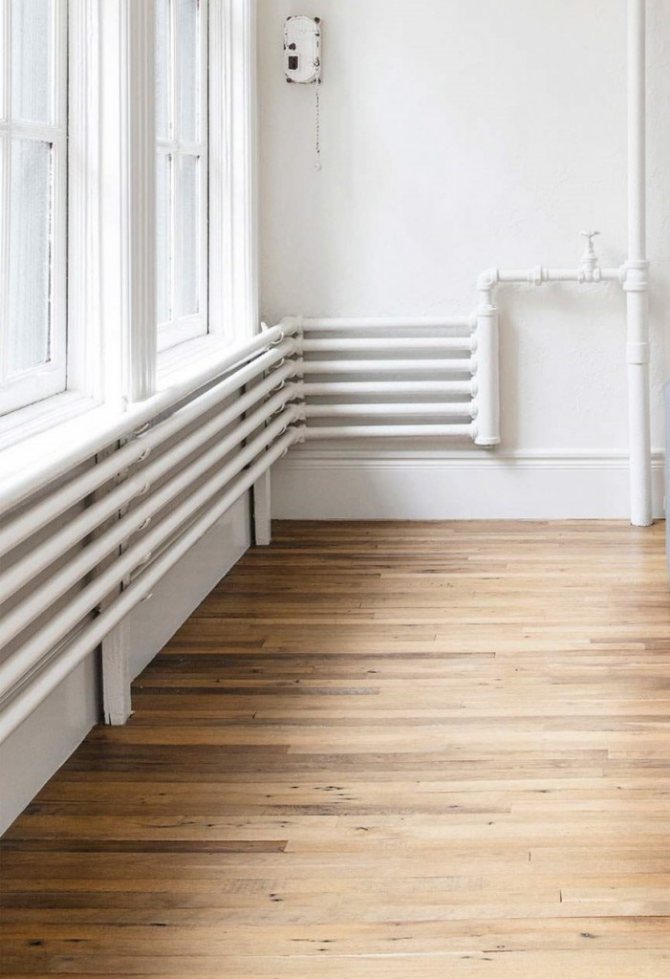
Art Nouveau style is suitable for radius loggias. It is characterized by the absence of sharp corners and the predominance of rounded and smooth shapes. Vertical and horizontal wall-mounted radiators, as well as remote modern ceramic heating panels powered by mains power, will fit equally seamlessly into an interior of this style.
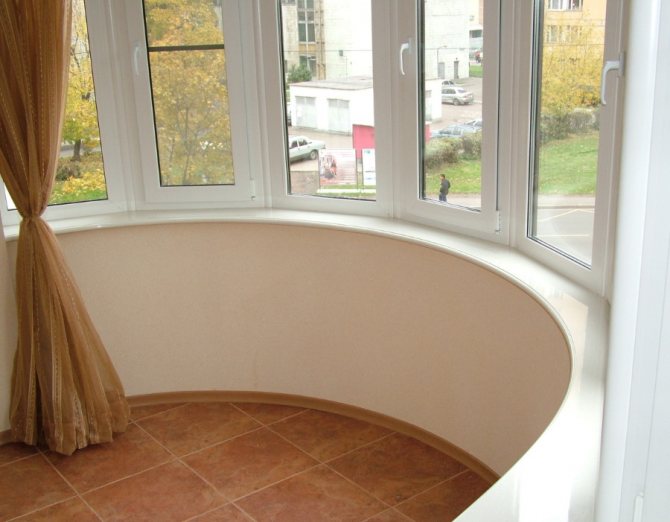
The photo shows a semicircular loggia with a ceramic floor equipped with a heating system
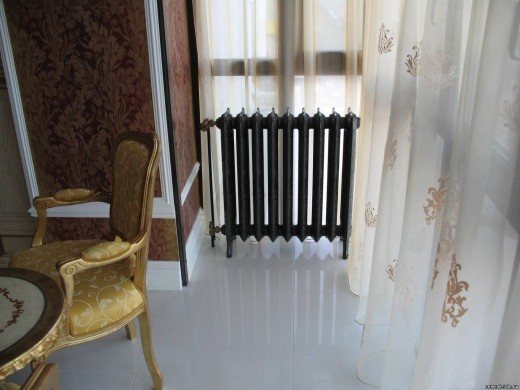
For classic style, wooden radiators are more suitable. In combination with carved furniture, expensive upholstery fabrics and decorative elements consisting of old paintings and antiques, they will give the room a special atmosphere of comfort and luxury.
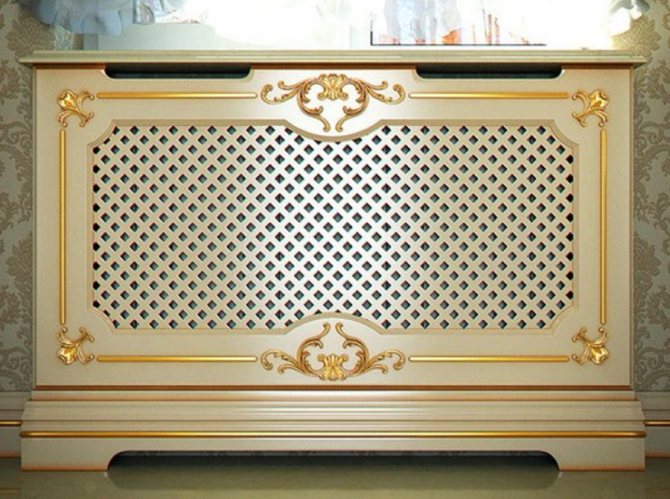
In a classic interior, screens with threads and golden decor are often used to disguise a heating radiator.
When choosing and installing a screen for a radiator on a balcony, you should take into account the need for natural air circulation. The battery screen should not interfere with the penetration of heat and warming up the room.
Photo
If it has been decided to make the balcony part of the apartment, you should think about how to design the heating device and make it part of the room.
You can install gratings; today they are made from various types of materials. Also, the batteries themselves can have a bizarre shape.
They may vary in color and material from which they are made. But the main thing that batteries should do is “give” heat.
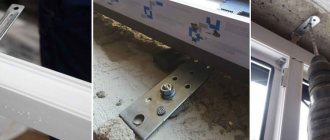
Initial radiator installation work
To install heating on your balcony (loggia) yourself, you need to stock up on the following tools:
- grinder;
- hammer drill;
- metal plates;
- polyurethane foam;
- file;
- as well as cement mortar in a ratio of 1 to 3 (one part of cement and three parts of sand).
Next, the mounting system is installed in the wall. A metal (steel) plate with a thickness of about 2 mm, a width of about 30 mm and a length of 300 mm is best suited for this purpose. When installing a fastening system, holes are made using a hammer drill 45-50 mm deep into the wall, then they are cleaned and steel plates are installed in them. Next, everything is covered with cement mortar (other available ingredients), taking into account the future thermal effect of the radiator.
After this, a small recess is made in the wall along the contour of the radiator using a grinder. The battery radiator will be inserted into it. After using the grinder, it is advisable to file all sharp corners in the resulting recess.
After the preparatory work has been carried out, two places are selected in the main heating pipe into which the input and output of the additional battery installed on the balcony will be connected. Opposite the selected places, a perforator makes a through piercing of the load-bearing wall. The load-bearing wall is always thick, so you need to choose a drill that is long enough for through-cutting. After installing the pipes going to the additional radiator, it is recommended to fill the holes with foam or other filler that is resistant to temperature changes.