A rocket stove is a popular option when it comes to creating a do-it-yourself unit that can heat a room or act as a kind of stove in camping conditions. Drawings and diagrams of such a design should be available to people who love tourism.
Creating a stove with your own hands is not difficult - it will take a little time, suitable tools, materials that are resistant to open fire and strong heat. Such a stove has several features and differences that make the stove an advantageous option for manufacturing.
A stationary camping rocket stove is installed both indoors (cottages, country houses) along the wall, and on a special site, including in open space. Suitable for high-quality heating of a room with an area of 45-50 m2 (the presence/absence of partitions, walls, separate rooms, ceiling heights is taken into account).
About the design
The Robinson rocket stove consists of the following elements:
- Firebox.
- Pipe for removing generated smoke.
The design feature of the fuel bunker is located not only vertically, but also horizontally, at an angle. The method of placement depends on the desire of the person, the features of the structure in which the finished stove will be installed.
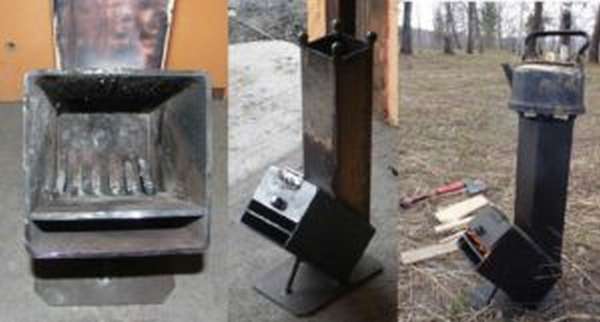
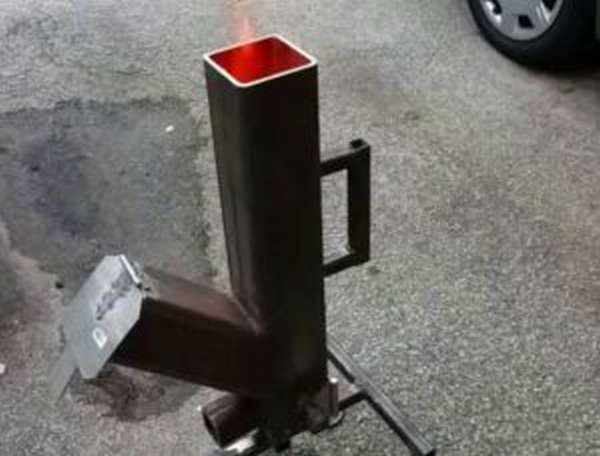
This is what a rocket stove made from a pipe looks like
An option can also be used in which the fuel bunker will be located between the chimney and two elements of a horizontal pipe section. This is done in order to lengthen the surface heated during fuel combustion, thereby increasing the efficiency and time of warming up the room.
Conventional schemes for creating furnaces have:
- A firebox located vertically and connected to the chimney by a piece of pipe (its length can be different). The area connecting the elements is used for cooking (hob).
- A firebox located directly next to the pipe (the diagram is used in the case when the stove must perform the function of a heating unit).
- A firebox fixed at an angle to the pipe (for ease of loading fuel into a special compartment).
The stove can have two fireboxes at once. A special feature is their location on the sides of the structure in a vertical position. Pipes must have a large cross-sectional size. The purpose of the oven is to heat a container with liquid, which is placed on a special stand (this option is used to supply hot water).
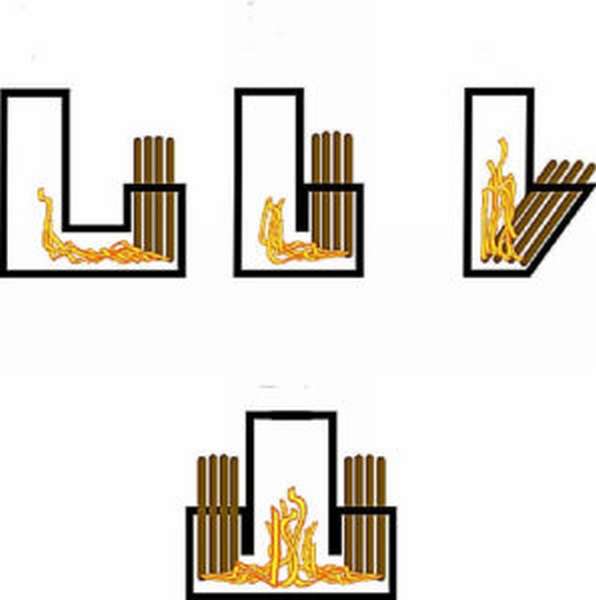
Design options
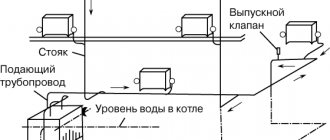
General operating principle
The operating principle of all types of rocket designs is approximately the same:
- Solid fuel (firewood) is placed in the firebox.
- Ignition is in progress.
- When heated by flame and combustion, gases are produced.
- Their movement begins along the vertical section of the pipe.
- The supply is provided by a special channel through which “secondary air”, which is already heated, quickly moves.
- Heated gases rise to the base of the pipe.
The basic operating principle is similar to pyrolysis boilers. As a result, at the outlet of the furnace, the maximum possible temperature is reached in the upper part of the structure. It is used for heating, heating water, and cooking. For convenience, you can make a special platform for placing containers by attaching it to the top of the pipe.
A big and significant advantage for the user of a rocket stove is its efficiency - firewood, as well as other types of solid fuel, are consumed little, the efficiency is high (about 65%). In order to improve the quality of functioning, it is enough to throw sawdust, paper, branches or dry grass into the firebox.
The simplest version of a rocket stove
A simple rocket-type camping stove is easy to make, saves time and resources during use, and is compact in size and dimensions. All work will require you to spend 2-3 hours with the preparation of tools and materials, which is very convenient when camping or in a summer cottage.
A design feature that needs to be taken into account is that the lower part of the unit, which acts as the bottom of the fuel chamber (grid), must be made movable. This is done to facilitate the process of laying firewood and loading it into the combustion bunker.
If wood chips are used, the retractable structural element serves as a convenient stand during the process of adding fuel to the stove. Additionally, the moving part greatly facilitates the process of cleaning the unit from ash.
A simple rocket stove made from a pipe
Preparation of materials
To make a rocket stove you will need to purchase:
- Pipe with a square cross-section (15 cm×15cm×3, 40.5 cm) – 1 pc.
- The pipe is also square in shape (it is optimal to choose 15 cm × 15 cm × 3, 30 cm) – 1 pc.
- Steel strip (recommended dimensions 30 cm × 5 cm × 3 mm) – you need to buy 4 pieces of such elements.
- Another option for steel strips (with parameters ideal for work: 14 cm × 5 cm × 3 mm) – 2 pcs.
- A grille, also made of good metal (steel) (choose dimensions 30cm×14cm) – 1 piece.
Additionally, you will need to buy a steel rod (3:5 mm) - 2.5 meters in order to make the grate yourself if desired. A high-quality Robinson oven with your own hands means minimal financial investment, a little attention and time.
Tools
To carry out all the necessary work you will need:
- Bulgarian.
- Welding.
- Metal scissors.
You should also have safety glasses and gloves.
Drawing
Work is carried out according to the diagram and drawing indicated below:
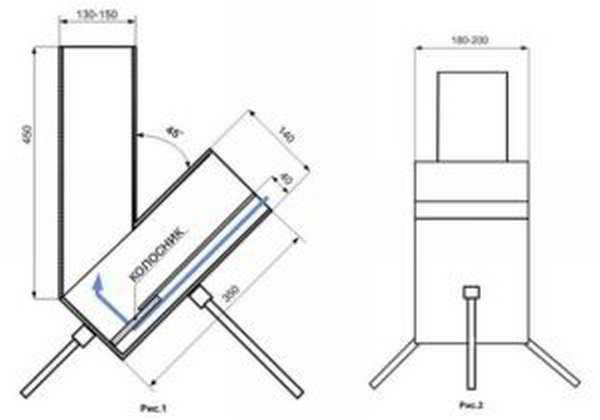
Drawing of the simplest rocket furnace made from a profile pipe
Manufacturing instructions
All work on creating a heating device must be carried out in stages. The guide to action consists of several steps that must be followed sequentially:
- Square pipes must be cut into pieces of the size required according to the drawing.
- Make markings on them, taking into account that one of their edges will need to be cut (the cut angle is 45 degrees). The work is carried out using a grinder.
- The resulting pipes will need to be carefully welded - the result should be a structure shaped like a boot.
When making a Robinson oven with your own hands and using drawings, it is important to follow the recommendations for the size of the parts contained there. The next steps will be:
- Cuts are made (on top of the pipe or on its sides) - the dimensions are 20 mm deep and 3.5 mm wide (a stand for installing containers will be installed in them).
- Steel strip (which has parameters 30cm×5cm×3mm), 1 piece purchased, must be cut exactly in half.
- Mark the second remaining strip of steel (also with parameters 30cm×5cm×3mm) exactly in the middle.
- To ensure high-quality completion of all stages of work, weld elements on both sides of the cut strip to it (you should get a cross-shaped shape).
- Steel strips (dimensions to be chosen are 30cm × 5cm × 3 mm) - the remaining 2 pieces and the remaining 14 cm long sections are welded into a frame that will be retractable.
- The elements are welded not side by side, but overlapping.
Next, the following work is carried out, which are final.
On top of the finished frame, using a spot welding machine, a finished grille (purchased additionally/specially) or parts of a good steel rod cut to the required length are attached. The distance at which the parts are attached is 1 cm. Then, a stand is installed on top of the pipe, and the grate is pushed into the combustion hopper. The main work on the production of the furnace can be considered completed.
The stage of verification and test behavior begins. You need to put some solid fuel in the firebox and light the stove; if no problems are identified in its operation, you need to wait for all structural elements to cool completely. Finally, you can paint the stove to protect the parts from corrosion. For this, heat-resistant paint is used. You can increase the operating comfort by welding a handle to the combustion chamber door.
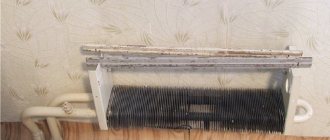
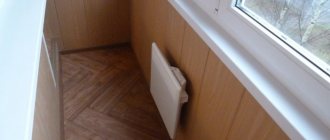
Making a radiator with your own hands
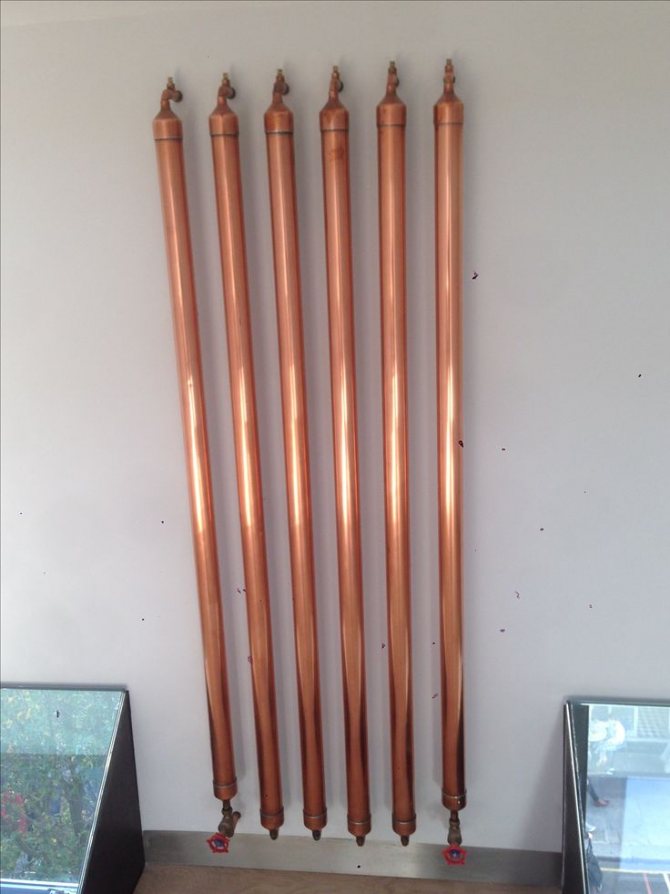
If you want to make a homemade heating radiator from a profile pipe, then you will need skills in working with a welding machine. You will also need a grinder. It is important to determine the size of the heat source. For this, power is calculated. It will depend on the surface area of the device and the thermal conductivity of the steel.
In order to calculate power, you should use the formula. However, experts advise taking power with a reserve. Exact values will not be needed if you plan to heat an outbuilding. A cast iron battery can be taken as a basis here. If the power of one section of such a radiator is 160 W, and the volume is 1.45 liters, then to replace a standard cast-iron 10-section device you will need a pipe radiator that will hold 14.5 liters of liquid. For every square meter of room, 1 kW of device power is required. This value should be increased when calculating system parameters in houses with poor thermal insulation.
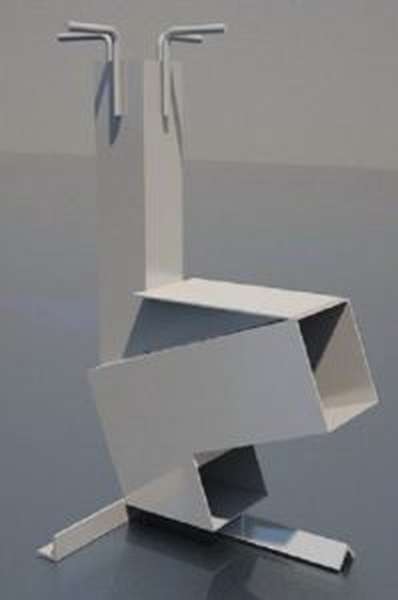
Robinson stove
Convenient and functional, the Robinson Rocket Stove is an excellent option for use on a hike or in the country. It is also not difficult to make it using drawings and diagrams. With your own hands you can easily create a unit that will be very similar to the factory one.
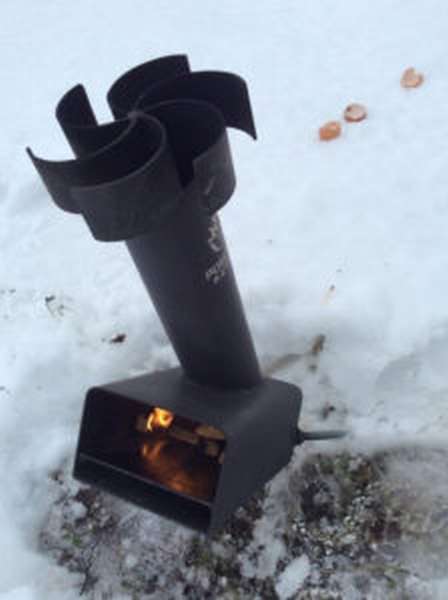
Robinson stove
Materials
To make a high-quality heating product on your own, you will need to purchase the following materials:
- Steel sheet (for making the body of the combustion bunker measuring 15 cm × 10 cm × 30 cm) – 1 piece, thickness 3 mm.
- Plates made of high-quality steel (at least 3 mm), the material parameters are 30 cm × 15 cm - you will need to take 2 of them.
- Strong steel plates with dimensions of 10 cm × 30 cm - according to the classic version of the project, 2 pieces will be required.
- Plates, also made of good steel, 10cm×15cm – 1 piece.
- Metal plate parameters: 15cm×20cm×3mm – 1 piece (for making a blower).
- Pipe with a diameter of 10 cm (height 60 cm) – 1 piece (metal).
- Sections from reinforcement with a diameter of 7 or 8 mm - 1.2 meters (required for the manufacture of the grate).
- Rings with a diameter of at least 3 cm – 3 pcs.
- Vertical riser (10 cm) – 1 pc.
- Ring with a diameter of 11 cm – 1 pc.
- Nuts (part value d13 is selected) – 3 pieces.
- A piece of steel pipe with thread - you need 3 of them for work.
Tools
To carry out all the necessary work you will need, as in the previous version:
- Bulgarian.
- Welding.
- Marker.
- Metal scissors.
You should also have safety glasses and gloves.
Drawing
The Robinson camp stove is assembled with your own hands according to the following drawing:
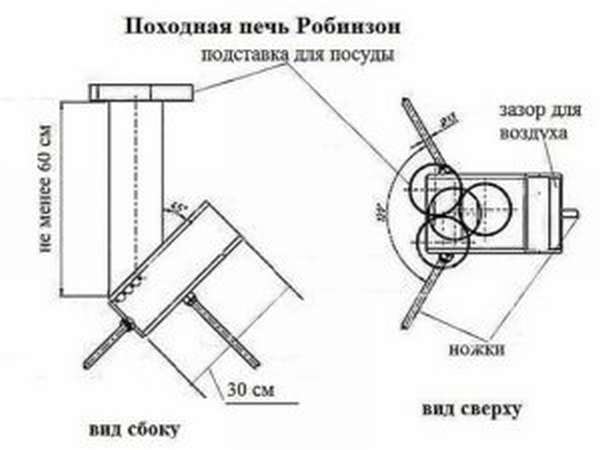
Robinson stove drawing
Step-by-step instruction
All basic work will require accuracy and attention, but will not take much time - about 3 hours with preparation. Basic actions involve the following steps:
- Preparing a plate that will separate the firebox from the ashpit in the finished structure - you will need to weld pieces of reinforcement to it (a distance of 1 cm from each element) - the result will be a grate.
- For convenience, a grate is attached to the plate available among the materials for manufacturing, after which, using a welding machine, you need to securely attach the resulting element to the side and rear walls of the future firebox. Feature of the work: before starting welding, you need to step back 30 cm from the bottom along the edge.
- The next step of the work is welding the corner elements of the connections of the rear and side walls of the combustion chamber.
- Then the bottom of the chamber is welded.
After these steps, you should move on to the final steps. Here actions such as attaching nuts are performed, which are necessary for the stove to stand stably. Next, if desired, legs are attached to them. Then the steps are:
- The firebox cover, if provided for by the selected drawing option, is attached to the body (welding is used).
- The next stage is marking the pipe (for this purpose you will need to use a bright metal marker).
- Then a cut is made at an angle of 300 (the outline is a regular oval).
- Each of the required pipes from the set of materials must be placed with an oval-shaped hole exactly in the middle of the roof of the structure.
- You will need to circle the pipe (with a marker).
- The resulting drawing is needed in order to cut a hole along its contour (the work is carried out using welding, the voltage may need to be increased).
- Then a pipe is welded into the resulting hole; it must be positioned vertically according to the diagram.
Additionally, it is recommended that you put a stand on the pipe and then secure it (for a container/pot with food or water).
At the end, the legs are attached (optional), and the first test run is carried out (with a minimum of solid fuel element). If you want to paint the structure, then before doing this you need to completely cool the entire structure.
Ready-made homemade Robinson stove
Design improvement
A convenient DIY camp stove, Robinson, assembled according to the diagram, can be improved.
The first thing you can do is to weld a door with a handle to the main structure in order to be able to control the amount of heat generated or the amount of firewood in the firebox. It will open not to the side, but upward.
The best option is to manufacture a damper that will open in several positions:
- down or left
- then to the right.
Such a damper must be installed in the corners welded in advance to the walls; the dimensions are chosen 1X1 cm or, as an option for an increase -1.5 cmX1.5 cm.
Additional ways to improve the Robinson stove: increasing the thickness of steel for the combustion chamber from 3 to 5 mm .
For an area where labor runs vertically, you can use a square rather than an oval hole.
The stand and legs can be created from various materials, using the most convenient options.
The last thing you can do is weld a wide metal plate to the firebox or attach metal corners to the pipe to place a water container on them. This will create a rocket stove with a hob.
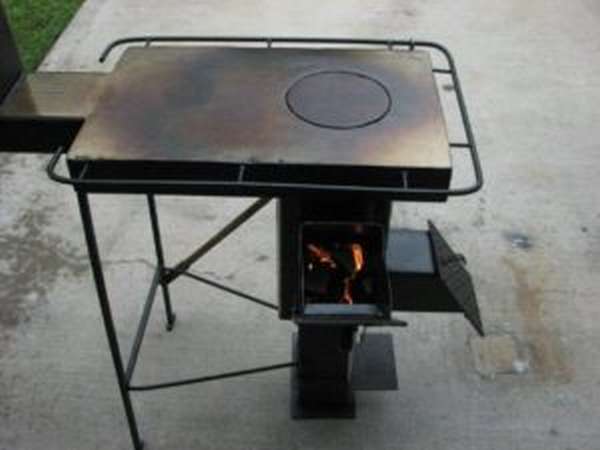
Rocket stove with hob
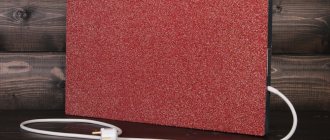
How to make a radiator for an LED with your own hands?
Assembling a simple aluminum structure for a low-power lighting fixture is not difficult. To do this you will need a metal tape 2-3 mm thick.
The radiator is made as follows:
- Cuts are made on the plate in increments of 5 mm. The resulting sectors are bent, giving the structure the appearance of an impeller.
- Holes are formed to fix the radiator.
Making a radiator for a 10 W lamp is more difficult. This will require 1 m of aluminum profile 2 mm thick, 2 cm wide. First, the strip is cut into 8 parts. The segments are laid on top of each other, a through hole is made, and the elements are secured with a bolt and nut. One edge is ground to fix the LED strip. Unbend the plates in different directions. Holes are made in the places where the module is installed. Treat the homemade radiator with hot glue, install a matrix, which is secured with self-tapping screws.
Stove Antoshka
This popular version of the tourist-camping type of stove will require a little more time to manufacture independently. The Antoshka model rocket stove is distinguished by its convenient design. A special feature of this type of furnace is the presence of an additional plane heated during operation of the unit.
It is also a stand for a container (hob) and a room heating amplifier. Consequently, the Antoshka stove can be used to provide hot water to a country house or a tourist camp.
Stove Antoshka
Materials
In order to make a stove yourself, you need to purchase the following set of materials:
- Square-shaped pipes (with material parameters 15 cm×15cm×3 mm. The length is also taken into account, which in this option should be 40.5 cm) 1 piece and (15cm×15cm×3 mm, also the length of the element is 18 cm) 1 piece and (10 cm×10cm×3 mm, with product length 60.5 cm) – 1 pc.
- Metal/steel plate (30cm×15cm×3mm) – 1 pc.
- The plate is also made of good, heat-resistant metal (the parameters should be as follows - 15cm × 15cm × 3 mm) - 1 pc.
- High-quality metal corner (5cm×5cm×3, length 30 cm) – 1 pc.
- Larger metal corner (5cm×5cm×3, length 40.5 cm) – 1 pc.
Additionally, you will need reinforcement/rod with a diameter of 8 mm, the length of the material in this version is 30 cm - you will need to purchase 4 such rods.
To make a grate with your own efforts, you will need reinforcement with a diameter of 8 mm, its length is 17 cm - 8 pieces. It is important not to forget to purchase triangular metal gussets that will need to be used to install the hob; the steel in them should be 3 mm - 2 pieces.
Tools
To carry out all the necessary work you will need, as in the previous version:
- Bulgarian.
- Welding (for reliable fastening of all elements).
- Marker.
- Metal scissors (for working with small elements).
You should also have safety glasses and gloves.
Manufacturing stages
To make the Antoshka stove you will need to do:
- Mark the existing pipe in the materials (place it vertically).
- Then make neat cuts on it, making them at an angle of 300.
- In the back of the pipe intended for the firebox, cut a hole whose size is 12x10 cm.
Second part of the work:
- It is also important not to forget to cut a hole at the bottom of the element, the size of which will increase slightly and will be 15x15 cm according to the drawing.
- Next you will need to connect these two elements.
- The rear wall of the firebox must be welded with a plate made of fire-resistant and high-quality steel prepared in advance for this purpose.
Afterwards, pieces of metal rods need to be welded to the lower hole of the Robinson rocket stove variation from the outside. The distance at which the work is carried out is 1-1.2 cm. Further work involves the following actions:
- To manufacture such a part of the heating unit as the blower chamber (air intake), a piece of 18 cm in size is used, which is part of a square pipe. Without it, the operation of the oven as a whole is not allowed for safety reasons.
- You need to make a cut on it at an angle of 300 (in the end, the size of this part of the structure is 10x18 cm).
The resulting part should have a bottom and two walls. It is best to place it on stands - this will ensure comfort for subsequent work. They are made from metal corners and attached by welding to the bottom of the structure.
Next, work begins on the main part of the furnace (upper). The steps will be as follows:
- The firebox of the future furnace (upper hole) - the pipe included in the materials package is welded to it or otherwise attached (if there is no welding). It is important to mount it in a strictly vertical position. It is important to remember here that maximum care must be taken.
- Triangular-shaped products made of metal (it’s better not to skimp on quality here) need to be placed on an edge, which will increase the stability of this part of the structure to create the necessary combination of elements.
- They are then welded/attached to the pipe and additionally to the top of the structure.
- The creation of the unit continues by welding a plate measuring 3 dm × 1.5 dm × 3 mm to the edge of the combustion hole, which is located at the top (in front of the master performing the work).
The final part of the creation: you need to weld corners to the top of the vertically located pipe - this will be a stand on which a container for cooking or heating food is installed. The reinforcement needs to be bent (900 semicircle), the resulting corners are welded to the pipe on four sides at a distance of 30 cm from each other.
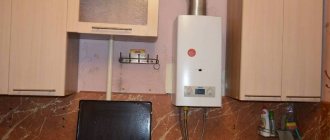
Preparation of materials
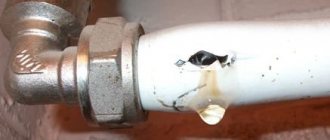
Before you make a heating radiator from a pipe, you must ensure that you have some materials. To make a device with the characteristics described above you will need:
- water pipe;
- fittings;
- 2 rounds;
- threaded connections;
- steel sheet.
The pipe should be made of carbon steel, and its length should be about 2 m. The wall thickness is 3.5 mm, and the diameter varies from 10 to 12 cm. The steel sheet should have a thickness of 3.5 mm. This material will be needed for the end caps. For throughput channels, a water pipe should be prepared.