Oil heaters do not often fail because they are reliable classic devices. But there are times when you need to do a quick repair of an oil heater yourself.
On this topic:
Efficient DIY garage oven
Oct 18, 2018
How to choose a walk-behind tractor for the garden
Aug 14, 2018
How to choose a chainsaw: practical advice
Aug 13, 2018
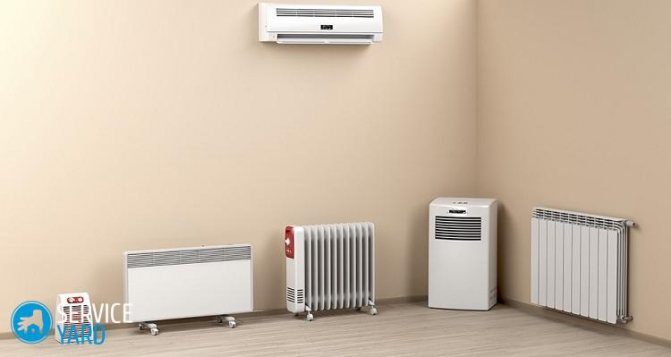
Types of electric heaters
May 7, 2017
BACK FORWARD 1 of 16
A breakdown of the oil cooler is usually accompanied by the appearance of extraneous sounds inside the housing. There may also be a slight oil leak or the protection will trip and the heater will simply turn off.
The first thing to do is disconnect it from the power supply. If possible, you need to take it to a service center for repairs, but this is not always possible. Therefore, you need to try to repair it yourself.
At first glance, it is impossible to repair an oil heater at home. But as practice shows, in 60% of cases the breakdown can be repaired with your own hands. To do this, you need to carefully understand the cause of the breakdown.
When repairing an oil heater, it is necessary to observe all safety measures and follow the instructions and operating rules of the device. Violation of any of the points may result in injury.
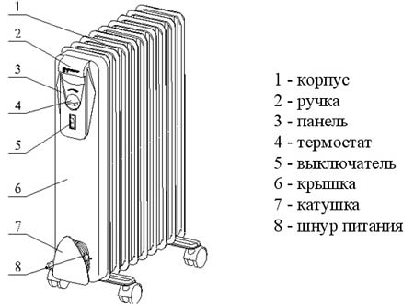
Operating principle and equipment of the device
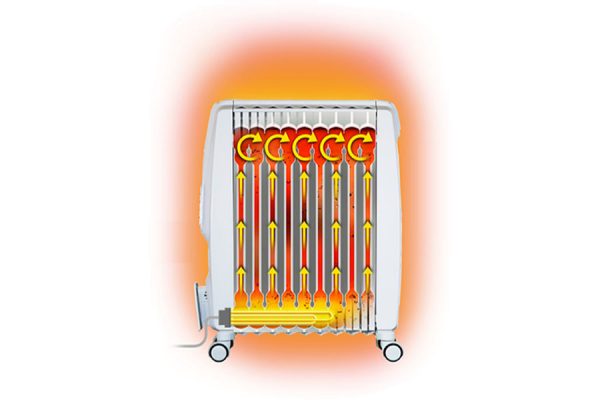
The device is based on a container filled strictly to a certain level with mineral oil.
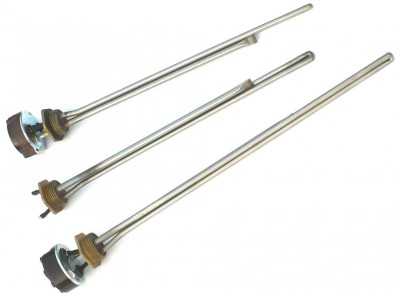
Inside this container there are tubular electric heaters (TEHs). Heating elements must be constantly immersed in oil, therefore installation of an oil heater is allowed only in a vertical position. If the heater falls and the heating elements are exposed, the latter may fail.
Electrical connection diagram for oil radiators.
Work related to replacing heating elements, and therefore the need to drain and replace the oil, is usually carried out in specialized workshops (if you have experience and clean transformer oil, you can risk doing this yourself). If the oil tank is depressurized, it is better to trust the professionals, since this cannot be fixed at home. Sometimes it will be cheaper to purchase a new heater.
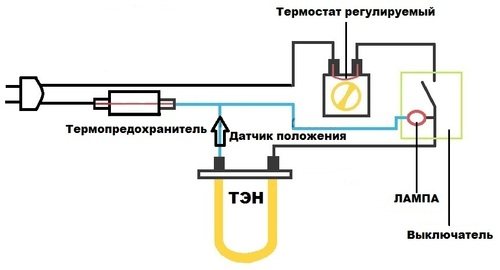
A simplified diagram of an oil heater is shown in Figure 1. The heating element, consisting of 2 oil heating elements, EK1 and EK2, is connected through the power switch V1, located on the body of the oil heater. Depending on the number of heating elements turned on, its power consumption changes (the circuit diagram for switching on the heating elements is shown conditionally and may differ).
The heated oil transfers heat to the body, which works like a regular radiator. The more sections it has, the faster the heat transfer occurs. The air temperature level in the room can be smoothly changed; it is set using a bimetallic thermostat, indicated in the diagram as SK1. The heater cannot be covered from above, otherwise the thermostat will simply turn off the device, reacting to the accumulation of hot air. Some models have special stands for drying clothes, but in general, using an oil radiator for drying is ineffective.
The heating element connection diagram also contains a thermal switch (SK2), which protects the device body itself from overheating. A feature of oil heaters is the gradual heating of the air. In order to speed up this process somewhat, some models are equipped with built-in fans. The connection location of the fan motor M in the diagram is conventionally shown by arrows, since it is not a mandatory element of the device. The mains switch SA1 supplies power to the warning lamp HL1.
Heater design
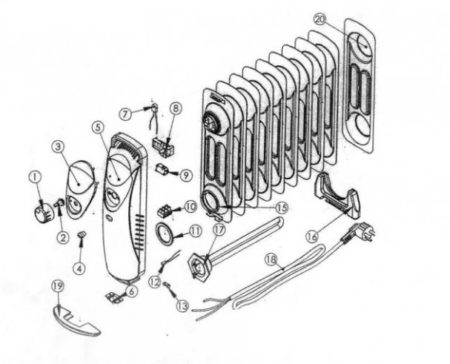
First we need to figure out what we have to deal with. An oil heater consists of several elements:
- frame. It is a sealed metal product. It is usually coated with a special powder paint, which prevents the material from deteriorating due to exposure to high temperatures,
- tubular electric heater. Located at the bottom of the body. During normal operation, it is completely covered with oil. By heating this filler from below, the heating element stimulates the onset of convection currents inside the equipment. As a result, the device heats up evenly and equally evenly transfers heat to the room,
- control system. It consists of a switch, as well as a power mode switch. The latter is not available on all models, but its presence significantly increases the level of comfort of people, since it allows you to adjust the air temperature depending on current needs,
- safety system. It includes an overheat sensor and a tip-over sensor. The first monitors the oil temperature. If it starts to boil, this is fraught with several negative consequences at once. Firstly, equipment burnout may occur. Secondly, boiling oil releases a lot of air, which begins to “expand” the body from the inside, which can lead to deformation and cracking of the latter. If a crack forms, the oil will leak out, and this is a fire hazard. But a sensor triggered by overheating will not allow all of the above, since it will automatically turn off the device. As for the rollover sensor, it also performs a very important function. As mentioned above, for the equipment to operate correctly, the tubular electric heater must be completely immersed in oil. If the device falls, the filler flows to the side and the heating element runs “dry”. This leads to its rapid overheating and burnout. If the heater falls, the tip-over sensor immediately turns off the power supply, thereby saving the equipment from damage.
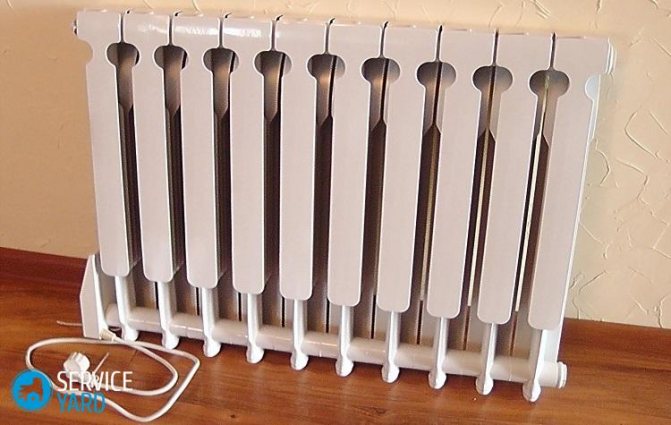
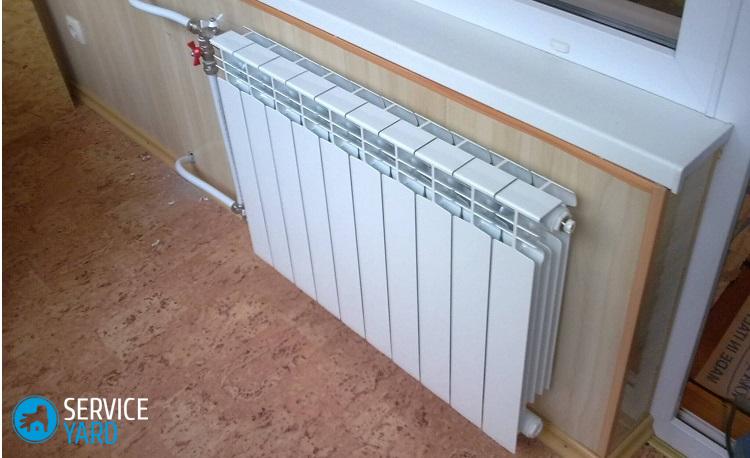
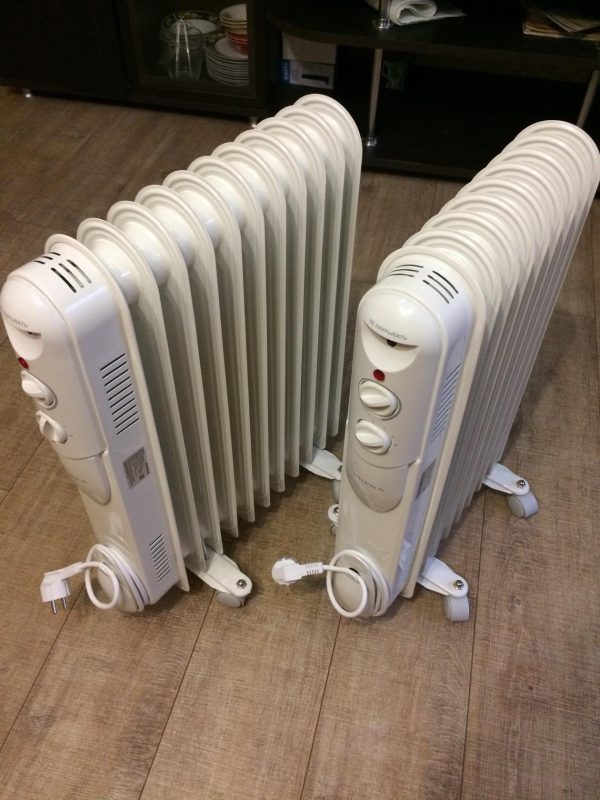
This set of elements is typical for any oil radiator. But there are some points that distinguish specific models from each other. In general, all oil heaters are divided into two large categories. In one of them, the body is a ribbed accordion, and in the other it is flat. The procedure for repairing the heater and filling it with oil depends on the type of radiator.
Protection devices and wiring
The connection diagram of the heater elements inside the device is made according to a three-wire circuit. This means that it uses a single-phase network with a third wire to ground the device body. The power cord plug and the socket where the heater will be connected must have grounding contacts. This does not mean that the device will not work in an old-style two-wire network, these are simply modern safety requirements.
In addition, it is advisable to use at least a fire protection RCD connected after the input circuit breaker and the meter. To protect against electric shock from the device body, you can use a two-pole RCD on a separate branch where the sockets for the heater will be connected.
The power of oil heaters is usually from 1 to 2.5 kW, that is, actually equivalent to the power of a conventional electric kettle (2.2 kW). Therefore, there should be no special requirements for electrical wiring. The circuit breakers in the distribution board also have sufficient reserve for such a load.
The only thing you could wish for when choosing a heater is the presence of a sensor that turns off the device when it tips over, and a timer that sets its operating mode according to a predetermined schedule. In this case, you can always maintain the most comfortable climate in the apartment and avoid accidental burnout of heating elements.
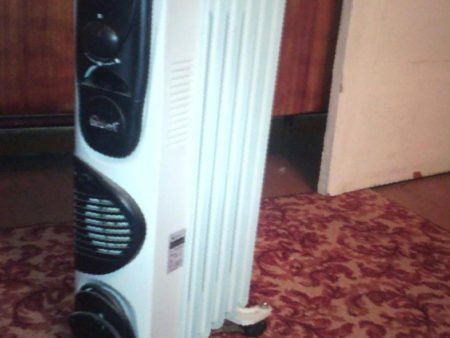
Oil heaters imitate the radiator of a central heating system. They consist of a hollow metal form, inside of which there is a heating element. The design is filled with mineral oil and operates on a 220 V mains voltage. This device is inexpensive. It is safe to use.
Oil heater does not work. Causes and troubleshooting
In some cases, you can repair the oil cooler yourself. Let's consider the main breakdowns of such devices and the algorithm for subsequent actions.
Important! When repairing an oil heater, observe all safety precautions and follow the operating rules of the device and the manufacturer's instructions. Violation of any of the points may result in injury.
Extraneous noise
Often, after a heater has been dropped or left tilted for a long time, it begins to make crackling or hissing noises during operation. This is one of the cases when there is no need to disassemble the device. Due to improper positioning or impact, air and oil have moved inside the device.
Troubleshooting - It is necessary to place the device in an upright position for several days. After this, the problem should resolve itself.
Electrics
If the device does not respond to being plugged in, does not heat up, and the indicator light does not even light up, then first try connecting the power cord to a different outlet. The cause may be a faulty socket. If it is the radiator that is broken, then using a multimeter you should check the serviceability of the electrical part of the device.
Important! If you smell a burning smell while the heater is operating, immediately unplug the device from the outlet. You should start looking for the causes of malfunctions only after the device has completely cooled down.
Troubleshooting:
- Check sockets and plugs. Check to see if there is a short circuit between the heater elements, because often the cause of such a problem is burnout at the wire connections.
- The de-energized radiator needs to be checked to ensure that all switch keys are working. This can be done using a multimeter or tester. In the on position there will be a short circuit at the ends, and in the off position there will be nothing.
- You also need to check the thermostat using a multimeter. There should be no short circuit and low resistance.
Other breakdowns associated with this problem can only be detected by disassembling the case:
- Inspect all contacts in the control unit - they may oxidize, burn out or become loose. In this case, repairing the oil heater comes down to treating the contacts with alcohol. Loose contacts should be tightened using a screwdriver, oxidized contacts should be rubbed with sandpaper and insulated.
Important! The most heat-resistant insulation is fiberglass tape, which can withstand temperatures up to 200 degrees.
- Finally, check again for short circuits. Perhaps this is where the repairs will end. If after the described actions the device does not work, then you should look for a breakdown in another place.

Thermal fuses
There may be several of these important parts in a heater. If one of them becomes unusable, the device stops working.
Troubleshooting - You should ring and thus find the faulty fuse. The non-working part must be removed, the wires insulated and connected.
Important! This procedure is safe if the heating device has several safety elements. If the only fuse fails, then it should be replaced with a new, working one.
Bimetallic plate
The plate may be deformed during operation. This often causes oil to leak from the device. In this case, replacement of the damaged element is required.
Troubleshooting:
- Disassemble the temperature controller.
- Set the warming temperature to minimum.
- Remove the regulator handle from the screw, unscrew the nuts and remove the frame.
- Remove the deformed plate and install a new one.
Oil leak, tank repair
If you notice oil leaks from the heater, it means that the seal of the housing is broken.
Troubleshooting:
Repairing oil radiators in this case is a responsible matter and not always justified. If you decide to take such actions, then you need to do the following:
- Drain the oil.
- Solder the tank using silver, brass or copper-phosphorus solder rather than tin. To do this, use a torch.
- It is necessary to thoroughly clean the edges of the seams from rust so that they “grab” firmly.
- During work, water should be poured into the tank. This will prevent fire. After completion of work, the tank should be dried.
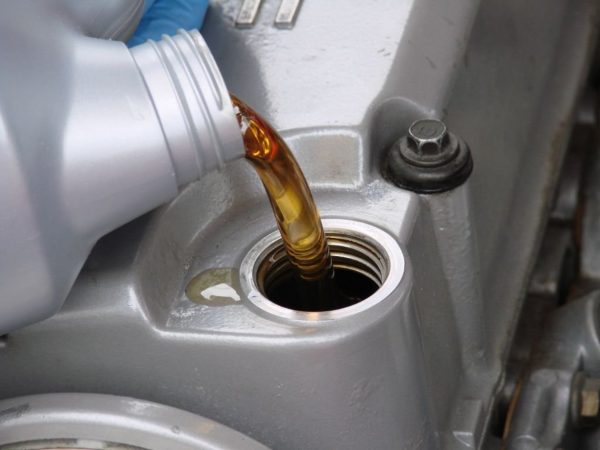
- After the tank repair is successfully completed, the oil should be changed. Use transformer oil for this. It must be remembered that mineral oils are not compatible with synthetic oils.
Important! Used oil should not be used for radiators. This leads to the heating element becoming clogged with scale. It is worth considering that the oil should fill the tank 90%, the rest of the space should be taken up by air.
Failure of the heating element
This part of the oil cooler cannot be repaired. If it is broken, then it can only be replaced with a working one. And this is only possible if your heater model has a removable heating element.
Debugg:
- If it is possible to change the heating element in your radiator, then it is worth choosing a new one, preferably copper, which would be identical in power to the old one.
Important! It is worth paying special attention to the joint between the heating element and the body. The gasket is supplemented with sealant.
- If the heating element is a non-separable element, then after flaring and replacement it will be extremely difficult to roll it back.
Drop or position sensor
This part is a weight that ensures the safety of using the heating device. At a certain angle of inclination of the radiator or its fall, the sensor turns off the device.
To check whether this element is working properly, you should place the heater on the floor and ring the contacts.
Important! It is not recommended to repair the fall sensor if it malfunctions. It is best to replace it with a new one.
How does an oil heater work?
The circuit of each oil heater is similar. The body of the heating unit is metal and consists of several sections that are hermetically joined together. The inside of the structure is filled with mineral oil, and the outside is covered with a layer of powder paint, which is very durable and resistant to mechanical damage.
The package includes:
- heating element (heating element);
- thermostat;
- heating regulator;
- wires;
- overlay panels.
The operating principle of any oil heater is the same. First, the wire is connected to the network, the heating element is heated, then, under the influence of thermal energy, the oil is heated, then the housing. Heat from the heated body is transferred to the air that comes into contact with it, it heats up and rises. According to the convection principle, cold and hot air are mixed, and its temperature rises. Some models are equipped with a fan to make the air change more intense.
Thermal energy heats the oil
Heating devices have different power levels and differ in the number of sealed parts. The room will heat up faster if the unit has more sections. At the same time, the heater is heavier and larger in size. All models are equipped with wheels with which the devices are moved, so the mobility of the heater does not depend on its size.
Oil convectors have a number of operating modes. For this purpose, switches are installed, and on some models there are touch control panels or LCD monitors, which show data on the operation of the device.
How to assemble an oil heater yourself
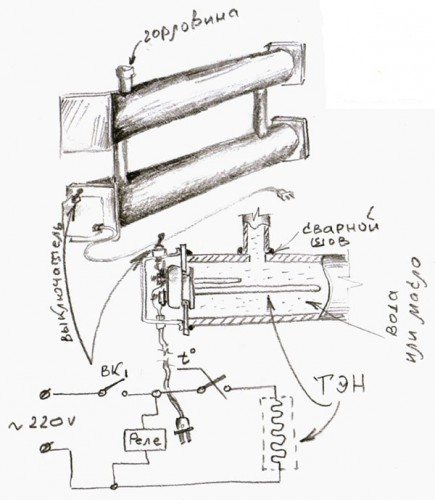
Making such a unit at home is not difficult. Moreover, the design of the oil radiator is the same everywhere, the difference lies only in the power of the equipment and the dimensions of the device body.
Depending on the size and required power of the device, from 1 to 4 heating elements can be installed in it. Often, one heating element is enough for a household heater.
Standard electrical diagram of an oil radiator.
As for the case itself, the choice is huge. Most often, standard cast iron, aluminum or steel batteries are used for this purpose. But you can also use a regular metal gas cylinder, a pipe of suitable diameter, or even a tightly sealed pan. The main thing is that the heating element does not touch the body.
Don't forget about the oil itself. As a rule, it is recommended to use any purified technical oil. But electrical transformer oil is considered the ideal option. This composition is already adapted to work at high temperatures.
The price for it is quite high and can take up to half the budget, so you need to approach the choice of case volume carefully.
Types of heating elements.
It is most convenient to make a heater from a standard cast iron battery MS-140; it has an acceptable cost, plus there are ready-made heating elements and related accessories on the market adapted for this model.
As already mentioned, the heaters are mounted at the lower end of the unit. The housing must be grounded; on the opposite side of the structure, a ball valve and an oil radiator drain hose are installed below. This is especially true for volumetric heaters with a heavy body, where draining the oil, if necessary, is difficult due to the high mass.
Radiator sketch.
Since we are talking about a heater based on MS-140, the upper hole of the battery, which is located above the heating element, is closed with a plug. And above the drain valve, the hole is closed with a plug with a Mayevsky valve built into it, so that, if necessary, the pressure can be relieved.
Important: regardless of the size and volume of the heater, its oil fill should be within 85%. The remaining 15% will be used to compensate for oil expansion when heated, plus in large units it is advisable to install an additional expansion tank.

Characteristics of different models of heaters.
The video in this article shows the intricacies of assembling the heater.
How to disassemble an oil heater?
Before repairing the heater, you need to determine the cause of the breakdown. To do this, you will need to disassemble the unit, although outwardly it seems that the oil heater cannot be disassembled, since it is monolithic.
Important! Before starting repairs, the device must be disconnected from the network. The structure cannot be turned on until it is fully assembled.
Disassembly procedure
There are many different models of oil heaters; there is no exact algorithm for analysis. But we can highlight general rules with the help of which the unit can be disassembled faster.
It is not difficult to disassemble an oil heater
First you need to carefully study the convector control panel. The design of a cheap oil heater is similar to an expensive one. Disassembly begins with the stage of unscrewing the bolts and removing fasteners. On some models, instead of screws, there is a plastic panel that is latched with a spring. In this case, you need to feel the latch on the panel with any wedge-shaped object (preferably made of plastic), press it harder and thereby bend it.
Major breakdowns of oil heaters
More often the heating element breaks down and the tank leaks. The oil heater becomes completely unusable. The relay will last for years. Today, Soviet irons are common and are still functional. The mechanism cannot be repaired. You need to clean oxidized contacts with alcohol. Repair of electronic components is limited primarily to replacing elements. Thermal fuses are too lazy to repair: it is difficult to calculate the response temperature. Masters avoid taking responsibility. Keys and relays should be cleaned from time to time.
The main thing is to replace the heating element, oil, and repair holes. Those wishing to take it up should know: air is certainly stored in the tank. Acts as a cushion when the oil begins to expand. Protects the tank from bursting. When replacing, use transformer oil; used oil is not suitable; it will cause scale to build up on the heating element.
Synthetic varieties are incompatible with mineral ones. Old-timers of automobile forums can give a good explanation to those who wish. The mechanism is cleaned of oil if it is not certain what type is poured inside before repair.
Avoid soldering the tank. Take non-tin solder - brass, copper-phosphorus, silver, use a torch. Refrigerator repairman's equipment is suitable. It is recommended to pour water inside the tank to avoid fire. Accordingly, after work the container must be dried. Before filling, the oil is evaporated at a temperature of 90 ºС. Be careful when heating the liquid persistently - it will begin to oxidize and burn. Of course, you can freeze the butter. A thin stream is passed through a chute that has a negative temperature. Oil is poured to 90% of the capacity of the oil heater; it can be measured using any available method, using water.
How to remove the heating element depends on the design. There is information about collapsible and non-dismountable versions. Try to select a heating element of similar power. The shell is made of copper tubes. The tank of oil heaters is made of steel, there is a possibility of corrosion caused by the formation of galvanic couples.
Small holes can be screwed in with bolts. Seal the threads with putty and use a heat-resistant sealant. It's hard to avoid leaks. Sealant alone will not do the job; heating and cooling cycles will cause cracks to appear. It’s not for nothing that the body is made of an accordion. The structure of the metal absorbs the lion's share of deforming loads.
The main types of faults are listed. Self-repair of oil heaters, when it comes to holes, is a labor-intensive and thankless task. However, if you have an inverter for welding thin sheets on hand, localize the hole. When repairing the rust layer, it is important to remove the corroded areas and allow the seam to catch. Repairing an oil leak has a chance of success.
The fall sensors went silent. They precede the input of the electrical circuit of the oil heater, and at a certain tilt, turn off the power to the device. It is not difficult to check the operation of the element. Lay it on its side and ring the contacts. Repairing the oil heater fall sensor is not justified by the risk caused by improper execution of the operations. Along with the thermal fuse, we see an element that ensures safe operation. Information regarding repairs is presented; we hope the story is useful to novice craftsmen. The pros themselves know how to fix the problem.
Oil heaters are considered the most reliable, durable and long-lasting devices, but they may also require repairs.

When it comes to additional heating of a room, oil heaters are considered the most reliable, durable and durable devices for this. However, they can also fail over time. Then the question arises: is it worth repairing oil heaters yourself, or is it better to turn to professionals for help? There is another option - simply get rid of the faulty unit. Let's find out how realistic it is to repair the device, and whether it is worth spending energy, time and material resources on it.
How to repair an oil heater
- Why doesn't the heater work?
- Internal structure of the structure
- Heater repair from A to Z
- Restoring the integrity of the hull
Why doesn't the heater work?
If you compare a non-working heater with a sick person, then first of all it is important to make the correct diagnosis. Only after finding out the cause of the breakdown, you will understand how to repair the device, restoring its functionality.
The most common causes of breakdowns can be divided into several categories:
- After turning on the device makes a cracking noise. This sound does not mean that the appliance is faulty. Most likely, the oil inside the device is gradually warming up. In addition, the cracking noise may be caused by a recent fall of the heating device. To solve this problem, you need to place the heater on a horizontal surface without a slope;
- the heater does not turn on. First of all, pay attention to the outlet and, if it is working, focus on the wiring of the heater itself. Most likely, the contact has come loose somewhere: either inside the cord or in the plug;
- The heater turns on, but does not heat. That is, visually, the radiator seems to be working properly - its lights are on and the noise of the fan is heard - but it does not produce heat. This indicates that the thermal relay has broken. A home craftsman can easily handle such repairs on his own;
- The heater does not heat up. Another probable cause of the malfunction may be failure of the heating element (heater).
Can an oil heater explode?
Oil is not a flammable liquid, so there is only one answer: oil units do not explode. If the thermostat breaks, such an electric heater will overheat, the housing will depressurize, and hot oil will leak, which can cause a fire.
An oil heater may cause a fire.
There are rules for operating oil structures:
- Do not use the devices in bathrooms or other rooms where there is high humidity.
- It is prohibited to cover the heater with fabrics. Overheating will occur and oil will begin to leak.
- The device should be located at a distance of half a meter from the wall, since there is a thermal relay that turns off the device in order to protect it from overheating.
- The heater must be positioned vertically during operation, because inside it is not completely filled with oil. If you put the device down, the heating element will be exposed, which will lead to depressurization.
- Do not move the unit by pulling on the cord. It will come off and there will be a short circuit.
- The cord should not come into contact with a hot surface, as this will cause the insulation to melt.
- In winter, the unit should be kept only in warm rooms.
- Do not use the device with a broken overheat sensor.
There are no categorical contraindications to leaving an oil heater overnight. This is one of the safest devices. But it is still recommended in such cases to purchase products with automatic shutdown.
Oil heater repair
The older generation remembers that previously, the accompanying documentation for all electrical appliances always included a detailed diagram, thanks to which it was possible to repair the product with your own hands.
Modern instructions, as a rule, do not contain such explanations. But you shouldn’t despair, an oil heater is not a spaceship and it’s quite possible to understand it.
Location of nodes.
Common breakdowns
Important: do not be alarmed if the oil radiator clicks when heating up or after shutting down. When the technical oil inside the unit heats up or cools down, slight crackling is normal. Plus, the thermostat can make such sounds. In some cases, installing the device on a solid, level surface solves the problem.
- If the sensors on the control panel of an electrical appliance do not show signs of life, then first of all you need to make sure that the outlet is working properly . A large load entails burning of the contacts. The next number is the fork, here the reason is similar. After making sure that the socket and plug are in order, you need to check the mechanical integrity of the wire itself, chafing, creases, squeezing;
Schematic diagram.
- If the indicators light up, the fan spins when it is on, but there is no heat, you need to check the operation of the thermostat . Such things often cannot be repaired, the price is low and such relays are available for sale. Unscrewing a couple of fasteners and reconnecting the terminals is not difficult;
- In the case when the unit heats up normally, but does not turn off after heating, the reason must be sought in the thermostat . As in the case of a thermostat, the thermostat cannot be repaired; it is immediately replaced with a new one. Despite the fact that the device seems to be working, you should not delay replacing the thermostat. Heating elements, operating in constant overload mode, will quickly burn out, and this is already serious;
- If the wires and automation are normal, you need to check the serviceability of the heating elements . A “broken” heating element can only be replaced if the possibility of dismantling is provided. In inexpensive models, the heating elements can be tightly sealed into the housing; here it is already cheaper to buy a new heater;
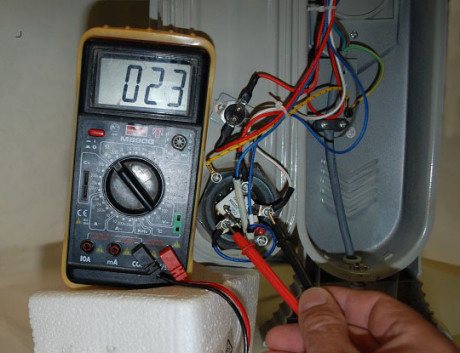
Diagnostics of the heating element using an ohmmeter.
Fault repair
Advice: although the oil radiator circuit diagram is relatively simple, if you decide to fix the unit yourself, you should not rely on memory. All disassembly actions must be recorded on paper or video, in order to subsequently return everything to its original state.
Repairing a socket, plug or cord is extremely simple. The socket or plug is unscrewed and if carbon deposits are detected, all burnt parts are removed and sanded. The cord is simply inspected and “ringed” using an ohmmeter.
What kind of oil is poured into the oil heater, the efficiency of the oil heater
Many people are interested in what kind of oil is poured into a floor-mounted oil heater. Transformer oil is poured into the sections. It is heated by a heating element and circulates. The oil temperature can reach one hundred degrees Celsius.
The heat output of the heater is very high. To increase efficiency, fans are installed on radiators, and special water evaporators are installed to prevent the air in the room from drying out.
The efficiency factor (COP) of the oil heater is 80%. With proper operation, the service life of a floor oil heater is more than twenty years.
The oil heater contains transformer oil
How to choose a device?
Heating problems in the cold season can arise both for residents of city apartments and private country houses. The problem that arises must be solved in an emergency mode using electrical equipment.
Why not take care of buying an oil heater in advance? These devices are very reliable and safe to use. The heating elements are closed, so there is no risk of fire. These designs were invented a long time ago, the principle of use has not changed.
The latest models have added several new features:
- light indicators;
- timers;
- fans;
- humidifiers;
- thermostats;
- overheat shutdown sensors.
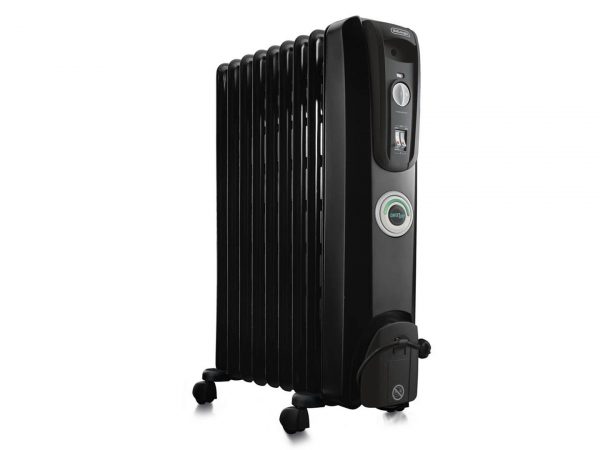
Oil heaters are divided into several types:
- Floor-standing. These are the most common radiators.
- Wall flat. They consume energy very economically.
- Tabletop. These are low-power devices and have low heat transfer.
Some models have a fireplace effect. They operate silently and quickly heat the room. They have drafts installed on both sides, so the heated air circulates very quickly.
Modern models have blocks with programs and timers. If there is such a block, you can set the on and off times. As a rule, new units are controlled remotely and have an emergency shutdown sensor.
Oil heater does not take up very much space
When choosing a device, consider the following factors:
- Power. This is the main indicator. A power of 1 kW is enough to heat a room of 10 square meters. meters with a three-meter ceiling. If there are windows or doors, then we add 0.2 kW for each element. In a room from 30 sq. meters you need to install several such devices.
- Dimensions. This indicator depends on the number of modules: the more modules, the larger the structure, the power of the device increases and the area of the heated room increases. This must be taken into account when choosing such equipment.
- Design features. This refers to additional functions that improve the ease of use of the device and increase the quality of its work. For example, the presence of a network indicator, temperature control mode, etc.
- Manufacturer. The manufacturer should also be taken into account. Brands that have been on the market for a long time are well-known and recognizable. They guarantee the quality of their products and long service life.
When choosing a heater, you need to take into account that the more functions installed on the equipment, the more expensive its cost and the more energy it will consume. Also, brands from well-known manufacturers are more expensive. You need to determine the optimal price for yourself, and also take into account the functionality of the device. This will allow you not to make a mistake in your choice.
Popular models of oil heaters
Let's look at the most popular heater models.
Ballu BOH/CL-09
Consists of three modules, operates in three modes with power from 600 to 1500 W. Can heat a room of twenty square meters. Equipped with a thermostat to maintain the set temperature for a certain time. For ease of movement it is equipped with wheels. Filled with mineral oil. Refers to environmentally friendly products.
The cost of such a device is from 2 to 4.5 thousand rubles.
Delonghi KH 770920 HOR
The unit is assembled from nine sections. It has cells to maintain the desired temperature, due to this it does not overheat. The device can heat a room up to 60 square meters. meters, has a thermostat, operates with a power of up to 2500 W. It has wheels that can be folded and a handle that can be moved freely.
The cost of this model varies from 5 to 6.5 thousand rubles.
Oil heater Delonghi KH 770920 HOR
Timberk TOR 21.1005 SLX
The structure consists of 5 sections. Capable of heating a room of 15 square meters. meters, the power of the unit does not exceed 100 W. Thanks to its small size, it is convenient to carry. Includes a folding handle, a power cord about 2 m long and wheels. An overheating protection system and indicator are installed.
You can buy such a model for 1,500 - 2,600 rubles.
General Climate NY18LA
Operates with a power of up to 1800 W, this allows the device to heat up to 18 square meters. meters. The model is controlled mechanically, has an anti-freeze function and a light indicator.
The cost of such a device is reasonable, ranging from 1,900 to 4,000 rubles.
Vitek VT-2122 GY
The thermostat of this unit is designed to heat a room up to 25 m2. The heater is floor-standing and can operate in different modes, in which the power can be set from 800 W to 2000 W. This is the best option for a small apartment. The heating temperature can be adjusted and is equipped with a light indicator.
Oil cooler design
The heater device consists of mechanical and electrical parts. The main and largest element is the metal container in which the mineral oil is located. Based on the appearance of these tanks, the heaters are divided into:
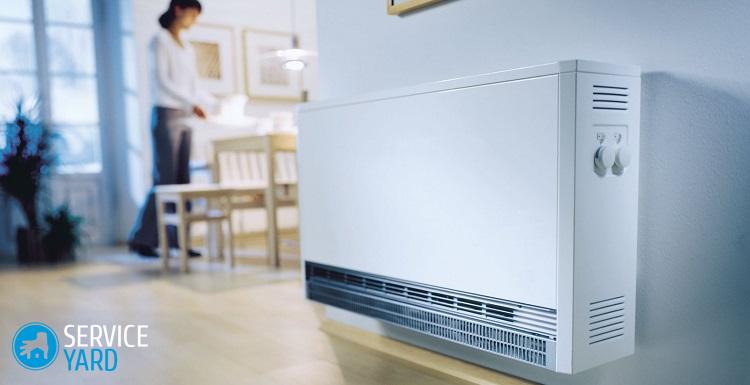
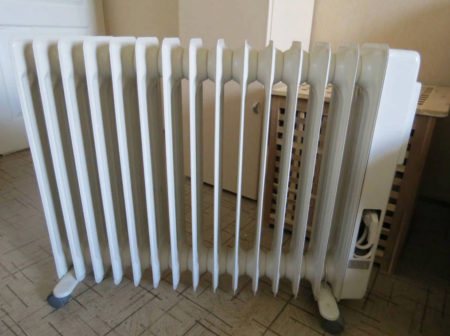
Panel ones have a flat shape without cutouts and can be installed both on the floor and on the wall. To do this, the manufacturer can supply the device with special fastening devices. Compared to sectional ones, to obtain the same power, panel ones are made in larger sizes. Sectional ones consist of segments of the same type assembled into one structure. They are designed for installation on a vertical surface. The more sections a heater contains, the more heat it can produce and therefore more power.
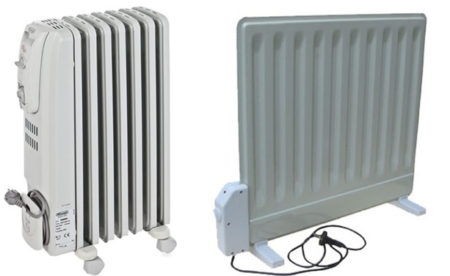
Types of radiators
The tank may be equipped with a safety valve; it protects the container from dangerous pressure. A tubular electric heater (TEH) is mounted at the bottom of the tank; it heats the oil to the required temperature. In addition to the heating element, the circuit includes the following elements:
- fuse;
- thermostats;
- warning lamp;
- power switch;
- fan;
- rollover protection.
All electrical elements, except the heater, are located on the cover. The fuse makes the electrical circuit safe by protecting it from short circuits and is located near the input of the power cord. An LED is used to signal the operation of the device; there may be several of them, depending on the additional purpose. The power switch is presented in the form of a toggle switch when using manual control, or a variable thermostat in an automatic device.
Heater device
Temperature control is carried out using a thermostat. How is it built? This device consists of a bimetallic strip and contacts. The plate is assembled from two metals having different expansion coefficients. When heated, one part of the plate expands more than the other, and the strip becomes deformed. This property is used for switching contacts of electrical devices; when heated, the plate bends and presses on the insulating support of the contact, disconnecting it. When it cools, it returns to its previous position, connecting the contact.
If such a plate is moved away from the contact, then operation will occur at a higher temperature. The plate is heated from the tank itself, since the thermostat is located in close proximity to it, and from external air through the housing on which it is located.
In some devices, manufacturers install a fan, which increases heat transfer, which leads to increased speed and uniform heating of the room. An important device is rollover protection. It consists of two contacts, one fixed, the other movable, located on an eccentric plate.
Types of faults and their elimination
Typical heater malfunctions are as follows. When the device is connected to the network, automatic protection is triggered on the distribution panel. This is a sign of a short circuit. Repair of oil heaters in this case is carried out by determining the location of the short circuit and eliminating the cause of the short circuit. If the device does not heat or heats poorly, there may be many reasons. You can find out why the device does not work by testing the circuit and identifying the faulty element.
Traces of oil on the body and floor will indicate a leak in the seal. It is necessary to find the location of the leak and restore the integrity of the housing. To fix a heater, you will need some tools, but they are fairly common and are likely to be found in any home.
It is necessary to consider each of the possible breakdowns in more detail.
Repairing oil leaks
If an oil leak is detected on the device body, you need to find the leak, weld it or solder it. In the latter case, you should use silver solder; you cannot solder with plain tin. Leaking oil will not allow the leak to be properly soldered, which means you will have to drain the oil and only then carry out soldering using a torch. Then you should check the tightness of the soldering area by filling the heater with water. After making sure that the liquid does not leak out at the leak site, it must be drained and the heater dried by heating.
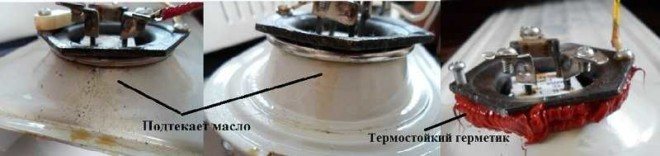
After all the water has evaporated, you can pour oil into the heater. Before pouring, the substance should be heated to 90°C. If there is a significant leak, the entire volume must be changed, using transformer oil if possible. When filling the heater, you must leave room for thermal expansion. Adding another oil is strictly prohibited, since the brand of the original product is unknown, you can accidentally mix mineral with synthetic. The entire volume of oil must be replaced.
Extraneous noise
Noises in the heater can be either periodic or constant. The source of noise after switching on may be water that entered the oil in the form of steam during assembly due to high humidity in the workshop. When water heats up, it changes from a liquid to a gaseous state and produces a crackling sound.
Another cause of noise when turned on may be bursting air bubbles. This happens when the heater was moved and the oil was swirled in it. After warming up the device, these noises disappear and do not pose a danger for further operation. A constant crackling sound is the cause of a malfunction in the electrical part of the heater. It should be found and eliminated, since such a device cannot be operated.

The heater may also crackle due to the linear expansion of parts whose dimensions change when heated. This is also not dangerous, in addition, the sounds disappear when warmed up.
Electrics
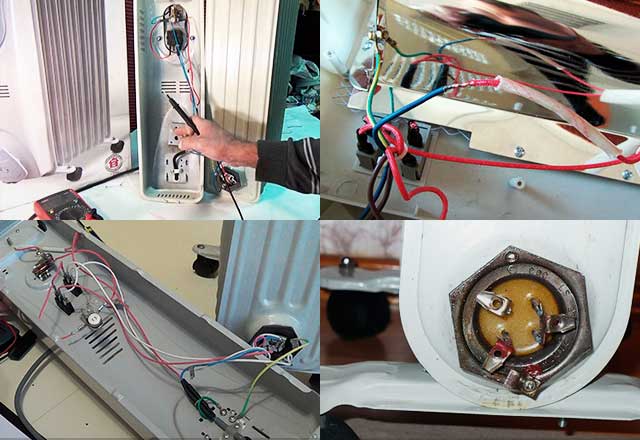
If the oil cooler stops working, this is most likely due to problems and malfunctions of the electrical part. The check should begin by removing the cover covering the heater's electrical circuit. After this, use a tester to check the serviceability of the power cord. The faulty element is found by calling one by one. Then you should switch the tester to resistance measurement mode and check the condition of the conductors. If the resistance of at least one conductor differs from zero, the plug or wire is replaced.

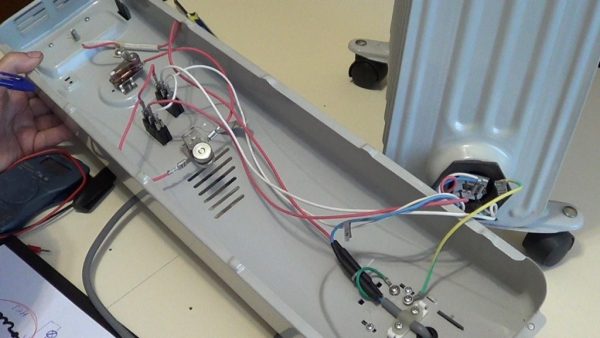
It will not be possible to repair the electrical part, except for the cord, at home. It is necessary to remember, or better yet, photograph the order in which the terminals are connected, and then remove the faulty sensor. You need to buy the same one in the store and install it in place of the old one.
Bimetallic plate
The bimetallic thermostat is located next to the heater mode control keys. It consists of a rotating handle connected to a moving contact and a bimetallic plate. It consists of two different metals and is capable of changing its linear dimensions depending on temperature, and when the ends are rigidly fixed, it can bend and make a contact.
Oil-filled heater operation
The operating principle of the oil cooler is as follows. When the device is connected to the electrical network, the device goes into standby mode. To turn it on, you need to select an operating mode; it is selected using an adjustable thermostat.
Other models on the case have two power adjustment keys; when one of them is turned on, the following circuit is connected: power is supplied to the fuse, then the current passes through the heater spiral, indicator light and mode switch contacts. After this, it passes through the closed tip-over protection contacts; if the heater is tilted strongly, these contacts are open and the device will not turn on. Then the current passes through the contacts of the emergency and adjustable thermostat and goes into the network. If you need to increase the heating speed, turn on the second heater coil using another key, which is connected in parallel to the first.
How do thermostats work? As the heating element heats up, the oil around it also begins to heat up and rise, and cold oil comes in its place. This is how the entire volume of coolant is mixed and heated.
Parameters to consider when choosing
Depending on the purpose for which the heater is purchased, the requirements for the device will differ. Therefore, before going to the store, you should think about how long this unit will be used, how much space it should heat, where it will stand, and so on. Sometimes even the color of the case matters. Other features to consider when purchasing can be seen in this video:
For ease of movement, some structures are equipped with handles, this makes it possible to easily move them, for example, from one floor to another. If you need to first heat one room, then another, then the built-in rollers will come in handy.
They won't scratch the floor and only require one person to move, even if the unit is hot. In cases where there are few outlets in the house, a long cord is required, this is also provided by some manufacturers. If the cable is not completely used, its remains are wound on a special bracket. What else should you pay attention to?
Power
This is the main indicator; the time spent heating the room depends on the power. A lack of power will not allow you to raise the temperature to the required value, and an excess will not be considered a disadvantage, unless heating occurs faster and the price is higher. Another thing is that more powerful heaters consume more current per unit of time. This can be seen in the table below.
Dependence of current on power
If you add an electric kettle, a powerful vacuum cleaner, or a water heater to the heater, the home electrical system will fail. Another reason to choose a less powerful unit is to reduce humidity. The more powerful the device, the drier the air becomes.
Advice. It is usually recommended to choose power at the rate of 1 kW per 10 square meters, provided that the room is insulated. If there are cracks in the doors and windows, then a powerful device will not cope, especially if there is severe frost or wind. For a more accurate calculation, you can use the electronic version of the power calculator.
Radiator section thickness
Manufacturers try to make the thickness of the sections as small as possible, because the oil cools faster. Unlike water radiators, which use process water with many impurities deposited in them, oil radiators use pure coolant. To increase heat transfer, in some models the upper part of the heater is expanded, as can be clearly seen in the figure.
Extended top model
Others incorporate a fan, forcing air through the sections.
Power mode switch
This function allows you to adjust the heating speed. Mainly used to quickly heat a room. For example, arriving at a dacha or country house for weekends or holidays. Two types of switching are used:
- using switches;
- using a thermostat.
The first method uses additional heating element coils. Turning on all the switches located on the case puts the device into forced mode. After the temperature has reached the desired level, the additional heater coils are turned off, and the device operates in gentle conditions.
In the second case, a wire with increased resistance is wound onto a bimetallic plate through an insulator and connected to the heater circuit. During operation of the heating element, the wire heats up and heats the plate. The more the spiral works, the more the plate heats up; when the set level is reached, it is triggered, turning off the spiral. Usually there is a second indicator that signals when the device is turned on and off.
Humidifier
Rapid heating of the room is associated with one unpleasant consequence - the air becomes dry. This occurs due to an increase in its volume. When heated, the gas expands and the excess goes outside, causing the water vapor content to decrease and the air to become dry. This phenomenon is poorly tolerated by many people. Some heater models are equipped with an air humidifier. This is a plastic water container that is installed on the radiator. While the heater is operating, the container heats up and the water begins to evaporate, saturating the air with the necessary moisture.
Interesting! To raise the humidity, just hang a damp cloth next to the device. When it dries, the water passes into the surrounding air. Wet cartridges can also be used; they are installed in the path of the fan, which drives air through the radiator.
Built-in fan
The main purpose of the fan is to speed up heating. It is mounted in the cover in such a way that the air flow created by the fan is directed towards the radiator. Passing through the heat exchanger, the air heats up and, leaving the unit, mixes with the surrounding atmosphere. Turns on and off using a switch located on the lid. Thanks to forced circulation, air mixing occurs faster. Typically, fans are installed on more powerful devices.
Heater with fan
The disadvantages are noise and the need to control the condition of the fan, because... it is not designed for long-term operation.
Device weight
When choosing, do not forget about the weight of the device. If it needs to be carried and transported frequently, then it is best to choose one with handles and wheels. Weight will depend on the power of the heater and the presence or absence of a fan. The number of sections and the size of the device itself also affects the weight. Therefore, you should consider all the pros and cons, and, if everything suits you, make the final choice.
The design of a simple oil heater
It is good to cover an oil heater with clothes to dry. The only type of device where the owner will avoid fatal consequences. The only thing is that on the side of the accordion container there is an extension equipped with electronic filling; avoid covering the compartment. The oil heater device includes the following elements:
Emergency shutdown sensor (thermal fuse, relay)
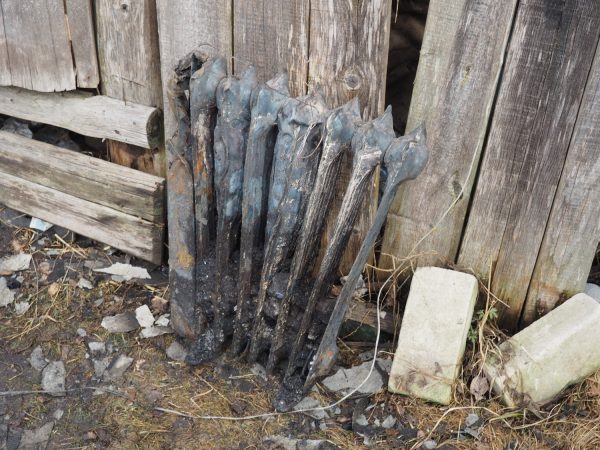
- A container filled with oil. Appearance - like an accordion, heating up to a decent temperature; wait a moment to touch it with your hand. When it comes to drying items, don't be afraid to place heat-resistant items. The container is sealed, but there is 15% air inside. Try placing the oil heater upside down, tilt it on its side, and return the load to the wheels. Hearing dull blows frighten mice: air bubbles burst inside. Water is not used by the heater, it will quickly evaporate, corrosion of the housing will become significant, the manufacturing technology would require the complete exclusion of air from the working fluid (water + oxygen = the most powerful oxidizer of living nature). The coefficient of thermal expansion of the most common liquid on the planet is ten times higher than that of steel. It's not good if the tank ruptures.
- The lower part of the end of the accordion contains a heating element, to which the electronics compartment clings. The oil heater does not have a pump and works by natural oil recirculation. The current starts from the heating element upward, then at the opposite end of the battery the liquid descends. While working, it emits audible spiral vibrations under the influence of alternating voltage. The effect is irreversible and is caused by the influence of the Earth's magnetic field. The boiling point is above 100 ºС (150-200), avoid touching the container, the liquid is not brought to a change in phase state due to the prohibition of using water: the container will burst. A double heating element (two spirals) will allow you to more flexibly regulate heating.
- There is a thermal fuse located not far from the heating element. The device will prevent a fire from happening if the oil suddenly leaks out and the temperature relay breaks. An oil heater would work hard when the copper heating element began to melt. The oil will leak out - the high temperature through the housing will cause the stuck thermal fuse to trip. The structure is divided into bimetallic (reusable) or wire (disposable). The photo shows the presence of a clearly blackened tablet above the heating element: a thermal fuse (see the first photo of the review), or a thermal relay (determined by the design).
Steel profile providing connection between the electronics compartment and the heater accordion
- The relay is located at the top. The main difference from the iron is visible: there is no contact with the body. Apparently, the thermal relay is simply trampling the air. An oil heater is reminiscent of an electric kettle, in which a bimetallic plate is often exposed to steam penetrating through a special hole in the housing. Thermal relay is an adjustment mechanism; the thermal fuse is designed to localize the event of failure of standard equipment.
- The pictures show: there are two switches, each has a phase, the ground of the heating element, and one wire of the thermal relay. This redundancy allows the indicator lights to glow. One phase is not enough to ensure the Joule-Lenz effect. The manufacturer does not know in advance which side the user will plug in, whether the blue (red) wire will be neutralized or exposed to 230 volts.