How to disassemble, extend and assemble a heating radiator
Aluminum, bimetallic, cast iron radiators are assembled according to the same principle: sections in the upper and lower parts are connected to each other by nipple nuts. Nipple nuts are hollow, ring-shaped nuts with external threads. The thread is applied to both ends. Special grooves are made inside each one. During assembly and disassembly, a key is inserted into them, rotating which tightens or separates (depending on the direction of rotation) both sections. Sealing is ensured by a gasket made of paronite or silicone, placed on top of the nut.
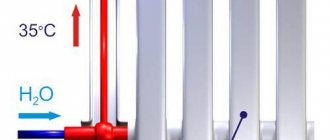
This is how the radiator is connected to the system
As a rule, it is necessary to disassemble and reassemble heating batteries in the following cases:
- when installing a new heating system;
- if necessary, add additional radiator sections;
- Replace the leaking section or gasket.
You need to change the gasket, which means disassembling the battery and then reassembling it
Disassembling an aluminum and bimetallic radiator
Before disassembling the heating battery, prepare the necessary tools.
The main tool is a nipple wrench (can be rented at a specialized store for little money). It is a rod about 700 mm long. On one side, a key head with a size of 24x40 mm is welded to it, and on the other, a through hole is made. You can insert a metal rod into it. It will make it easier to turn the nut.
This is the main tool used when assembling/disassembling heating radiators
There are several notches on the surface of the key. The distance between them corresponds to the width of the radiator section. By inserting the key inside the battery and counting the number of notches, you can easily find the nipple for the desired section.
Before disassembling the heating battery, you need to be aware of the direction of rotation of the key. Place the radiator on a flat horizontal surface with the front side up. On the right there will be a right-hand thread, and on the left side there will be a left-hand thread. In order not to get confused, you can do it simpler: take the nut and tighten it alternately on the right and left, and then decide which way to turn the key. This is important because the threads can easily be stripped and then you need to buy two new sections. Imported manufacturers make the following designations for threads on the plugs and fittings on the front side of the section: D-right, S-left.
The thread on the nipple nut can be right-handed or left-handed, so before disassembling the radiator, we determine which direction to turn
Let's say you need to unscrew one section on the right. To do this, insert the key with a “spatula” into the upper hole to the desired location, secure it in the groove of the nipple nut and forcefully turn the key counterclockwise and “rip it off” from its place. This is where you may need a rod inserted into the ring on the key: a decent amount of force is required.
We make two full turns and move the key to the lower part of the radiator. We repeat the operation, rotating the key in the same direction. Unscrew the nipple 2 turns here too. We take out the key again and repeat the procedure for the upper part. So, one by one, unscrew the section completely. This is done to ensure that there are no distortions.
How to assemble an aluminum radiator
We assemble in reverse order. We place the sections on a flat surface (a suitable sized table or simply place it on the floor). If the radiator is not new, unscrew the end cap and Mayevsky tap.
Before installation, you should carefully examine the threads and grooves; they must be of high quality, without chips or changes. On the mounted section for testing, we “drive” the thread by screwing in and unscrewing the nipple. Here you need to pay attention to the fact that there may be a gasket under the layer of factory paint in front of the thread. Lightly rub the end with fine sandpaper; if it is found there, then it must be carefully cut off with a knife with a sharp blade.
This is what an aluminum radiator looks like in cross section
Before adding sections of the heating radiator, be sure to clean the ends to a smooth surface. We even remove factory paint. It is not needed at the ends of radiators, but will only contribute to the early appearance of leaks. Sooner or later, coolant will begin to seep under the paint. In the case of non-freezing liquids, this will happen very quickly; if water is used in the system, then not very much, but it will definitely happen. And then coolant will begin to leak between the sections, although the gaskets are still in perfect condition. The whole point is that the paint on the ends has peeled off or been corroded, and microcracks have appeared. So we make sure to clean the ends to bare metal, but use fine sandpaper so that the surface of the metal is smooth and without scratches. This guarantees the operation of the system without leaks in the radiators.
For better tightness, the ends then need to be degreased (using gasoline). Gaskets are also degreased, but they need to be washed with ordinary soapy water. For a system that will be filled with water, degreasing is an optional procedure, but for systems that will run on antifreeze it is necessary. Antifreezes have high fluidity and seep into the smallest pores. After everything is dry, we begin to assemble the aluminum radiators.
Then tighten both nipple nuts half a turn. Heat-resistant paronite (silicone) gaskets are placed on top of the nipple to seal the joints. Now we take the section that needs to be screwed and place it tightly against the nuts, checking the tightness of their fit. Next, insert the key into the upper hole and tighten it 1-2 turns. At the same time, we do not use the lever yet. We twist our hands. Then we perform the same operation in the lower hole. We repeat several times, alternately tightening both nuts several turns.
We unscrew the sections gradually, one or two turns of the nut, either from below or from above.
Tighten as much as you can. Only after tightening by hand can the lever be used. This must be done in two stages on each nipple. It is better not to use excessive force when final tightening the nipples, since you can easily break the threads: aluminum is a soft metal, don’t forget.
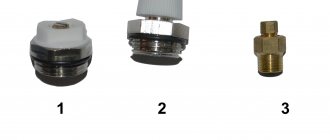
If the section is completely assembled, screw a plug onto the unused holes on one side, and a Mayevsky valve on the other (to bleed air from the system). Now you know how to assemble sections of a heating radiator and, if necessary, you can add several sections.
Dismantling cast iron radiators
The most common are cast iron radiators MC140. During their operation, which in some cases is 30 years or more, they have shown themselves only at their best:
- accumulates heat;
- resistant to poor quality coolant;
- ease of maintenance;
- reliable and have a long service life (from 10 years and above)
How to disassemble this grandfather? And it’s very simple, because structurally all radiators are assembled according to the same principle: using nipple nuts and gaskets for tightness. True, in those ancient times, tow with paint was screwed onto the nut and there was a rubber gasket.
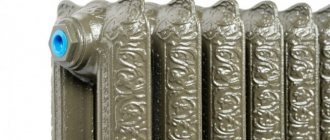
Cast iron radiators in some systems last for 50 years, it is clear that disassembling them will not be easy
There are no problems disassembling the new radiator. But you’ll have to tinker with the old one:
- Over time, the joint between the sections “sticks”;
- the internal protrusions for the key are corroded by the coolant.
This is why dismantling the old “cast iron” is quite problematic.
Another difficulty in working with cast iron is its heavy weight. The weight of one “clean” section is 7.5 kg. A 10-section battery weighs 75 kg, so it’s best to carry it with two people. Before disassembling the radiator, it is best to remove and wash it. A battery that is light in weight can be washed in the bath, after laying down a rag. To do this, it is best to take a piece of hose, connect it to a cold water tap and rinse thoroughly. If you hate to dirty the bathtub, you can go out into the yard. All that matters is the presence of water, you also need a drain: there will be more than enough of any horror in the water.
Only a strong person can carry cast iron batteries alone
The place for disassembling the radiator is chosen to be level and quite spacious. If you live in a multi-story building, then this work can be done on the staircase. Tools you will need:
- radiator key;
- chisel, hammer, small sledgehammer;
- brush with metal bristles, blowtorch;
- several boards or blocks for lining under the battery;
- plumbing wrench No. 2,3 for unscrewing side plugs (footers) and plugs.
A few words about the key: you are unlikely to find something like this in a store; it’s easier to look in the market or borrow from a plumber you know.
The key is a round rod with a diameter of 18 mm. On one side it is flattened in the form of a spatula to the internal size: its width is 28x40 mm and its thickness is 6 mm. On the other hand, a ring is welded to it, into which a lever is inserted for rotation. The length of the key is defined as ½ the length of the largest radiator plus approximately 300 mm. You can make such a “miracle” from a suitable piece of half-inch pipe by flattening one end. But this option is only suitable for disassembling a new radiator.
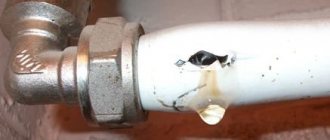
The joint is leaking - the gasket is leaking. It is necessary to disassemble the cast iron battery and change it
To make work easier, before disassembling the joint must be heated with a hair dryer or a blowtorch. This is where you need boards: you place the radiator on them and heat it.
There are a lot of problems with “boiled” sections. They have become so close that significant physical effort does not help. Then the first “cure” is heating. Heat the metal until it glows faintly, then try to untwist it (just take thicker gloves). Another option may be suitable: unwind it after cooling, but only immediately after the temperature drops. In this case, microcracks form in the gaskets, and such a connection is destroyed more easily.
Now about the procedure. Having previously unscrewed the plugs, place the key on top of the radiator, aligning the head of the key with the place where the nipple will be unscrewed, and make a circular mark with chalk on the body of the key along the end of the section. Instead of chalk, you can use a piece of electrical tape or tape. Next, insert the key into the lower internal hole and turn it slightly along the axis to the right and left to bring it to the mark made.
Now let’s talk about which direction the section needs to be unscrewed. If there is a nipple, then we “bait” it alternately with the left or right side. We determine in which direction it twists. Then you need to unscrew the nut with a wrench in the opposite direction. If the thread is right-handed (twists clockwise), then to unscrew it we turn the key counterclockwise. For left-handed threads, unscrew clockwise.
If a miracle happens and you manage to break the thread, do not rush to unscrew it completely. Unscrew the nut one turn, then do the same with the upper nipple. And so unscrew it little by little, first from the top, then from the bottom. Cast iron does not like distortions and can simply crack. In the same way we unwind all sections.
It happens that a leaking section cannot be untwisted. Then try sawing it with a metal saw or a hacksaw. Just cut the section with extreme caution. After all, cast iron is a fragile material by nature. There is another way: the middle part of the unusable section is simply broken with a small sledgehammer on both sides, and the nipples are unscrewed with a plumber's wrench or knocked out with a hammer and chisel.
When disassembling, it is not always possible to get by with just a key. It is often necessary to heat the metal until it glows faintly, and only then will it be possible (and not always) to strip the threads from a boiled battery
Assembling a cast iron radiator
This is done in the reverse order, the only difference being the change in the direction of rotation of the key. Do not forget about replacing gaskets; it is best to buy paronite gaskets in the store, they are stronger, more durable and can withstand aggressive coolants (antifreeze).
If you don’t find such gaskets, you can use plumbing flax. It is wound onto the right-hand thread clockwise, and onto the left-hand thread in the opposite direction - counterclockwise. Also, for reliability, you can apply a sealant (for example Unilock) to the threads of the nipple nut. If you plan to use antifreeze in the system, then you cannot apply paint to the winding - it will corrode very quickly and you will have to repack everything. And this is draining the system, flushing it, disassembling it, then assembling all the sections... a lot of work. So, under a system with antifreeze, use a chemical-resistant sealant and paronite gaskets.
Results
The assembly and disassembly of radiators from any material follows the same scenario. Only the weight can be different, and also some specific characteristics of the metals (the fragility of cast iron, for example).
teplowood.ru
Features of installation of heating radiators
According to industry SNiP, the following standards must be adhered to:
- between the radiator and the floor you need to maintain a distance of 10 cm, between the heating device and the window sill - from 5 cm, to the nearest wall - 3-5 cm,
- the length of the device fixed under the window should be no more than 50-75% of the width of the opening,
- the vertical axis of the battery (it is determined by eye in the middle) should continue with a similar parameter of the window. There may be a deviation of no more than 2 cm,
- installation of radiators is most appropriate in areas where there is intense air circulation - near doorways, under windows.
If you apply a heat-reflecting screen to the wall (in particular, attach foil material), the battery can be placed closer - at a distance of 2.5 cm. An additional finishing layer helps to reflect heat from the wall, which leads to energy savings and faster heating of the room.
The assembly technology is determined by the type of system being used and the selected equipment connection diagram.
How to disassemble an aluminum heating radiator with your own hands
Home / Radiators / How to disassemble a heating radiator with your own hands: useful tips and basic rules
The need to disassemble heating radiators may arise in every home. If one of the sections leaks, it needs to be replaced or removed. It is necessary to add additional fins when the existing ones do not warm the room to the required temperature. And if during the heating season the apartment becomes hot, you need to remove the extra sections. Such problems can be solved with the help of professionals, but if your financial condition leaves much to be desired, you will have to learn how to disassemble a heating radiator with your own hands. This will allow you to save money and gain useful experience.
How to disassemble a heating radiator with your own hands
Heating radiator designs
If a heating element breaks down, especially in the cold season, it must be repaired or replaced immediately. Whether it is possible to disassemble the radiator depends on the type of its design. Quite often, non-removable types of radiators are installed in apartments, which cannot be restored. In this case, it is better to immediately purchase a new battery. But there are also collapsible models that can be dismantled to replace a damaged element and installed back.
Products are divided into two main types:
- Sectional batteries assembled from several identical sections reliably connected to each other. Each of them has a channel through which water circulates, and heat-emitting ribs warm the room. Sectional batteries are the most popular because the cost of such radiators is lower. If a breakdown occurs, it is enough to replace only the damaged section, and if necessary, you can always add or remove ribs.
Sectional heating radiators
- Monolithic products are one solid structure that does not have separate sections. In appearance, these radiators may resemble sectional counterparts, but the differences between them are obvious. Monolithic devices do not have connecting joints, due to which they are able to withstand greater pressure. Because of this, the trouble-free operation of these structures is almost twice as long as that of sectional ones. But in case of leakage, the monolithic device will have to be changed completely. In sectional products, it will be enough to replace the damaged element.
Bimetallic monolithic radiator
Preparing for disassembly
At this stage, you need to prepare all the necessary tools and remove the battery from its mounting location. For work, depending on the type and condition of the radiator, you may need the following tools:
- radiator (nipple) key;
- an adjustable wrench or a set of wrenches with different head sizes;
- autogen or grinder;
- construction hair dryer;
- hammer, sledgehammer;
- chisel.
Tools for disassembling radiators
A nipple wrench is an iron rod with a spade-shaped head at one end, and a hole or bent “ear” at the other. A tool purchased in a store has serifs, the distance between which is equal to the width of the heating radiator sections. They will help you find the location of the required nipple nut.
Nipple key
After preparing the tools, it is necessary to arrange a place for disassembling the radiator. A floor or a sturdy table will do. It is necessary to take into account that dirty water will flow out of the battery, and do not forget to place a waterproof cloth under it.
Dismantling of bimetallic and aluminum sectional products
To disconnect the radiator from the system and remove it from its mounting location, you must do the following:
- Stop water circulation and relieve pressure.
- If the heating battery is hot, you need to wait until it cools down and then disconnect it from the system. To do this, you need to unscrew the connecting couplings at the inlet and outlet.
- Move the coupling away from the radiator along the pipe and remove the device from the brackets.
- Drain the remaining water and place the product in the disassembly area, face up.
- Pull out and rinse the filter immediately to prevent dirt from drying on it.
Dismantling of bimetallic and aluminum sectional products
At the next stage, the radiator is disassembled into separate sections. To avoid damage during operation, you need to figure out which way to turn the nipple nut. This element is a ring-shaped nut with an external thread and grooves inside on both sides. In this case, one nut has both right and left threads. If you unscrew it, the adjacent sections of the battery will evenly move apart, and when twisted, they will tighten.
Nipple nut
Manufacturers usually make marks on the face of plugs and sleeves that indicate thread directions. O denotes right-hand thread, “S” denotes left-hand thread. To accurately determine the direction of movement, it is recommended to take a loose nipple nut and try to attach it to the threads in the radiator. Having decided which way it twists, it will become clear where to turn the key to separate the sections.
Important! If you turn the nipple nut in the wrong direction, you can easily break the threads on it and on the heating battery.
Installation of nipple nut
Having decided on the direction of the thread, insert the nipple wrench into the radiator and slide it towards the desired nut. The notches on the tool will help you do this. When it is in the grooves, insert the lever into the hole on the other side. It will take force to move the nut out of place. Call an assistant to fix the radiator in one place.
Repair of bimetallic radiators
When the nut has moved half a turn, go to the other side to unscrew the second one and do the same. After making sure that both nuts rotate without applying much physical force, gradually unscrew one side or the other, moving 5-7 mm.
Gasket between radiator sections
After disconnection, take away the metal spacers that were between the sections. If they are in good condition, then they can be installed back during reassembly; if in bad condition, then use them as a sample for purchasing new ones. Silicone gaskets must be changed.
Disassembling a cast iron radiator
Cast iron radiator
Cast iron products, as a rule, last in apartments for several decades. Due to this, in many cases it is impossible to disassemble them without damaging them. To remove the battery from its mounting location, unscrew the inlet and outlet clamps. If this fails, you will have to cut it with a grinder or an autogen. After dismantling, the product is washed and placed on a flat surface.
Cutting off the old battery with a grinder
Over many years of operation, the joints between sections, nipple nuts and other individual elements stick to each other. Due to this, disassembly requires the use of more physical force than when working with new heating radiators. If the nut does not come off, use a tool to heat the joints. When the stuck areas warm up, it will be easier to separate them.
Tip: you can use a hair dryer, autogen or blowtorch for heating.
If the grooves intended for fixing the key in the connecting nuts are corroded by rust, it will not be possible to disassemble the product. An effective way to remove the damaged section is mechanical breaking using a sledgehammer, but in this case there is a high risk of damaging the entire structure. You can also try sawing the battery at the joints with a grinder or a hacksaw.
Disassembling the old battery
After separating the damaged section from the entire structure, try knocking out the nipple nuts using a hammer and chisel. To make the job easier, hire an assistant. It may not be possible to remove and disassemble the radiator with your own hands, since cast iron products are very heavy. One section weighs about 7.5 kg. Accordingly, a battery of 10 sections will pull 75 kg.
Scheme for disassembling cast iron radiators.
If you understand how to disassemble a heating radiator with your own hands, this can be done quickly and without any negative consequences. The main thing is to stock up on the necessary tools and knowledge. Problems may arise with older batteries. But if you're lucky, you'll be able to remove the necessary sections. Otherwise, you will have to buy a new heating element.
Photo gallery (14 photos)
02.11.2016
gopb.ru
How to disassemble a heating radiator yourself
The need to disassemble heating radiators arises when they begin to leak, or one of the fins has cracked or burst. In old buildings, when there was no question of energy saving, radiators were installed in which there were more fins installed than required, so the excess fins must be removed.
Heating radiator design.
Before disassembling heating radiators, regardless of their type, you should make sure that no water is flowing into the pipes. It is advisable to do the work together.
If the heating system is mounted on polypropylene or metal-plastic pipes, the couplings are disassembled.
If the heating system is mounted from steel pipes, you need to try to unwind the flows at the inlet and outlet of the sections. If this fails, and this often happens in apartments of old construction, the edges need to be cut with a grinder or an autogen.
All that remains is to remove the battery from the hooks that secure it to the wall and place it on a flat surface.
Dismantling cast iron heating radiators
Disassembling cast iron radiators sometimes becomes a very labor-intensive process, but necessary.
Scheme for disassembling cast iron heating radiators: a - gripping thread sections with nipples for 2-3 threads; b - additional turning of nipples and joining of sections; c — connection of the third section; d - grouping of two radiators; 1 - section; 2 - nipple; 3 - gasket; 4 - short radiator key; 5 - crowbar; 6 - long radiator key.
The new or old radiator is placed on a level place. At least on one side you need to remove the usual footers or blind plugs. On different sections of radiators they can be with left-handed or right-handed threads. Typically, cast iron fittings have a right-hand thread, and plugs have a left-hand thread. If there are no disassembly skills and there is a free section, it is better to find out, before applying force, what type of thread this is and in which direction the key should be turned. If the thread is left-handed, when disassembling cast-iron batteries you need to turn the key clockwise.
As when unscrewing any nuts, you first need to “tear” the fittings out of place, i.e. Turn them a quarter turn on both sides of the battery. Then the footers are unscrewed so that a gap of several millimeters is formed between the sections. If you release the feet more, the entire structure will begin to bend under its own weight and due to the applied efforts. In this case, the thread may jam. To prevent this from happening, an assistant must stand on the battery being disassembled, who will prevent bending with his weight.
Usually, disassembling old heating radiators is difficult because the fittings and sections are “stuck.” In order to disassemble such a battery, you will have to use an autogen or a blowtorch. The junction is heated in a circular motion. As soon as it is warm enough, the futorki is unscrewed. If you fail to unscrew it the first time, the steps are repeated.
If you do not have enough strength to disassemble the battery, you need to increase the length of the key. An ordinary pipe is used, which serves as a handle.
The built-in nipples for venting cast iron radiators are unscrewed in the same way.
If it was not possible to disassemble a cast iron battery using the methods considered, all that remains is to cut it with a grinder or autogenous gun, or break it in a lying position with a sledgehammer. You need to carefully break or cut one section. After this operation, the adhesion between the sections may weaken, the battery can be disassembled, and the remaining sections can be saved.
The use of a “liquid key” or WD fluid has no effect, since in old cast-iron batteries the fittings were sealed with flax and paint, and liquids will not get on the threads.
Return to contents
Diagram of aluminum heating radiators.
Aluminum or bimetallic heating radiators are disassembled in the same way as cast iron ones, but there are slight differences:
- these are smaller sizes of keys and nipples;
- as a rule, these are new products, so when disassembling them you do not need to put as much effort as in the case of cast iron ones;
- on the front side of the plugs and fittings there are designations S and D, respectively for left and right threads.
Metal gaskets are installed between the sections for sealing. After disassembly, they should be wiped, cleaned and stored for later reassembly.
Gaskets under the plugs are usually made of silicone; they cannot be used during assembly and must be replaced with new ones.
Many models of aluminum sections are non-separable. You can disassemble them, but you cannot assemble them.
For disassembly you will need tools and materials:
- disassembly keys (5/4 inch - for cast iron batteries, 1 inch - for aluminum or bimetallic);
- gas key;
- adjustable (plumbing) wrench No. 2-3;
- grinder with a metal disc;
- blowtorch;
- gas cutter (autogen);
- piece of steel pipe.
https://youtu.be/CFOkZ07OeYE
Please note that the work described is dirty and noisy. Therefore, it must be agreed upon with the neighbors.
Using the tips and recommendations provided and if you have a tool, you can disassemble and reassemble heating batteries with your own hands.
1poteply.ru
Assembly
Assembling a bimetallic radiator is no more difficult than disassembling it. To do this, several steps must be taken.
- Place all battery cells on a flat surface.
- Carefully inspect each threaded connection and then clean thoroughly. Even if your radiator is fresh from the factory, the threads still need some work. First, remove any paint from the end sections if there is any. Any excess layer will interfere with the tightness of the connection, which can lead to leaks. Second, sand the threads. The grain size should be very fine. Otherwise, you risk scratching the element. And this, again, will cause a violation of the tightness of the connection.
- Now it is necessary to carry out the procedure for degreasing the end sections. This is done using gasoline. Gaskets should be washed with soap and water for the same purpose. The degreasing procedure is not mandatory for those systems where water is used as a coolant. But if antifreeze leaks in the batteries, you should still pay attention to treating with gasoline, since the “antifreeze” is extremely fluid and can penetrate even microscopic holes.
- Once everything is ready, you can proceed directly to assembly. Place gaskets on the nipple connector and then connect the radiator sections on both sides. Next, using the same special tool, tighten the nuts. This is done in exactly the same way as in the case of unscrewing - carefully, with small turns, work with each nipple in turn. There is no need to tighten it too much, since bimetallic radiators are quite soft and the threads can be damaged.
- When the battery is completely assembled, install a special plug on one of the end holes, and a Mayevsky tap on the other. It should be purchased even if it was not previously on this radiator. With this equipment you can easily get rid of air pockets that form in the battery.
As you can see, the process of disassembling and assembling a modern heating radiator is, in general, a trivial matter, accessible to everyone. It's no more difficult than assembling a car from a construction set. With careful attention and a careful approach, you will definitely do an excellent job with this job. Good luck!
Assembly of aluminum heating radiators
Aluminum heating radiators - general information and characteristics
In the 80s of the twentieth century, a model of aluminum heating radiator was introduced to the world market. Compared to such a familiar product as cast iron batteries, this type of heating device had a number of serious advantages, as a result of which it quickly gained popularity among consumers. Indeed, an aluminum heating radiator has a number of characteristics due to which it is considered one of the most convenient heating devices. Let's take a closer look at these characteristics:
- Aluminum is a material with excellent thermal conductivity, as a result of which products made from it can be used in systems with unstable coolant pressure. Half of the heat is transferred by radiation, half by thermal convection;
- Low weight - this simplifies the installation of this type of device, as well as its transportation and maintenance;
- Durability - aluminum heating radiators can withstand pressure of 16 atmospheres;
- Low cost - devices of this type are much lower than similar bimetallic or copper products;
- Possibility of regulation;
- Aesthetic appearance.
Thanks to all these characteristics, aluminum radiators quickly conquered the market and became widely used for heating rooms.
However, along with the advantages, these devices also have a number of significant disadvantages:
- Aluminum is a chemically active metal and has insufficient corrosion resistance;
- In prefabricated models, it is impossible to use any other coolant other than water with strictly maintained acid-base characteristics;
- Aluminum radiators have a tendency to air up. Therefore, it is periodically necessary to bleed air from the system;
- The threaded connection in such models is a weak point. In the event of a water hammer, the seal of the product may be compromised.
Aluminum batteries are available in two types:
- solid cast;
- prefabricated, consisting of separate sections. If desired, they can be expanded - add additional sections, or, on the contrary, remove them.
Disassembling aluminum radiators
It is usually necessary to disassemble an aluminum heating radiator in cases where:
- We are going to install a new heating system;
- You need to expand the battery or remove extra sections;
- Leaks need to be repaired or seals replaced.
In order to disassemble the product, we will need a set of wrenches, a screwdriver and a radiator wrench.
The first step is to remove the battery from its mounting location. To do this, perform the following steps:
- We stop the water circulation in the system and relieve the pressure;
- We make sure that the device has cooled down and the hot water inside it will not scald us by spilling out;
- We find the threaded connection in the place where the hose is attached to the battery pipe by means of a coupling. We select a wrench of a suitable size - with its help you need to unscrew this connection;
- We move the coupling along the pipe, remove the device and place it on a specially placed plastic film on the floor. There may be some water left inside - you should drain it. Place the radiator face up;
- We take out the special filter and immediately wash it. Otherwise, the dirt on it may dry to such an extent that it will be impossible to clean it. In this case, you will have to buy a new filter - reusing the old one will be impossible.
The next step will be to disassemble the battery itself into separate sections. You should know that the battery sections are connected to each other using nipple nuts - these are nuts that are empty inside with external threads on both sides and grooves for installation inside. For this purpose, we use a radiator wrench, specially designed for working with nipple nuts. If necessary, you can make it yourself. This is a spatula key with notches on the rod - the distance between them corresponds to the width of the aluminum radiator sections. That is, by checking how many notches the key fits inside, we can find out which nipple nut we are currently turning.
Having placed the blade in the grooves of the corresponding nipple nut in the hole from above, we make a couple of turns counterclockwise. Then we take out the key, insert it into the hole from below into the grooves of the corresponding nipple nut and also turn it a couple of turns. Then we return the key to the top nut and repeat everything until the sections are separated.
Unscrewing the nipple nuts in this way is necessary to avoid distortion. In order to be able to apply the necessary force, there is a through slot at the end of the key into which, if necessary, we insert a metal rod as a lever.
After we managed to disassemble the radiator, we clean it inside, change gaskets and seals. If there is a need to expand the battery, you need to add the required number of sections.
If it is necessary to eliminate a leak, we prepare a special solution - add bronze powder to the epoxy resin and mix thoroughly. We clean the damaged area with a cable, then treat it with the prepared composition and wait 30–60 minutes until it dries completely. When working with this composition, everything should be done so quickly as to prevent it from drying out ahead of time.
After completing all necessary operations to service the product and troubleshoot problems, it is necessary to assemble the battery and install it.
Assembly of aluminum radiators
Sequence of actions when assembling an aluminum radiator:
- To reassemble the battery, place it on a flat surface. We will carefully inspect all threaded connections for cracks and chips;
- We clean each connection from debris and contaminants. If we want to add new parts, we need to clean the ends until they shine. Even the manufacturer's paint is removed - at the joints it will be a significant hindrance, causing premature leaks of the coolant. For cleaning, we use sandpaper with very fine grain so as not to leave scratches on the surface, which can also cause a leak;
- We degrease the ends with gasoline. Wash the gaskets in soapy water. Degreasing is mandatory in systems that use antifreeze rather than plain water. They have a high fluidity rate and can penetrate into the smallest irregularities;
- Now we can start connecting the sections. We put paronite seals on the nipple nut and place them on both sides of the product section. Place the key hole on top and turn it a couple of times without using the lever. Then, in the same way, we make a couple of turns of the nipple nut in the lower hole. We do this until the key stops turning, and pull it out using the lever. We do not apply much force - aluminum is a soft metal and it is very easy to damage the threads. According to this scheme, we assemble the entire product;
- We put a plug on the unused hole, and on the other side we attach the Mayevsky valve - it serves to bleed excess air from the system. Then we install the radiator and connect it to the system. We make sure that the coupling tightly connects the product to the water supply hose. After which we can supply water to the system, observing whether there are coolant leaks anywhere.
Conclusion
So, we were able to make sure that disassembling and then assembling an aluminum heating radiator is not very difficult. All operations should be performed very carefully - aluminum is a very soft metal and can be easily damaged. To complete the work, you do not need any special construction skills - just a set of simple tools, attentiveness and accuracy. Thus, if you need to service the product or need to add a certain number of sections, you can completely cope with this task on your own.
mynovostroika.ru
Disassembly process

As a tool, you will need a nipple wrench specifically designed for such work. On one side there is a square hole where you can insert a lever, due to which the work will be done quite simply. It is worth saying right away that you are unlikely to find such a tool in stores - as a rule, it is made directly by plumbers from scrap materials. So try going to a specialized workshop and renting a nipple key there.
After you obtain the necessary tools, you can begin to work.
- Turn off the water in the heating system. If you live in a private house, great, do it yourself. If we are talking about housing in an apartment building, then you will have to contact the organization servicing the building so that their specialists will shut off the coolant supply through the riser. Naturally, this can only be done during the period when the heating season is already over. Otherwise, you will leave all your neighbors in the riser without heat.
- After turning off the water supply, it is necessary to disconnect the radiator from the supply pipes. To do this, unscrew the corresponding fittings, having previously placed containers under these areas to collect the draining residual water.
- Then remove the disconnected radiator from the wall. This is not difficult to do - as a rule, it simply hangs on ordinary brackets.
- After this, pay attention to the ends of the battery. There are either Mayevsky taps installed, which are responsible for releasing excess air from the heating system, or simply plugs. Both should be dismantled. This is done with a simple wrench. Again, be sure to pay attention to the thread direction markings and unscrew accordingly.
- Then proceed directly to separating the sections. You need to insert the nipple wrench so that its end fits into the hole on the corresponding nut. Once you hit the target, install a lever on the back of the key. Next, you will need someone's help. Have a friend hold the radiator firmly in place while you try to turn the nut. This must be done with effort, but slowly and carefully. At one time you need to make an incomplete revolution, literally 5 or 7 mm. Then remove the nipple wrench and move to the nut located on the opposite side. Then repeat all the steps: insert the tool into the hole, connect the lever and turn the nut. Thus, moving from one nipple to another and turning it no more than 7 mm at a time, unscrew both elements. You may think that this is a rather tedious process. This is true. But if you rush to unscrew the nuts completely at once, you can end up with a strong distortion and, as a result, deformation of the heating battery. You understand that after this, replacing one section will no longer be enough.
- After this, the section can be removed. Carefully inspect the gaskets installed at the joints. If they are made of metal, make sure there are no deformations. If you see damage, you will need to purchase new items. To avoid the wrong size, take old pads with you to the store. If the sealing elements are made of rubber or silicone, then they must be replaced in any case. Moreover, it is advisable to purchase new gaskets made from paronite - this is the best option for plumbing products.
