Finishing walls, ceilings and floors during renovation is difficult work. But it is important for creating unique beauty. If you want your home to be cozy and beautiful, and dream of placing a fireplace of any type in it, then let me remind you that facing a fireplace with your own hands is also not the easiest activity. The work consists of many nuances that are worth considering. It is difficult because it requires knowledge, skills and abilities. If such difficulties do not scare you, then let me tell you about the most important thing.
Material selection
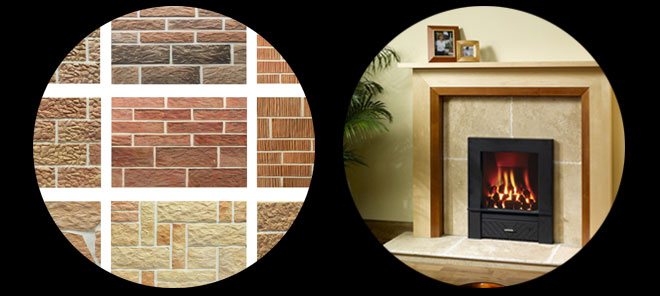
In order to make the most ordinary and inexpensive fireplace look expensive, it is customary to decorate it. The design must have a complete and attractive appearance, so it is extremely important to choose the finishing material without errors. Your choice can be based only on personal tastes or on the advice of experts. Very often, the fireplace is decorated in the style that is inherent in the whole space. Often the main reason for purchasing this or that cladding is financial capabilities. In each case, the final decision is made only by you.
Therefore, if you intend to perform such specific work yourself, you should understand that all materials have their own characteristics.
The easiest way for cladding is to lay standard ceramic tiles. Work related to drywall will require more time and knowledge of the specifics of working with it. You can also lay out a beautiful stone with your own hands, but for this you will need our step-by-step instructions, which describe each stage in detail.
Let's summarize - you can decorate the fireplace:
- plasterboard (the most economical and profitable option);
- tiles;
- ceramic tiles of any categories and classes, stone;.
For each selected material you will need your own list of tools and materials, which we will talk about later...
Advantages and disadvantages
Each material has positive and negative qualities. Therefore, before purchasing natural stone for cladding, it is worth learning about it in more detail.
- The most significant thing is that facing a fireplace with natural stone looks quite rich and elegant. Moreover, there are a great many design solutions for this material.
- Natural stone perfectly tolerates temperature changes and high humidity, so it can be installed in almost any room, even without constant heating.
- In addition, facing the fireplace with natural stone is quite resistant to mechanical stress and therefore durable.
- Natural stone is an environmentally friendly material that does not produce harmful odors when heated and therefore will not harm your health.
- In a fireplace clad with natural stone, you can safely use solid fuel, since the casing will withstand the highest temperatures.
- Fireplaces lined with natural stone retain heat for a long time; such a fireplace is very convenient if you use it to heat your home.
- The work of cladding with natural stone can be completely done with your own hands, thereby significantly reducing the cost of the structure. This is not to say that laying a stone is an easy task, but it is quite doable. The main thing is to do everything according to the instructions and take your time.
- However, processing this material is not so simple, because it is quite durable.
- Cladding with natural stone is an expensive pleasure. But if you take into account the service life and quality of the cladding, the material completely pays for itself.
Instructions for laying tiles
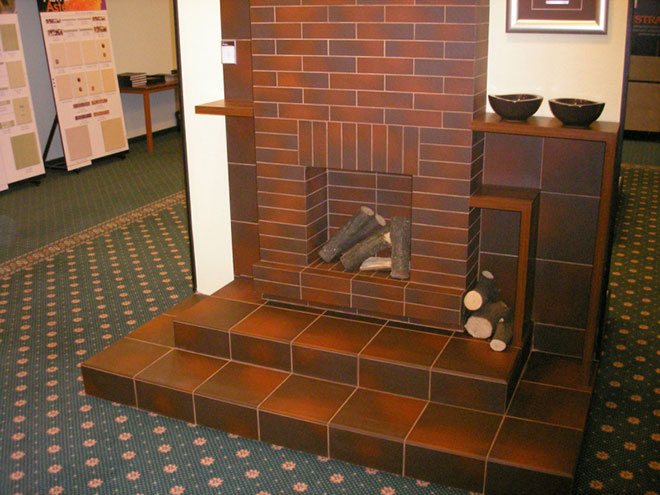
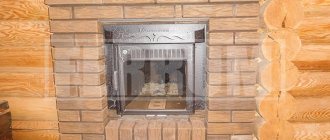
Ceramic tiles are a material that has proven to be ideal not only for bathrooms and kitchens, but also for beautifully covering almost any fireplace. It resists temperature changes well and does not lose its appearance for many years. It cannot be compared with drywall or stone. We can say that it is the ideal material for such work. In order to cope with the task and at the same time tiling the fireplace without taking much time, we have enclosed instructions for you.
You will need:
- Heat-resistant adhesive from any manufacturer.
- Tiles for floors and vertical surfaces;
- Building level, chisel, notched trowel, rubber hammer.
- Tile cutter
- Consumables (plastic crosses, cloth for cleaning the surface).
This is the main list of what you will need, then you can move on to work. The process is lengthy only because the first three rows must stand, so the work can take two to three days.
So, the first thing is surface preparation. The second is the process of applying plaster to the walls.
Between these stages you need to prepare the material for installation. Preview all the elements so that they are the same shade. There may be a difference in shades, so the darker one is laid first on the bottom.
- After completing all these procedures, surface marking begins. At this moment, you will need a level that will help you make all the calculations as smoothly as possible.
- Once the facing material is ready and the glue has reached the desired consistency, we proceed directly to work. Don't forget to use plastic crosses. Laying begins from the bottom row. You apply glue with a notched trowel and tap each element with a rubber hammer. After laying three rows, work can be suspended.
- It is very important to clean each tile of adhesive to avoid damaging the surface later. All this is done after the seams are filled with mortar.
How to lay tiles correctly?
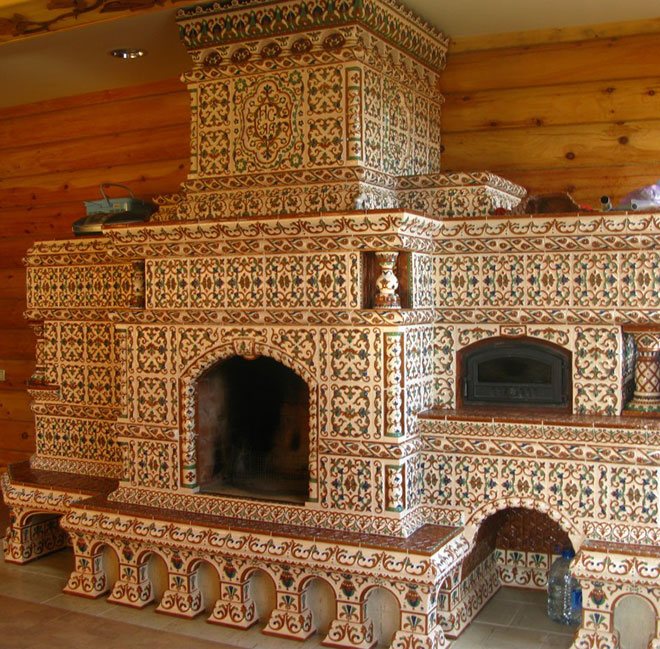
This material is completely different, but also more interesting. It is perfect for rooms where they want to reflect the motifs of antiquity. Tiles always look impressive, so you can decorate your fireplace with them. Working with this material is difficult, which is influenced by its shape (tiles are the same ceramic tiles only with a unique shape). They have a tiller (a box-shaped protrusion without a lid), which modifies the entire work process.
In order to prepare the tiles, you need to use a grinder. First of all, it is important to adjust the dimensions of all elements, then you can proceed to the active installation process. It all starts with surface preparation.
- After everything is ready, you need to fill the pumps ½ full with a mixture of broken bricks and clay mortar.
- Then you need to correctly thread the crutch into the tillers. A soft wire is attached to the center of each crutch - one end of it is embedded in the masonry joint of the fireplace.
- The pumps are filled to the brim with the composition. The element is installed in its designated place, and the wire leading from the crutch is embedded in the seam.
Working with this material is not so simple, so before starting the process we recommend watching videos of how specialists do it. This information will not be superfluous.
How to veneer a fireplace with your own hands
When planning work, it is necessary to take into account that the fireplace cladding can be started after the masonry has completely dried, waiting for it to shrink.
Cladding with natural stone: step-by-step instructions
First you need to do some preliminary preparation:
- moisten the surface of the fireplace with water from a spray bottle and unstitch the masonry seams to a depth of 10 mm;
- Next, you should brush off dust and various contaminants from the surface of the fireplace;
- It is advisable to seal small depressions and chips with cement mortar. Uneven brickwork will need to be sanded with a grinder using a special wheel.
The prepared surface of the fireplace should be covered with reinforcing mesh with 50x50 mm cells, securing it with nails with metal washers or self-tapping screws in the masonry seams. Before finishing work begins, you should heat the fireplace with a small amount of wood so that its surface warms up to approximately 30 °C.
This cladding method is easy to implement, but quite labor-intensive. When carrying out work, you will need to take into account the characteristics of a particular material:
- First you need to adjust the natural stone for installation. To do this, you will need to draw a life-size outline of the fireplace facade on the floor with chalk, and then lay out the laying material, selecting the tiles by shape, color and thickness;
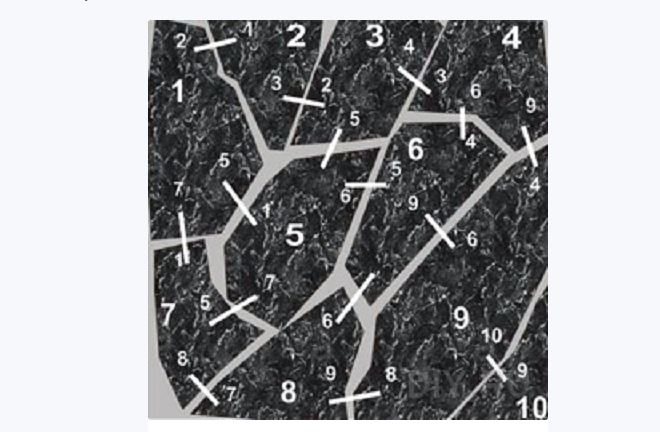
- Further, it is recommended to mark them by writing a serial number in the center and along the edges the numbers of the tiles adjacent to the edges - in this case it will be easy to lay them. There is no need to achieve a perfect fit of the stone; in any case, the overall picture will be quite harmonious. However, it is better to set aside tiles that differ significantly in thickness, otherwise the surface will otherwise need to be leveled by changing the thickness of the adhesive;
- First, it is recommended to fix the thickest tiles on the surface of the fireplace - then, according to their level, you will need to be guided when laying the rest of the tile material. It is recommended to place small elements remaining after trimming in inconspicuous places;
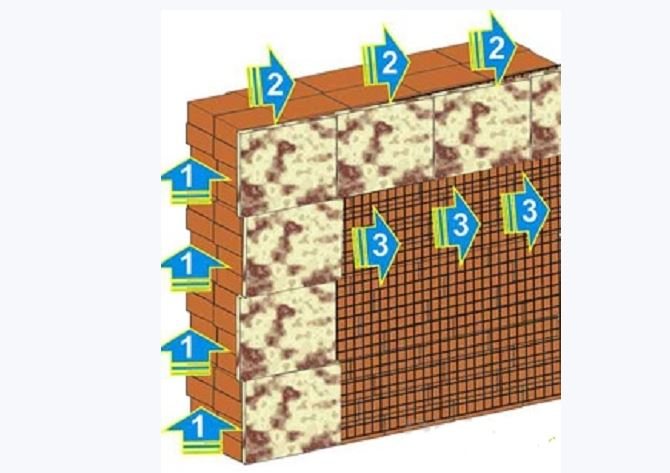
- installation begins from the bottom corner of the fireplace, moving upward. Once you reach the corner from the top, you will need to lay the top horizontal row and then lay the stone in rows from top to bottom. To secure the cladding elements, you should use s-shaped wire fasteners that strengthen the structure - they are fixed on the reinforcing mesh, with the lower end acting as a support for the tiles;
- After finishing installation, you should wait for it to dry - this will take at least two days. Next you will need to start grouting the joints. It is recommended to first check on a piece of tile whether the grout mixture leaves marks that are difficult to remove.
This technology for facing fireplaces can also be used for laying artificial stone.
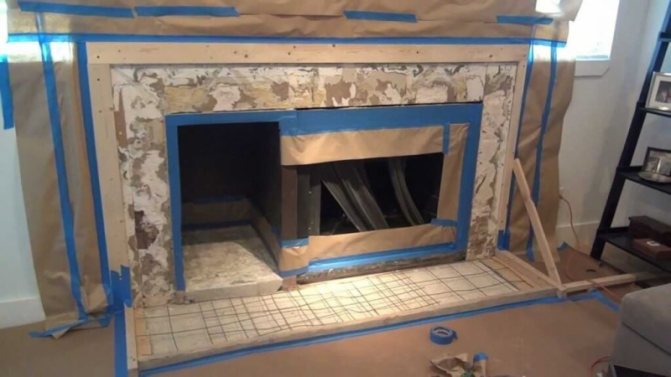
Finishing with ceramic tiles: step-by-step instructions
Preparing the surface of the fireplace façade for tiling is carried out in the same way as for laying the stone described above.
Next you will need to perform the following sequence of work:
- after fixing the metal reinforcing mesh, the surface of the fireplace must be leveled using an adhesive composition for ceramic tiles;
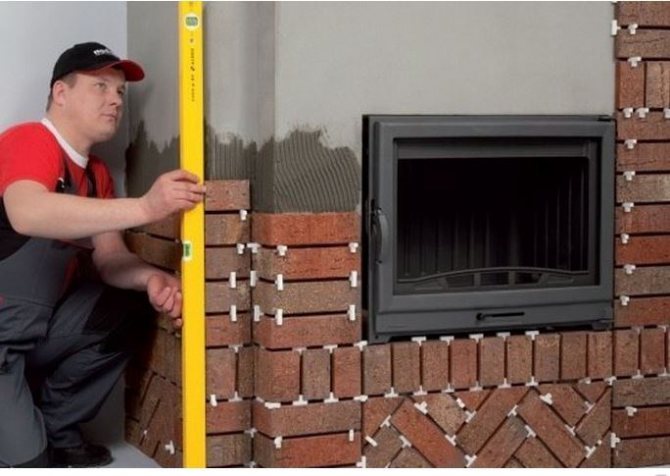
- Next, using a building level, apply markings. It is convenient to monitor the verticality of the installation using a rope with a plumb line attached to a nail;
- After applying the markings, you can proceed directly to the cladding. Laying should begin from the bottom, arranging the tile elements in rows. Corner elements (if used) should be laid first. The adhesive mixture must be applied to the wall using a notched trowel, treating a small area of the area - for gluing one or two finishing elements;
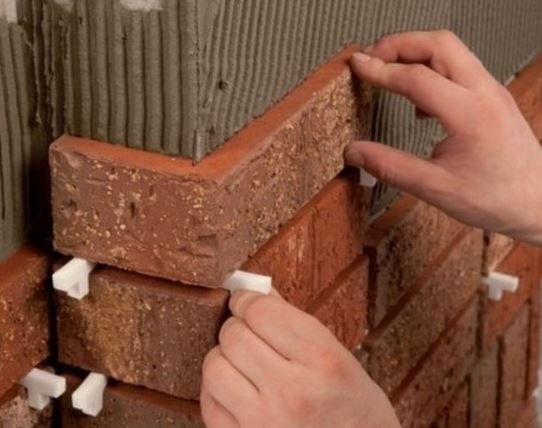
- Next, you will need to install the tiles according to the markings, securing them to the wall and, if necessary, tapping them with a rubber mallet. To align the joints, it is necessary to use plastic tile crosses;
- During the finishing work, it is necessary to periodically check that the cladding is located in the same plane (for this you can use a metal strip). It is necessary to eliminate defects in the cladding, as well as wipe off excess glue before the adhesive mixture hardens;
- then, after waiting for the masonry to dry, after about a day you can start grouting the joints using a special mineral composition or using a mixture of clay and sand. It is convenient to apply the grout mixture with a narrow spatula or a construction float. Next you will need to smooth the seams with a damp sponge. After 20 minutes, wipe the surface of the cladding clean with a damp cloth.
It will take at least a day for the masonry to dry completely. If desired, the surface of unglazed tiles can be treated with heat-resistant varnish - the varnished surface of the fireplace will be more convenient to clean from soot.
Features of plastering and plasterboard cladding
If you want to do without spending a lot of money and personal time, then plasterboard will help you a lot with this. The material is inexpensive and easy to cladding. If you follow the rules of working with it, there will be no problems or difficulties. If you have ever worked with this material, then everything should be done by analogy. Never start work until there is a construction plan - this is the main advice.
The first thing to do is install the metal frame.
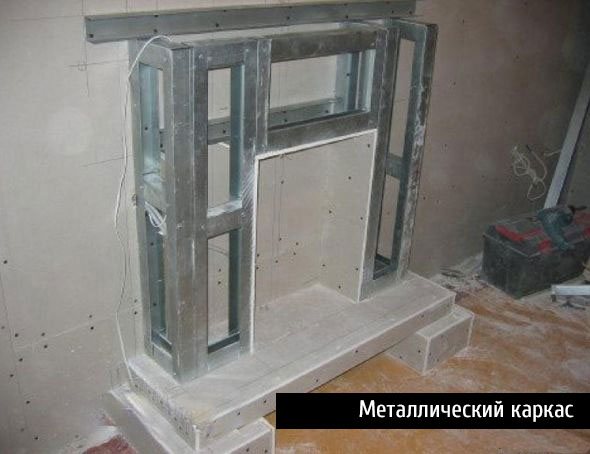
It serves as a base, so make it strong and reliable. Next, prepare the pieces of material that will be needed for cladding. The peculiarity of gypsum cladding is that you can easily create any geometric shape, the most ambitious idea. You fix each canvas, and then choose the type of plaster or other coating.
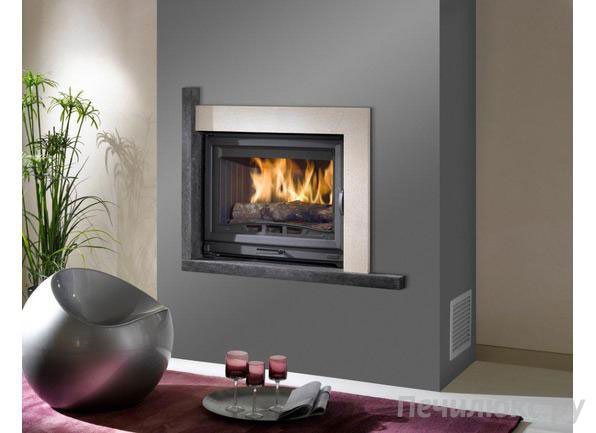
Whatever material you choose, whatever type of fireplace you buy, you will be able to make the room beautiful in any case. This element is always a decoration; it is a key object in houses and even apartments. It is not a design that is only suitable for classics, because a fireplace is an element of an interior made in high-tech, minimalism. It is always appropriate and will never be out of place. This means that you really need to try to complete all the work strategically correctly using our tips. Make every effort and the result you get will definitely exceed all expectations.
Watch the video of how the girls, using available building materials, decide to remake the portal of their fireplace.
Plastering a fireplace
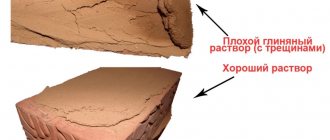
Facing the hearth with plastering can be considered a quick and inexpensive finishing option. After all, the cost of the material is affordable for everyone, and the work process does not require special knowledge and skills. In addition, plastering does not burden the main masonry of the fireplace, therefore, there is no need to strengthen the base. It is also easy and quick to change the color scheme and create a new fireplace style. The main condition for quality finishing is the correct choice of plaster. It must be heat-resistant with the addition of special fibers. These conditions are met by adding clay, lime, hemp or straw to a regular solution. The decorative effect of a plastered portal is achieved by painting with compounds that are resistant to sudden changes in temperature: from strong heating to the final cooling of the fireplace.
Related article: How to choose curtains for kitchen curtains: advice from designers will help you
Plastering a fireplace
IMPORTANT! To obtain a better solution, it is recommended to add a small amount of table salt to it.
Plastering is carried out in this way:
- Contaminants and old plaster are removed from the surface.
- Using small nails, a reinforcing mesh is secured to the masonry.
- The prepared plastering mixture is applied to the base with a spatula and distributed evenly.
- The plastered surface is dried for two days.
- A coloring solution or decorative putty is applied. If necessary, water-soluble color is added to them.
We begin cladding
Start laying the thickest elements first: laying them requires a minimum amount of mortar. This sequence of actions is the most correct from a technology point of view.
Any finishing with stone or other similar material starts from the corner. When laying, it is recommended to alternate long and short elements.
To give the entire product a more beautiful and natural look, try to adjust the existing elements to size. If you have not prepared for this in advance, then you can adjust the elements to the desired size during the work itself. To do this, you will need either wide wire cutters or an ordinary hacksaw.
The thickness of the solution applied to each element must be at least 1.5 centimeters. The solution must be evenly applied to the surface using a trowel.
When laying each element, it is necessary to press it slightly into the solution, while simultaneously moving it in different directions. This will allow you to fill the seam between the elements as much as possible and secure the element itself in the best possible way. The solution should protrude slightly from the seams. Using a trowel, it is necessary to remove excess mortar that protrudes from the connecting seams.
If you are tiling the fireplace in very dry weather, you will need to wet each element before installation. This can be done using an ordinary paint brush or spray. You can also immerse each element in a container of water for a while.
Be sure to wet the products when using a seamless installation method. In this case, climatic conditions do not play any role.
If some of the solution gets on the facing material itself, let it dry before removing it. Otherwise, you risk simply smearing the solution over the surface of the stone. And cleaning it out of micropores will be quite problematic, and the appearance of the product will be ruined.