A good owner should have all the rooms in the apartment look good, be insulated and properly decorated , even if we are talking about a balcony.
It's no secret that balcony space today is often used for storing things and various rubbish. At the same time, this room can be arranged in such a way that it would not be embarrassing to show it to guests, and it could even be turned into a living space.
This article will talk about why to make a floor in this room, and will also give an example of detailed instructions on how to make a floor with your own hands.
Why make a floor on the balcony?
Once you figure out the answer to this question, you will definitely want to start installing the floor as soon as possible. The fact is that any room begins with the threshold and floor, the balcony is no exception.
If we talk about the aesthetic side of the issue, then flooring is necessary on the balcony for the reason that it will look much more beautiful than without covering.
Today, there are many types of flooring that can be used to bring the most daring design ideas into reality. The room will look interesting, original and modern.
If we talk about the practical side, then there are even more reasons why you should make a floor on the balcony.
The main reasons why you should make a floor:
- The room is heated;
- Moisture resistance;
- Durability of the structure;
- Possibility to change the floor covering if necessary;
- Visual absence of any heating system.
Cladding the balcony parapet with foam blocks
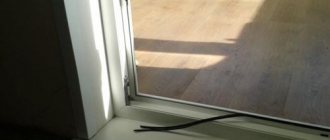
Or, better said, laying an additional wall near the parapet. That is, by doing so we close our balcony and protect it from external influences. The method is questionable; such a decision must be made in consultation with specialists from the management company, since the load on the balcony slab together with the balcony glazing may exceed the permissible limit.
Important!
Consult with the specialists of the management company whether laying a partition from foam blocks is possible in your case.
It is also worth consulting about the load on the slab if you are doing warm glazing.
Video about preparing a loggia for glazing
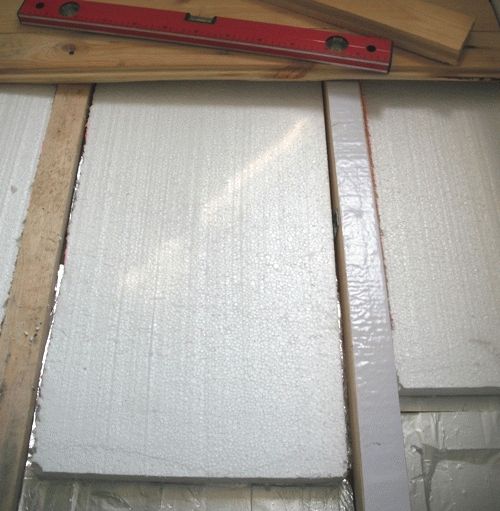
A balcony parapet lined with foam blocks is already suitable for “cold” glazing and finishing. But, if you think about a “warm” balcony, you also need to insulate this parapet. The easiest way to do this is with 100 mm thick polystyrene foam boards. Or use a pie made of mineral wool and polystyrene foam, 50 mm each layer. This thickness of insulation will eat up a significant area of your balcony, but nothing can be done about it.
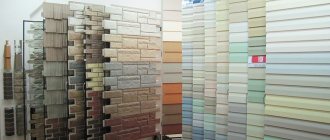
What kind of floor should I make on the balcony?
There are many types of modern flooring that you can create for your balcony. Each option has its own characteristics that should be taken into account when choosing a floor.
Wooden floor
Currently considered one of the most popular floor coverings. It can last for many years and does not require special care.
Before installing it, it is recommended to remove all old material so that only the concrete slab and fencing remain. Otherwise, you risk that the balcony will soon become unusable.
Advantages of wooden floors:
- ease of installation;
- reliability and durability ;
- good sound insulation ;
- low cost.
Flaws:
- wooden floors are rarely perfectly smooth;
- in some cases the floors squeak ;
- formation of gaps between boards.
Self-leveling floors
Today this coating is very popular , replacing linoleum.
Installation of a self-leveling floor on a balcony is explained by the fact that it will serve for a long time , and without any damage.
Advantages:
- high wear resistance and strength;
- environmental friendliness;
- stylish design.
Minuses:
- quite high cost;
- The flooring installation process requires special knowledge and skills.
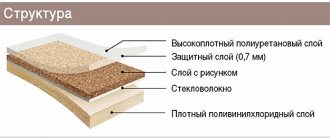
Ceramic tile floor
Ceramic tiles are quite often used for finishing floors not only in kitchens, bathrooms, but also on balconies. This is not surprising, because such tiles ensure even edges, durability of the coating, and accuracy of geometric dimensions.
Advantages:
- high wear resistance and density of the material;
- ideally imitates wood, stone and other materials;
- It is resistant to mechanical damage.
Flaws:
- complexity of installation;
- retain very well , which is especially important for a room such as a balcony.
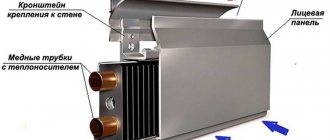
Water floors on the balcony
Such floors rarely installed on loggias, since installation of the structure is quite difficult to perform in a small room.
However, such coatings also occur.
Advantages:
- identical floor heating throughout the balcony;
- no utilities are visible, although the room is well heated;
- significant energy savings.
Flaws:
- the likelihood of leaks increases;
- complexity of installation;
- decrease in pressure in the riser.
There are many other types of flooring that you can use when installing a floor on a balcony, but in this article we will take a closer look at how to make a wooden floor on a balcony.
Flooring installation
Plywood, chipboard or OSB are usually laid on the floor. I would recommend suspending your own choice of either plywood or OSB. Chipboard is not a water-resistant and environmentally friendly material.
Using any tool that is comfortable for you (we do this with a grinder and a wood wheel), cut out a piece 1 cm less than the width of the balcony and lay it on the logs. You can screw it right away, or you can lay all the flooring material and screw it in later. To make it clear where to turn the screws, connect the marks made in advance on the walls.
So we figured out how to raise the floor on the balcony, and at the same time insulated it well. We raised the floor by 10 cm (44 timber and 2 plywood), if you need more, take a thicker timber. Now you can lay linoleum on it or put a backing and start laying the laminate.
In the end, as usual, a video lesson.
Since we are now talking about insulation, it is better to insulate not only the floors, but also the walls; read how to do this in the article about insulating walls from inside the house.
See also in this category:
Have you decided to save money on builders and install laminate flooring yourself? Right! There is nothing super complicated in laying laminate flooring, just a small construction set with locks. At the same time, you will gain skills for the future; this has never bothered anyone.
Linoleum on wood floor
After installing a wooden floor, the question often arises: how to cover the floors, so that it is not very expensive and quite convenient? There are many materials, but we will focus on linoleum. From this article you will learn how to lay linoleum on a wooden floor.
Screed for water heated floors
The screed is always intended to level the surface where you will then lay any kind of covering. According to the technologies of our century, which have been developed for decades, the slab that is the basis of any serial structure is often made smooth, and only on one side. That […]
leave a comment
Wooden floor on the balcony: design features
The most common option is to completely dismantle the old floor and install a new wooden covering in its place.
You can do all the work absolutely independently , and achieve good results.
The main thing is to follow all the rules and recommendations that you read in this article.
You are required to remove all objects and things from the balcony, remove the old covering and remove the old material. In this case, the wooden structure will be installed in accordance with all the rules and regulations, thanks to which it will serve you for many more years .
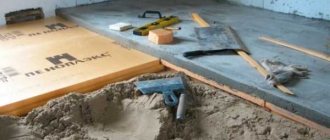
Preparatory stage
Any independent work on installing a wooden floor should begin with calculations of the length and width of the balcony.
You should also prepare a floorboard, a wooden beam, and buy special fasteners . You will also need a product that will protect the floor covering from moisture.
At the preparatory stage, it is important to calculate everything correctly and make sure that you have all the necessary elements at your disposal.
Leveling the floor surface
The next stage involves carefully leveling the surface. You don't have to do it to perfection, but some work.
You are required to lay logs (bars located horizontally). Boards will be laid on these logs in the future.
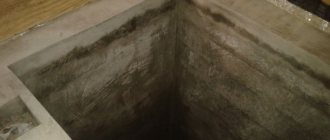
It is worth carefully inspecting the concrete slab to ensure there are no cracks or irregularities.
Construction of sheathing
This is necessary in order to insulate the balcony from below, as well as to allow good circulation under the floor. High-quality insulation can be laid between the concrete slab and boards. This is especially true if the balcony will be used as a living space.
The logs are attached to the balcony slab using dowels. small in the plate .
The beams are placed along the entire perimeter of the balcony, additional logs are installed in such a way as to protect the boards from bending. If the balcony is long enough, it is recommended to lay the boards across.
Basic rules when laying a frame from logs
- The frame is laid out in the form of a box plus an additional beam in the middle;
- Wood is sometimes coated with varnish or other means that can resist moisture;
- The strength of the frame is checked in this way: you should step on it first in one part of the balcony, then in the other. If its elements do not wobble, then the frame is strong and reliable;
- The floorboard is laid perpendicular to the beams.
The final stage of work
Now all that remains is to secure the floorboard. This is not at all difficult to do. Each board is laid one by one , one after the other, with your own hands. The boards are attached to the joists using self-tapping screws .
The first board is secured the front side out to one side of the prepared frame, and the next board is inserted into the groove.
As a rule, methods for attaching the material are described in the instructions that come with the packaging of the material you have chosen for finishing the floor.
A wooden floor is quite easy to make with your own hands. Firstly, you will save your finances on this. Secondly, you will quickly learn similar work on laying floor coverings, thanks to which you will be able to carry out more complex work in the future. This floor will look on the balcony and can protect the room from extreme cold.
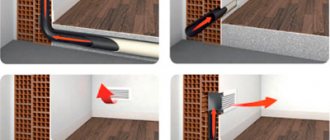
We insulate the balcony parapet without foam blocks
The balcony parapet can be insulated without foam blocks; for this, you can again use polystyrene foam boards. To put it simply, everything is quite simple. All free space between the outer cladding and the met. The parapet grating needs to be filled with insulation (polystyrene foam can be used), and ALL remaining cracks should be filled with polyurethane foam. The insulation should lie flush with the outside of the grate (if possible), so it will be easy and even to place another layer of insulation on it. Depending on your desire to do “warm” or “cold” insulation, you need to lay from 30 to 100 mm of insulation.
Insulation of balcony parapet with polystyrene foam
If necessary, an additional frame is built into which a second layer of insulation is laid.
I recommend: Backfilling of foundation cavities
Fast, inexpensive and do it yourself.
The various technologies offered on the Internet are, of course, good, but they are either expensive or require materials that are difficult to find in a small town.
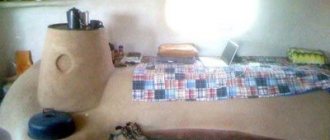
Using some knowledge of a general physics course, I made the floor for my balcony myself. Last year, a major renovation was carried out on the balcony; this article describes the process. It, like this one, provides detailed photos in “before” and “after” format.
Here are some materials for insulating a balcony. But I did not adhere to the fact that it is best to use mineral wool as floor insulation. Reason: on the balcony there is a whole greenhouse of all kinds of vegetation and the likelihood of moisture getting under the floor is very high (as Sergey told us, “in humid conditions, mineral wool quickly becomes saturated with moisture, “falls off” and loses its thermal insulation properties”), in addition, I have a terrible allergy to mines. the cotton wool and the prospect of re-flooring did not suit me.
On the advice of a carpenter friend with golden hands, I decided to make an ordinary wooden floor, like in an ordinary apartment with some changes. By the way, he made a sandbox mill, a decorative Russian well, how to replace carpentry windows yourself, and for a couple of beers he provided a photo and wrote about it (as best he could, anyone who needs it will understand).
To begin with, the budget was strictly limited. At the end of the article, we’ll calculate the total cost and find out why it’s better to do all the work yourself.
Purchasing material
At the construction market we buy a floorboard 8.5 cm wide and 86 cm long (distance from the parapet to the wall), timber for the logs and a sheet of foam plastic.
Board 8.5 x 4 cm For a subfloor, it is not possible to use the highest grade, and even more so for a floor on a balcony. But this only depends on the thickness of the wallet. For the floor on the balcony of an old Khrushchev building, a board of the lowest quality will do. It is not advisable to buy whole boards, and they are 3 meters each: the length of the future floor is only 270 cm, lifting 10 boards to the upper floors is difficult due to the design features of the staircases. We choose “from the remnants” with a length no less than the distance from the parapet to the wall. By the way, buying in pieces allowed you to save money.
The beams for the logs needed different sections. In our case, 2.5 x 5 cm and 5 x 5 cm.
In hardware and office supply stores we buy 2 rolls of food foil for baking and 2 rolls of double-sided tape. Aluminum foil, especially durable, 10 meters per roll. It took 1.5 rolls for a base area of 270 x 86 cm. At first it was impossible to glue it evenly, so there was a slight overrun.
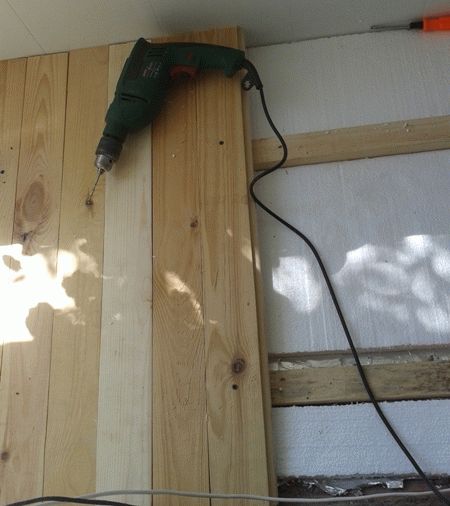
Necessary and sufficient tools: a drill with an impact mechanism, a hacksaw (I had to buy a new one, that’s why it looks so fresh in the photo), a “six” impact drill, a regular wood drill with a slightly smaller diameter than self-tapping screws (in our case, a “four” drill "), tape measure, shaped screwdriver (there was no such luxury as a screwdriver), metal corners (according to the width of the timber for the joists), consumables (screws and dowels and nails)
Alifa was used as a protective coating. Why 1 liter was bought, the question remained open; 0.5 liter would have been enough (Alif). Good and accurate level (preferably not made in China, as in the photo)
Main stages of installation
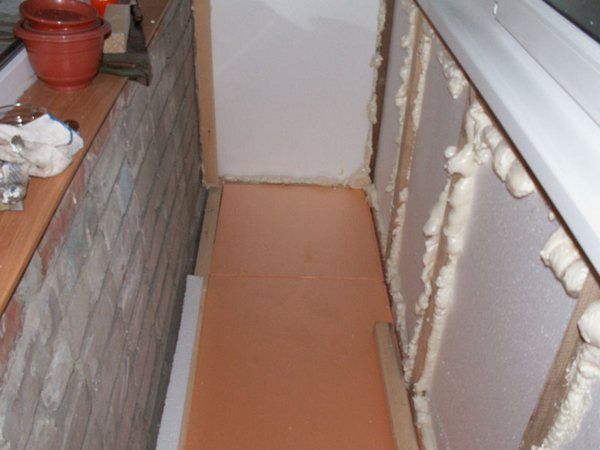
Before starting all work, you should thoroughly (preferably twice) wash and dry the base. Try not to let the dust settle again. Dry with the balcony windows closed.
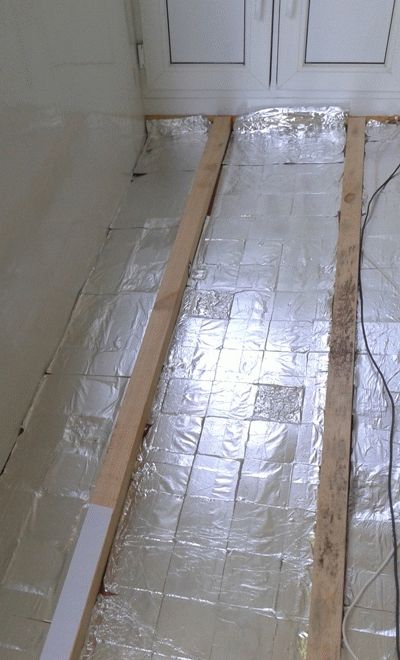
Due to the strong slope of the base, the height of the logs turned out to be different: 2.5 cm and 5 cm. Keeping a constant distance between the logs (38 cm in the photo) and setting a level on them, we move the logs and find the exact horizontal position of our level. Next, use a marker to make notes on the position of the lag. We also make notes for the metal corners - fastening the joists. The number of attachment points may vary. With a log length of 270 cm, 3 corners were needed for each. Two on one side and one on the reverse. We drill the base, fasten the corners to the base, lay and fasten the joists (with the exception of fastening the joist close to the wall. Since the distance is too small to work with a screwdriver, first fasten the corner to the joist, then fasten the corner to the base. It is not difficult to guess that from the side there was only one corner of the wall). Now the logs do not “dangle” and you can safely attach floorboards . But before that, let's think about insulation. We glue double-sided tape to the base. Along, across, cross to cross... as your heart desires.
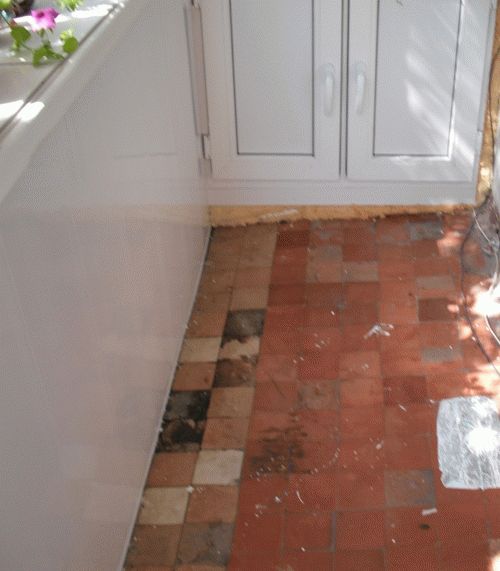
Insulating the floor on the balcony
Carefully remove the protective layer from the adhesive tape and, without tearing the foil off the roll, stick it to the base. It’s unlikely that you’ll be able to stick on pre-cut pieces of foil (checked, so there was an overrun). The width of the foil roll did not match the distance between the joists (30 and 38 cm, respectively), so gluing took a considerable amount of time.
Cover the entire surface of the base with foil.
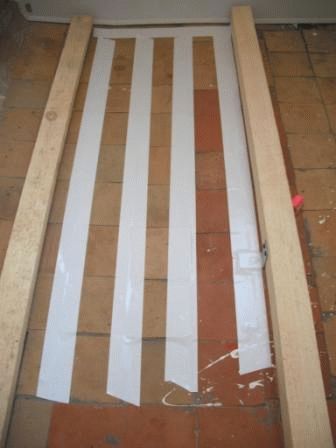
Installation of floorboards (floorboards)
We fasten the first floorboard with self-tapping screws. Next, we lay the next floorboards and at the same time place pre-cut strips of foam plastic under them.
I didn’t worry about ventilation or space when attaching the first board. The tree itself “breathes”, and taking into account the fact that any tree, no matter how well dried, will still dry out over time, the resulting cracks will allow air to pass through perfectly. The option with indents is applicable if you use chipboard or other sheet material.
Installation of floorboards (floorboards)
We “attract” every fifth floorboard with self-tapping screws, drilling 100% of the floorboard and 5-10% of the joists. The holes were necessary because the second joist was made of larch. As you know, larch is harder and more elastic than, for example, ordinary pine from which floorboards were made. But this fact only played into the hands: larch is extremely resistant to rotting. But cutting it (adjusting it to length) at home with an ordinary hacksaw made me sweat.
Finishing
After installing the floorboards, we sand with sandpaper No. 16, vacuum and cover with two layers of Alif. If “you can’t spoil the porridge with oil,” then you don’t have to regret “Alifa” (“Alifa” is made from sunflower oil). After the second layer has dried, we attach the baseboard and select the color of the felt-based carpet.

And woo a la!
How much does a balcony floor cost?
Floor boards in pieces of 2.3 m2 + 2 logs of 3 m each = 10,600 tenge = 2,120 rubles.
2 rolls of foil + 2 rolls of tape ≈ 700 tenge = 140 rubles.
Angles, screws, drills ≈ 900 tenge = 180 rubles.
1 liter “Alif” = 500 tenge = 100 rubles
The plinth remained after the renovation, 2 “sticks” of 2.5 m each
Total - 12,700 tenge = 2,540 rubles... That is, we met the allocated 15,000 tenge
It is better to do all the work yourself. Only you will know which floorboard is not secured with tenons to its neighbors. Unscrewing it from the joists, you will be presented with a whole underground world. How to use it?... everyone decides for themselves
Temperature difference measurement
| External | Floorboard temperature |
Installation of electrical wiring in a bathhouse || Bath Detergents
Related posts:
We insulate the balcony yourselfIn the section: Household choresWith the arrival of cold weather, careful insulation of the balcony becomes important for many owners of city apartments. If there is an involuntary delay in this matter, then it will be possible... | Self-replacement of the seal in the NORD refrigeratorIn the section: Household choresTasks: Bloody nose, find and buy a new seal for this model from 2003. |
Decorative (Russian) well.In the section: Household choresWe assemble a decorative (Russian) well. This can be installed on a site, for example, to close a sewer hatch, valve, faucet and any pipe connections. | Living room decor trends 2013 |