Are you thinking about how to properly insulate your home and make it as comfortable as possible for living? It is necessary to start insulation from the foundation and floor - this is where the main flow of cold air comes from. To ensure that your flooring is comfortable, that there is no draft blowing from it and that heat does not go underground, it is most effective to use penoplex floor insulation. They can be used to insulate both wooden and concrete floors. This material has excellent characteristics and lasts for decades without losing its qualities. They can properly insulate your home, reduce heat loss to a minimum and reduce heating costs by 20-50 percent.
What are the requirements for insulation?
Let's figure it out - what kind of insulation should be that can be laid on the floor. You must understand that increased demands are placed on him:
- Low thermal conductivity.
- High strength (it should not be pressed through).
- Minimum weight (it is not recommended to heavily load the floors).
- Resistant to moisture and temperature changes. The underground is always humid, so mineral wool is not very suitable for insulation.
- Environmentally friendly material.
- Easy installation and possibility of further finishing.
- The material should not be chewed by mice, and fungus or mold should not grow in it.
- Durability. The insulation is laid once and until the next major renovation of the floor, which may be in 15-20 years.
Pnoplex - a modern material for floor insulation
What is penoplex
All the above requirements are fully met by only one material - penoplex. This material is made from polystyrene foam and has truly unique characteristics. This is a modern, practical and inexpensive solution that is well suited for both a private home and an apartment. The low coefficient of thermal conductivity of the material allows you to save on height - a sheet 30 mm thick retains as much heat as a 200 mm layer of expanded clay. High strength allows it to withstand heavy loads - it is much denser than foam and practically does not compress. The material is not afraid of moisture; it contains fire retardants, so it has negative flammability. It also practically does not change its size as the temperature increases or decreases, so it can be laid in absolutely any room and covered with screed on top.
Laying penoplex on the floor will not cause you any particular difficulties. It is produced in the form of squares (rectangles), it can be cut with an ordinary construction knife and glued to the base with foam, putty or special glue. The material can be hemmed under the subfloor or placed between the joists. This is a really good option for insulation.
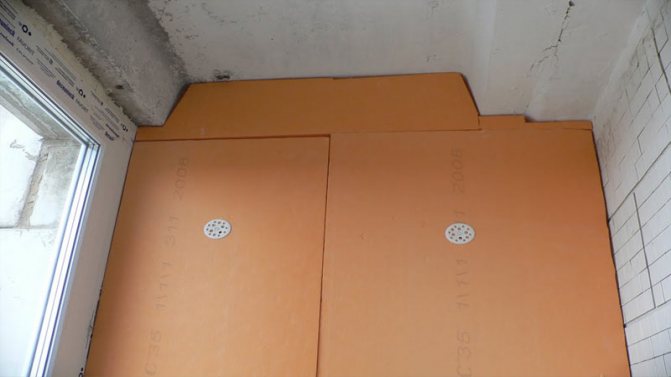
Penoplex is attached to the base using fungi and glue.
Laying penoplex
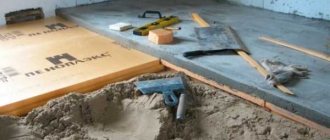
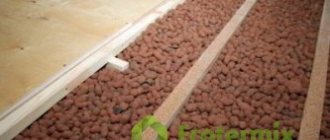
Penoplex is a durable and hard material with a closed cellular structure. That is why it can be safely laid on a solid and not entirely level base. There is successful experience of laying material directly on sand, crushed stone, expanded clay and other bulk fillers.
Note:
Despite the fact that penoplex can withstand loads and can be slightly compressed, it is still better to level the surface yourself and seal all the cracks and potholes with regular putty.
Laying work is carried out according to the following scheme:
- Buy material with a margin of 5-10%. Just calculate the area of the room and order the required quantity.
- Remove construction debris from the surface, vacuum it, and remove paint or oil stains, if any. The base must be strong and clean.
- If the base has differences in height of more than 10 mm, then it must be leveled with a screed. If loose bases are used, then simply level and compact them as much as possible.
- Think about what you will use to secure the material. On a loose surface, the slabs can simply be spread out, and on a hard surface, they can be glued with special glue or foam.
- Be sure to prime the hard surface to ensure good adhesion. This will also further clean it from dust.
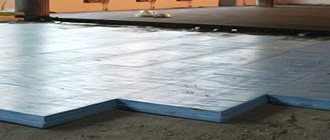
- Lay the tiles starting from the far corner of the room, joint to joint. Move the new row halfway across the tile to create a bandage, like in brickwork. Compact the tiles well to create a smooth surface.
- In the corners, trim it with a regular knife. Before installation, we recommend that you stick damper tape on the walls so that the penoplex and the future screed do not touch them.
- After installation is complete, allow time for the glue or foam to dry. Usually 6-8 hours are enough for this. When laying on a loose surface, you can start pouring the screed immediately.
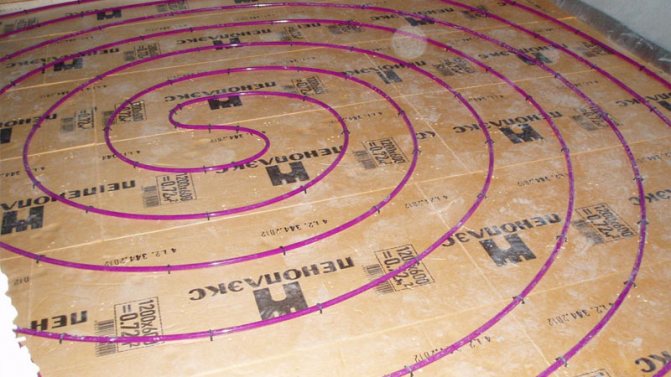
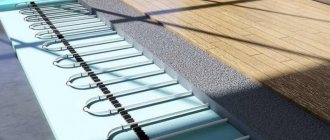
Penoplex is an excellent base for laying heated floors
Note:
Additionally, you can secure the sheets with spacers (umbrellas). To do this you will need a drill and a pobedit drill bit. After laying one row, you need to drill holes in the center of each sheet and in the seams opposite the corners so that the umbrella presses two tiles at once.
If you want the result to be as effective as possible, then try not to lean the tiles against each other, but foam each seam. This will avoid so-called cold bridges - air will not pass through the cracks.
Creating a screed
Floor screed with penoplex can be carried out either with a cement-sand mixture or with modern ready-made compounds. We recommend that you use ready-made mixtures - they are stronger, have better characteristics and last much longer.
First of all, lay a layer of vapor barrier (special membrane) on the insulation and place its edges on the walls. Then arrange the beacons in a level equal to the width of the rule. Check the correct installation of the beacons with a long, even bar. Lay it so that it lies on three beacons at once. The plank should not wobble - if installed correctly, all three points are located in the same plane.
The screed is poured in the classic way - prepare the solution, pour it between the beacons, tamp it, and level it using the rule. You need to work quickly enough so that the previously laid mortar does not set before applying a new one. You need to move from the far corner to the exit from the room. If the room does not have a door and frame, then instead lay a regular wooden plank or piece of profile higher than the expected level of the screed.
Note:
It is advisable to reinforce the screed. For this, a standard metal mesh with a cell size of 5 by 5 to 10 by 10 cm or special mineral fibers is used.
The screed should dry evenly and slowly. Do not create a draft in the apartment, close the windows from direct sunlight. It is recommended to moisten the concrete screed 1-2 times a day for 3-5 days - this will avoid cracks and tears. Gypsum mixtures dry quite quickly - most of them can be used within 5-7 days. But cement ones take a long time, up to 25-27 days.
Screed thickness
There are no clear recommendations from the manufacturer regarding the thickness of the screed laid on penoplex. But professional builders recommend making a layer of at least 40 mm. It is this layer that reliably holds the surface together and does not sag during use. If you want to make self-leveling floors, first fill in the classic leveling screed, and then mount them on top. This way you will save a significant amount on materials.
Even a novice craftsman can lay penoplex under the floor screed - this does not require special skills or tools. Try it - you will definitely succeed!
Leveling the floor is an important step, which determines how harmonious the finish will look. One of the most important functions of a screed is insulation. Floor screed using penoplex will help not only provide maximum thermal insulation, but also significantly raise the level of the base.
This method requires significant preparation - the work is quite labor-intensive, and there are a considerable number of nuances.
Is it possible to lay laminate flooring on penoplex without a screed?
Insulating the floor with penoplex is a common practice today. The thermal insulator is chosen due to its low thermal conductivity, the possibility of a small thickness, as well as high compression strength, which makes it possible to do without additional reinforcement when installing floors. They are used to insulate constructed floors, floors on the ground, floors above basement floors, rooms on floors, balconies and loggias. The material is also popular because the price of penoplex flooring and screed is relatively affordable. As a finishing coating, tiles are installed, veneered ones are installed, screed boards with a “warm floor” system, penoplex are placed under laminate and linoleum.
Laying features
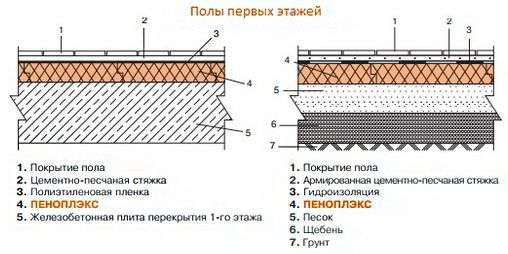
Typically, polystyrene foam is used with a concrete or soil base. Based on this, there are some features of the work.
When the base is made of concrete, foam plastic under the floor screed should be selected with maximum density. This figure can be 35 kilograms per cubic meter. In order for the material to lie smoothly and without gaps, the entire area must first be leveled.
Next, the floor screed using foam plastic is carried out in the following sequence:
- Laying a waterproofing layer. The material must be overlapped and secured with tape. The width of one layer over another should be 7-10 centimeters.
- Penoplex is laid under floor screed or polystyrene foam. If the sheets have tongues and grooves, then the work is greatly simplified. Otherwise, gaps between the plates should be avoided.
- A fastening solution is applied, and a reinforcing mesh is placed on top of it. Its main purpose is to prevent cracking of the finish coating.
- A finishing screed is made on top of the penoplex with a thickness of 5 to 8 centimeters.
- The final stage is sealing the seams and installing the finishing floor covering.
When working with a soil base on Barlinek parquet, you should pay attention to the following features:
- Initially, the soil must be compacted tightly, ensuring maximum leveling.
- A ten-centimeter layer of crushed stone should be poured and leveled over the entire area of the room.
- To eliminate voids between stones, fine sand is suitable, which is also poured in an even layer.
- Then polystyrene foam is laid under the screed or foam sheets.
- The final leveling of the floor is being carried out.
Penoplex screed has a number of significant advantages, which are determined by the characteristics of the material itself:
- A high level of thermal insulation will help maintain a comfortable temperature in the room.
- Low sound conductivity will protect against extraneous noise.
- The fire resistance of the material and its self-extinguishing properties are reliable protection against fire.
- Expanded polystyrene on the floor under the screed will last a long time due to the lack of shrinkage and due to its hygienic properties.
Foam screed also has some disadvantages:
- Susceptibility to mechanical stress.
- Low air throughput.
The thickness of the Knauf foam screed depends on the size of the insulating material. It can range from 2 to 10 centimeters. Preference should be given to foam that will meet operational loads and requirements.
Penoplex under the screed on the first floor of the building should be quite thick - up to 10 centimeters. If the number of storeys is higher, then you can limit yourself to five centimeters. The thickness of the foam screed will be 4-5 centimeters without taking into account all other layers.
Why choose penoplex?
Thermal insulation of floors is performed in different ways. Manufacturers offer various thermal insulation materials with certain advantages. Penoplex insulation has a number of undeniable advantages. This material:
- It has a characteristic fine-cell structure. A large number of cells allows penoplex to retain heat inside the house.
- Moisture resistance with long service life. The absence of a tendency to the appearance of fungi and mold allows penoplex to maintain its performance characteristics for a long time.
- Has high strength. Considering that during operation the laminate experiences significant load, the use of penoplex for insulation will prevent subsidence of the floor, since this material has a high compression resistance.
- Allows the use of a heated floor system. Heating does not impair the performance characteristics of penoplex. The exception is constant heating to a temperature of 80 C. In this case, the foam will deform, and over time it will lose its properties.
- It is characterized by fire resistance, which makes it possible to use it in a wooden house.
- Versatility. If the house does not have a basement and laminate flooring is installed, penoplex can be used to insulate the floor. Thermal insulation properties will ensure a sufficient level of comfort for residents.
- It has an affordable price, which makes it possible to use in any room.
Attention! The characteristics of penoplex allow it to be used for floor insulation, regardless of the thickness of the laminate.
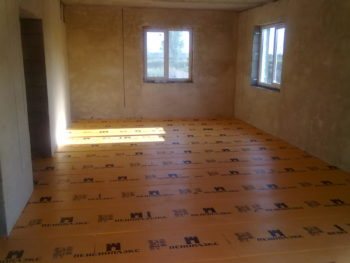
Floor insulation work
Like many materials, penoplex has a number of features that are taken into account when choosing it for floor insulation. This material is not exposed to ultraviolet radiation. When exposed to sunlight, it can lose its performance characteristics. In addition, the sound insulation characteristics are much lower than other materials used for insulating surfaces. For example, fiberglass or mineral wool can provide much better sound insulation of a room than penoplex.
Important nuances
The technology for installing penoplex screeds involves the following sequence:
- Preparation of the base, which consists of leveling. A special dry solution is suitable for this work. It can be purchased ready-made and applied over the entire area in a five-centimeter layer.
- When the first layer has completely dried, you can begin installing the waterproofing coating. The layout is carried out overlapping with overlaps on the wall.
- Laying expanded polystyrene or polystyrene boards. Please note that cracks and gaps between the plates are not allowed. If present, they must be sealed with foam.
- The screed itself on polystyrene foam begins with the installation of beacon guides. They should be set perfectly evenly, because the error of the finishing layer will depend on this.
- The final stage involves applying the mortar between the beacons and leveling it according to the construction rules.
After the finishing layer has dried, you need to check the surface. If necessary, it can be brought to ideal condition using self-leveling floors, then proceed to finishing work.
Screed on extruded polystyrene foam is relatively inexpensive. The average cost of work per square meter is from 350 rubles. At the same time, the price of foam plastic for floor screed fluctuates at 2-3 thousand rubles per package.
Extruded polystyrene foam for screed is somewhat more expensive - 4 thousand rubles.
Getting the job done (video)
Penoplex - a warm base for the floor
There are many floor insulation technologies. This includes expanded clay, mineral wool, and, of course, penoplex. The latter is one of the best modern heat insulators, although, it should be noted, not the cheapest. To insulate the floor, a 20-30 mm slab is sufficient (on the first floors it can be increased to 50 mm), while the thickness of mineral wool, for example, is recommended to be twice as thick.
- The advantages of penoplex for floor insulation are as follows:
- Excellent moisture-proofing properties
- Good thermal insulation
- Mechanical strength
- Durability
- Easy installation
Before installing the laminate on Penoplex, you need to lay the insulation itself. This is quite easy to do. It all depends on what kind of leveling screed it will be - cement or made of sheet material (plywood, OSB, GVL). For one you will need as smooth a rough surface as possible, for the other you will have to lay down wooden logs as a base for the coating.
Under a cement screed on penoplex, on which the laminate will then be laid, it is better to choose slabs with grooves at the ends for tighter joints. If the system requires the presence of wooden logs, then the heat insulator can be taken without a curved edge.
Penoplex insulation is not a substrate for laminate! Do not confuse it with the backing made of extruded polystyrene foam. When laying laminate flooring on penoplex, a screed, dry or cement, must be installed.
Installation of penoplex under laminate with concrete screed
- Prepare penoplex laminate with screed as follows:
How to insulate a floor under a screed with penoplex with your own hands - instructions with video
The figure is huge, especially in terms of annual heating costs in the northern latitudes, where Russia is predominantly located. Floor insulation with Penoplex is not so much a wise expenditure of money as a successful investment that saves a considerable amount from the annual budget.

- Description of series
- Self-installation
- Recommendations
- Prices
1. Penoplex Foundation.
When using any material, you must follow the manufacturer's recommendations. Penoplex Foundation for floor insulation will be the best solution from the line of this company. It will also help with thermal insulation of basements, ground floors and any supporting concrete structures that have contact with the ground and dampness.
Is it possible to lay laminate flooring on penoplex without a screed?
Insulating the floor with penoplex is a common practice today. The thermal insulator is chosen due to its low thermal conductivity, the possibility of a small thickness, as well as high compression strength, which makes it possible to do without additional reinforcement when installing floors. They are used to insulate constructed floors, floors on the ground, floors above basement floors, rooms on floors, balconies and loggias. The material is also popular because the price of penoplex flooring and screed is relatively affordable. As a finishing coating, tiles are installed, veneered ones are installed, screed boards with a “warm floor” system, penoplex are placed under laminate and linoleum.
Floor insulation technology
Insulating a floor with Penoplex is a task that even an untrained person can cope with. The scope of work depends on whether it is carried out in an apartment on a concrete foundation or in a private house on the ground. First, let's look at the first option, in which the most popular place is the balcony. Note that the technology for thermal insulation of floors with polystyrene foam and DIY Penoplex is very similar. The materials are similar in nature, so the installation is almost identical.
- To insulate a concrete floor on a loggia with Penoplex slabs, you must first remove the old coating and apply a thin cement screed for leveling. This will protect Penoplex sheets from damage on uneven surfaces under pressure.
- In order for the insulation of the floor on the balcony to be durable, you should lay a vapor barrier layer, which can also be used as ordinary polyethylene. The joints of the film are taped with tape.
- Afterwards Penoplex is laid. Due to the presence of an L-shaped recess on the edges, the joints are much more airtight than when using the same foam. But even taking this into account, it is better to thinly apply sealant to them using a spatula.
- Another layer of vapor barrier is placed on top, then cement. The floor screed with Penoplex at the base must be at least 40 mm thick, and when installing a heating system - at least 70.
- After all the work, the structures are allowed to stand for 7 days or more, then the floor covering can be installed. Thermal insulation of the floor under the screed, made in this way, even without additional heating of the surface, gives good results.
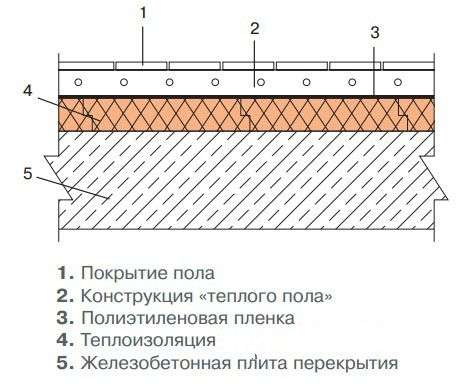
Installation of slabs on the ground of the first tier of a private house is carried out according to the same scheme. It differs in that you need to independently organize a concrete coating on which a vapor barrier is laid, after which all the above work is repeated. According to reviews, Penoplex insulation of the first floor floor is perfectly compatible with a concrete screed made over a well-compacted 35-centimeter layer of gravel or small crushed stone.
Tips and tricks
- The thickness of Penoplex for the floor of a loggia or first floor should be 40-60, for an apartment 20-30 mm is enough.
- Plates made of extruded polystyrene foam are much less afraid of water compared to any analogues made of polystyrene foam, so insulating the floor in an apartment with Penoplex is much more reliable and durable than using its counterpart. Indeed, with the penetration of water, even in small quantities, not only the performance decreases, but also the service life of the coating is significantly reduced.
A floor without insulation is like a hole in your pocket through which money falls out. Calculations show that the use of this material pays off after just 3 winterings. The approximate cost of work in rubles is 300 per m2. Considering the low complexity of installation, you can save a decent amount by performing thermal insulation yourself. After all, the price for installation of the total cost is about 50%.
How to put penoplex under laminate correctly
Insulating the floor with penoplex is a common suggestion today. This heat insulator is chosen because of its low thermal conductivity, the ability to get by with a small thickness, as well as high compressive strength, which makes it possible to do without additional reinforcement when installing floors. They insulate floors laid on the ground, floors above basements, floors on floors, balconies and loggias. The material is also popular because the price of foam floors and screed is relatively affordable. As a finishing coating, tiles and veneer boards are installed, a screed with a “warm floor” system is installed, and penoplex is placed under the laminate and linoleum.
Thickness of leveling cement floor screed
Renovation in an apartment or private house, as a rule, begins with leveling the floors. Concrete pouring helps create the most even surface possible and ensures its strength throughout its entire service life. The thickness of the floor screed depends on two parameters: the type of room and the type of insulation used. The role of thermal insulation can be played by a layer of penoplex or a complex of water heating elements.

The construction market offers a wide range of self-leveling mixtures, but many consumers prefer “classic” cement mortar. Its main advantages are resistance to deformation and low cost.
How to insulate a floor with penoplex
In order for the concrete base to meet operating conditions, the possible thickness of the leveling cement floor screed should be calculated. If it is laid on a prepared surface, then the layer should not be less than 2 cm. Reinforcement allows you to reduce the amount of concrete required for leveling; if this cannot be done, then the solution is poured at a depth of 7-8 cm.
Under severe loads, the permissible thickness of the cement-sand screed layer is 7 cm, and installation of reinforcement becomes mandatory.
Penoplex is often used as floor insulation, characterized by high thermal protection, durability and safety. After laying it, they proceed to concreting. As a rule, the minimum thickness of a foam screed is 4 cm. If you are not satisfied with the height of the layer, then it is better to reduce the amount of thermal insulation rather than concrete.
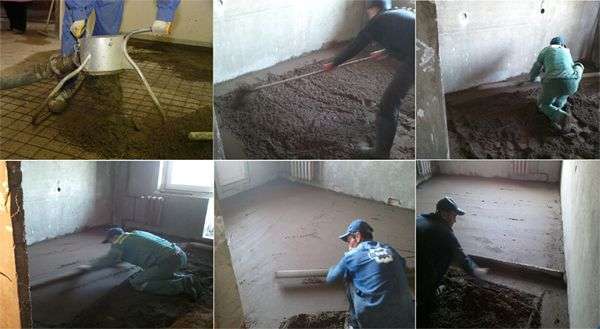
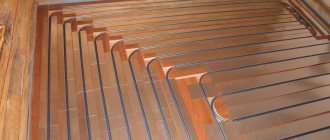
Currently, warm water floor systems, which are a complex of water heating elements passing under the base of the room, are gaining popularity. Such systems are usually protected from mechanical stress by cement-sand filling. The maximum thickness of the screed for a heated floor in a living space is 10 cm. Experts advise pouring 2–5 cm of concrete over the pipeline. If there is sound insulation between the “warm floor” system and the base, then the layer should not be less than 3.5 cm.
Laying laminate on penoplex
The use of expanded polystyrene as thermal insulation during repairs and construction has recently become increasingly popular.
This is easily explained by the excellent performance properties of penoplex and the ease of its installation. Due to the fact that insulation boards have a high level of rigidity, some decide that it can be used as a rigid base for decorative finishing. Let's look into this issue and consider whether it is possible to lay laminate on penoplex.
Floor insulation with Penoplex slabs
Expert calculations show that approximately 10% of thermal energy is lost through the floor of a traditional private house. The figure is huge, especially in terms of annual heating costs in the northern latitudes, where Russia is predominantly located. Floor insulation with Penoplex is not so much a wise expenditure of money as a successful investment that saves a considerable amount from the annual budget.
- Description of series
- Self-installation
- Recommendations
- Prices
1. Penoplex Foundation.
When using any material, you must follow the manufacturer's recommendations. Penoplex Foundation for floor insulation will be the best solution from the line of this company. It will also help with thermal insulation of basements, ground floors and any supporting concrete structures that have contact with the ground and dampness.
Penoplex has all the advantages of extruded polystyrene foam. Prices for insulation with it, taking into account the characteristics, do not exceed similar works from other types, since it compares favorably with ultra-low thermal conductivity of 0.030 W/(m×°C), almost complete absence of moisture absorption - no more than 0.5% by volume, and enormous strength – about 27 tons/m. kv and unsurpassed durability - 60-80 years. The cost of Penoplex thermal insulation is approximately 4,200 rubles/m3. Sheet dimensions – 600 x 1200, thickness – from 20 to 100 mm.
2. Penoplex Comfort.
Material with a wide range of applications. With its help, you can insulate your balcony floor, foundations, walls, roofs, loggias, garages and other utility rooms with your own hands. It is also used for garden paths to prevent frost heaving.
If you are in doubt whether to choose polystyrene foam or Penoplex, pay attention to its differences: with a low density of 25-35 kg/m3, the strength is 20 tons/m2, the operating temperature range is from -50 to +75 degrees. Penoplex has L-shaped edges, which allow its slabs to be joined without the formation of cold bridges.
You can buy Penoplex Comfort at an average price of 4,350 rubles/m3. One sheet of this insulation has dimensions of 600 x 1,200, thickness is 20-100 mm.
