What is clay
Clay is a sedimentary rock. When dry it is dusty, but when moistened it becomes plastic. It contains one or more minerals of the kaolinite or montmorillonite group, but may also contain sandy compounds.
The clay is predominantly gray in color, but there are varieties in white, red, yellow, brown, blue, green, purple and even black. This is due to the substances contained in each type of clay. Depending on these same substances, the areas of application of clays are different.
Since this rock has high ductility, fire resistance, excellent sinterability and good waterproofing, it is widely used in pottery and brick production. However, often clay products develop cracks at the stage of modeling or drying, or at the final stage - firing. This can happen for several reasons: the clay is dry, the clay is “skinny”, that is, it contains a large admixture of sand, or, conversely, the selected variety is too “oily”.
Additives for clay mortar
To prevent the possibility of cracks forming on the product, it is necessary to choose the “right” type of clay from the very beginning. Blue and white clays are ideal for pottery. But sometimes the right choice of material is not enough.
If the product cracks due to insufficient moisture, the issue can be resolved by simply adding water to the clay solution.
However, sometimes a clay product cracks due to excessive “fat content” of the solution. Clays with high plasticity are called “fat.” When soaked, they give a tactile sensation of a fatty substance. The dough made from such clay is shiny, slippery and practically free of impurities. In this case, so-called “lean” substances are added to solutions made from such clay: “lean” clay, burnt brick, pottery scrap or sawdust and sand - ordinary or quartz.
But the opposite situation also happens - the product cracks due to the clay being too “thin”. This material is non-plastic or low-plastic, rough to the touch, has a matte surface and crumbles easily even with simple finger pressure. It contains a very large amount of impurities in the form of sand and earthy particles. In this case, it is necessary to carry out the reverse operation - add fatter clay to the “lean” clay or use other additives that increase the fat content of the solution, for example, glycerin or chicken protein.
There is another method - to soak the solution. Its essence is to add water to the solution and mix it thoroughly. The solution is allowed to settle. Water remains in the top layer, which is drained. The next layer contains liquid clay, and underneath it are unwanted additives. The liquid clay is carefully scooped out and poured into a basin, leaving it in the sun to evaporate excess moisture. As a result, plastic clay with the consistency of hard dough remains.
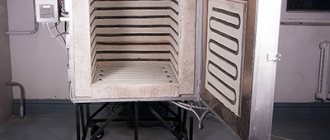
Every owner of a heating unit certainly faces the problem of how and with what to coat the stove so that it does not crack, even if it is made of refractory bricks and sealed with a mortar using fireclay clay. Sooner or later, cracks may appear on this structure.
Technical characteristics of clay mortar for plastering walls
Clay plaster with the addition of sawdust has a thermal conductivity of 29 W/m2 °C. The vapor permeability coefficient of plaster is high, so the material can be used for processing wooden wall panels. The density of the clay mass is 1700 kg/cubic. m. With a plaster application thickness of 1 cm, the consumption per 1 m² will be 15 kg. The material is thermally resistant.
Technical parameters determined the use of clay mortar in the following areas:
- construction and finishing works;
- plastering of fireplaces and stoves;
- design and insulation of external wall panels in private buildings;
- interior finishing work in premises and outbuildings.
The waterproof characteristics of clay are low, so when decorating facades it is important to plan the installation of additional waterproofing to prevent deformation of the decorative layer from air humidity and precipitation.
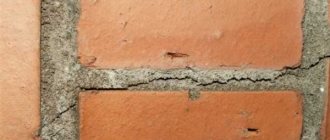
Why do cracks appear on the stove?
The reasons why they are formed are:
- violation of masonry technology;
- use of low-quality building materials;
- uneven heating of the stove surface.
The presence of through cracks poses a potential threat to the health of everyone living in the house. Carbon monoxide begins to penetrate into the room through them. Therefore, it is so urgent to solve the problem than to cover up cracks in a brick oven. In this case, repair work must be organized immediately.
Sealing cracks in brick structures with gypsum-based mortar
In traditional Russian brick ovens, sealing of cracks formed during operation is best done with a gypsum-based solution.
Necessary equipment
In order to prepare the solution and repair the furnace, you will need:
- container for mixing the mixture - a trough or tub;
- measuring bucket, construction sieve with a hole size of at least 0.3 cm, shovel;
- spatula, paint brush, construction knife, hammer, nails;
- soft mesh made of iron wire or natural burlap, asbestos cord;
- gypsum powder, cement or heat-resistant clay as the main element with the addition of river sand, asbestos and construction glue;
- lime with chalk for whitewashing.
All dry building components (materials for grouting cracks on brick stoves) must be measured in accordance with the required quantity and then be sure to be sifted through a sieve before mixing.
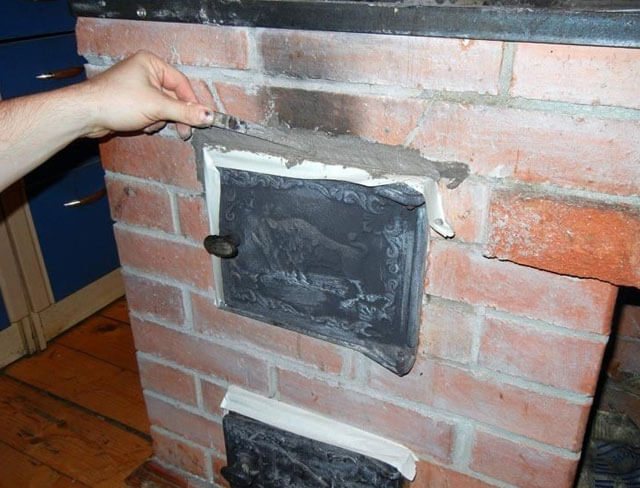
Cladding process
Solutions based on gypsum or cement are prepared in small portions. In this case, it is recommended to use the cement mixture for 1-1.5 hours, and the gypsum mixture for 5-10 minutes, since after this period they lose their elasticity and become unsuitable for further restoration work with them.
Tip: it is advisable to soak fireclay or other fireproof clay in water for about a day, since in this state it will mix better with sand.
Lime, before adding the appropriate components, depending on the composition, is slaked with water. It should have a homogeneous, fairly thick consistency, which, if necessary, can then be diluted with a small amount of liquid.
Restoration work on sealing cracks in brick kilns using gypsum-based solutions must be carried out quickly enough and in small volumes, otherwise the entire preparatory part, unfortunately, will be repeated, which is undesirable for such a structure
Sealing cracks with gypsum mortar is very durable and aesthetically pleasing. After applying the mixture to the problem area of the stove, it should be immediately brought to a smooth and even state using a spatula.
The advantage of clay coating of a brick oven is that it is less complicated, but also guaranteed to eliminate cracks or cracks. In any case, the choice is yours.
Sooner or later, owners of country houses and private houses will have to solve the problem - how to cover the stove? A failed heating device poses a threat to the life and health of the inhabitants of the house. It is no coincidence that fire safety regulations prohibit the operation of a faulty stove. The work of a master stove maker is not cheap. However, if necessary, you can repair the “heart of the house” yourself.
The oven can fail for various reasons. Sometimes it’s easier not to cover up any defects that appear, but to rebuild the stove. However, such drastic measures are rarely required. As a rule, the main reasons for the emergency condition are shrinkage, poor-quality materials and errors made when laying out the fireplace.
Heating systems require regular maintenance. According to SNiP standards, heating devices in a dacha must be inspected twice a year. And in a private house at least once a quarter. Unfortunately, most homeowners neglect these requirements.
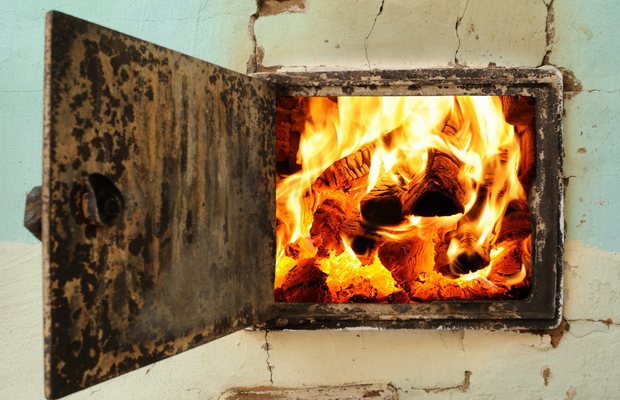
Only a complete oven can be used
The main danger for the residents of the house is not a collapsed fireplace, but the cracks that appear in it. The explanation is simple - no one will heat a stove that is obviously in emergency condition, but cracks cannot always be noticed in time. Carbon smoke leaking through them is a serious danger for the inhabitants of the house. According to statistics provided by the Ministry of Emergency Situations, in a fire, 70% of people die from smoke, and of those who survive, 42% end up in hospital with carbon monoxide poisoning.
Crack repair work
This process can be divided into several stages:
- Diagnosis of existing damage.
- Preparation of the solution.
- Plastering the heating structure.
Stage one – damage diagnosis
Before coating the stove, you should assess the extent of the existing damage in order to find out the scope of the work to be done. If the cracks are minor, then surface measures will be sufficient. To do this, the bricks are cleaned of finishing materials and plaster, the damage is repaired and the stove is plastered.
If there are large through cracks, damage to the masonry or cladding, the heating unit must be disassembled to make repairs.
Stage two - preparing the solution
Regardless of the size of the damage, you need to prepare a special solution to putty the oven. Depending on financial capabilities and the availability of materials, certain types of mixtures are used when carrying out repairs.
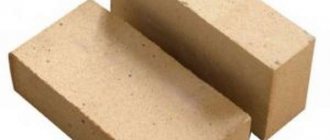
Fireclay clay
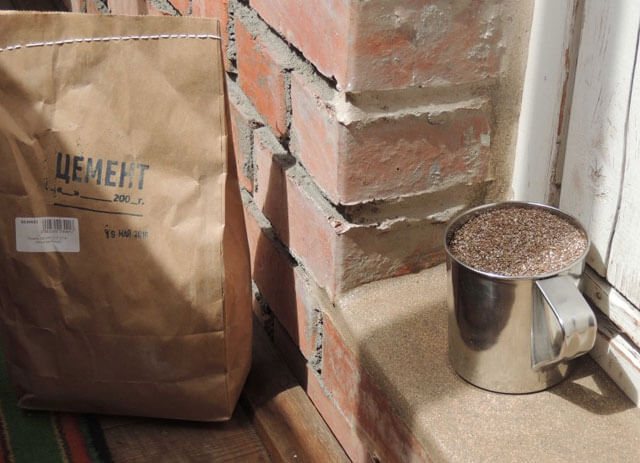
Most often, fireclay clay, which has excellent fire resistance, is used to restore a brick structure. Stoves made with this material are reliable and durable. Many people don't know where to get clay. This clay is sold in every hardware store - it is packaged in paper bags weighing 20 kilograms.
Sand and clay
You need to follow the procedure for preparing clay for coating the oven. It is first soaked in water and left for 2 days. The cost of fireclay clay is affordable.
A mortar made from ordinary clay and sand is the most inexpensive solution than covering up cracks in a stove between bricks. It is used quite often, since the mixture is plastic, and after firing it becomes durable and strong.
How to cover up cracks
It is important not just to “cover up” them, but to examine them in time and seal them correctly to prevent the ingress of carbon monoxide. If you use low-quality material again, instead of one crack, several will appear and quickly.
So, the entire process of removing defects can be divided into 3 stages:
- analysis of the crack and the nature of its origin;
- preparation of solution;
- plastering and grouting.
Crack Analysis
Even a beginner can handle this stage. The task is to determine the location and size. In case of minor damage, as a rule, not through and therefore not dangerous, you can simply clean the bricks from the previously applied finishing and part of the mortar in the area of the crack. Seal them with the prepared solution and clean them so that the restoration work is not noticeable.
If we are talking about deep cracks, especially those through which smoke and a characteristic odor noticeably leaks, you will have to dismantle the bricks in this area and re-lay new ones. This is a painstaking job that requires the correct selection of solution and careful work.
Preparation of the solution
Regardless of the location and size of the cracks, a certain solution will be needed to eliminate them. These can be traditional materials - fireclay clay or a mixture based on river sand and clay, modern - stove glue, personally prepared - stove grout. By the way, you can also purchase it at a hardware store and dilute it yourself.
The table below shows examples of components for plastering stoves and their proportions.
Each material can be used in the work, but in order to understand how to plaster the stove so as not to crack, you need to understand each of them.
The most popular material for laying stoves and fireplaces, restoration and plastering. Fireclay clay is the most reliable material that has passed centuries of testing and is still very popular. The stoves, built on fireclay clay more than 100 years ago, still stand and do not crack.
Today you can buy fireclay clay at any hardware store. Standard packaging is 20 kg, but there are also individual packages of 5-10 kg or large batches of 50 kg. Before work, according to the instructions, the clay is soaked in water in a ratio of 2:1 and left for a day, after which they proceed directly to the plaster.
Clay and sand
The cheapest option for plastering the stove not only during the restoration of cracks, but also during the initial laying. Despite the fact that such material costs a penny, it is very flexible, easy to work with, and after the first two starts of the furnace it becomes very strong and durable.
How to cook:
- Pour 1 part clay with 3 parts water and leave for 72 hours.
- After one and a half days, stir the solution thoroughly, adding a little water, and strain it through a medium sieve (mesh cross-section up to 3 mm).
- Drain off excess water, then mix well again. The result should be a creamy “product” that is ready for the addition of sand.
- At this stage it is very important not to overdo it with sand. Add it gradually, continuing to stir the clay solution. Periodically remove the stick and check how much is stuck to it. As a result, there should be small fragments on the stick. If large pieces stick, continue mixing the solution with river sand. As a rule, the ratio is 1:2.5, where 1 part is clay, the rest is sand.
In order to avoid mistakes, watch the video on how to properly prepare clay for grouting cracks
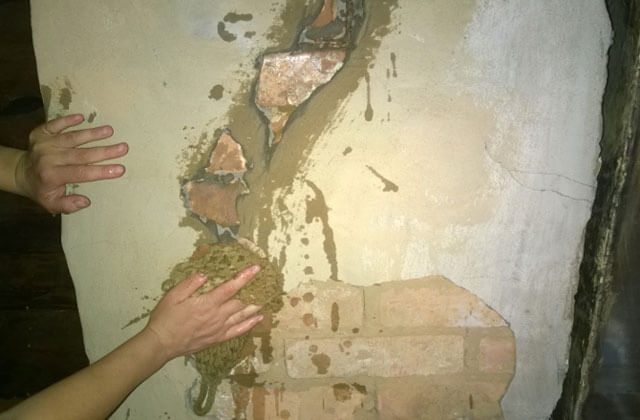
Procedure:
- thoroughly mix the composition obtained for restoration;
- To check how plastic and high-quality the mixture is, simply make a ball of clay, roll it out and squeeze it tightly with your fingers. The ideal composition will be like hard plasticine, wrinkled, but not cracked. If cracks appear, you will have to add a little more water;
- Moisten cracks and crevices generously with water;
- push the solution with your fingers, trying to get as deep as possible;
- sand the seams and proceed to general plastering.
Oven grout
Of course, it is best to purchase ready-made grout, which is simply diluted with water. It is expensive, but it is ideal for ovens. Very plastic, strong, durable, capable of maintaining integrity even at 10,000C.
Before sealing the cracks with a special grout, they are pre-moistened with water immediately before application.
For those who do not have the opportunity to purchase grout, we will tell you how to prepare a composition identical in characteristics to the grout.
You will need:
- clay - 1 part;
- water - 3 parts;
- sand - 4 parts;
- straw, cut into small pieces - 1 part;
- salt - pack.
Mix clay with water in a ratio of 1:3 and leave for 2-3 days. Next, add sand and gradually knead (see above for how to do this correctly). When finished, add straw and a pack of regular table salt.
Furnace glue
Very comfortable and practical material. which is also sold in all hardware stores. Its main advantage is ease of preparation and simple application.
There are 2 types of oven glue - plastic and hard. Plastic is used to fill cracks, while hard is a finishing coating that hardens very quickly.
The oven glue hardens within 15-20 minutes. To avoid wasting it, knead in small portions.
The procedure is as follows:
- preparing 1 liter of plastic solution;
- abundant wetting of bricks with water;
- applying (pushing) the mixture into all detected cracks and crevices;
- preparing 5 liters of solid solution;
- coating the entire oven.
Cracks appear on any stove. In the video you will see how to seal cracks and crevices on a Russian stove with a stove bench
How to plaster a stove so it doesn't crack
The first step is always to seal the cracks and, after they have dried, they begin to cover the entire surface of the stove.
With any restoration method, it is necessary to remove the layer of plaster on the bricks/bricks at the site of damage, the cladding or the decorative layer.
Always before filling cracks with mortar, moisten them generously with water - this will form an excellent bond between the brick and the mortar, so that it will not fall out as it dries.
Cracks and cracks are sealed only with your fingers so that the solution penetrates deeply. Buy waterproof gloves.
Once all damage has been repaired, leave the oven for at least a week to allow everything to dry completely. And after that you can melt it completely - no more cracks will appear in this place.
How to prepare clay
This solution is prepared in the following sequence:
- The clay is poured with water in a ratio of 1:3 and allowed to brew for 24 hours.
- After a day, it is stirred by adding water. The resulting mixture is filtered through a sieve with a mesh size of 3x3 millimeters and settled.
- The water is drained, after which the thickness of the clay should resemble the consistency of sour cream.
- Sand and clay are mixed in equal proportions.
- The readiness of the solution is determined by stirring it with a stick. If there is a lot of clay left on it, then you need to add sand to the mixture. The solution is ready when small clots stick to the stick.
Usually take 2.5 parts sand to 1 part clay.
Special putty is what you need to coat the oven with to prevent it from cracking
You can buy this mixture for eliminating cracks or make it yourself. Fireproof putty for stoves and fireplaces purchased at a building materials store is ideal for repairs. It perfectly withstands temperatures of 1000 degrees. Before applying it, the stove and cracks should be treated with water.
You can do the grouting yourself, following the instructions:
- Pour clay into a container and break up the lumps.
- Fill it with water and leave for 12 hours.
- Pour sand into the clay and knead the mixture.
- Finely chopped straw is added in small portions.
- Add one pack of salt.
Sand and clay are mixed in a ratio of 1:4. For 4 buckets of clay you will need about 50 kilograms of straw.
How to cover the stove so that it does not crack from the heat?
To prevent the stove from cracking in the house, it is necessary to responsibly carry out the work during the construction of the building. The main causes of the malfunction are laid down at this stage. But if the problem has already arisen, it is important to resolve it promptly. How and how to do this, you will learn about this in the article.
First you need to understand why cracks are spreading along the wall of the stove.
Reasons for appearance
Before properly and reliably caulking the stove, in order to prevent repeated malfunctions, you need to know what can affect the integrity of the stove coating:
- during a long break in heating the house and sudden temperature changes;
- the furnace was laid using low-quality mortar;
- Perhaps the reason is the settlement of the building or foundation. In this case, it will be necessary to carry out major repairs to the foundation, increasing its size and strength;
- after laying the stove, the process of normal drying of surfaces was disrupted;
- when plastering the stove, a low-quality solution was used or a thick or very thin layer was applied;
- Perhaps the reason is faulty ventilation and condensation deposited on the walls of the furnace.
Is it possible to use a stove with cracks?
The answer to this question is unequivocal - you will need to cover up a faulty, smoking stove immediately; it is not recommended to use it. Such requirements are explained not by a violation of the appearance of the walls, but by cracks that allow carbon monoxide to enter the room. Poisoning from combustion waste can lead to dire consequences.
Firefighter statistics show that most people die in a fire because of the gas, and not from the fire.
Damage diagnostics
Therefore, at the first sign of smoke in the house, you will need to do the following:
- diagnose the furnace surfaces and find the fault;
- after this, immediately prepare a solution or buy ready-made material for filling cracks;
- cover the walls and plaster them again.
But first of all, diagnostics will help determine the size of damaged surfaces and the approximate amount of materials to be repaired. If the mortar has simply cracked due to high temperatures, you simply need to remove the layer of plaster and apply a new layer of high-quality materials.
It’s worse if the cracks are through and continue to expand after the work has been done. In this case, it may be necessary to call specialists to identify the causes and lay a new stove. Stone stoves are a complex structure, so you shouldn’t try to lay it out from a book; it’s better to entrust this work to an experienced stove maker.
Such cracks can no longer be simply covered up
In this example, you shouldn’t cover it up either. The brick was badly cracked.
If the cracks are small and their size does not increase, you can begin to troubleshoot the problem yourself. To do this, it is important to prepare a high-quality solution and apply it correctly to the wall. How to cover up cracks in a stove so that it does not crack from the heat - knowledge of the basic materials for making the mortar will help in this matter.
Examples of small cracks:
Example 1
Example 2
Example 3
How to cover up cracks?
For these purposes, you can use several options that will reliably seal cracks in the walls and prevent gas from escaping into the room. Let's look at each method in more detail.
Fireclay clay
Before you cover cracks in the stove with fireclay clay, you need to know its advantages:
- the material is resistant to temperature during fuel combustion;
- high level of vapor permeability;
- resistant to moisture when heated;
- environmentally friendly material, safe for humans and animals, therefore can be used in residential premises.
To make the solution you will need to mix several ingredients:
- 1 part cement grade 500;
- 2 parts fireclay clay"
- 7 parts river sand.
The solution is mixed well and water is added. The consistency depends on the skill and type of work, but you should not make it very liquid or thick. To get rid of stones and lumps, the clay can first be soaked in water for several hours and the lumps of material can be crushed, and the cement and sand can be sifted. Such a solution will be plastic and laid on the surface in an even layer.
Plastering walls is easy if you have a certain skill. To do this, it is important to install beacons and, distributing the solution, level the layer on the wall. You will need to prepare a trowel and spatula, the size of which depends on the surface area.
Clay and sand
This is the most affordable, inexpensive solution for plastering surfaces. Such a solution for the oven has sufficient plasticity and is not subject to destruction under the influence of high temperatures.
It’s easy to prepare the solution for use; for this you will need:
- prepare a large trough in advance, add the required amount of clay and completely fill the layer with water. For 1 bucket of clay, pour 3 buckets of water. The clay should soak for 24 hours;
- then mix the solution and add more water to it. We pass the slurry through a sieve, get rid of lumps and let the solution settle;
- drain the excess water, making the solution as thick as homemade sour cream;
- add river sand in a 1 to 1 ratio and mix the solution.
Important! At this time, you can determine the quality of the solution. Having lowered the shovel holder into it, and seeing the adhering clay, in this case you will need to add a little sand. Only after seeing small clumps of sand and clay solution on the holder can you start plastering the walls of the stove.
With this solution it is necessary to repair all cracks that appear, after wetting the surfaces and then plastering the stove in several layers. In villages, they still use the old method, adding horse manure to the prepared solution. This solution is obtained with increased thermal insulation properties. Hay plays the role of air layers that prevent the free passage of heat.
Grout
This oven putty is sold ready-made, but it’s easy to make yourself. The main advantage of this material is the ability to retain its properties even when heated to 10,000. Industrial materials are used for arranging and repairing stoves and fireplaces, but the price of such grout is high, so home craftsmen do it with their own hands.
The mixture for coating the oven is made in several stages:
- knead large lumps of clay and pour it into a trough;
- fill it with water and leave for 10-12 hours;
- pour part of the sand into the soaked clay, maintaining a ratio of 1 to 4, mix the solution well, adding 5 parts of chopped straw in small portions;
- Add 1 kg of coarse table salt to the finished putty and finally mix the solution.
The finished grout can be used to fill gaps between bricks, crevices, cracks and complete the first rough layer of plaster.
Furnace glue
In order to repair a cracked stove, you can buy heat-resistant special glue at a hardware store. Due to its properties, it is not exposed to high temperatures for a long time. It consists of the addition of fireclay clay and cements with high fire-resistant properties.
A plastic and hard adhesive mixture is produced. Using hard materials, the surfaces of the stoves are plastered. Plastic glue is used to fill cracks and seams between bricks.
When using this material, you must follow the instructions when diluting and using the heat-resistant substance. You should not make it in large portions; it dries out quickly and becomes unsuitable for work.
How to properly coat a stove?
In order to reliably cover the cracks in a brick kiln, work is carried out in several stages:
- For large cracks, you will need to completely remove the layer of plaster and use a chisel or other tool to widen the cracks and gaps between the bricks. You need to work carefully, not missing even small cracks. By cutting the crack edges in this way, you increase the area for filling with mortar and improve the quality of adhesion to the main surface of the wall. The minimum depth for filling cracks with mortar is 10 mm.
- Now it is important to cover all surfaces with a deep penetration primer or plain water. Then we heat the stove by adding a small amount of firewood. It is important for us to dry all surfaces before work.
- While the oven is still warm, apply a thin layer of liquid clay solution using a paint brush or a large paint brush. This solution, once dry, will serve as the basis for continuing work.
- You can lay a layer of reinforcing mesh on top or simply cover the surface with old bags. We fasten the steel mesh with self-tapping screws, and glue the burlap with glue or nails, which we hammer into the joints between the bricks.
- Using any of the previously listed solutions, apply 2 layers of plaster, each up to 5 mm thick.
- After drying, you can plaster the walls with an additional layer of lime mortar or simply whitewash the walls of the stove with lime.
Coating process
How long does it take to dry?
It is not recommended to use the oven until the solution is completely dry. When using different materials, this period may vary. Using heat-resistant glue as a putty, the layer of solution will dry within a few hours.
It will take more time for the solution of clay and sand to dry and form. In this case, you will be able to use the stove only after a day. Then the brick oven, protected from cracks with mortar, will remain crack-free for a long time.
Therefore, we do not advise you to rush, immediately flooding your Russian stove with a stove bench. Repairing cracks in a furnace is a simple but important job. The choice of material for the solution is a purely individual matter. The main thing is to do the work carefully and responsibly. Then your house will always be light and clean, without the smell of burning and smoke penetrating through the cracks in the walls of the stove.
Source: https://pechnoy.guru/pechi/izgotovlenie-pechi/remont/chem-zamazat-pech-chtoby-ona-ne-treskalas-ot-zhara.html
Oven adhesive composition
Building materials stores sell special glue designed for repairing stoves, which is durable and heat resistant. For its production, refractory cement and fireclay powder are used.
They produce plastic and solid mixtures. The first of them is used to fill the cracks, and the second is used to plaster the entire stove surface. The main advantage of oven glue is that it dries quickly.
How to coat a stove with clay
The choice of how to seal the stove so as not to crack depends on what mixture you decide to use. But first you need to clean the bricks from the plaster and the layer of finishing material. They are then treated with a solution.
If you decide to use a clay mixture, then you need to follow the instructions on how to properly coat the stove with clay:
- The prepared solution is stirred one more time.
- They check its quality. To do this, roll the mixture into a ball and if it starts to crack, then add water.
- Before coating the stove with clay to prevent it from cracking, the damaged areas are moistened with water.
- The cracks are filled with the solution.
- Then the oven can be plastered.
- Despite the fact that the repair of the brick kiln is completed, you should not rush to heat the unit, since the solution must dry completely.
From paint
If the brick wall was painted, but began to peel off over time, then you need to urgently remove the old paint. The modern method of sandblasting walls is often used. But this may damage the material.
Therefore, it is best to adhere to the following recommendations:
- Perform initial paint removal.
- Get rid of fungus.
- Perform chemical treatment.
- Perform secondary paint removal.
First you need to remove the loose layer of paint. All visible wall surfaces on which peeling paint is visible are treated with a spatula. Then the wall is carefully brushed to remove dust.
The second stage is getting rid of the fungus. A special solution is prepared (bleach and water in a ratio of 3:1) and applied to the wall with a brush. After this, rinse thoroughly with water.
When the wall is completely dry, another solution is applied to it, which removes the remaining layer of paint chemically: caustic soda and water in a ratio of 1:3.
A small amount of flour is gradually added to this solution until it becomes mushy.
The prepared solution is applied to the wall with a spatula and left for 2 days. After this, warm water from a hose (under high pressure) removes the solution from the surface along with the old paint.
If you need to clean a wall in your house, then while applying the solution to the walls, strips of paper are glued to it. It is then removed from the surface along with the paint.
Instead of a homemade solution, you can purchase a special solution in the store. To breed it you need to follow the instructions.
For high-quality cleaning of bricks, you can use the advice of professionals:
- When cleaning from cement mortar, the brick can be moistened with water. The cement will absorb a small amount of moisture and come off easily.
- The chemical method of cleaning bricks from mortar is carried out only for red ceramic bricks.
- When using various chemical solutions to clean brick, you need to wear gloves and protective clothing. It is advisable to cover the floor with film.
- Before cleaning brick, it is best to do a test cleaning on a small area. This will help ensure that the product will not damage the surface of the material.
Removing plaque from brick using improvised means is quite simple. To speed up the work, you can purchase the solution in the store. The main thing is to follow the instructions for carrying out the work. Due to this, you can get a high-quality result.
The clay, which has the optimal fat content and has aged well, just needs to be thoroughly kneaded and the pebbles that accidentally fall into it should be selected.
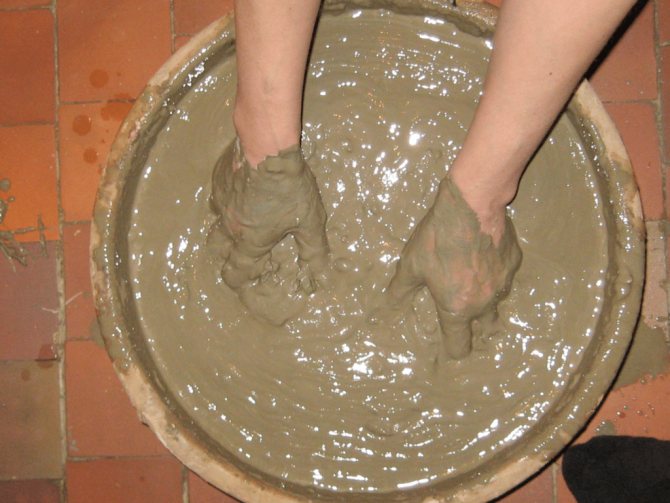
In the past, clay was kneaded in a pottery or hut on the floor sprinkled with sand, which is called “topanets” in the riddle about the pot. Often the whole family, including children, was involved in kneading and cleaning the clay. The clay was trampled with bare feet until it turned into a thin plate, which was immediately rolled into a roll. The roll was then folded in half and trampled again. When the clay regained the shape of a plate, a new roll was rolled up. This was repeated up to five times until the clay turned into a homogeneous mass, soft and pliable, like pie dough. By the way, well-washed and cleaned clay, ready for pottery work, is called clay dough.
Why does clay crack?
The surface of the clay layer can crack for various reasons, and yet why this happens, consider the probable reasons and find out what to do to prevent the clay from cracking when drying:
- excessively thick layer. To avoid this, plaster with clay, applying a maximum two-centimeter layer. If there is a need to apply a second one, then the previous one should set well. In good weather, this takes at least a day. If it is intended to apply a plaster layer more than four centimeters thick, the surface must be reinforced with steel mesh;
- the plaster dries too quickly and begins to crack. Optimal conditions for this are 10 – 20 degrees Celsius. If the weather is hot, it is recommended to suspend work and moisten the walls more often. Perhaps the base of the wall quickly absorbs moisture. In this case, it is also moisturized abundantly;
- the solution turned out to be too greasy. Replace the clay or reduce its amount in the solution. The same applies to cement material.
Clay elutriation
Souring clay is soaking it, soaking it in water.
When elutriated, the clay not only becomes purified, but also becomes fattier and more flexible.
Therefore, clay that contains a lot of sand and has low plasticity is most often elutriated. You need to soak the clay in a tall vessel, such as a bucket.
Pour one part clay with three parts water and leave overnight. In the morning, thoroughly stir the clay with a stirrer until a homogeneous solution is obtained. Then let the solution sit for a long time. As soon as the water clears from the top, carefully drain it using a rubber hose. But it is not so easy to drain the water without muddying it. Therefore, even in ancient times, a simple and ingenious device was invented, which is still used by Japanese potters (Fig. 1.4). Several holes are drilled vertically in a wooden tub at a short distance from each other. Before filling the tub with liquid clay mortar, each hole is plugged with a wooden stopper. Heavier grains of sand and various kinds of pebbles settle to the bottom first. Then, after settling, clay particles fall down. Gradually, the water from above brightens and finally becomes transparent (1.4a). As soon as the level of clear water appears just below the top hole, the plug is pulled out and the cleared, settled water is poured out of the barrel (1.46). After some time, remove the plug located below. This way all the settled water is gradually drained out. To speed up the process of clay settling, bitter Epsom salt is first added to the solution (about one pinch per bucket). Instead of a wooden tub, you can use a suitable metal container. At different levels, short tubes are soldered into it and plugged with plugs.
After removing the settled water, carefully scoop out the liquid clay, leaving the bottom layer untouched, which contains pebbles and sand that have settled to the bottom. Pour the clay solution into a wide wooden box or basin and place it in the sun so that excess moisture evaporates from the clay faster (1.5). As soon as the dried clay loses its fluidity, stir it with a shovel from time to time. After the clay acquires the consistency of thick dough and stops sticking to your hands, it is covered with plastic film or oilcloth and stored until the start of modeling work.
Limescale deposits on taps, tiles, and shower stall walls cannot be wiped off with water alone; on the contrary, it multiplies it. Here we need more cunning methods. And if you understand what it is and how to deal with strange white spots, they will no longer seem so inaccessible.
Tap water contains many mineral additives, including lime. It evaporates when it comes into contact with the surface and forms a coating. If we turn to chemistry, it is calcium carbonate, in another way it is a mixture of carbonic acid and calcium. Therefore, it forms on surfaces that come into contact with water in the house.
Types of clay-based plasters
Let's consider the main options for plasters and the technology for their preparation.
Fireclay clay
Difficulties arise in the work, the bricks hold weakly in the masonry, the plaster layer is covered with numerous cracks. This is due to the fact that during the firing process the clay almost completely loses its plasticity, which must be returned to it when preparing the solution. In these cases, craftsmen recommend adding quartz sand or a special adhesive composition. The procedure for preparing the solution is as follows:
- you will need a pack of fireclay powder, which is poured into a container;
- water is added gradually until it covers the entire mass;
- it is necessary to wait three days for the material to infuse;
- after this sand is added. If the solution turns out to be thick, you can add water, otherwise the clay layer will crack when it dries;
- The mass is thoroughly mixed.
A properly prepared solution should resemble thick sour cream in thickness, only in this case it will not drain and will adhere perfectly to the surface. To speed up the drying process and take measures to prevent the clay from cracking, it is necessary to add cement at the rate of two kilograms per package of fireclay.
It is possible to purchase ready-to-mix formulations that do not require steeping for three days.
Clay-sand mortar
How to properly make such a solution so that the clay does not crack? First you need to sift the sand, for which you will need a sieve with a hole size of 2 - 3 mm. Its amount will depend on the degree of fat content of the clay.
The clay is pre-soaked. It is placed in a tank and filled with water, leaving for one to two days. After this, the mass is mixed and passed through a three-millimeter sieve. The result should be a solution that is similar in thickness to sour cream.
We start adding sand. As a rule, one and a half times more sand is required per liter of solution. But when the clay is oily and the solution is prepared in such proportions, then cracks will definitely appear. And with low-fat clay, the layer of plaster will not be durable.
The ratio of sand and clay should be accurately determined. For this purpose, take a liter of solution, to which sand is added in doses, while stirring the mass. The end result should be a material that easily slides off a metal shovel, but does not spread over it.
Clay-sand mortar
Clay-sand mortar with added fiber
What other clay solution can be used to cover the stove so that it does not crack? To do this, a small amount of cement is added to the working composition - a trowel per bucket.
Overheat
Brick blocks, even those made of fireclay clay, are a very fragile material, so if the operating conditions are violated, the masonry will gradually collapse.
If the stove heats up gradually, the masonry will not crack
Let's imagine this picture. One day in winter, after a long absence, the owners of the dacha, having come to relax for the weekend, begin to light the stove. Wanting to warm the house as quickly as possible, they add as much fuel as possible. And then they intensively operate the device for six to eight hours, adding firewood. The inside of the firebox and chimney heats up very quickly, but the outside remains cold for some time. Under the influence of rapidly rising internal temperatures, the bricks undergo linear expansion and press against each other with increased force. And since they have nowhere to expand, they crack and deform, moving to the side. The frozen mortar in the seams between them cannot withstand the load and, losing its strength, partially crumbles. After the fuel runs out and the masonry cools, the bricks shrink to their previous size, leaving noticeable gaps instead of sealed seams.
Furnace masonry damaged from overheating. Photo from ogon.guru
Meanwhile, avoiding this problem is not at all difficult. Since the heating rate is of great importance, experts recommend not to heat the stove for too long after a long break; after a couple of hours, the device should be allowed to rest. During this time, the inner walls will cool down a little, and the outer walls will heat up. As a result, the temperature will be equalized and the masonry will remain intact.
But what to do if the “melting” has already happened - with all the ensuing consequences? Of course, you shouldn’t leave cracked bricks, otherwise their destruction will continue. The damaged part of the wall or chimney will have to be repaired: replace the bad blocks with new ones and fill the seams again with mortar. When repairing masonry, experienced stove makers advise making two cuts up to 3 cm deep on the back side of the bricks. And make another cut at the butt - that is, where the blocks join each other horizontally. In this case, thanks to the gaps, they will have the opportunity to expand without damage. It is very important to make exactly two cuts dividing the brick into three even parts, and not one in the center, which will only accelerate the appearance of cracks. A small cutout on the butt allows you to increase the thickness of the seam, which will also strengthen the masonry.
Bricks with cuts can easily withstand thermal expansion. Photo from fireplaces-and-stoves.ru
Thus, the structure of the stove will remain intact even if it overheats, and the device will continue to please its owner for many years to come.
Ads by
Nuances of testing clay plasticity
Different clays differ in their plasticity. There are:
- “fat” clays with high plasticity;
- material of medium ductility;
- “lean” clays with a low level of plasticity.
I determine the level of plasticity using a simple method. The clay is poured with water to turn it into a dough-like mass suitable for molding. The material is used to make cylinders seven centimeters long and 30 mm in diameter, the ends are pinched with fingers and slowly torn apart. Plasticity is judged by the shapes that the cylinder takes at the point of rupture, by its elongation. A plastic material is characterized by the formation of a long and thin neck, and if the clay is thin, the neck will be thick and short.
The level of plasticity is determined in another way. Flagella about twenty centimeters long and 1.5–2 mm in diameter are rolled out of the working material and bent into semicircles or pretzels. If cracks appear on the materials at this time, the clay is thin. Cracks that form during bending indicate that the clay is of medium plasticity, and fatty clay can be identified by the complete absence of cracks in the samples.
Advantages and disadvantages of clay compositions
The following features are highlighted as advantages:
- clay is a natural and environmentally friendly product;
- solutions perfectly absorb water and release it, which prolongs the service life of coatings;
- reasonable cost;
- the remains of the used solution are stored for a long time;
- the material perfectly protects the surface from mechanical impacts;
- the elasticity of the material allows it to be applied without any problems;
- Not only internal, but also external surfaces are finished with a clay mixture;
- using the solution, level and decorate the surfaces.
In addition to the positive aspects, clay-based plaster has a number of disadvantages, which explain most cases why clay cracks:
- There is no exact recipe for preparing the solution; craftsmen prepare the mixture using their own experience;
- there is a possibility that the surface will become covered with cracks;
- Such compositions are rarely used; there are few experienced craftsmen who know how to cover a stove with clay so that it does not crack.
On what coatings does plaque appear?
More often it forms on tiles in the bathroom, kitchen around the sink, on the shower stall, on acrylic and cast iron bathtubs. Let's look at ways to prevent the appearance of chalky white spots.
The most effective is to install house filters at the entrance to the apartment or water pipes in the house. They will clean the water from rust, sand, clay impurities, remove turbidity and unpleasant odor, and it will become softer. But this method is quite expensive. Let's look at other daily ways to stay clean.
- Tiles and ceramics
You can keep your tiles clean without using hard sponges, which damage the surface. These also include metal brushes. To prevent limescale from hardening, wipe the ceramics with a soft, dry cloth after each wash. It would be good to clean the toilet a couple of times a week with gel or paste products. It is advisable to put special water softening tablets in the tank.
- Acrylic surfaces
For example, to prevent an acrylic bathtub from becoming covered with limescale, the correct angle of inclination must be maintained during installation. Otherwise, the water will stagnate and it will be more difficult to drain. Dirt will accumulate on the walls, which is then difficult to wash off. And the pipes will become clogged, and they will have to be thoroughly cleaned. If you overdo it with the slope, there is a high risk of slipping in such a bathtub.
The quality of the bath also plays a significant role. Made from cast acrylic, it will last for several years. And the risk of cracks, scratches, and chips is much less. But to maintain cleanliness and whiteness, regular care is needed.
Firstly, it is advisable to clean the bathtub with at least a light cleaning product after each use. Secondly, you should not use hard or hard brushes that scratch the enamel. Thirdly, do not use aggressive detergents. Acrylic is not resistant to abrasive solutions.
- Cast iron surfaces
To prevent limescale and dirt from accumulating in the bathroom, especially cast iron, it needs proper care. Every day before going to bed, when no one will use the bathroom, you need to rinse it with a light product. Then wipe with a towel to prevent rust formation. Once or twice a week, thoroughly clean the bathtub with a strong detergent.
Repair taps and mixers immediately after breakdown, otherwise leaking water will form severe rust. Just like for an acrylic bathtub, use only soft solutions and brushes.
Too hot water above 65 degrees can cause cracks in the enamel. And if they appear, you need to remove them immediately by calling a specialist or doing it yourself.
Cast iron bathtubs cannot be cleaned with the following products:
- containing chlorine, unless we are talking about mold.
- with caustic acids. They are only permissible for topical use for a short time.
- with abrasives. These particles scratch the enamel. The plaque gets inside the cracks, corroding them until it reaches the cast iron.
- containing concentrated hydrochloric acid.
The cleaning tools are the same as for an acrylic bathtub. Do not use metal brushes, fiberglass sponges or various sharp objects. As a last resort, if no remedy helps, an insert with an acrylic surface is inserted into the bathtub.
- Glass and plastic
To prevent water stains from appearing on glass and plastic surfaces and to ensure that they always shine, it is enough to rinse them with dishwashing detergent after use. And rinse off first with hot, then with cold water. And then wipe it dry with a cloth until it dries. Cups on glass tables should be placed on saucers to avoid streaks and circles.
Wax is applied to the shower doors several times a week. It repels water that flows down and leaves the doors clear.
Criteria for choosing a solution
Previously, classical solutions were used, taking into account combinations of heat resistance, increased heat capacity and thermal expansion equal to the brick material. To make such solutions, fatty clay was used.
Today you can purchase dry mixtures, certain types of clays and other compositions that simplify construction and repair work. It should be noted that not every such composition has the necessary characteristics - fire resistance, heat resistance, gas tightness.
The solution must be heat resistant, withstand high temperatures and exposure to chemically active substances. In addition, the gas density level must be quite high. The seams do not allow flue gases to pass through, but moisture must pass through the finished mixture for the stove to “breathe.”
Instructions for applying clay plaster
The work is performed in the following sequence:
- mortar cakes are applied along the wall at regular intervals, and the material is stretched over the entire surface with a wide spatula, a rule or a trowel;
- Evenness is checked using a level. If necessary, apply a second layer;
- the surface is given time to dry completely: from 1 to 3 months, depending on the season;
- finishing is being carried out. To do this, use a solution consisting of clay, cement and sand in a ratio of 1 to 1 to 3. The mixture is applied in a thin layer and leveled. After three to four weeks, the stove can be whitewashed with lime.
We now know how to coat a stove with clay so that it does not crack. But you should know that half the success depends on the correct preparation of the solution.