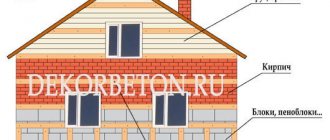
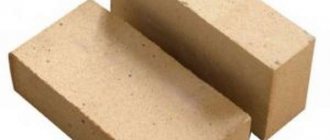
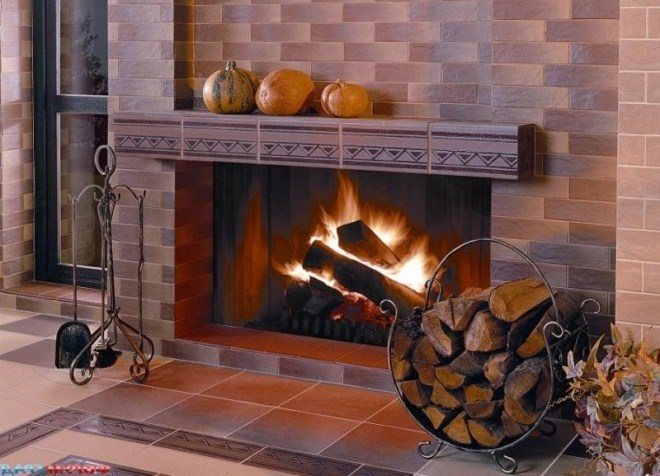
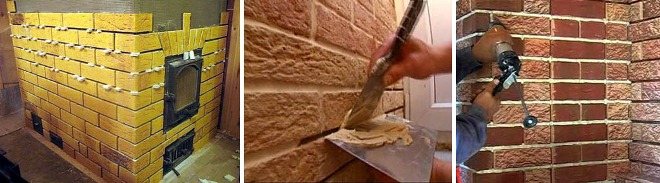
Various tiles are used for cladding at the final stage of furnace construction. Whatever choice is made, there is a need to seal the seams during installation. Already at this stage it is necessary to select high-quality material that would meet the technical and decorative requirements. Heat-resistant grout will serve as a barrier to moisture, preventing destruction. There are many types of joint sealing materials, but when working with ovens, they are selected taking into account the high operating temperature. But this is not the last criterion.
What is grout used for?
Heat-resistant grout for stove tiles has two main purposes. The first is the protection of seams from the effects of adverse factors, including temperature, as well as their strengthening. The second is giving decorative characteristics. Properly selected heat-resistant grout can either improve the appearance or ruin it. Some materials are more convenient to work with and have excellent resistance to high temperatures, but they spoil the overall design.
When working, you need to take into account two factors - technical requirements and decorative features. When design remains in the background, standard heat-resistant grout can be used for joints. If it is important to preserve the overall design, another need is added - to choose the composition in accordance with the color.
How to tile a stove so that it holds securely?
The correct choice of adhesive material largely depends on how the facing tiles will adhere to the stove. This is where you should start.
First of all, find out what maximum temperature the surface intended for cladding will have. If the temperature does not exceed 70 degrees, then adhesive mastic can be used. For higher values, you will have to cladding with clay mortar (a budget option) or choose a special heat-resistant glue.
Choosing facing tiles.
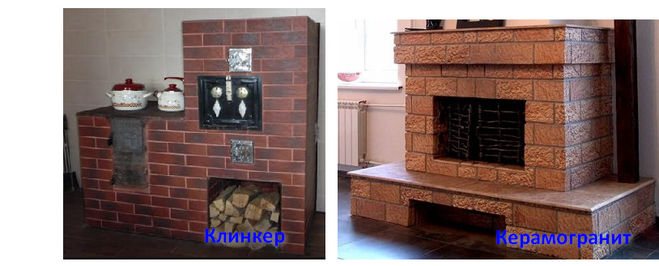
Most often, porcelain stoneware, majolica, terracotta, clinker, and less often ordinary ceramic tiles are used for lining stoves, since their service life on the stove is short.
Majolica and terracotta are made by pressing; they both have high strength and the only difference is that a layer of colored glaze is applied to the majolica.
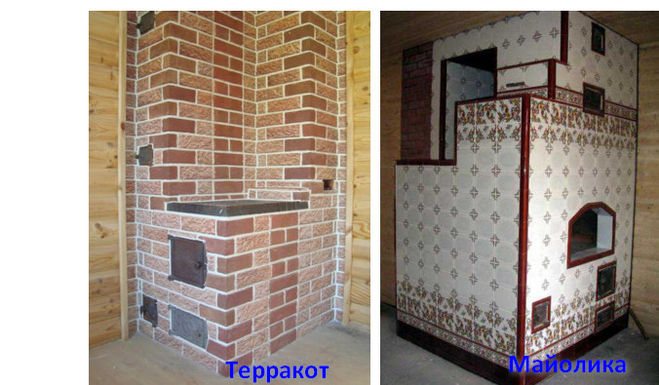
Clinker tiles are thicker than majolica and terracotta tiles and are therefore more durable and more resistant to high temperatures. Porcelain tiles have similar properties.
Experienced craftsmen claim that the technology for tiling any type of tile is the same and agree that the best choice would be terracotta tiles because of their durability, good heat transfer and a large selection of colors and shades.
Cladding technology.
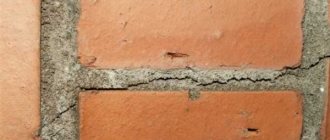
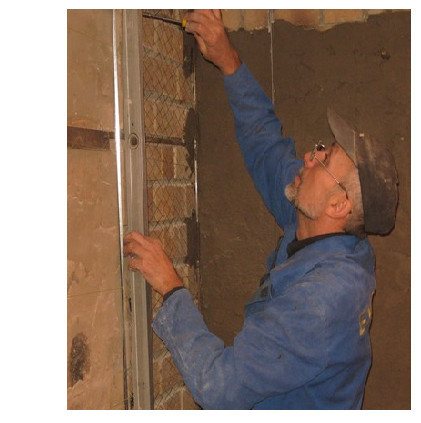
First of all, you need to prepare the surface of the stove - thoroughly clean it of dirt and dust, if any, remove old plaster. This work is best done with a metal brush or drill with special attachments. Then the seams are unstitched to a depth of 10 mm and the surface is again cleaned of dust and moistened well.
Now the prepared surface of the oven is covered with a metal mesh designed specifically for plastering work with a mesh size of 50 by 50 mm and secured with dowels or self-tapping screws. In places that are exposed to the most heat (near the hob and fire door), the mesh is secured especially carefully.
Mastic or cement-clay mortar prepared in the following ratios is applied to the mesh:
cement grade 400 (not lower) - 1 part;
clay - 3 parts;
sifted river sand - 0.2 parts.
The applied solution is carefully leveled, trying to avoid bumps and deep depressions. The more thoroughly the surface is leveled, the better the tile will lie and the less glue will be consumed. After complete leveling, do not heat the oven too much and after the surface has dried, you can proceed directly to the cladding.
Choice of glue.
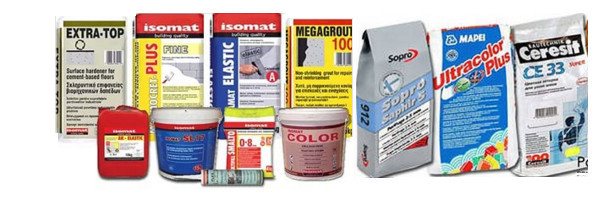
Nowadays there is a large selection of adhesive solutions and mixtures on sale, so choosing the right one will not be difficult.
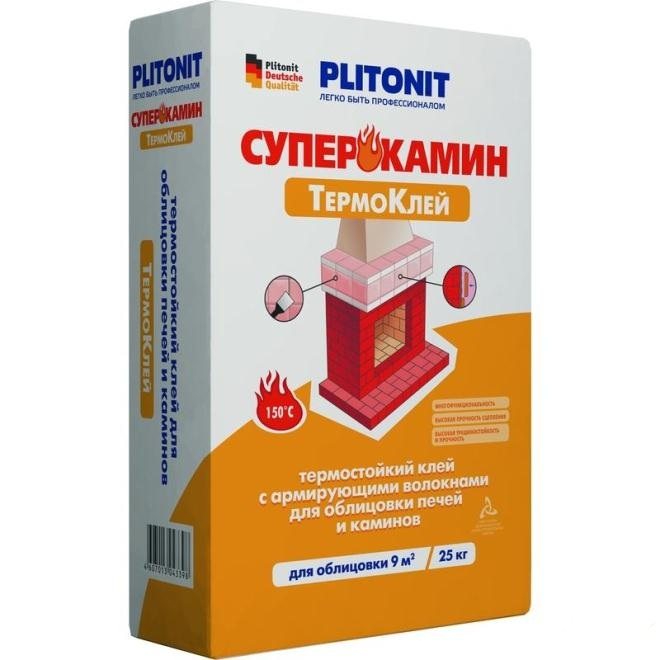
The most popular is the domestic “Plitonit-SuperFireplace”.
Its advantage over other analogues is that it can be used to putty and grout seams.
Laying tiles.
Before laying begins, a flat strip is securely fixed to the oven wall strictly horizontally at the height of the tile size. One row of tiles is laid on it (it will be the second - the first row from the floor is laid later). After laying one row, lay the next one and so on until the very top. To ensure that the gaps between the rows are the same, crosses with a thickness of 2-3 mm are used. After several laid rows, check the horizontal and vertical levels.
The adhesive is applied to the tiles with a rectangular spatula, leveled evenly over the entire surface with a notched trowel with straight teeth, and the tiles are pressed to the surface of the oven. For better shrinkage, tap the tiles with a rubber hammer or an ordinary one, but through a flat wooden spacer. Excess glue that appears is carefully removed.
Upon completion of installation, the entire surface is cleaned
When the tiles have been laid to the desired level, the lath is removed and the bottom row is laid. The resulting gap between the bottom row and the floor due to the unevenness of the latter, later cover it with a plinth.
Grouting joints.
Grouting is the final finishing touch, but no less important than all the previous ones. Poorly executed grouting will ruin even an ideal installation, but done correctly it can hide some flaws. You can prepare the grout yourself using a cement base. But it is still better to use ready-made grout mixtures.
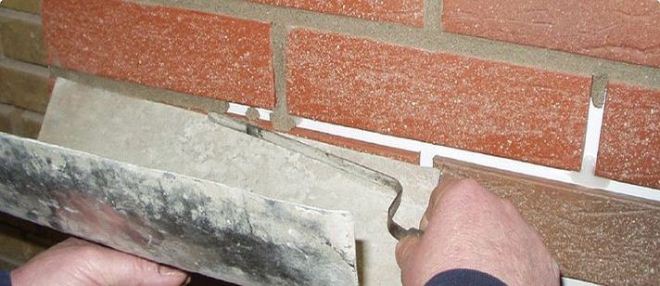
You can start grouting no earlier than 3-4 days after finishing the cladding. The seams between the tiles are cleaned of dust and glue residues, the crosses are removed and proceed directly to the grout. Rubber spatulas are used for grouting.
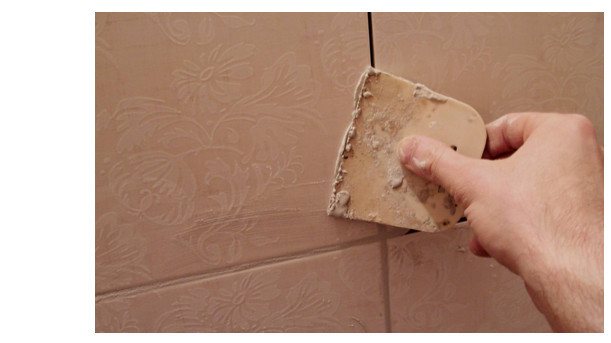
or you can apply it using a special device.![][8] Excess grout is removed immediately, and at the end of the work, the oven is additionally washed with a sponge, being careful not to wet the seams.
It will be possible to really heat the stove only after 3 weeks, and until then you can only lightly heat it.
The stoves are also lined with tiles.
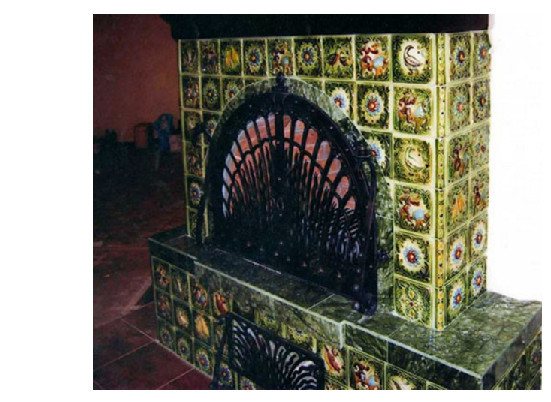
They look very beautiful, but the process of tiling itself is very complicated and it is better to invite specialists for this work.
Kinds
All grouts for construction work are represented by two large groups - cement and epoxy. There are others, they contain auxiliary components and have an improved formula. Such grouts include silicone, polyurethane and others. When it comes to the construction of furnaces, only cement and epoxy variations with heat resistance are considered.
Features of different types of heat-resistant grout for ovens:
- Cement - they are prepared on the basis of Portland cement and may contain sand additives. There are ready-made ones, as well as those that are diluted with liquid before use.
- Epoxy - based on resin with the addition of a hardener, which gives strength, also includes various dyes; they look more attractive than cement ones, but are more expensive and more difficult to use.
For household work, it is recommended to use heat-resistant cement-based grout. They are cheaper, easy to work with, and you can add the color you want. If epoxy is used, the help of a specialist may be required. When working with them, it is easy to make mistakes, which will affect the final quality. They require special application techniques.
Important! If the heat-resistant cement mixture hardens during long-term storage, it can be easily stirred again and continued work. If this happens to epoxy, it will have to be thrown away; after drying, it is not suitable for further use.
Choosing grout for the oven
Grout for stoves and fireplaces is produced by different manufacturers of building materials. They differ in their level of resistance to different temperatures. The composition for treating the seams of furnaces and other objects in contact with high temperatures must be heat-resistant.
When the structure is exposed to fire, heat resistance alone is not enough; the mixture for joints must also be heat-resistant. In addition to these requirements, other characteristics are also taken into account.
Criterias of choice
What you need to pay attention to when purchasing a stove tile sealer:
- Heat resistance and heat resistance - must withstand exposure to high temperatures, some have a maximum value of +300 degrees, others +1500 degrees (high temperature heat resistant).
- An obstacle to the penetration of moisture - the resulting seam should not allow moisture to pass through, otherwise it will lead to damage to the tile itself, it will become deformed, crack, collapse, which means its service life will be significantly reduced.
- Good quality of the coloring matter, resistance to fading - under the influence of high temperatures and open fire, heat-resistant mixtures can lose their original appearance, but when the tiles are decorative, this is an undesirable phenomenon; the grout must be resistant to changes in the main color.
- Features of additional components - the nature of the grout composition matters, heat-resistant mixtures can be coarse-grained and fine-grained, the first gives the effect of roughness, the second gives a glossy, smooth surface.
- Color - the heat-resistant mixture must meet decorative requirements; you can buy a mixture with pigment already added or add it when mixing by purchasing the necessary coloring substance at a hardware store.
Putty for stoves and fireplaces “Emelya”: pros and cons
Many modern architectural buildings are equipped with an individual heating system.
In cottages, dachas, and country houses you can see heating stoves or working wood-burning fireplaces. Performing an aesthetic and heating function, these structures, like all products created by human hands, need finishing. Such plaster should not be afraid of strong increases and sudden changes in temperature. Heat-resistant putty for stoves and fireplaces "Emelya" meets all the requirements for cladding heating equipment.
About the product
Putty for stoves and fireplaces "Emelya" is the brainchild of a domestic manufacturer of paints and varnishes and building materials, which has been successfully operating since the early 2000s.
Concord OST technologists guarantee that Emelya putty, like all other company products, meets all quality standards and norms. The product is easy to use and can compete with leading Russian and foreign manufacturers of dry and ready-made mortars.
Peculiarities
The durability and safety of using stoves and fireplaces is influenced by various factors: correct installation, selection of firewood, ability to properly build and maintain a fire. Maintenance, periodic repairs and renewal of the surface are also important. Putty plays an important role in this process.
Emelya plaster is used for finishing fireplaces, stoves, chimneys and chimneys. With its help, seams and cracks are sealed, which prevents the room from smoking and increases the long-term retention of heat by the structure. It is also used as a lining material for the direct laying of stoves and their tiling.
The putty has excellent binding properties, creates strong adhesion to surfaces and reliable fixation of various structural elements. It is worth noting that the coating can withstand temperatures of 900 ºC and is not suitable for work in the firebox area.
The basis of the Emelya fireproof putty is kaolin - heat-resistant clay, the diluent is water, it also contains additives BASF, TROY, ROHM AND HAAS and a Dow Chemical thickener. The cladding is sold ready-made, the color of the mixture is beige. The shelf life is one year (if the container is not opened).
Coating of heating equipment is carried out at an ambient temperature of 5C. Before use, the paste must be stirred thoroughly. At sub-zero temperatures, it is impossible to work with the composition, since the water crystallizes, and as a result, the putty will become unusable, harden, and lumps will appear in it.
Facing material "Emelya" is necessary for:
- Improving the appearance of the product. The putty is elastic, does not form cracks after drying, and creates a pleasant natural shade of clay in color. In the future, the smooth surface can be tiled, whitened or treated with heat-resistant paint.
- Ensuring the safe operation of the fireplace. Under the influence of high temperatures, cracks may appear in the masonry and in the brick itself, through which smoke begins to enter the room. This is extremely dangerous for people's lives. Emelya putty is capable of penetrating deep into the joints of masonry, filling all the cracks, ensuring the sealing of structural elements.
Emelya cladding is used to increase the positive characteristics of stoves:
- To facilitate the maintenance of the heating structure. Stoves and fireplaces decorated with this lining material are much easier to clean from visible sides.
- Increased heat transfer. The heat in a stove that has putty on it lasts longer, therefore, it will be comfortable to stay in the room for a longer period of time.
- Increasing the service life of the structure. The facing material for stoves and fireplaces is highly resistant to elevated temperatures, so if the putty is applied correctly, the heating elements will last for decades without the need for repair.
Advantages and disadvantages
The special heat-resistant putty mixture “Emelya” has the following positive properties:
- Environmentally friendly - safe for humans and the environment. This is an important criterion when choosing cladding, since with strong heating, many even normally harmless components of mortars can form toxins. The putty for Emelya stoves does not contain such substances.
- Long service life. According to the manufacturer, putty applied correctly to the surface of the heat source can last about 50 years.
Working with coating will have a positive result if you follow the manufacturer’s recommendations and follow the following sequence:
- The surface of the heating device must be cleaned of dust, dirt, grease deposits, and old peeling coatings. This will improve adhesion and allow the composition to hold much more securely;
- If the already applied coating will not be removed, you need to ensure its strength;
- The putty must be applied in a continuous layer or in spots with a construction spatula; the thickness of the facing coating should not be more than 5 mm.
- You need to have time to level the surface while the solution is wet. As a rule, 10-15 minutes are allotted for this process, after which the putty hardens.
- If the solution has hardened and it was not possible to completely level it, you can moisten the surface with a spray bottle and wipe the remaining area, periodically moistening the work area.
Experts recommend heating the stove or fireplace before starting work; the surface should be slightly warm, but not hot. These manipulations are carried out so that the solution adheres better to the surface being treated and dries faster. In addition, the smoke will allow you to detect possible cracks and thereby ensure a complete repair.
Reviews
Consumers managed to test the Emelya putty and were convinced by personal example that it is a high-quality, reliable, highly plastic material that is easy to work with. It is applied to the surface without problems and is easily leveled. After complete hardening, it does not crumble or crack.
READ MORE: Electric sauna stove, electric stove and electric sauna heater for 220V, Sawo stove and Harvia heater
As customers noted, it has a faint smell, but unobtrusive, so working with the putty is quite comfortable. The solution is easily removed from the tool and hands, does not weigh down the structure, and withstands high temperatures perfectly.
To learn how to plaster a stove, see the following video.
Many people want to see a stove or fireplace in their home or country house. But they face the question of not only functionality, but also safety, as well as aesthetic appearance. Coating for stoves and fireplaces “Emelya” will help solve these problems.
Compound
Its main component is kaolin - a white, heat-resistant clay that is formed during the weathering of rocks with a high content of feldspars. Distilled water serves as a diluent.
Purpose of additives:
- increasing the level of plasticization;
- elimination of possible cracks due to uneven drying of the applied solution.
Properties
The time when you made your own mixture for coating the fireplace and stove is over. Not all components are as available as before. For example, heat-resistant clays are quite difficult to find as they are used less.
Putty for stoves must meet several requirements:
- Heat resistance. A composition that does not have sufficient fire resistance should not be used due to the risk of fire.
- Elasticity. Using the composition you can make the surface perfectly smooth.
- Crack resistant. With constant heating and cooling of the surface, the material contracts and expands, which leads to cracking.
- The composition should be based on clay or a lime-gypsum mixture with fire-resistant components.
- Price is not an indicator of quality. You shouldn’t rely on it; the main help here is the information on the label and the composition.
Emelya putty has all of the above qualities, and it also has a number of undeniable advantages.
- Environmentally friendly. The coating consists entirely of natural ingredients and does not pose a danger to humans or the environment. During application and operation, it does not emit any harmful substances.
- Life time. If you follow all the recommendations for application from the putty manufacturer, it will last 50 years or more.
- Versatility. The mixture can be used not only for coating stoves and fireplaces, but also during brick laying. It will help increase the fire resistance and reliability of the entire structure. The coating can be used not only indoors, but also outdoors.
- The composition is odorless.
- Easy to apply.
- The composition does not need to be diluted; it is completely ready for use.
- The manufacturer gives 72 hours for complete drying at a temperature of at least 20 degrees.
The disadvantages of the Emelya coating include its price. Compared to conventional compounds, fire-resistant mixtures are always more expensive.
Application
Emelya putty is intended for finishing stoves and fireplaces. It is also used for grouting cracks. Before applying the putty, it is necessary to measure the area to be treated. This will allow you to correctly calculate the required volume of putty. The mixture consumption per 1 m² is 700 g.
You also need to take care of the tools, you need to prepare:
- spatulas for applying and leveling the solution;
- level so that the surfaces are level.
The best brands and their characteristics
Many compounds from different manufacturers can be used for cladding fireplaces and stoves. The company matters because the quality of well-known companies is time-tested, and spoiling their reputation is to your detriment.
Today there are dozens of different manufacturers, but let’s look at the most famous ones that produce heat-resistant mixtures that meet all the necessary requirements.
Well-known brands of heat-resistant grout:
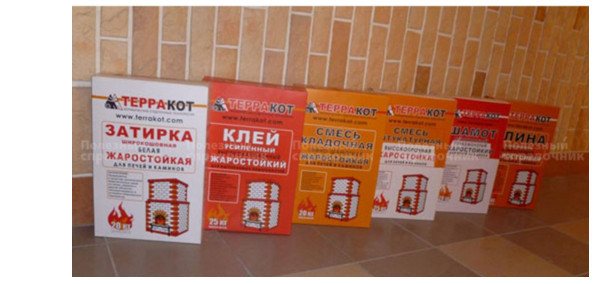
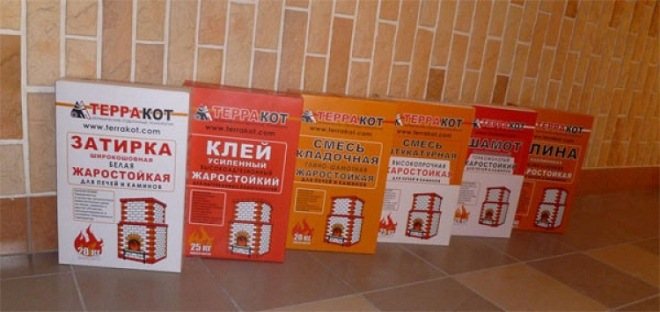
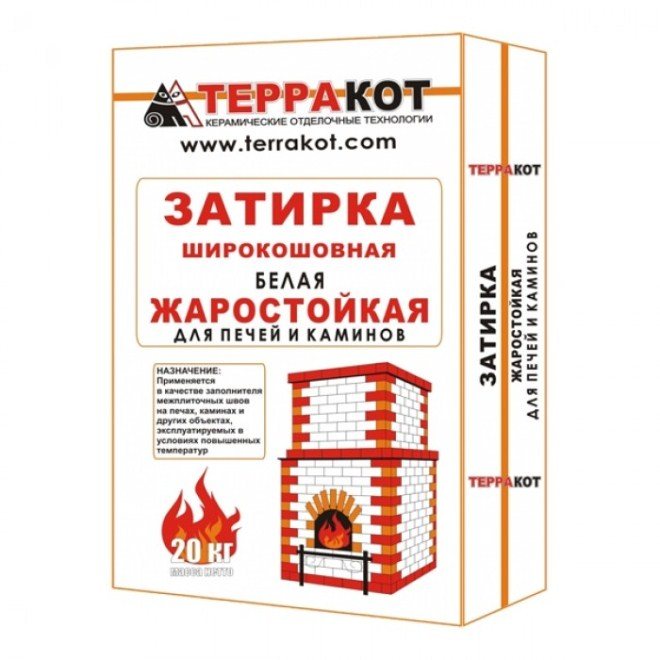
- Terracotta – they produce universal heat-resistant grout for stoves and fireplaces.
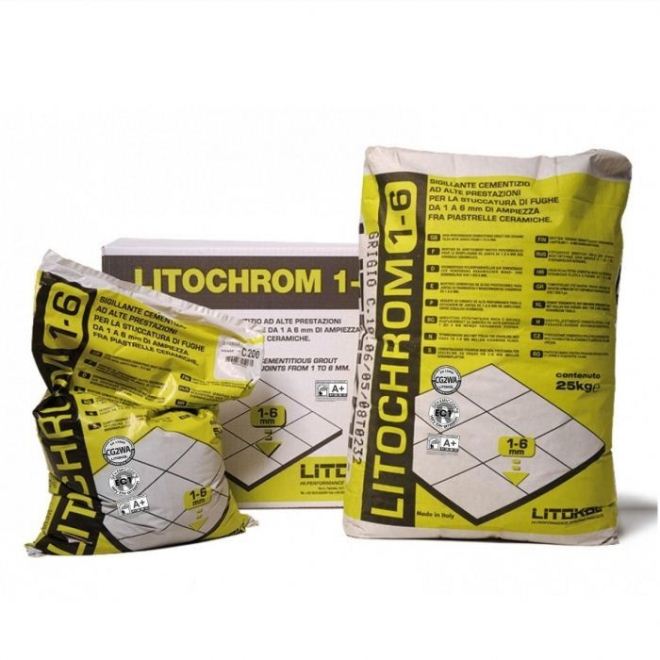
- Litokol – grout for thermal panels with clinker tiles.
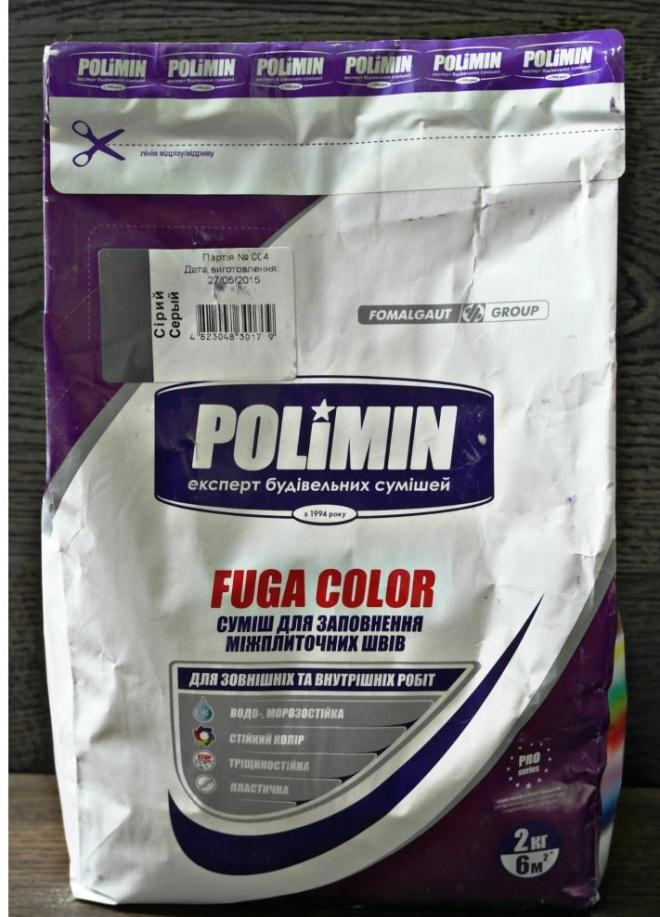
- Polymin – for sealing heated surfaces.
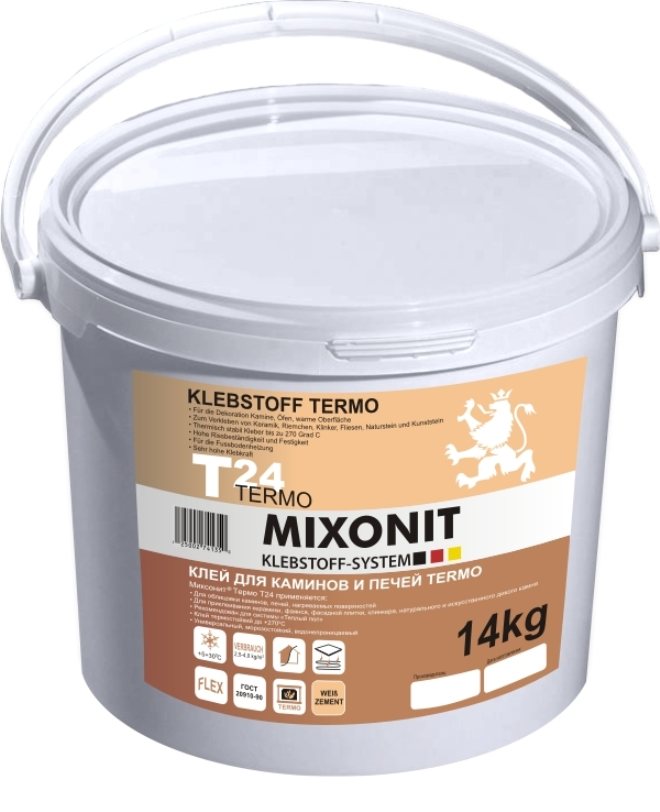
- Mixonite - for joints of clinker tiles of different colors.
- Superfireplace – for ceramic tiles of fireplaces and stoves.
Terracotta produces universal materials that are heat resistant. Such grouts adhere well, do not run off, and can be used in conditions up to +400 degrees. To start working with them, you need to mix the dry component with water. In this way an elastic composition is obtained. For 1 kg of mixture you need 280 ml of pure liquid. After cooking, it can be stored for no more than an hour, after which it hardens and needs to be kneaded again.
Hot-melt adhesive Superfireplace can be used for grouting joints of ceramic tiles, as well as other structures that are in direct contact with high temperatures. It has excellent adhesion and good strength, and can be applied to surfaces that heat up to +150 degrees under operating conditions.
Mixonite is a heat-resistant composition for clinker tiles with different color variations. Used for seams with a thickness of 2-20 mm. It has high strength and resistance to aggressive components. Withstands up to +100 degrees.
The heat-resistant composition Polymin for furnace work can withstand up to +160 degrees. Used for sealing heated surfaces.
On video: Heat-resistant grout for Terracotta tiles
Heat-resistant grout “Terracotta” wide-joint
Grout for stoves and fireplaces “Terracotta” is designed specifically for filling tile joints on heated surfaces.
COMPOUND:
White cement, microcalcite, heat-resistant binder, chemical additives.
DISTINGUISHING PROPERTIES:
Heat-resistant, waterproof, environmentally friendly, highly plastic dry mixture. Does not flow from vertical surfaces. Has a high adhesion force to the surface. Retains its properties when heated to +200°C. Does not crack when filled with wide joints.
RECOMMENDED SURFACES:
Ceramic, concrete, gypsum tiles, natural stone.
SURFACE PREPARATION:
The base must be free of dust and dirt, lumps of mortar, old plaster, oil and emulsion paint residues. Grouting of joints should be done no earlier than 1 day after cladding.
SPECIFICATIONS:
color of the mixture is white (base color, if desired, can be easily changed using a color scheme for water-based paints) pot life of the solution 1 hour humidity of the dry mixture 0.1% application temperature from +5 to +35°C layer thickness 10 mm heat resistance +200°C
aggregate fraction not > 2.5 mm solution strength (28 days) not < 100 kgf/cm2
METHOD OF PREPARING THE SOLUTION:
Mix the powder with clean water at room temperature to the desired consistency. Leave for 10-15 minutes. After repeated mixing, the mixture is ready for use.
EXECUTION OF WORK:
Fill the construction gun (tube with a nozzle) with the prepared mortar mixture and fill the seams, trying to insert the mortar more tightly and deeply into the seam. When working with glazed tiles, filling the joints can be done using a spatula. Remove excess mixture immediately. 1 hour after completion of work, clean the tiles from grout with a damp sponge. After the joints have completely dried, the surface is finally sanded with a cotton rag. During the first weeks, surfaces with filled joints should be washed with water without adding detergents to eliminate their influence on the color and hardening of the solution. The actual color of the grout is established as it dries, no earlier than 2 days after application. Note: filling of joints in coverings made of Terracotta ceramic tiles is carried out using a construction gun to a depth of at least half the thickness of the tile. After the seams have dried a little, unstitch them using a “stitcher”. Use a stiff nylon brush to remove excess mortar before it hardens.
MIXTURE CONSUMPTION:
Consumption of dry mixture for narrow joint grouting is 0.5-1 kg/m2, for wide joint grouting 2-3 kg/m2.
PACKING AND STORAGE:
Available in bags of 3 kg and 20 kg. The guaranteed shelf life of the mixture in undamaged original packaging in dry rooms at temperatures from -40 to +40°C is 6 months. The period of use of the mixture is not limited. The mixture retains its properties after freezing and thawing, getting wet and drying.
Products are not subject to mandatory certification. TU 5745-001-51125281-05 r.1.5
The products are safe for humans: sanitary and epidemiological conclusion from
04/22/2008 No. 45.01.01.574.P.000213.04.08
How to make oven grout with your own hands
At home, anyone can try to make a heat-resistant composition with their own hands. To do this, you need to buy plaster, liquid to obtain water resistance and dye. The components are mixed to a creamy consistency.
It is possible to make a composition from cement and clay. To do this, parts of these components are mixed with water. Portland cement with sand is often used for grouting. However, the service life of such a composition is reduced under the influence of high temperatures.
Methods of applying grout
The heat-resistant composition can be applied in three main ways:
- Semi-dry method.
- Using a construction gun.
- Over the entire cladding area.
Each technique shows its advantages and significant disadvantages.
Semi-dry method
The dry part of the composition is mixed with a small amount of liquid. The consistency ends up being like wet sand. By jointing this mixture is placed into the joints.
What are the advantages of using this method of applying heat-resistant grout:
- Cheapness.
- No components for plasticity.
This method has several more disadvantages:
- You cannot fill a seam smaller than 5 mm.
- You need experience with this method of application, otherwise the quality or aesthetics will be lost.
- The choice of colors is limited to gray and beige.
Using a construction gun
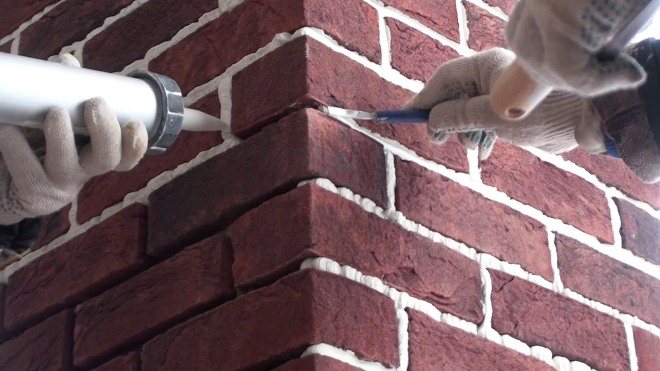
The heat-resistant mixture is diluted with water and poured into the gun. The tip is used to fill all the cracks, after which the excess material is removed. For a tighter fit, the mixture can be pressed with a tool or finger.
The advantages of this method of working with heat-resistant compounds will be:
- Easy to apply.
- No special skills are required, you can do everything yourself according to the instructions.
Some disadvantages of the technique:
- The work requires special tools.
- High cost of work.
Applying the composition over the entire cladding area
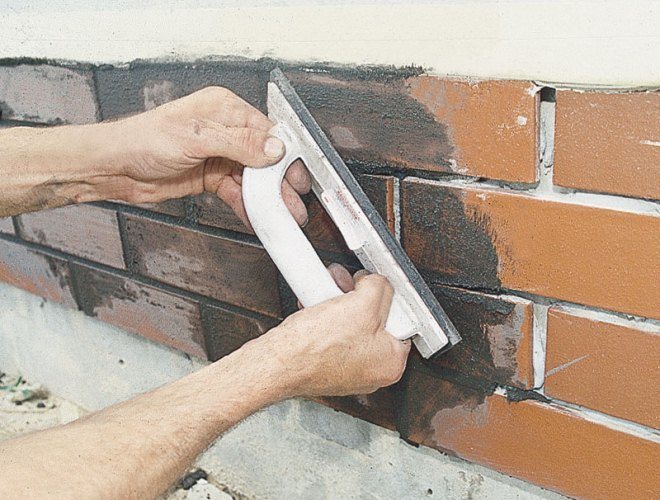
The prepared creamy mixture is applied to the entire tile, after which it is cleaned with a spatula with a rubber tip. This way, the grout remains in the joints, but is removed from the tile itself. A damp sponge is also used to remove the mixture.
The advantages of this method of working with a heat-resistant mixture:
- Long period of operation.
- Can be used for any type of tile.
But there are also disadvantages:
- High cost of work.
- Limited choice of color palette.
Tips for use
Useful tips to help you get the job done efficiently:
- For the upcoming work, a small amount of the composition should be diluted. There is no need to use the whole mixture at once, as it will dry out and will have to be diluted again. It is better to prepare quantities for one working meter, then for another. This will save time and material.
- If necessary, dye is added. This is done while mixing the dry component with the liquid. If the color has already been added, you do not need to do anything.
- After application using the chosen method, you need to remove excess material from the decorative elements and the entire surface of the tile using a spatula and a soap solution with a sponge. You can wipe the entire oven with a damp cloth only a few hours after the heat-resistant composition has hardened.
What matters when choosing a heat-resistant composition for a stove:
- Highest possible operating temperature.
- Minimum and maximum slot depth.
- The condition of the surface on which the composition is applied (horizontal or vertical).
- Included basic and additional components.
- Color, degree of discoloration.
Cement grouts are easier to use. They are cheaper and can be remixed once dry. Epoxy is expensive and requires experience and skills to work with, so you may need the help of a professional.
Heat-resistant grout for sealing the seams of stoves and fireplaces has a functional and decorative value. When choosing, attention is paid to the components, possible methods of application, color, service life, and features of use in different conditions. You need to select the application option based on personal experience, skills and the availability of the necessary tools.
Each representative has separate characteristics, which can be clarified with the manufacturer (on the website, by calling the phone number indicated on the package). If you prepare the grout yourself, it is better to consult with someone who has already done this to get useful advice.
Applying heat-resistant grout(2 videos)
Types and methods of applying heat-resistant grout (20 photos)
Heat-resistant putty for ovens: video instructions for DIY installation, photos and price
During active use of the furnace during the first five years, a large number of cracks appear that allow carbon dioxide and carbon monoxide to pass through.
For a room, such cracks are very dangerous, since a person staying in the house for a long time can cause irreparable harm to health. Therefore, they must be sealed, and fire-resistant putty will help with this. You can also use this mixture to hide visual defects.
READ MORE: Violet Magic Tulip: description and photo, features of cultivation and care at home
Properties and composition
The main difference between old and new types of putties is hidden in their chemical composition:
- In the past, mixtures of clay and sand were used to give the finishing material the necessary properties.
- Today the situation has changed somewhat due to the rapid development of the chemical industry - clay has been replaced by inorganic chemical compounds, which are somewhat cheaper and more common than natural clay.
The properties of fireproof putty also differ. First of all, this is due to the uniform heating of the putty over the entire area, which turns the entire surface of the furnace into a kind of radiator. Thanks to this property, the rate of heating of the room significantly increases in the cold season.
You can always update the putty without dismantling, which is really convenient. Thanks to this property, your stove will always look like new!
Choice of putty
In specialized construction stores, the choice of putty for stoves is simply huge, so purchasing the necessary option does not present any difficulties.
Many buyers focus on the cost of the mixture, as it plays a role. If you are purchasing putty for a master, then it is worth checking which company he prefers to work with, since different mixtures “lay” on the surface differently.
Criterias of choice
The main selection criteria are:
- Putty color;
- Permissible operating temperature;
- Fat content of the clay used;
- Mixture ratio.
These parameters play a role for specialists who professionally lay stoves. If you are faced with this task for the first time, it is better to check with a consultant about the best option.
Top brands
The best brands today are recognized as:
- Bergauf Bau Termo - Germany, an excellent German manufacturer, the average price of a 25 kg bag of mixture is 500 rubles.
- REAL is a Russian manufacturer that is distinguished by its high price and quality. The cost of a bag of material is about 800 rubles.
- PLITONOT – Russia, a bag of the mixture costs no more than 500 rubles.
What materials are heat-resistant putty for ovens made from? Can it be used for laying or finishing the stove with tiles, tiles and other materials?
Do I need to buy putty or can I make it myself? Let's figure it out.
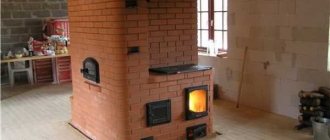
This stove could definitely use some exterior trim. How it can be accomplished is something we have to figure out.
Temperature
Let's immediately separate the flies from the cutlets, so to speak.
Requirements for finishing materials vary greatly depending on where exactly they are used.
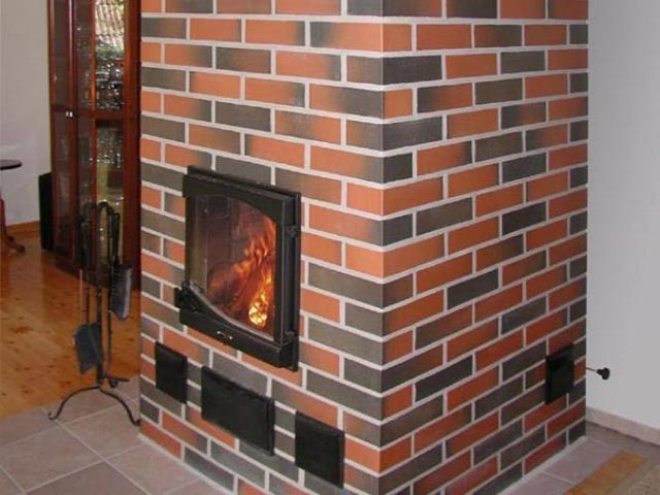
- The temperature of most of the outer surface of the stove after kindling and warming up ranges from 45 to 70 degrees.
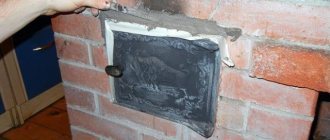
- The area above the hob warms up to 110 - 130 degrees. In addition to direct heating due to the thermal conductivity of the brick, infrared radiation from the stove is added there.
- The stove itself and the combustion door heat up to approximately 600 degrees. It is clear that the surfaces adjacent to them will not be much colder.
- Finally, the temperature inside the firebox is 800-1000 degrees.
Temperature of the outer lining of the furnace.
Most of the compositions for finishing stoves are universal and can be used as putty, masonry mortar and putty. Of course, with reservations related to temperature conditions.
Let's explore some popular solutions.
Basis-Heat
Before us is a dry adhesive mixture for cladding. The base is a sand-cement mixture; The temperature regime is limited to 150 degrees Celsius. The price of a 25-kilogram bag is 450-500 rubles.
The area of use directly follows from the recommended temperature regime: the mixture is intended exclusively for laying tiles on the outer surface of the stove; however, it is also suitable for filling joints or plastering surfaces. The instructions for use in this capacity are quite standard: layer thickness - no more than a centimeter; Before laying the tiles, it is recommended to reinforce the surface with steel mesh.
Coating Emelya
This product is based on kaolin, a white heat-resistant clay. The thinner is water. Other additives play a secondary role and are intended mainly to prevent cracking of the solution during uneven drying.
Here are the manufacturer's recommendations for using the composition.
- The solution is sold in a completely ready-to-use state. Shelf life in a closed container is 1 year.
The coating is supplied in a sealed container completely ready for use.
- The mixture is applied at a temperature below 5C, which is understandable: in this case we will avoid crystallization of water when freezing.
- Operating temperature is limited to 900 degrees. Conclusions? The coating can be used everywhere except the firebox: for external finishing of the stove and chimney, sealing seams, laying facing bricks or tiles.
- The layer thickness is no more than 5 millimeters. The limitation is associated both with shrinkage and possible cracks during coating, and with thermal expansion of different materials: stove bricks are laid with thin seams to avoid cracking.
Plitonite
The Russian-German company offers a whole line of finishing materials for stoves and fireplaces “Super-Fireplace”.
They differ in composition and, accordingly, functionality.
- “Fireproof” is the most heat-resistant of the compositions. The base is the already familiar kaolin, also known as fireclay clay. Designed for masonry (including fireboxes) and for external plastering of walls. According to the documentation, it is suitable for areas with temperatures up to 1200C.
READ MORE: Pink orchids 18 photos description of the phalaenopsis variety Pink Dragon and other names of yellow-pink orchids Care rules
Packaging Plitonit SuperFireplace Fireproof.
- Thermal masonry mortar is intended for the construction of external walls of furnaces and chimneys with an operating temperature of up to 400 degrees.
- The scope of application of the Hot Glue solution is external cladding, putty and grouting of joints between tiles or tiles. The thickness of the putty layer is also limited to 5 millimeters; The working temperature of the cement-based mixture is up to 150 C.
- “Thermal repair,” as the name suggests, is used to repair cracks in masonry and defects in plaster. Operating temperature - 400 degrees; layer thickness - up to 50 mm. Compressive strength after reaching full strength reaches 100 kgf/cm2.
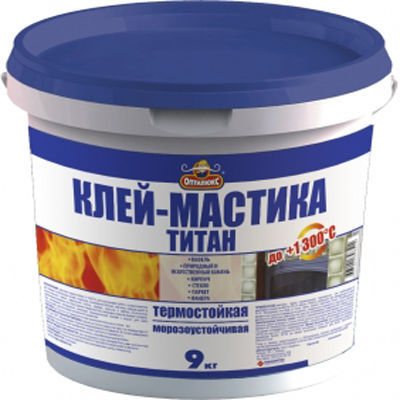
Mastic Titan
Another ready-made composition based on stone flour and a polymer binder. Characterized by the highest adhesion to any surfaces; among other things, can be used for gluing glass. Heat resistance - up to 1300 degrees; Accordingly, the scope of application when finishing the stove is described by the capacious word “everywhere”.
The author can confirm based on his own experience: if this mastic has set, it can only be removed with a piece of the wall.
crazy hands
The putty composition for stoves is often prepared by hand.
It only requires an equal amount of fine sifted sand and moderately oily clay.
- Dry clay is mixed with sand and filled with slightly salted water.
- After soaking for 3 days, the solution is thoroughly mixed again and can be used to putty joints or plaster the entire surface of the oven.
The technology for making oven putty yourself has a couple of subtleties.
- If the clay has insufficient fat content (the wall plastered in the test area crumbles when touched), skim milk (without cream) is used instead of salted water.
- Adding a small amount of slaked lime will make the putty white. As an option, the finished surface can be whitened with an extremely durable mixture of skim milk and crushed chalk. The service life of such coating is at least 10 years.
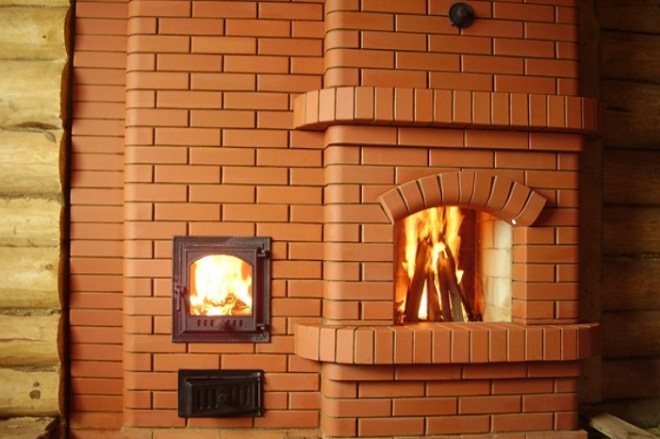
The stove in the photo is plastered and whitewashed using the method described above.
Conclusion
The video in this article, as usual, will invite you to familiarize yourself with additional information on finishing stoves and the materials used for this (see also the article “Waterproof putty - what is it, what is it for and how is it used”).
1 Preparation of the base 2 Let's talk about the solution 2.1 Selection of the components of the solution 2.2 Proportions of the compositions 2.3 Modern ready-made mixtures 3 Application technology 4.
1 Drywall 1.1 Jointing 1.2 Seams: reinforcement and sealing 1.3 Self-tapping screws 1.4 Puttying the surface 2 Cement plaster 2.1 Elimination.
1 Reasons for finishing walls with putty mixtures 1.1 Selection of finishing materials 2 Technology of finishing walls 2.1 Surface preparation before.