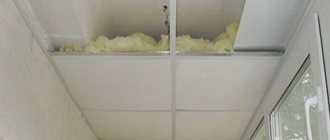
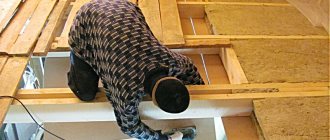
Why do you need to insulate your garage door?
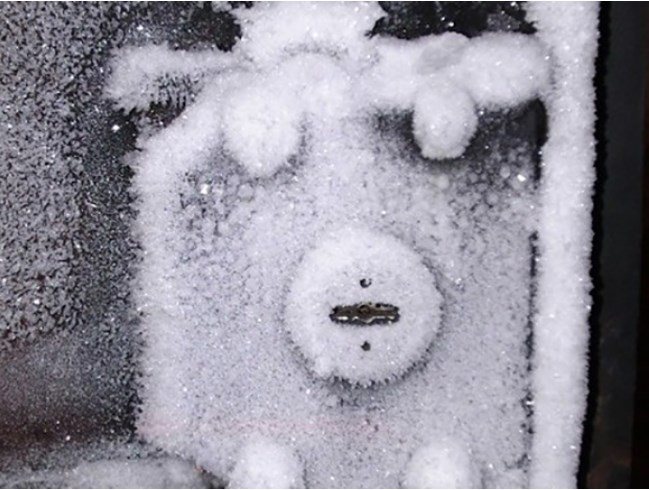
Metal garage doors become very hot during the warm season, making it difficult to stay indoors. In winter, moisture and drizzle are present on the surface of the valves, which, in turn, can lead to corrosion, destruction of the hinges and damage to the lock.
Insulating garage doors using a heat insulator that prevents metal from coming into contact with moist air prevents condensation from forming. Indeed, unlike ventilation, which can also be installed in a garage, in this case the temperature inside the room will not decrease, becoming equal to street conditions.
After insulation, the gate will not be susceptible to rust, even if the air humidity exceeds due to the fact that there are people inside the room or vegetables are stored. This means that the garage will last longer and will not cause the owner any problems during operation.
Also, do not forget that insulated garage doors in the summer will not release the accumulated thermal energy to the air inside the room. The temperature in the garage will be comfortable even in the height of summer.
Answers to some general questions
Before we go directly to describing the process of insulating a garage door with our own hands, I want to answer some questions that you will definitely begin to have as the planned date of the finishing work itself approaches:
Why insulate your garage door at all?
Many car enthusiasts may object to the proposal to increase the thermal insulation properties of their own car by saying that the main thing is the roof over their heads, and everything else is an unnecessary luxury.
But let's look at this statement and consider the problems that arise in the case of such a negligent attitude:
- Your stay in the garage is not always limited to walking from the gate to the car in the morning and back in the evening . Sometimes you have to roll up your sleeves and repair your vehicle. So in winter, in the absence of insulation, doing this will be more than problematic. I don’t recommend anyone to sort through steel parts in the cold. Therefore, strengthening the thermal insulation of the room in question is primarily necessary for a person, not a machine;
It is better to overhaul the engine in a warm place, not in the cold.
- Temperature changes, which are inevitable in the absence of insulation, lead to the appearance of condensation inside the garage , including hard-to-reach parts of the car. Such an abundance of dampness accelerates corrosion processes, which can ultimately result in very expensive repairs to your vehicle.
An example of what happens to a car living in an uninsulated garage
As you can see, the reasons are compelling enough to begin thermal insulation of the room. But why are we talking specifically about gates? Perhaps it would be better to do global insulation of the garage from the inside with your own hands?
It all depends on what material the walls of your building are made of:
- If it is made of brick, cinder block, foam block or concrete, then you can limit yourself to enhancing the thermal insulation properties of only the entrance part , which, as a rule, is made of steel. The fact is that metal has excellent anti-vandal properties and does an excellent job of preventing intruders from accessing your car, but at the same time it also has very high thermal conductivity, due to which it releases all the accumulated heat outside;
Thermogram clearly demonstrates heat loss from iron garage doors
- If it is made of the same iron as the gate itself, then, of course, you should insulate the walls and even the ceiling of the garage room . Otherwise, in winter it will be incredibly cold, and regularly falling condensation will cause significant damage to the car.
An iron garage in winter is not the best place to spend time
Do all types of gates need insulation and can be insulated?
The entrance, or rather the entrance, to your garage may have various design solutions that affect the choice of approach to the process of thermal insulation work.
Here are the variations found in our area:
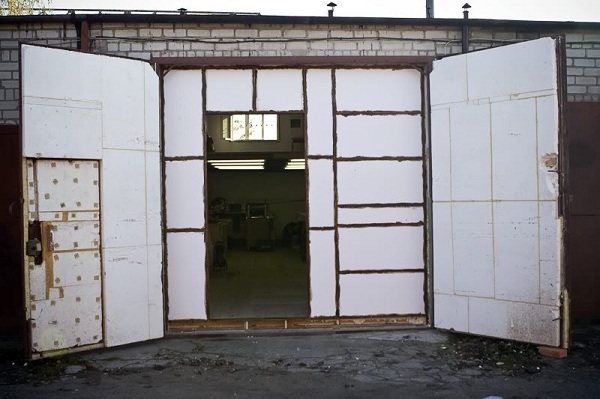
- Swing . This is a classic, which consists of a frame and two gate leaves made of sheet steel. Such a structure undoubtedly needs to be insulated, otherwise the metal will release all the heat in winter and all the coolness in summer from the room;
Two doors opening along the vertical axis
I recommend equipping the gate with an additional wicket. Then, in order to get inside, you won’t have to open the entire structure, letting in a large amount of cold; it will be enough to slip into a relatively small hole, saving precious heat.
An example of a steel swing gate with a wicket in one of the leaves
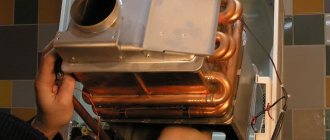
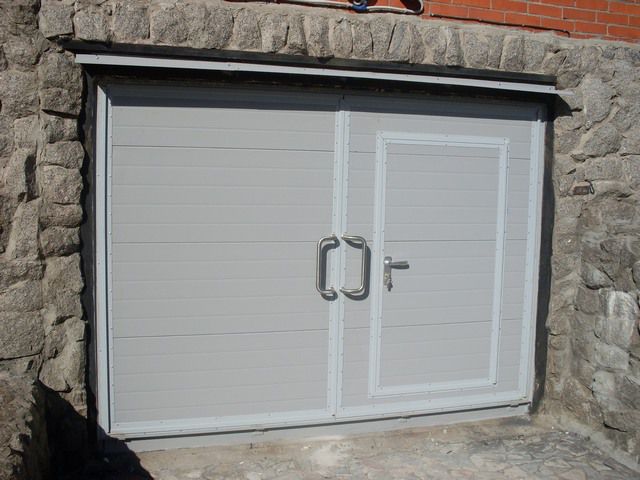
- Custom lift-and-swing . In this case, the working part of the structure is a sandwich panel, inside of which there is foamed polyurethane, which is already an excellent heat insulator. So you can just enjoy the fashionable gate and not take any additional action;
Scheme of the structure of the door leaf of custom-made overhead gates
- Homemade rotary-lifting . Here everything is similar with swing structures, since again we are dealing with a steel sheet covering the entrance to the building. It can and should be insulated;
- Roller shutters . They cannot be insulated due to their design features. Moreover, I would not install them in the garage at all due to their very low protective characteristics.
Why should you insulate from the inside?
In fact, why? After all, when it comes to a residential building, all the craftsmen unanimously advise performing insulation from the outside in order to avoid transferring the dew point to the inside of the building. But here we should not forget that when it comes to gates, their primary functions are protective and anti-vandal. That is, by placing insulation outside, you run a very high risk of losing it in the near future .
Insulation of garage doors should be done exclusively from the inside
What types of garage doors need to be insulated?
Any metal swing gates that are installed in most Russian garages must be insulated. This is due to the fact that the steel from which the frame and gate leaves are made react very quickly to temperature fluctuations. In winter, when there is severe frost, cold penetrates into the room through cracks, and condensation also appears, leading to corrosion of the car body. In summer, metal sheets become very hot in the sun and, accordingly, it becomes very hot in the garage. By insulating your garage door, you can solve all these problems.
The work plan for insulating garage doors necessarily includes surface preparation and installation of sheathing. Only after this is the installation of insulation, installation of sheathing and decorative finishing carried out. This sequence of work remains the same, regardless of which insulation option the garage owner chooses.
Finishing
Interior design is not limited to the mentioned lining, plywood or insulation. The following options are no less popular:
- siding;
- galvanized iron;
- chipboards;
- PVC panels.
They are attached to the sheathing with glue or self-tapping screws, the joints are treated with silicone sealant. The surface can be primed or painted. When deciding what to cover the gate with, you need to take into account the main requirement for materials - non-combustibility. Insulating garage doors yourself is not that difficult. Materials are available in different prices and quality. If everything is done correctly, it will be pleasant and safe for both the car and its owner.
Insulation options
When thinking about installing a heat insulator on the surface of garage door leaves, it is important to find out what types of insulation the modern market offers. The material with low thermal conductivity from which the insulation is made is most effective if it is of sufficient thickness. It is generally accepted that for garage doors the insulation thickness should be at least 5 cm.
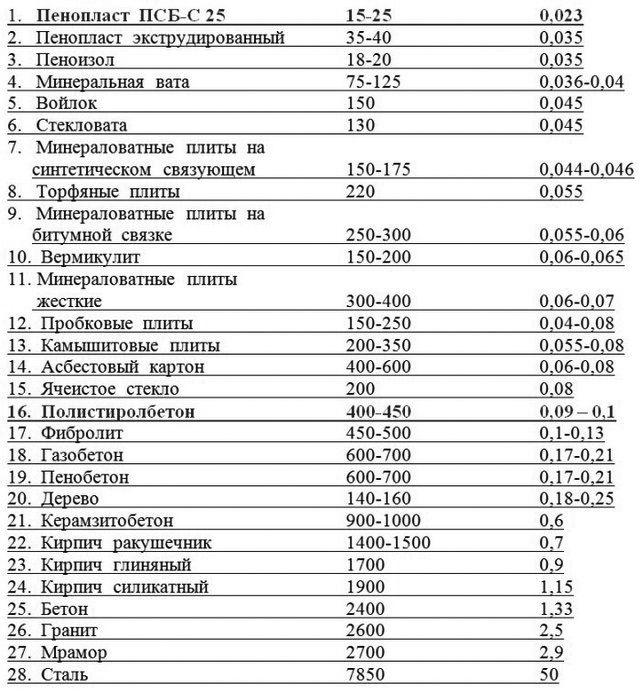
Knowing the properties and characteristics of one or another option, it will be much easier to choose how to insulate the garage door from the inside . The most popular types of insulating materials are the following:
- On a roll. They have a soft texture, due to which they can be installed even on a not entirely flat surface. A large number of different types of roll materials differ in properties and installation features. Thanks to the wide variety of insulation materials, you can choose the right option for any garage door surface.
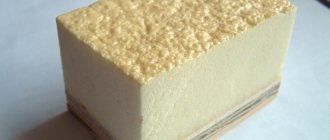
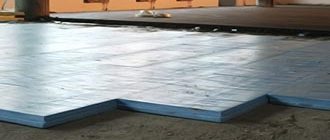
- In the form of tiles. Thermal insulation materials, having a certain size and a convenient square shape, are convenient and easy to install. Basically, polystyrene foam and extruded polyurethane foam (penoplex) are used to insulate garage doors. The first one benefits from its low cost and is a budget analogue of other options.
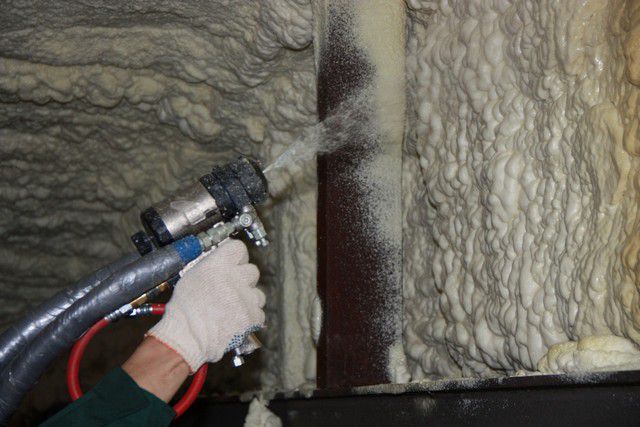
- Sprayable. The types of this insulation differ in the ingredients included in the liquid solution, the formula, the result, and are similar only in the method of application. The main advantage of this type of insulation is the ability to apply it to any surface, including uneven ones and with various small elements. However, you must remember that the installation technology requires the use of special equipment. Using liquid polyurethane foam, which has good heat-saving properties, you can reliably insulate your garage door.
Preparatory stage
It is necessary to carry out this before insulating the garage door from the inside, since the metal, although reliable, requires certain conditions in order to remain so for a long time. Gates are a structure not designed for loads, so super-strong grades of steel are not used for their production. This has advantages: lower price and ease of working with such metal. However, gates are strongly influenced by the environment, so corrosion is inevitable. To prevent the metal from rusting in just a couple of years, the simplest algorithm is used:
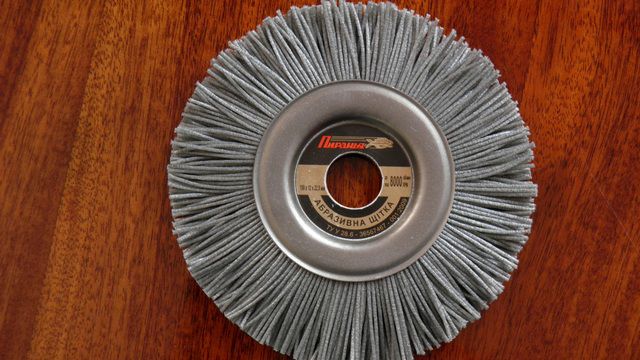
- The surface is thoroughly cleaned of old paint, rust and other debris. Instead of traditional sandpaper or a hand brush for metal, you can use a metal brush attachment.
- The stripped iron is degreased with acetone or another alcohol-containing solution.
- Primer. It is better to buy a special product. The cheapest, but not the best way is to paint with oil paint.
High-quality durable paints and varnishes are expensive, and knowledgeable people advise, if there is a shortage of funds, to use any bitumen-based composition. They are not particularly aesthetic, but this is not necessary, because the surface will subsequently not be visible.
To ensure that the insulation of garage doors is of high quality and that the insulation itself sits securely, a frame made of wooden blocks or a thin metal profile is mounted. It is attached inside to the stiffening ribs or edges of the gate using metal screws or screws. Drill 4-5 holes for self-tapping screws per meter. The cell structure is equal in thickness to the reinforcement cage or slightly larger, and corresponds in length and width to the dimensions of the insulation. Before starting work, the wood is thoroughly treated with an antiseptic and other protective compounds. A cheap, reliable method is impregnation with well-heated drying oil. This is necessary so that fungus or something similar does not appear. The lathing is also done if the final cladding of the gate is planned, which is attached to it.
Surface preparation and lathing creation
Having decided to sheathe garage doors with insulation, the owner of the premises must take care of preparing the doors for installation of materials. To do this, it is necessary to free the metal gates from foreign objects: remove brackets, hangers, hooks and any other hanging elements. The only fixed elements that remain on the sashes are those that are attached to the metal - the upper and lower latches and the lock.
At the second stage, the surface of the gate is cleaned from a layer of old paint. For this work, it is best to use a special metal brush or sandpaper.
If cracks, potholes with rust are found on the sashes, they must be eliminated by welding, installing patches in the future, and cleaning the seams. At the final stage, the surface of the garage door leaves is covered with two layers of protective bitumen mastic. Moreover, it is best to apply the solution in the transverse direction.
After it has dried, you can proceed to installing the sheathing - a special structure made of wooden blocks. Such a system will serve as a support for installing the sheathing and protecting the heat insulator. The bars are connected to each other using reinforced corners and self-tapping screws. When choosing bars for sheathing, it is important to take into account their thickness: it should be less than the selected material for thermal insulation, since the sheathing will still need to be attached to the bars.
When installing the sheathing, it is important to leave the latch at the top and bottom with the lock and bolt free: they will later be finished with their own protective covers. To ensure good tightness inside the cavity formed between the sheathing and the gate leaves, the sides of the bars adjacent to the gate and all joints between the bars are treated with polyurethane foam. To ensure structural rigidity, you can install one or two jumpers in the sheathing: this is no longer required, as this will complicate further work on installing the heat insulator.
Choice of insulation
Frankly speaking, I don’t see any difficulties at this stage, taking into account the amazing abundance of insulating materials in any hardware store. But, still, general ideas about what you need to better have.
Mineral wool
Excellent insulation made from natural raw materials.
Can be represented by the following subspecies:
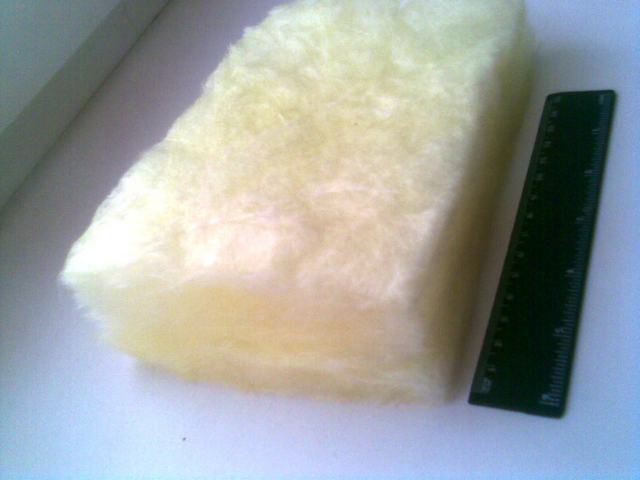
- Glass wool . Technical specifications:
Be sure to wear a respirator and safety glasses when working with glass wool. The fibers of this material, as you can see from the table, are incredibly thin and at the same time very brittle. As a result, the air around is filled with armadas of tiny, sharp particles that can damage the respiratory and vision organs.
Be sure to protect your eyes and throat with a respirator and special glasses
- Slag . Technical specifications:
I do not recommend using slag wool for insulating metal surfaces. Not only is it hygroscopic, but it is also acidic. That is, the acceleration of corrosion processes will be ensured.
- Stone wool . Technical specifications:
Roll of stone wool
Mineral wool in each of its interpretations has a fairly high hygroscopicity. This means that moisture will accumulate in it, which in turn will provoke the appearance of rust on the metal gates.
If you still decide to use basalt wool, be sure to additionally cover it with a vapor barrier film to prevent condensation from accumulating between the fibers.
Unrolled roll of vapor barrier film
Foam plastics include all foamed gas-filled polymers.
For us they all look the same, but in fact there are differences:
- Polystyrene . This is the most common representative of this type of insulation. It is a cluster of sintered balls, has minimal hygroscopicity, low thermal conductivity and low cost. But it crumbles due to low strength indicators, which should also be taken into account;
Insulating a garage with polystyrene foam is the most common option.
I recommend purchasing extruded polystyrene foam. Unlike conventional polystyrene foam, it has increased strength, so you will have much less waste during installation work.
Extruded polystyrene foam boards are an excellent material for insulation.
- Polyvinyl chloride . It boasts increased sound insulation properties and fire resistance. Although, due to its slightly higher price compared to cheap polystyrene, it is less popular;
PVC foam boards
- Urea-formaldehyde . This option is used in liquid form to fill all kinds of cavities and cracks, which is possible due to its peculiarity not to change its volume when solidified;
Urea-formaldehyde foam: from liquid to solid
- Polyurethane foam . And this is what we are used to calling polyurethane foam when we are talking about a rigid variety, and foam rubber in cases where we are talking about an elastic variation of this material. Construction foam has excellent adhesion to metal, high waterproofing and low thermal conductivity.
Rigid polyurethane foam is nothing more than the familiar polyurethane foam
How to insulate your garage door is up to you. I recommend using either basalt wool in combination with a vapor barrier, or extruded polystyrene foam.
Before you insulate your garage door, you need to check the effectiveness of your ventilation system.
If in your case it does not concern the area affected during the finishing work, then you can skip this step, but in the following situations you need to pay sufficient attention to it:
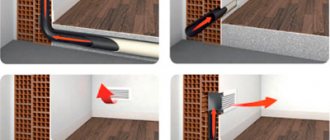
- The supply ventilation openings are located at the bottom of the gate itself . In this case, under no circumstances should they be covered with thermal insulation material during its installation. Be sure to take this into account, otherwise dampness will begin to accumulate in the room, negatively affecting your car;
The principle of operation of the ventilation system with an inlet opening at the bottom of the gate
- Air enters through the cracks formed by the loose fit of the valves . This option will not allow for complete insulation, so it is necessary to implement the flow of fresh air in a different way. Either follow the path described above, cutting a hole in the gate itself, or make it in the wall.
Air flow can also be carried out through a hole in the wall
Once effective ventilation has been established, you can move on to working with the gate itself:
Features of installation of popular types of insulation
When thinking about how to insulate a garage door, you need to remember that the installation features of insulation vary, depending on its type and characteristics. Most often, garage owners choose the following options:
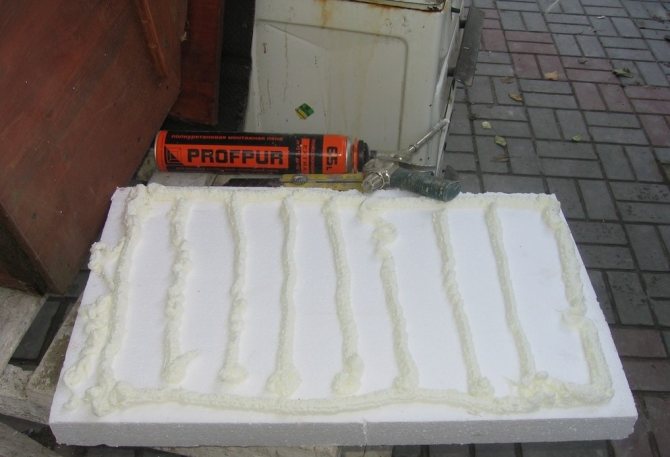
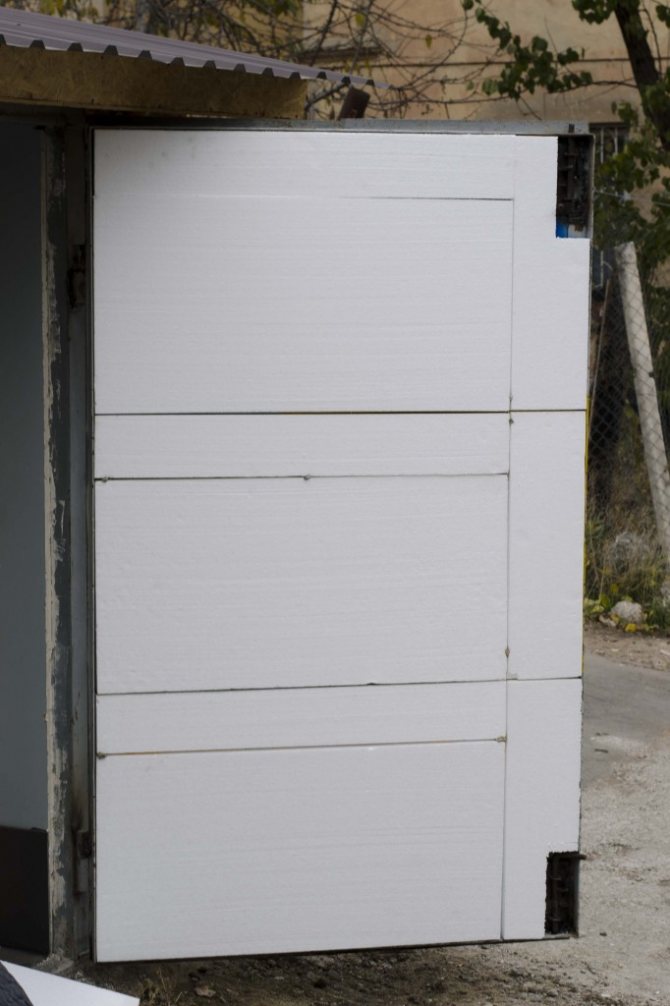
- Styrofoam. An inexpensive insulator of a certain thickness and size, having a flat and smooth surface. Polystyrene foam is very easy to install if you cut pieces of suitable size and shape, which are then inserted into the slots of the sheathing. You can first apply small strips of polyurethane foam or glue to the surface of the material that will be adjacent to the sashes.
To prevent pieces of foam from falling off the surface, they can be temporarily fixed with a tensioned wire between nails driven into the sheathing strips. After all the fragments have been installed, the joints and gaps are filled with polyurethane foam. When it hardens, the interfering residues can be cut off with a knife. - Mineral wool. The advantages of this material are its resistance to rotting, fire resistance, light weight and low price. And to get rid of its main drawback - hygroscopicity - a waterproofing material must be used during installation: a special or ordinary polyethylene film.
Installation of mineral wool includes cutting pieces of suitable size and shape, which are inserted into the holes of the sheathing. If there are small gaps, they need to be filled with foam. The vapor barrier is secured to the sheathing strips using a stapler: it must be laid from bottom to top in horizontal layers. Where the material overlaps, the joints can be taped with tape for good tightness. - Polyurethane foam. Since the material is sold in liquid form, you will need to purchase special equipment to apply it. Despite its high cost, polyurethane foam is used quite often by garage owners because it can be applied to any surface, even with any flaws.
Installation of insulation involves spraying it onto the surface of the gate leaves. If it is not possible to obtain the required layer thickness the first time, the procedure is repeated. After the solution has set, the sheathing can be installed.
How to insulate a garage from the inside with foam
Winter is getting closer, weather forecasters promise frosts down to -10.
The task is to urgently insulate the outer wall of the garage before it becomes covered with a centimeter layer of ice and frost. Of the many different options, I decided to choose polyurethane foam. For several reasons: 1. Easy to apply to surfaces with any irregularities. 2. The result is a monolithic layer of insulation without cold bridges. 3. I just wanted to conduct an experiment. On the way to the garage at MASTER I bought Turkish polyurethane foam, as I was told by the manufacturer of the AKFIX 70L winter brand, 4 cylinders for 160 rubles for a total of 640 rubles. Let me tell you, I immediately had to buy 2 more cylinders. And the total amount was 960 rubles. 4. It is advisable to moisten the wall before applying foam. Of course, if the wall was able to be heated. Otherwise, the water will immediately turn into ice, which will have to be melted
Next, after practicing, you can proceed to the areas adjacent to the ceiling. Fill the gun with a second can of foam. Shake well. It is not possible to reach everywhere with a pistol, holding it with the nozzle pointing downwards. For example, near the ceiling the foam nozzle will point upward. Therefore, the places where the nozzle needs to be directed upwards need to be foamed with the cylinder as full as possible. Since if the cylinder is almost empty, when the nozzle rises upward, not foam, but “air” will come out of the gun.
The second bottle of foam is gone
The third bottle of foam is gone
It took four cans of foam
This was the end of my foam supplies and I had to leave everything for the next day.
Second day. I bought two more cans of polyurethane foam. Since there were no bare, completely uninsulated sections of the wall left, I was faced with the task of warming the wall without using a gas burner. I turned on the IR drying, the wall began to warm up, but very locally and it seemed to me for a very long time (I just didn’t want to sit and wait)
I decided to use a hair dryer
Thanks to the hairdryer, the wall warmed up more or less, I melted the ice and sprayed it with water from a spray bottle. The water didn't freeze. I warmed up the foam cylinders in the bucket again and began to continue foaming the wall. The fifth bottle of foam is gone. After the fifth bottle of foam, a small surprise happened
It took six cylinders of polyurethane foam
That's all, the outer wall of the garage is insulated from the inside, without an air gap in which moisture would begin to accumulate if insulated with ordinary sheet insulation. It took time for everything (if you add up the hours of two days) 4.5 hours. The only thing I would like to say is that in some places there were unfoamed areas of 3-4 mm2. At places where layers turn and meet. It would be advisable to foam them all to avoid the formation of cold bridges with subsequent icing. I decided to go a little different way
How to extend the service life of insulated gates?
How long an insulated garage door will last depends on many factors, and, first of all, on careful and careful use. If the tightness of the finish is broken, cold bridges will form and, as a result, condensation will appear.
This process is fraught with the formation of corrosion, so you need to carefully monitor the surface of the casing, excluding any dents or holes as a result of leaving or entering the garage with a car or carrying out any repair work. Then the latches and locks will work normally, and the metal parts of the gate will not be destroyed.
Methods of carrying out work
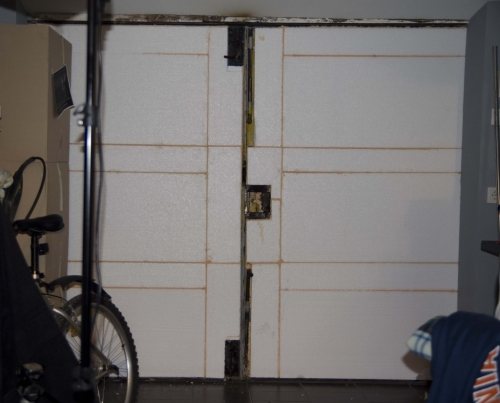
If the gate is double, then both door blocks are insulated
Thermal insulation of garage doors can be done using two methods:
- Without surface finishing;
- With subsequent surface finishing.
Explore ways to insulate garage doors and choose the one that suits your needs best.
Covering gates with clapboard not only makes them more attractive, but also serves as additional insulation
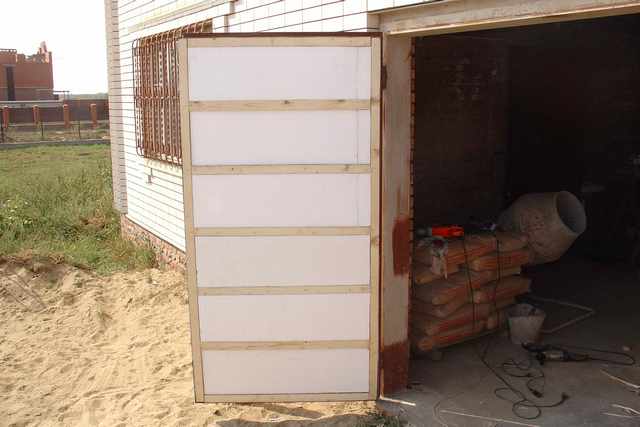
Method No. 1 - insulation without surface finishing
This is a simple technique, but to get a good result, you need to fulfill a number of important conditions. Before insulating your garage door, you should collect the necessary materials, the list of which is shown in the table below.
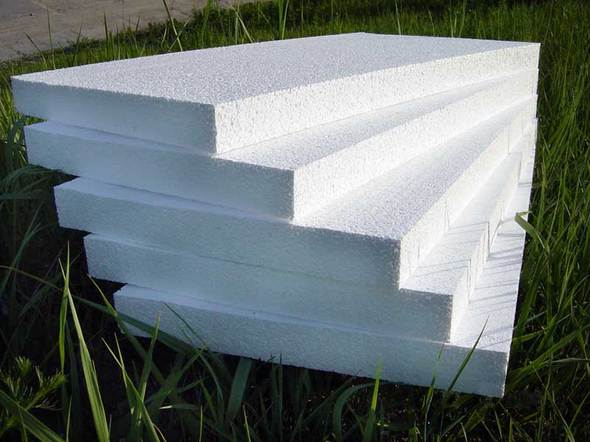
Polystyrene foam is the most suitable material for insulation
| Material | Recommendations for selection |
| Styrofoam | This option has good thermal insulation characteristics. The most commonly used sheets are 5 cm thick and 1000x600 mm in size; the unit price is 80-90 rubles. As an option, you can consider extruded polystyrene foam; it is noticeably more expensive, but also higher in strength. Mineral wool is not suitable for such purposes, as it does not tolerate high humidity. |
| Adhesive for insulation | It is best to use polyurethane-based compounds. They are sold in the same cans as polyurethane foam and are applied with a gun. Most often, one package is enough, the cost of a high-quality option is 300-350 rubles |
| Anti-corrosion primer | To prepare a metal surface for insulation, you will need a primer. It is best to buy the composition in an aerosol package, it is very convenient to apply, and such a container costs 150-200 rubles. Usually you need 1-2 cylinders to work |
This glue will securely fix the foam on the gate.
To carry out the work you need the following set of tools:
- A metal brush or drill attachment for cleaning a metal surface;
- Solvent or gasoline for degreasing metal and a cloth;
- If the primer is in a jar, then a brush is needed for application;
- Cutting polystyrene foam is done with a hacksaw for metal or wood;
A short, fine-toothed metal hacksaw is great for cutting foam.
- The glue is applied using a foam gun.
Now let's look at the workflow. It is described for swing gates - this is the most common option at the moment.
Insulation instructions look like this:
- First of all, you need to clean the metal from dirt and dust. If there are pockets of corrosion on the surface of the gate, they are carefully removed with a wire brush. It is easier to work with a drill or grinder with a wire disk; with their help you will quickly remove rust from all areas;
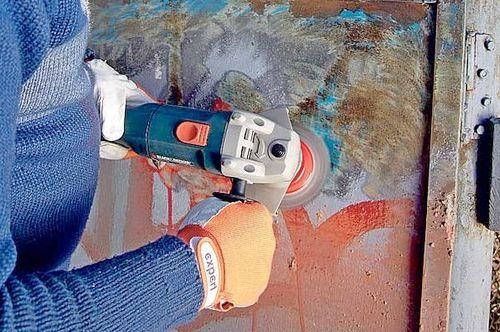
It is important to remove all rust
- After removing corrosion, the surface is cleaned of dust and then degreased. To do this, rags are soaked in solvent and gasoline, and all areas are thoroughly wiped. After drying, you can apply primer, it is best to do this in two layers to ensure good protection of the metal ;
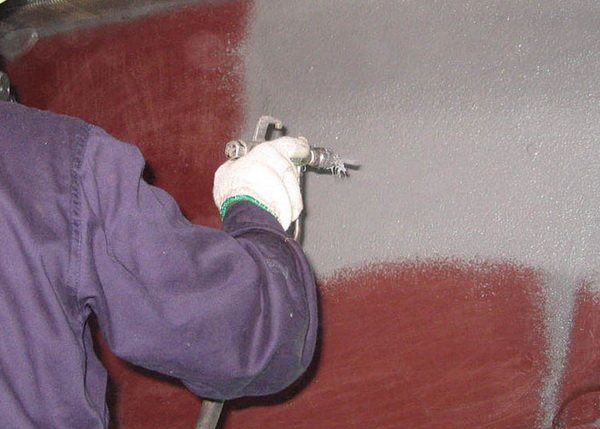
If you have a spray gun, the job becomes easier.
- The foam is tried on the surface; most likely, you will have to cut individual pieces, but it is better to do this later. Once the whole elements are in place, you can take precise measurements and cut the sheets so that they perfectly cover the surface. The glue is applied around the perimeter and in the middle in some areas; do not apply the composition very close to the edge so that when gluing it does not come out from the side;
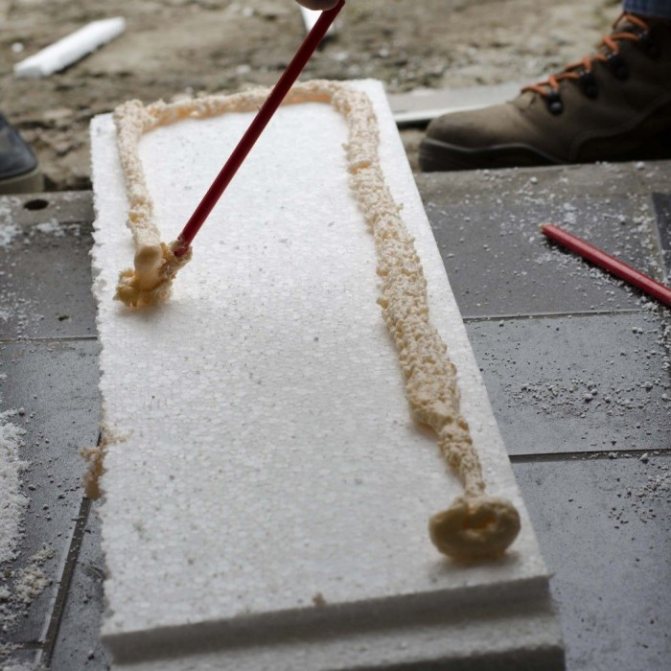
On small pieces, glue can only be applied around the perimeter
Before gluing the sheet, you need to leave it for 5-7 minutes. During this time, the composition will harden a little and will have the highest adhesive characteristics.
- The element is carefully placed on the surface and pressed. Due to their light weight, the sheets immediately hold perfectly and do not need to be fixed;
- Next, measurements are taken and the sheets are cut into pieces of the required size. The process is simple: a line is drawn on the surface along which the piece is cut with a hacksaw; you can use a level as a guide, then the cutting line will definitely be perfectly straight;
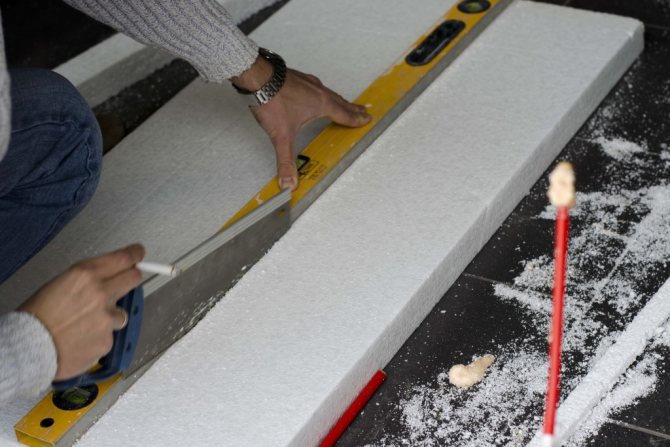
Cutting foam sheets is easy
- If it is necessary to cut a groove for the projection of the gate, this can be done with the same hacksaw or knife;
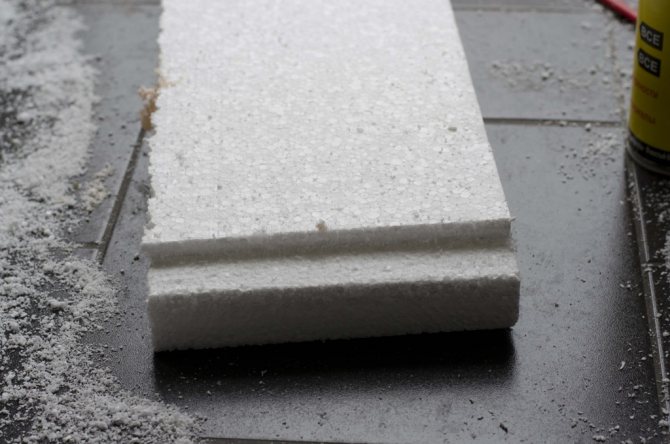
Cutting a groove couldn't be easier
- Gluing is carried out until the surface is completely covered. Do not pay attention to small cracks - we will eliminate them in the next step;
By adjusting the sheets to the gate, we achieve the optimal effect
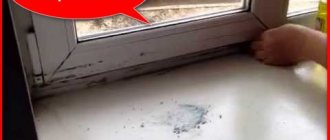
Don't forget to make cutouts for the top and bottom gate bolts. They should be of such a size that you can comfortably use the locks.
The valves should not rest against the foam
- All cracks and joints are filled with the adhesive that remains after fastening. It not only fixes the insulation, but also has excellent thermal insulation characteristics ;
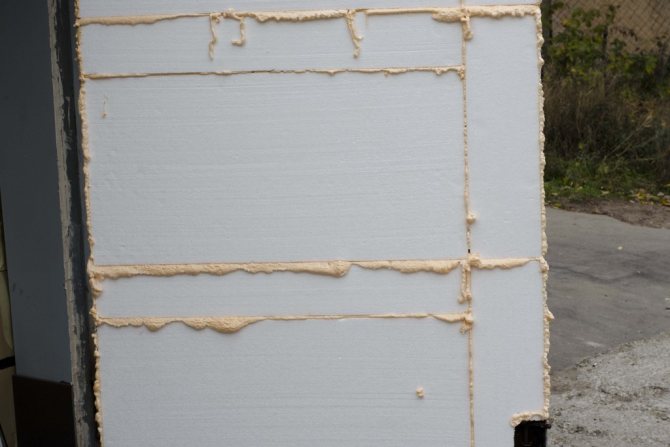
It is important to seal all the cracks for the best effect.
- After the composition has hardened, all excess is cut off. You get a smooth, neat surface. The gate will provide excellent protection from the cold, and the garage will become much warmer.
This is what the finished result looks like
Method No. 2 - insulation over a wooden frame
If we insulate garage doors with our own hands and then finish the surface, then the technology will differ from that described above.
First of all, let's figure out what materials are needed, in this case everything is used as in the case above, but a couple more items are added:
- A wooden block, the thickness of which should be the same as the foam. Choose options made from dry wood. Most often, people use pine, but you can also use larch, it is much stronger and is not afraid of changes in temperature and humidity;

You can use a spliced block; it costs less and resists deformation better
- To attach the block to the gate, we will use self-tapping screws with a press washer 30-40 mm long. Select a specific option so that the fasteners fit into the block a little more than half the thickness.
We will additionally need a screwdriver with a PH2 attachment for tightening screws and a drill with a drill with a diameter of 4.5 mm for drilling holes in metal.

Drill holes using a powerful power tool.
Insulation of the gate leaves in this case is carried out according to the following algorithm:
The process diagram is quite simple
- First you need to thoroughly clean the surface and prime it. Pay special attention to abutments and joints where corrosion is difficult to remove;
- The frame is fastened around the perimeter through the side stiffening ribs; first, holes are drilled in increments of 30-35 cm, and then a block is placed and screwed . If you have ribs in the middle, then they must either be attached from the outside through a sheet, or glued with liquid nails. I've used the second option several times and it holds up great; when buying glue, pay attention to whether it's suitable for metal;
Wooden blocks are attached in a way that is convenient for you, there are no restrictions
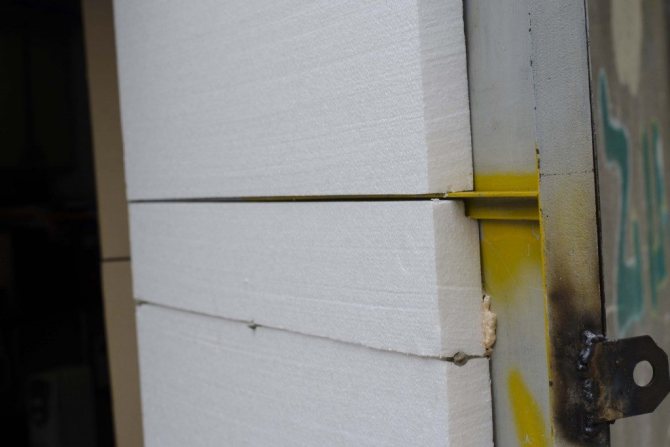
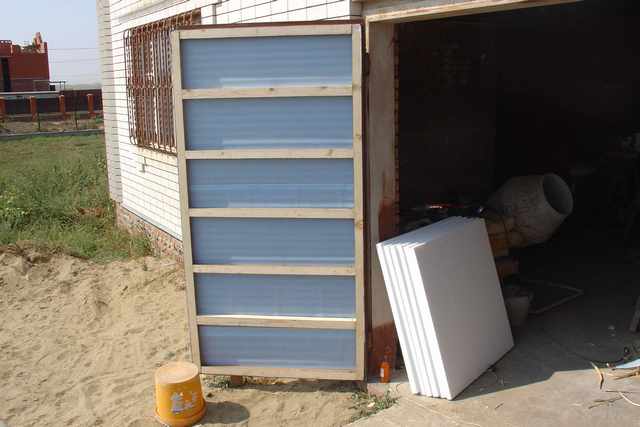
- The foam sheet is glued in exactly the same way as in the case above. The minimum thickness of the insulation layer is 5 cm; if you put thinner material, the effect will not be very good. It is necessary to fill all the openings in the frame, cutting out pieces according to the configuration of the structure;
Polystyrene foam is cut into pieces exactly to the size of the sheathing
- All seams and joints are filled with polyurethane foam; it insulates voids and serves as an additional fastening of the foam to the frame. After about 2 hours, when the composition has hardened, you can cut off the excess and proceed to the next stage of work;
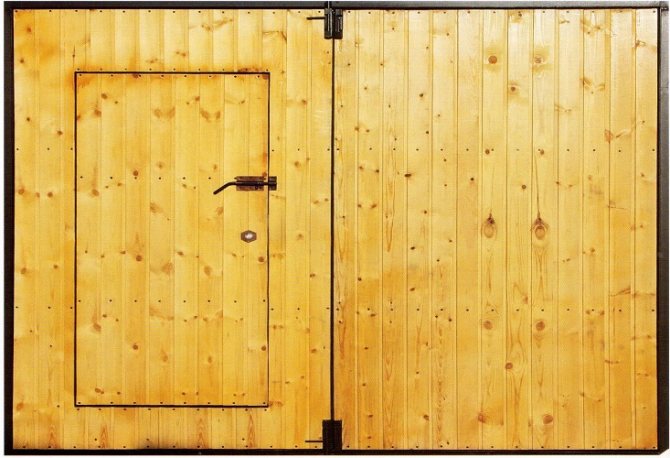
- Surface covering can be done using any available material: wooden lining, chipboard, fiberboard or moisture-resistant OSB boards. The latter option is best suited due to its strength, but moisture-resistant plywood can also be an excellent solution . The material is attached with self-tapping screws to the block.
The sheathed surface looks very neat, all that remains is to paint it
Additional recommendations for insulation
To keep your garage warm even more effectively, you can follow a few simple steps.
All of them allow you to insulate the garage door opening even better:
- Along the perimeter of the gate frame, all voids must be filled with foam. Often, during installation, people simply attach anchors or weld the structure to the embedded elements, forgetting about the cracks through which a lot of heat is lost;
- The slope around the perimeter of the opening can also be covered with foam plastic; this is necessary if the doors do not fit very well to the frame;
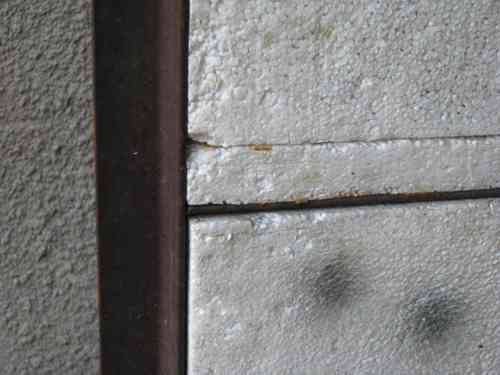
The slope can also be sealed with foam plastic
- Rubber strips can be secured along the perimeter of the sashes with self-tapping screws, and then all the cracks will be reliably protected. You can use both special elements and those cut from chambers;
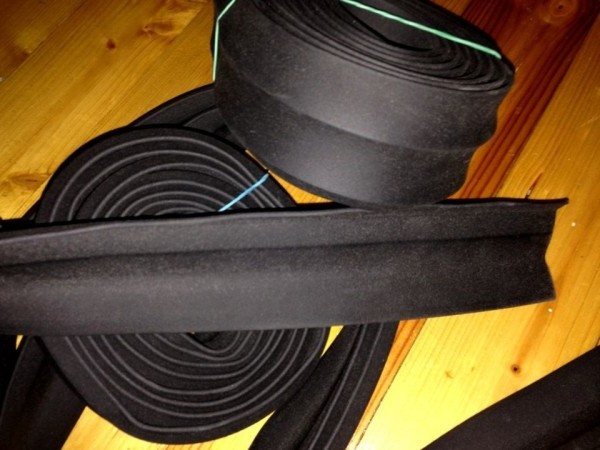
Rubber strips allow you to close the gaps between the sashes and the frame
- A canopy can be attached to the inside of the opening. It is best to use an option made of tarpaulin or awning fabric . It is fixed above the gate and lowered if necessary.
The canopy creates an additional barrier to the cold
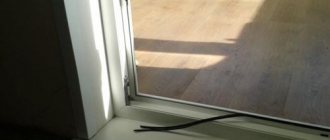
The finishing touch to the insulation process
After installing the insulation, you need to make sure that warm air from the room is not blown out through the cracks in the sashes. For this purpose, a seal is used, for example, parts of a rubber strip with a circular cross-section that look like a hose. It is secured with metal strips and self-tapping screws using a special tail. On the lower part of the sashes it is better to use a brush profile, which is also secured with self-tapping screws.
The insulation of garage doors is completed by installing the sheathing. For this, sheet materials of various thicknesses are used: chipboard, plywood, OSB board, as well as lining or wall panels. Installing garage sheathing is not complicated: you can simply fasten it to the sheathing bars, which, in turn, are treated with polyurethane foam around the perimeter. This step is necessary for high-quality tightness of the entire system. To make the cladding look presentable and last longer, some owners additionally process it: paint it or cover it with various materials.
Perimeter seal
An equally important factor, without taking into account which insulating garage doors with your own hands will be useless.
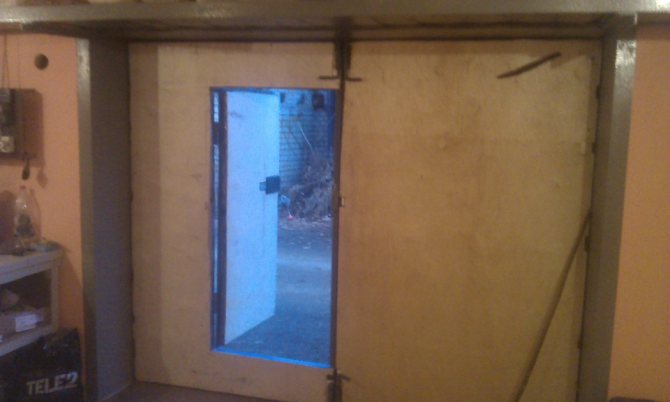
Entrance door
When choosing a gate, you should prefer a model with a regular door. This is a little more expensive compared to solid canvas, but it pays for itself in the energy saved on heating the garage. Obviously, repeated opening of a large door will carry away much more heat than a door that is several times smaller in size.
It is unrealistic to ensure an absolutely tight fit of the sashes along the entire perimeter of the opening. The materials used in interior spaces for windows or doors are not initially suitable. For garage doors - a solid metal structure - corresponding accessories are manufactured. A good solution is rubber hoses, hollow or filled with foam rubber or other similar material. The seal is sold together with the strip or, if it is missing, it is attached to the base with screws using mounting strips. If the gaps are very large, slats are additionally used, and brush profiles are placed in the lower part.
An accessory familiar to car service customers, it comes in several versions.
Thermal curtain
It operates on the principle of a fan heater, cutting off cold air right at the inlet. However, both the unit itself and the electricity it consumes are expensive.
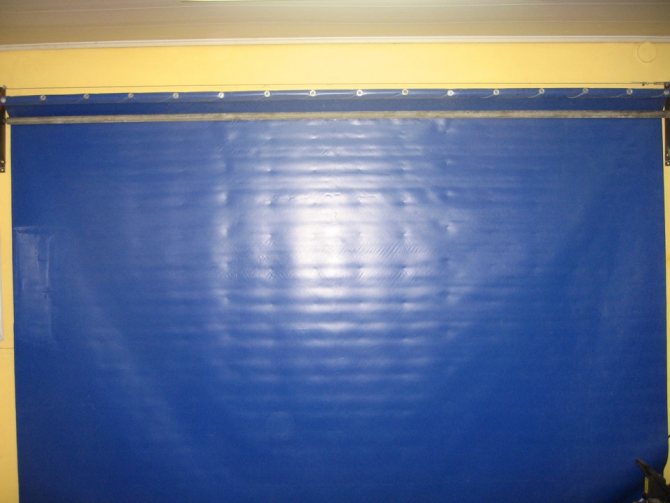
The same classic sliding curtain, only with water-repellent impregnation. Installation is simple: a baguette is secured above the gate or a metal string is stretched. They are easy to hang canvas curtains on.
It is made from vertically placed ribbons above the entrance. Dense technical polyethylene is cut into strips 10 - 15 cm wide. They are secured with a stapler on a wooden strip with an overlap of a centimeter - one and a half. Everything is pressed on top with the same rail for reliability. Whatever the curtain, it should not reach the floor, but should be a couple of centimeters shorter.