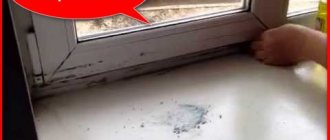
Penoplex is used to insulate plasterboard walls. This material replaces mineral wool, polyurethane foam and other insulating materials. Insulation of walls is a very important point in the process of organizing a comfortable microclimate in an apartment or house.

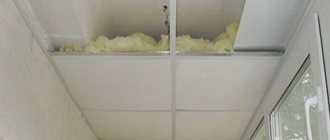
Insulation of loggias under plasterboard with penoplex
Penoplex and drywall are used in different spaces, from the hallway to the bathroom. The main thing is to clearly define what the advantages of penoplex are and why it is worth betting on it, bypassing the shelves with other heat-insulating materials in the hardware store.
PSB foam plastic: how to choose for a balcony
PSB foam plastic is one of the first insulation materials that began to be used for insulating balconies and loggias. Essentially, it consists of polystyrene balls with air inside, which stick together under slight pressure. The result is a slab with a rather fragile structure, which limits the method and place of its use.
PSB foam plastic is best suited for insulating loggias or balconies outside. This is due not only to the fragility of the material, but also to its increased thickness. If the insulation is installed from the inside, then it “eats up” the area for which this event is being held.
Choosing PSB foam for insulating a balcony
When choosing polystyrene foam for insulating residential premises (including balconies and loggias), you should definitely give preference to slabs marked with the designation “C”. It indicates the presence of fire retardants in polystyrene. These additives give the material self-extinguishing properties. Although such a composition will not protect against fire, it cannot become its root cause. And this is the main thing.
The second selection criterion is density. In the marking it is present in the form of a digital designation and is defined in kg/m3. Typically, slabs with a density of 15-25 kg/m3 are used for balconies. The higher the density, the lower the fragility of the slab. The strongest slabs have a density of 35-50 kg/m3. But the price of such material is correspondingly higher.
Thickness is an important parameter, based on which the thermal insulation properties of the material are determined. The most common range of foam thickness for balcony insulation is 20-50 mm. The scope of application of a particular slab also depends on the thickness and density:
- Foam plastic PSB-S-15 20 mm is an economical solution for internal insulation of balconies along joists, where a concrete slab is used as an enclosing structure. The material is mounted using mounting adhesive or specialized foam using plastic dowels. Installation on ceilings is allowed, where the material does not take up much usable space.
- Foam plastic PSB-S-15 50 mm - used for insulating balconies and loggias outside. Due to the increased thickness it will provide good thermal insulation even with thin partitions.
- Foam plastic PSB-S-25 Facade 50 mm - characterized by high insulating ability and strength. It can be used for installation on first floor balconies with a high risk of mechanical influences.
How is PSB foam insulated on the outside?
The instructions for external insulation of balconies with PSB slabs do not differ from those for facade thermal insulation. The slabs are attached to the base of the ceiling using specialized glue. Additionally fixed with plastic dowels with an enlarged head. Before installation on mineral surfaces, waterproofing must be carried out to prevent moisture from penetrating into the base structure.
To protect against mechanical loads and other external factors, PSB-S foam requires additional finishing. Decorative plaster with preliminary waterproofing can be used as finishing. Higher aesthetics are achieved by covering the heat insulator with vinyl or acrylic siding.
Application for interior and exterior decoration
An expanded polystyrene sheet attached to the frame allows you to protect the room and the building as a whole from the penetration of cold. This idea is a practical option for ensuring a comfortable temperature in the living space. Internal and external finishing of surfaces with polystyrene foam has its own characteristics, which you need to become familiar with at the stage of planning the insulation of the room.
We advise you to look at: insulating a balcony with mineral wool and penoplex.
Installation work for exterior finishing
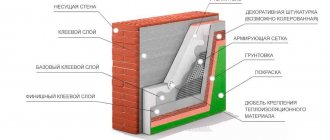
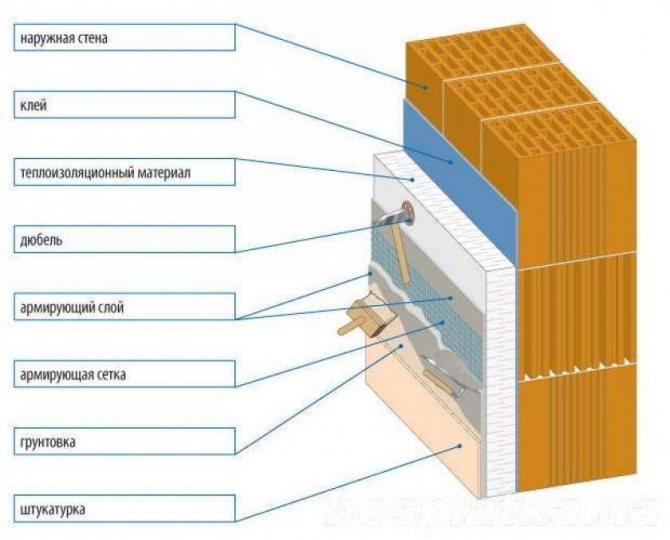
Insulation of the outside with penoplex should be performed in the following sequence:
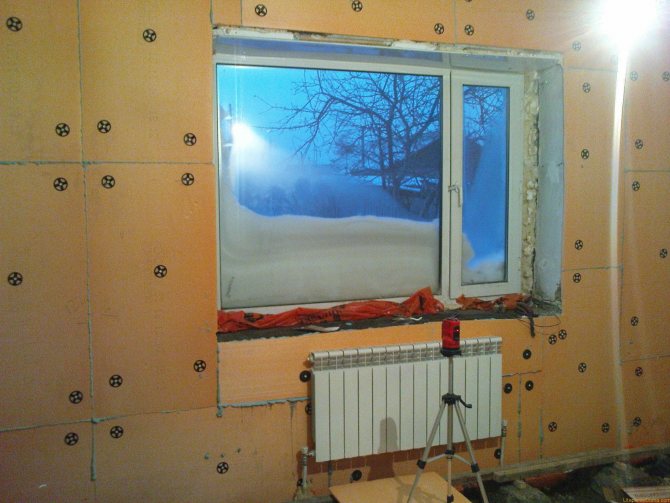
- To fix penoplex sheets to the wall, the surface must first be leveled. This is not difficult to do; just remove the flaws and plaster the coating.
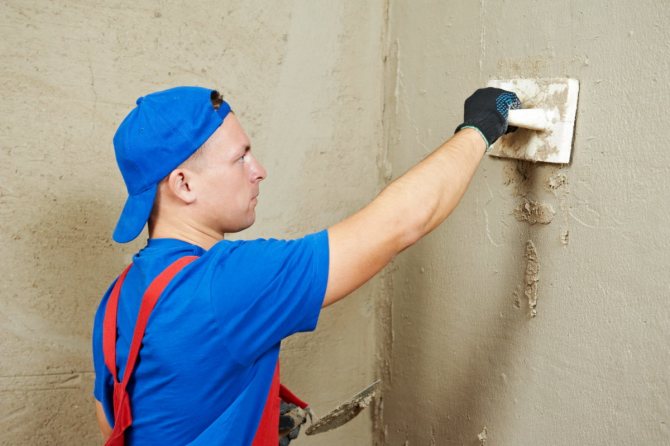
- When the plaster has dried, you can begin installing the penoplex. The process is carried out by gluing slabs of material onto a special adhesive solution on top of the plaster.
Useful tips
- In order for the penoplex to be securely fixed on the wall, the sheet coated with glue should be applied at a distance of 20 millimeters from its actual placement. Then, pressing on the plate, move it to the desired place.
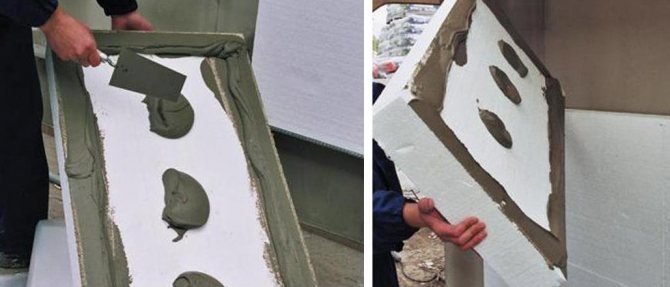
Glue on penoplex is applied pointwise or using a construction gun along the perimeter of the sheet - Having attached the material with glue over the entire surface of the outer covering, you should proceed to the next step - attaching the sheet of polystyrene foam to the frame using dowels. To securely fasten the sheets, you should prepare dowels at a rate of 4 pieces per square meter.
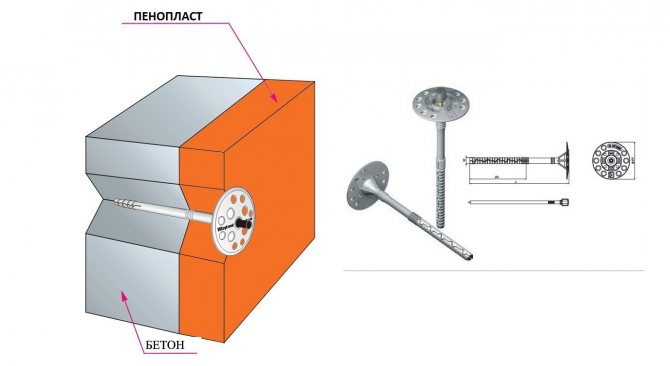
Fastening penoplex to concrete using “umbrellas” for greater strength - In order for the gypsum board and expanded polystyrene to be securely fixed around the perimeter, at joints, corners, near doors and windows, more dowels should be screwed in. You need to calculate so that there are approximately 6-8 dowels per square meter.
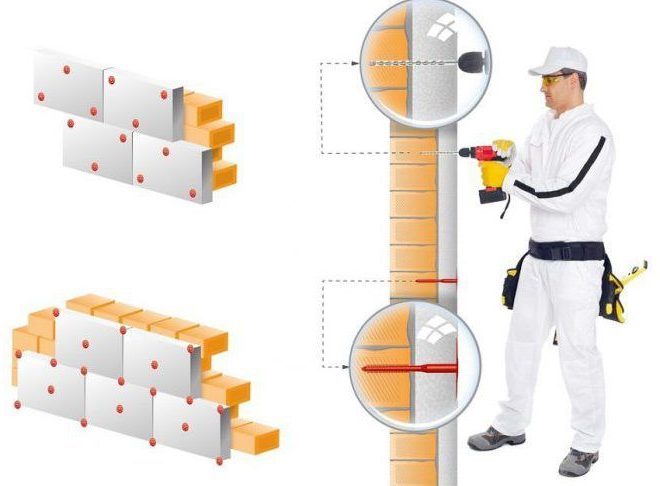
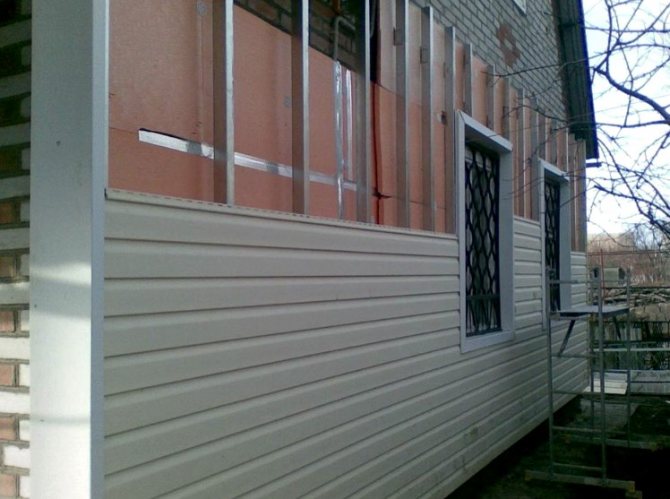
The fastening of penoplex differs depending on the location of insulation. - Finishing, in the case of exterior finishing, is carried out in several ways. In this case, you can level the plaster using sandpaper that was applied to a sheet of polystyrene foam. This technique also uses finishing using metal or wooden beams, as well as siding.
Finishing with penoplex and siding of the facade of the house - A reinforcing mesh is applied on top of the plaster or other selected finishing material. It is overlapped so that there are no sections of coverage left without a mesh.
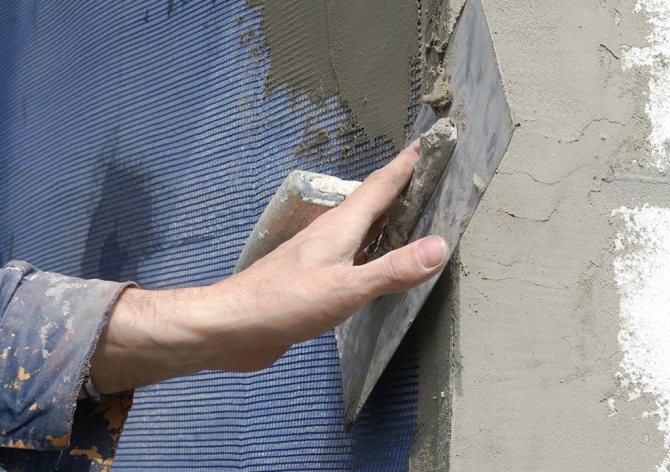
Reinforcing mesh applied to the wall and the process of filling it - Having insulated the outer surface using penoplex, you can proceed to the final stage. Namely, to carry out cladding with the selected material. If these are plasterboard sheets, then they can simply be glued on top of polystyrene foam using a special fastening adhesive for installation work. If another material is preferable, such as wooden beams or siding, then it must be fixed on top of the foam with dowels or screws, passing the fastening element through the foam and the frame. To do this, you need to select fasteners of the required diameter and length.
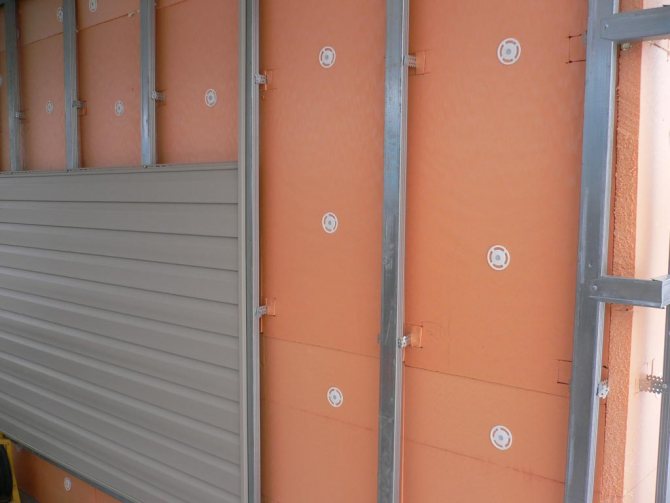
Penoplex laid under the cladding of the facade of the house - After completion of the work, if the cladding was carried out using a sheet of plasterboard, you need to apply a primer that will protect the surface from corrosion and fungal formations.
- When the primer has dried, the first layer of plaster is applied to the drywall sheets, and then sanded with sandpaper.
- After applying and leveling the second layer, you should begin decorative finishing.
By completing the process in the correct order, paying attention to every detail, you can obtain a reliable, cold-proof exterior finish.
Interior decoration
Various adhesives are used to attach penoplex.
If you glue penoplex on the interior wall of a room, the process is similar to that for external finishing.
The sequence is as follows:
- Sheets of foam plastic are fixed on top of the plastered and leveled wall. How to secure the insulating sheets is up to the owners alone. You can mount foam boards onto frame profiles, or you can attach them with glue.
- Indoors, it is recommended to install a vapor barrier foil film on top of the polystyrene foam before sheathing with dowels or gluing drywall. This will extend the service life of both polystyrene foam and plasterboard construction.
Internal insulation of house walls using waterproofing and several types of insulation - When the drywall is glued to the penoplex or fixed with dowels, it is necessary to plaster the recesses from the screws that hold the drywall to the surface. If the sheets were glued, then the gaps between the sheets should be sealed and the gypsum board surfaces should also be plastered.
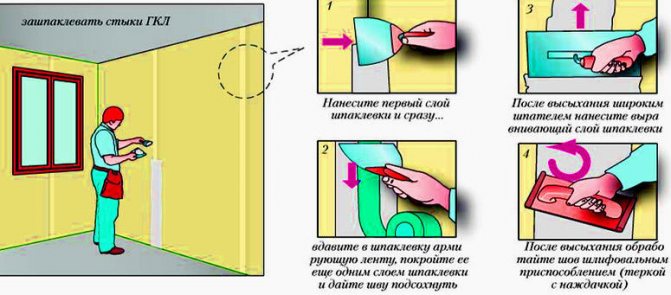
The process of filling joints between plasterboard sheets - After the first layer of plaster has dried, it is rubbed down using sandpaper. Then a new finishing layer of the mixture is applied.
- The dried top layer of plaster should also be sanded, and then proceed to decorative finishing (painting or wallpapering).
The process of insulation and transformation of walls can be considered complete.
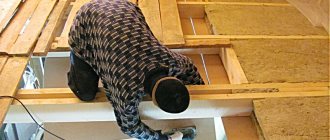
Extruded polystyrene foam for balconies and loggias
Extruded polystyrene foam is the same foam, but made using a different technology. The raw material is fed through a molding machine (extruder), which compacts the slab. In this way, a homogeneous dense structure with increased mechanical strength is achieved. Extruded polystyrene slabs easily withstand loads from walking and other mechanical influences, and practically do not shrink.
The advantages of extruded polystyrene are as follows:
- excellent insulation even with small thicknesses - 2-3 cm.
- zero hygroscopicity;
- vapor tightness;
- ease of installation.
Thanks to these features, the material is suitable for thermal insulation of rooms from the inside. Often this type of turnkey insulation of balconies and loggias is carried out by craftsmen. Although simple installation technology allows you to do it yourself.
There are quite a few manufacturers of XPS polystyrene. Despite this, it is possible to insulate a balcony with Penoplex or Technonikol equally well if the material was purchased from a reliable supplier and has certificates confirming its quality. We recommend using for thermal insulation:
- TECHNONICOL CARBON ECO 1200x600x20 mm - for rooms with a small area. Due to the small thickness, high-quality wall insulation is achieved without “eating” the area. These plates are mounted end-to-end. For better thermal insulation, it is recommended to foam the joint.
- TECHNONICOL Technoplex 1180x580x50 mm is a good choice for insulating both walls and floors with ceilings from inside the balcony. The increased thickness makes it possible to enhance the thermal insulation effect and further increase noise absorption from the street. The presence of a tongue-and-groove lock allows you to avoid cold bridges across the joints.
- TECHNONICOL CARBON ECO 1180x580x100 mm is the choice for spacious and heated rooms. If your block has been demolished, and the balcony or loggia is part of the room or kitchen, this brand of extruded foam will be the best option. This foam ensures that there is no penetration of cold from the outside and no heat leakage from the room. If you follow the instructions for insulating balconies from the inside, it will ensure a guaranteed high result.
Features of the material
Penoplex in the construction industry is called expanded polystyrene. It appeared on the market not so long ago, but nevertheless has earned high popularity among repairmen and owners of apartments or houses. The features of penoplex are:
- the material is used for wall insulation and plasterboard covering;
- is produced in the form of plates, which facilitates the installation process on the frame;
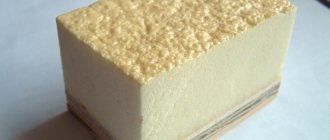
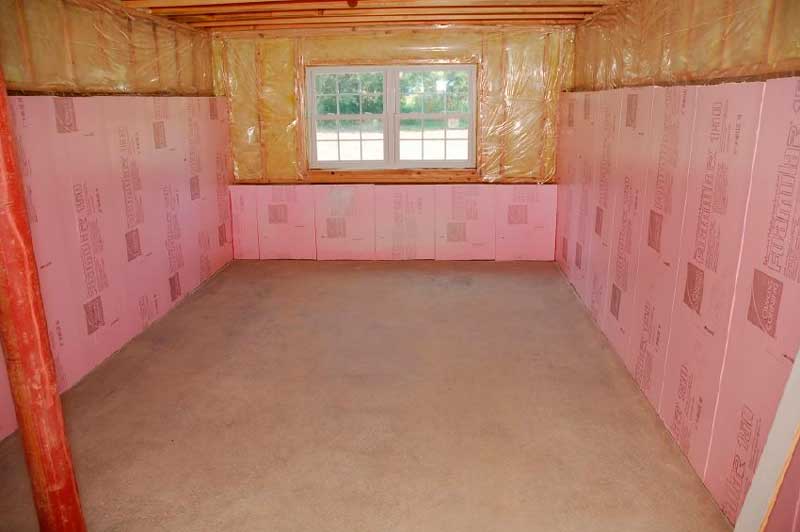
Penoplex in slabs for insulating rooms under plasterboard and other finishing materials - looks good and durable. Despite this, the slabs are airy and light. Not surprising, because 90 percent of the raw material consists of air. This result is achieved by using an extruder apparatus in the manufacture of penoplex. It is created under pressure at high temperature. Thus, the material undergoes natural adaptation to possible temperature changes in the room in which the insulating penoplex will be installed;
Floor insulation with penoplex slabs for further finishing - insulating the walls from the inside with penoplex and plasterboard allows you to evenly distribute heat over the entire surface;
- attaching penoplex under plasterboard sheets will ensure heat retention on the surface;
;
- a sheet of expanded polystyrene protects the plasterboard covering from moisture. Excess moisture leads to damage to plasterboard structures, the appearance of fungus, and corrosion on metal frame profiles;
- expanded polystyrene protects the room from unnecessary sounds coming from neighboring rooms or apartments;
- lovers of eco-renovation should pay attention to such material as penoplex, because it is safe and is positioned as environmentally friendly;
- Despite its light weight, the penoplex material is durable and can withstand even high levels of load on its sheets.
Insulating the walls of a private house with penoplex indoors
All of the above features indicate that the polystyrene foam material is worthy of the attention of people who plan to protect the room from the cold and extend the service life of plasterboard sheets.
PIR plate - overview and features of balcony insulation
PIR board is an innovative material used for effective insulation of interior spaces. It is produced on the basis of polyisocyanurate. This chemical thermoset is characterized by fairly high strength and non-shrinkage due to the chemically strengthened molecular compound of the structure. At the same time, the PIR board is characterized by porosity. The pores are closed, which ensures:
- increased thermal insulation ability;
- noise absorption;
- lack of hygroscopicity;
- lack of vapor permeability.
All these criteria are important when insulating a balcony from the inside.
Some companies produce a specialized line of materials for insulating loggias or balconies. One of these is TechnoNIKOL. This brand has developed the LOGICPIR Balcony L PIR board. Structurally, this board is a three-layer material. The core is thermoset polyisocyanurate. Front surfaces are made of high-density aluminum foil. You can see this insulation for a balcony in the photo.
Thanks to the sandwich design, the stove perfectly reflects heat into the room and cold out. In addition, the slab has an L-shaped edge on four sides. During installation, high-quality joining is achieved without the subsequent formation of cold bridges. In this way, thermal efficiency, unique to this day, is achieved with a thermal conductivity coefficient of 0.021 W/m2*K.
The installation of PIR boards is no different from the installation of conventional or extruded polystyrene foam. Fastening is carried out on pre-leveled walls. For fixation, mushroom dowels with an enlarged head and a plastic nail are used.
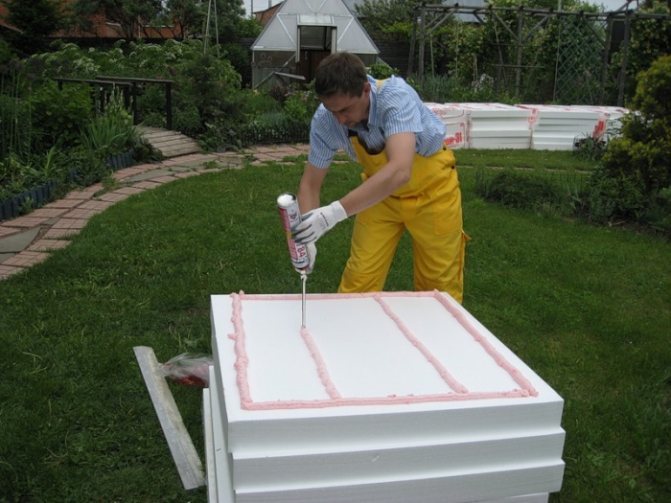
You can easily shape such a slab using a regular cutting tool. After arranging all surfaces, it is recommended to additionally glue the joints with aluminized tape. The remaining gaps can be foamed. For foaming, it is better to use SOUDAL gun foam. It provides an economical outlet from the cylinder, has low secondary expansion and efficiently seals gaps.
Assembling the sheathing
If you plan to cover the surface with a decorative coating, you will need to install a sheathing made of wood or metal profiles. Advantages and disadvantages of wooden structures:
- light and pliable to work with, but subject to increased moisture absorption;
- Having correctly calculated the load, they will withstand plasterboard and metal-plastic sheathing;
- easy installation, long service life.
By insulating balconies with penoplex, which will become additional living space, you can safely install wooden sheathing. In an insufficiently insulated room exposed to dampness, it is better to install galvanized structures; they will last more years.
Pros and cons of metal profiles:
- the ability to choose any shape and size;
- Corrosion resistant;
- lightweight, but withstands heavy loads.
The disadvantage is that it is difficult to assemble, and you will also need skills in using special tools.
The first stage is marking, determining the height of the outer beams. Then the U-shaped profile is fixed, observing the vertical and horizontal levels, if it is wood - with self-tapping screws, a metal profile - with dowels. The remaining bars are placed at a distance of 20-25 cm and also secured. After fixing the intermediate profile around the perimeter, the sheathing is considered complete. If necessary, it is treated with protective mixtures against fungus, moisture, and insects.
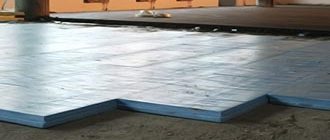
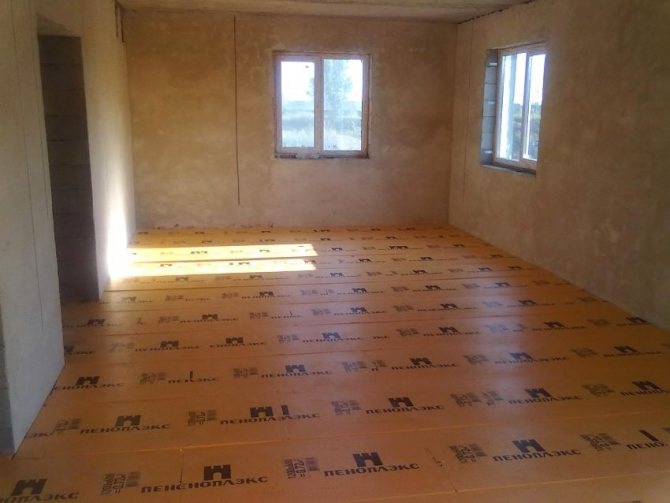
Insulating the floor on a loggia or balcony with penoplex
You can replace the installation of electric heating systems with warm floors or enhance their effect by insulating the floor on the balcony and loggia using penoplex. Step-by-step technology:
- The slab is inspected for integrity at the junction with the walls.
- Thoroughly cleaned of previous decorating and coloring materials.
- Chips, cracks and gaps are treated with plaster, after complete drying with a primer 2-3 times.
- Installation of logs, between which the insulation is laid, their height should be greater than the thickness of the penoplex, and the pitch should be no less than 50 cm.
- Waterproofing is laid on the floor between the joists, with allowance for the walls.
- Marked and cut insulation is placed on top, attaching it pointwise with foam.
Several layers of insulating film are laid on polystyrene foam, and the logs are covered with a rough covering (sheets of plywood, chipboard, and other wood materials with moisture-resistant properties). Balconies are finished with decorative coverings - laminate, linoleum, carpet.
For interior floor tiling or heating installations, the procedure usually changes. First, the insulation is laid on the waterproofing; it is important to seal the space between the sheets and walls with foam, and be sure to cover it with foil film. Next, a cement screed of 2 cm or more is poured, only then ceramic tiles are laid.
The following floorings can be laid on the thermal insulation: cement-sand screed; gypsum fiber sheets; DSP with electric heating, decorative tiles. All types of heaters and lighting are mounted in boxes prior to interior finishing.