4311
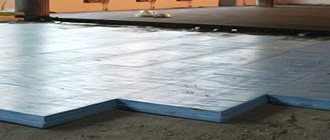
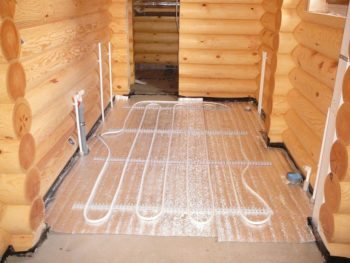
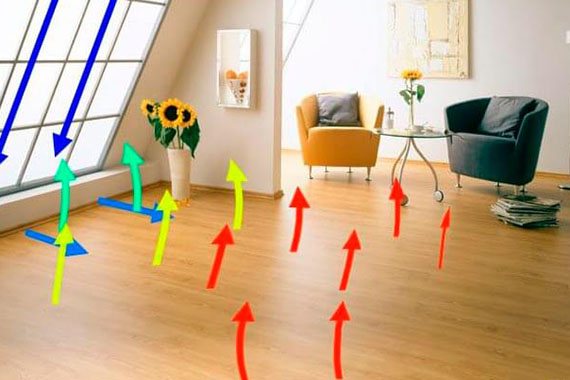
The economic situation in the country is forcing more and more people to think about reducing housing maintenance costs by using modern energy saving technologies. Individual heating systems have become an effective method of achieving results in this matter. But the maximum result is achieved by turning the entire floor surface into a single heating element, and if the temperature of the working fluid is low, the savings are significant. One of the conditions for achieving the result is the combination of a water-heated floor and a floor covering with high thermal conductivity.
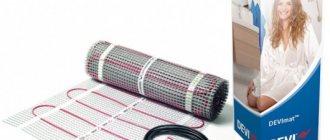
Room with water heated floor
Advantages and disadvantages
Due to the presence of a large number of advantages, vinyl laminate flooring successfully competes with many traditional coverings. Among its advantages it is worth noting the following:
- the presence of a large selection of colors and patterns, which allows you to imitate any materials;
- ease of cleaning and maintenance;
- vinyl laminate is waterproof, so it can be used in the bathroom, kitchen or similar areas;
- it is comfortable to walk on, it is warm and soft;
- low cost;
- high strength;
- good maintainability;
- ease of installation.
Despite the fact that manufacturers indicate only the positive characteristics of vinyl laminate, like any other material, it has a number of disadvantages:
- the presence of chemicals in it can cause irritation of the mucous membranes and respiratory diseases, usually this occurs during the first time after installation of such a coating;
- this material is not biodegradable, therefore, after its service life expires, it pollutes the environment;
- non-renewable natural resources are used to produce vinyl laminate;
- the surface of the subfloor must be smooth and free of debris, since the presence of solid particles leads to damage to the vinyl coating;
- traces from heels or rubber mats can cause a chemical reaction, resulting in discoloration of the material;
- it is not possible to restore such a floor; if damaged, it must be replaced;
- over time, a low-quality coating may turn yellow;
- When burned, it releases toxic substances.
Kinds
There is a classification of this material according to its intended use:
- household PVC laminate
flooring in rooms with low traffic, intended for covering, for example, bedrooms or living rooms; - commercial use
, has a thicker coating layer, so it can be used in rooms with medium and high traffic; - a special coating
is used for installation in gyms and shopping centers, as it can withstand heavy loads and has high wear resistance.
The most popular and famous is Contesse vinyl laminate
, which is a worthy competitor to traditional flooring materials. It can be used in apartments or houses, as well as in schools, shops, and offices.
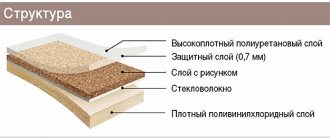
The bottom layer of this coating consists of wear-resistant polyvinyl chloride, and the top layer is reinforced with fiberglass and covered with a protective layer of polyurethane and aluminum oxide. This structure makes Contesse vinyl laminate durable, its service life is about 10-15 years, and in residential areas it can last 25-30 years.
In addition, flooring can be divided into several types:
Self-adhesive
It can be made both in the form of panels and in the form of tiles of various sizes; a layer of adhesive is applied to its back side, which is protected by film. It is convenient to install it yourself; the only condition is that the surface is smooth and clean.
Castle
In this case, vinyl laminate is produced with a locking connection and adhesive tape, the panels are connected using locks, they are not attached to the floor, and an applied adhesive tape is used to seal the seams. This type is perfect for underfloor heating systems.
Roll material
This type of vinyl laminate is the most difficult to install, all due to the need to use special glue, which is expensive. It is made in the form of strips rolled into a roll.
Quartz vinyl laminate
A special feature is that it has a three-layer structure. Between the protective bottom layer and the top layer, which is responsible for the appearance of the coating, there is an intermediate layer consisting of quartz chips. This structure makes this material very durable, and it belongs to class 43, but the cost of this coating will be high.
PVC tiles and other materials
For a warm water floor, important conditions are good thermal conductivity of the finishing floor covering and ease of use during further operation. For these purposes, it is possible to use any coating:
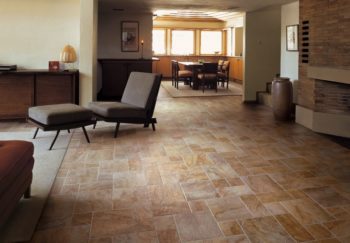
- Ceramic tiles are widely used, have high energy intensity and to warm up to a comfortable temperature requires a long time or a powerful heat source, which is formed by reducing the technical distance between the loops of water pipes.
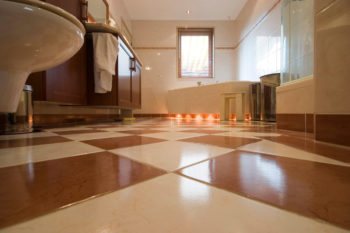
Ceramic tiles
- Laminate – represents a compacted structure with good thermal permeability. Allowed for installation in conjunction with a water heated floor system only after the concrete screed has dried. The reason is the design feature of the material, the upper part of which has water-repellent properties, and the lower part is hygroscopic. Allowing the screed to dry out will lead to steam emissions, which will cause deformation of the lamellas, which will lead to the need to replace damaged elements.
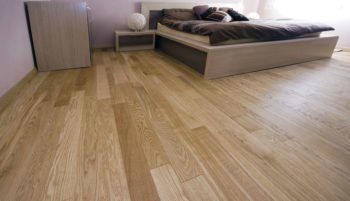
Laminate
- Practice shows that the use of standard linoleum coverings is a losing option for floor coverings for heated floors. Despite the good thermal conductivity properties, operation at comfortable temperatures leads to softening of the material and fatal discoloration.
Linoleum
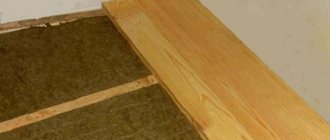
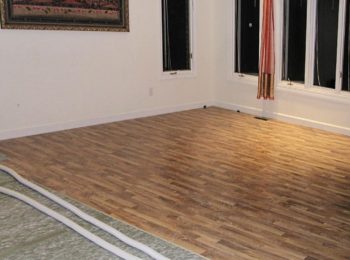
- The use of natural wood flooring (parquet, floorboards) is not considered the best option. The material has poor thermal conductivity properties: use at elevated temperatures will lead to disruption of the structure and cracking of the surface.
Wooden floor
Experts in the installation of water heated floors consider PVC tiles to be a winning option. Vinyl tiles are a material with a whole set of positive qualities necessary for the finishing floor covering of a water-heated floor:
- comfortable use without changing the shape and structure of the material at temperatures not exceeding eighty degrees (floor heating up to forty-five degrees);
- high heat conductivity;
- various types of tiles are combined with almost all types of rough covering;
- can be installed without the use of special tools;
- provides stable sound insulation from the noise of working fluid flowing in the pipes;
- the high safety margin of the tiles is guaranteed by the production technology;
- an assortment of colors and textures, including anti-slip coating;
- fastening is provided in three options: self-adhesive, locking connection and supplied glue;
- affordable price.
PVC tiles
Important! The design features of fastening PVC tiles make it possible to easily replace a floor covering element that has failed or has lost its presentation.
Installation process
Before laying vinyl laminate, it is necessary to properly prepare the surface; the base can be of different types:
- cement-sand screed;
- plywood or chipboard;
- installation can be carried out on an old coating, but in this case the linoleum under the laminate must be firmly attached to the base, the tiles must not have a relief, and the seams must be filled with putty.
Before installation, the entire surface must be thoroughly removed from debris and dust. The material must lie in the room for 2 days to adapt to its conditions. The temperature in the room should not be less than 15°C.
The first panel is cut by 1/3 to create an offset; wedges are installed around the perimeter of the room, which are removed after laying the laminate.
When laying self-adhesive vinyl laminate flooring, no underlay is used; if it has a click joint, then the underlay must be installed.
On the panel located from the wall, cut off the adhesive tape, after which the second panel is brought in and carefully glued. After laying the row, the joints of the panels must be rolled well with a special roller.
If the element lies unevenly or misaligned, you can correct or replace it within 10 minutes, but do not damage the smart tape.
If the vinyl laminate has a click joint, then it is laid on a substrate, its strips are connected to each other with tape, and then the panels are installed with a Click lock, as usual.
To lay roll material, you need to use a special glue, the cost of which is high and installation is quite difficult, so beginners should not choose this installation method.
Which is better, laminate or PVC tiles?
It is impossible to answer unequivocally the question of what is better, regular or PVC; it all depends on the desires of the owner and the conditions in which the floor covering will be used.
If we talk about PVC laminate, then its advantage over the usual one will be in its small thickness, so the height of the room is reduced slightly, it is excellent for laying on a warm floor and can be used in rooms with high humidity.
In both cases, it is necessary to properly prepare the surface so that it is smooth and free of dust and dirt. Please note that PVC laminate can cause allergies, especially immediately after installation, so it is not advisable to use it in a children's room.
Do you need a backing?
If self-adhesive vinyl laminate is being installed, no underlay is required. In the case of using a coating with interlocking joints, you can use a backing that will help hide small irregularities and act as additional shock absorption. The backing for vinyl laminate can be either cork or pine, polypropylene or a combination.
Which glue to choose
To lay vinyl laminate flooring, you need to use a special glue that will ensure a strong and durable connection.
- Water-dispersed adhesive is odorless, safe for humans and provides a reliable connection.
- Click Guard adhesive is a cross between an adhesive and a sealant, so the panels are not only securely held together, but also protected from moisture.
- Moment glue is used to connect the ends of panels; it dries very quickly and allows you to connect the planks end to end.
The worst glue
experts believe that it is created on the basis of artificial resins and contains acetone.
The best option
It is considered a universal adhesive for laminate flooring.
Operating principle of film coatings
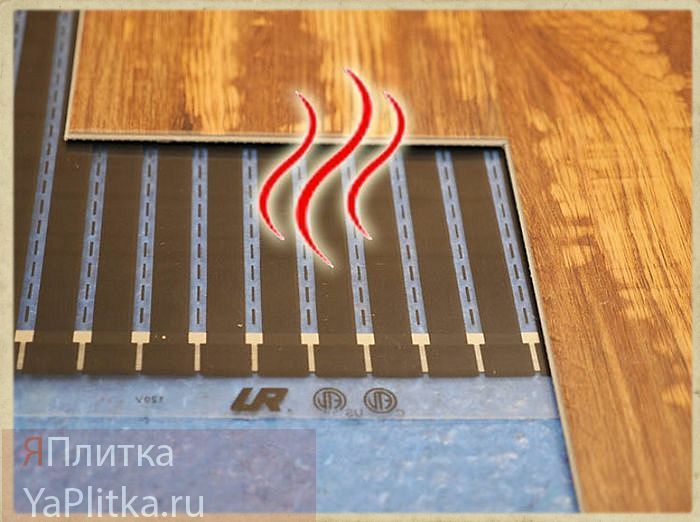
The film coating uses a carbon or graphite heating element. Another option for this type of floor is that the film is completely covered with carbon fiber.
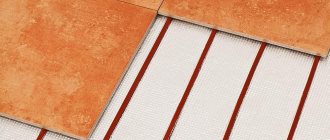
Film infrared floors are laid under the tiles, on a previously cleaned and leveled surface. The film is connected to the power supply, and thanks to infrared radiation, the surfaces in the room begin to heat up. This type of floor heating can be used as an auxiliary, and even as the main room heating system.
The temperature of IR floors can be easily adjusted. The maximum heating is set to 50 degrees, but this is not necessary. As a rule, the temperature is set at 21 degrees.
To operate the system, a voltage of 220 V is required, and the maximum energy consumption is about 250 W/m2. With thermoregulation, energy consumption per 1 sq.m is 35-85 W.
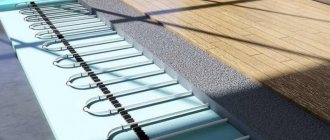
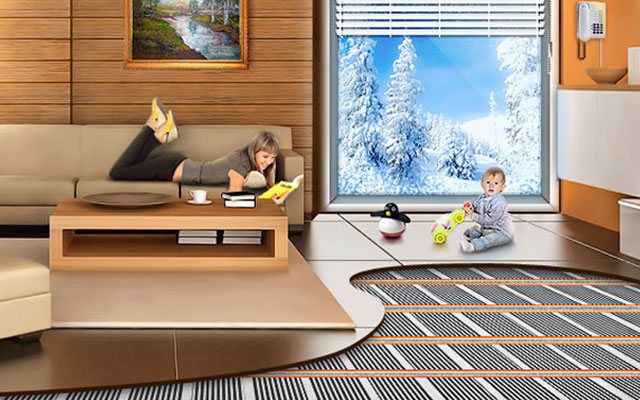
As you can see in this layout diagram, the heating is divided into separate zones. At the same time, heat is not supplied under the bathtub and shower cabin, and why waste energy and money on them.
The advantages of IR flooring over other technologies are as follows:
- Easy to install. Such a system is easy to install, especially when compared with a water floor.
- Small thickness of IR film. It does not affect the height of floors and tiles.
- Autonomous work. The heating system works automatically. It turns on and off according to a timer and constantly maintains the required temperature.
- Low cost of materials.
- Long service life.
- The efficiency of IR floors is 20% higher than that of other types of heated floors.
- There is no need for additional system maintenance.
- If a single element of the system is damaged, the rest continue to work. This is possible thanks to their parallel connection.
This technology also has its disadvantages, although they are much fewer than the advantages:
- High loads on the floor covering can lead to mechanical damage to the heating elements.
- High energy consumption, which leads to high electricity bills.
There are two technologies for installing infrared floors under tiles: dry and wet. The first option implies that the IR film will not come into contact with concrete. Installing an infrared floor using the wet method involves pouring concrete over the heating elements. Let's look at how to install a heated floor using each method in more detail.
Installation using the dry method is carried out as follows:
- Preparing the premises. First, remove all debris and dust. Potholes, cracks and bumps must be leveled and covered. If there are many cracks, you can make a new concrete screed using self-leveling mixtures. Next we install the waterproofing membrane. If a waterproofing membrane is used, then the joints must be sealed with putty or wide tape. The membrane is mounted with an overlap of 12 cm.
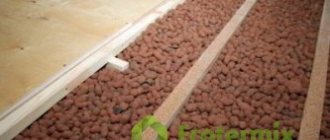
- Thermal insulation. Installing insulation is important to prevent heat loss. To do this, it is recommended to use insulation with a foil surface, which repel up to 90% of heat (isolon, penofol, etc.). This will help make the floor insulation as effective as possible.
- Installation of IR film. It should be remembered that IR film has its own characteristics, and to prevent difficulties during operation, all work is carried out strictly according to the instructions, especially connecting the power wires of the heating elements. The film is laid carefully, at a distance of at least 10 cm from the wall. The elements of the heating film should also not touch each other. To do this, be sure to leave a gap of 5-7 cm between them.
- Installation of the protective layer. This is necessary to protect the IR film from mechanical stress. Even ordinary polyethylene film can act as a protective layer. The main thing is that the material is not too dense - this can reduce the efficiency of floor heating.
- Installation in the form of durable sheets. This stage involves the installation of a durable subfloor on which the screed will be poured. For this, sheets of plasterboard or chipboard panels are often used. When installing, be careful not to damage the IR film.
- Next, we move on to laying the tiles, using classical technology. Installation is carried out using a regular adhesive mixture, which is applied to the tiles with a notched trowel. When laying, be sure to use a building level so that the tiles lie flat, and a rubberized hammer.
This method is better suited for installing a film IR heater under a tile in terms of economy and ease of installation. But the wet installation method is much inferior in terms of safety due to possible contact of the surface of the screed with the heating elements.
Step-by-step installation instructions this way:
- Floor preparation is similar to the dry method.
- Laying insulation and IR film. This stage is also similar to the dry method.
- Installation of protective film. For the wet installation method, this stage is the most important, because this is what affects the durability of such a floor. If the concrete solution gets on the heating elements, the service life is reduced by at least 30%. We select a thick plastic film and carefully lay it on top of the IR film. The protective layer must be overlapped, the gap should be at least 15-20 cm. The joints must be sealed with wide tape. For reliability, many people lay the film in several layers.
- Laying reinforcing mesh. For this purpose, a masonry metal mesh or a fiberglass mesh is used. Installation of reinforcement must be carried out carefully so as not to damage the protective film.
- Pouring concrete screed. If the screed is thicker than 5-10 mm, the efficiency of the IR heater decreases sharply, so it is important to make a layer within these dimensions. To make floors smoother, self-leveling ready-made mixtures are often used.
- Once the floors are dry, they move on to laying ceramic tiles. The installation process is carried out in the classical way.
READ MORE: How long does it take for a cement concrete floor screed to dry, methods for calculating time
Useful video
Step-by-step instructions for installing vinyl laminate flooring yourself
For several years now, quartz vinyl flooring, also popularly called “quartz-vinyl,” has occupied a strong place in the fashion of flooring. This is not accidental, not only because the line of these coatings contains an alternative to the classic wooden laminate pattern - an imitation of natural stone, but also because it has high wear resistance, moisture resistance and safety for health. The only disadvantage of this coating is its high thermal conductivity (almost like ceramic tiles), which means you can’t really walk on it barefoot, it’s too cold. In this regard, of course, cork coverings win. But you can always turn this minus into a big plus, for this you just need to lay a warm floor under it, it will heat up almost instantly, compared to the same laminate and especially cork (about 5-10 minutes, depending on the thickness , type, floor power and thermal insulation technology), accordingly, it will consume less electricity than the same heated floor under laminate or cork.
Now the question arises: what kind of warm floor is suitable for quartz-vinyl tiles? In order to choose a warm floor, we first need to decide on the type of quartz-vinyl coating; at the moment there are two of them:
1. Quartz-vinyl tiles, which are glued directly to the rough screed or self-leveling floor;
2. Interlocking quartz vinyl (assembled like laminate).
In the first option, where the tiles are glued to the floor, we use, or, you can use, that is, everything that is filled with a screed or self-leveling floor after installation, a heating film will not work here, because quartz vinyl will not stick to it, and there will be connections stick out. The technology briefly looks like this:
1. Lay the heated floor,
2. Fill it with screed or self-leveling floor (it sticks better to the self-leveling floor - fewer pores),
3. After the screed/self-leveling floor has completely dried, glue the quartz-vinyl tiles,
4. Enjoy the result visually and warm your heels.
In the second option with interlocking quartz vinyl coating, everything is much simpler - we use the following technology:
2. Place it on it and secure it with tape,
3. We assemble quartz-vinyl (like laminate),
Keep your feet warm and your head cool
.
Vinyl flooring is compatible with the most commonly used underfloor heating systems: water, electric and film (infrared).
Experts argue about the advisability of using heating in conjunction with quartz vinyl tiles. The fact is that high-quality quartz vinyl is not inferior in thermal conductivity to floor coverings made of natural wood.
That is why the use of heating is unnecessary
, is recommended only in special cases, for example, on the ground floor, in a bathroom or toilet, on a balcony or loggia, in a children's room, corridor or hallway.
And ideally compatible with underfloor heating: FineFloor, Vinilam, Decoria, Aquafloor, Corkstyle Vinyline, NOX, Alpine Floor, Art East, Pergo, IVC Moduleo
.
Observe the temperature regime (heating up to 28°C)
- heated quartz vinyl will last a long time!
Is it possible to install a film floor under the tiles?
To answer this question, it is necessary to take into account the operating recommendations provided by the manufacturer. In particular, it says: “The product can be installed under tiles, wood, laminate, linoleum, etc.”
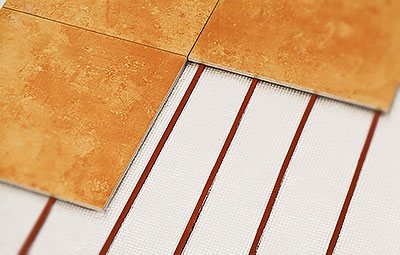
A thin electric film heated floor under tiles is installed quickly, does not “steal” free space and does not affect the quality of installation.
Since the heating system is resistant to moisture and precipitation, the film can be laid outdoors, followed by cladding with porcelain stoneware. This will forever solve the problem of icy paths, garage heating, etc.
Laying an infrared warm film floor under tiles with your own hands requires a certain level of professionalism and the availability of building materials. Although the technology is fully and thoroughly described by the manufacturer, if you have any doubts about your capabilities, it is better to seek help from a specialist.
Laying film infrared heated floors under tiles has its own characteristics. There are several installation methods, which differ only in a couple of nuances.
The last reason determines special requirements when installing heated film floors, especially under thin finishing coatings: laminate and linoleum. But even when installing a heated floor system under ceramic tiles, there are specific requirements for their installation that must be observed.
- In order for them to be most effective, laying should be done either in a very thin cement screed with a thickness of 8~10 mm, or in a layer of tile adhesive under a reinforcing plastic mesh.
- Under no circumstances should metal reinforcing mesh be used.
- Laying should only be done on an open floor surface free from furniture or household equipment.
- Peak energy consumption in heating mode is 100~250 W/m².
- Operating energy consumption in thermal control mode is 35~85 W/m².
- The maximum share of infrared radiation in the spectrum is 90%.
- The radiation wavelength is 5~20 microns.
- Operating voltage: 220 V, 50 Hz.
- Maximum operating temperature is 130 °C.
Thanks to such high performance parameters, infrared heated floors are quite capable of being used not only as auxiliary, but also as the main elements of heating systems.
All work on installing a heated film floor should begin with a detailed and thorough step-by-step work plan and calculation of the amount of materials required.
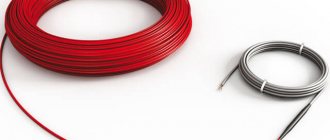
- The heated floor itself is in the required quantity. For laying under tiles, a film with carbon heating elements is better suited. Bimetallic heated floors are not recommended for this purpose.
- Thermal reflective film. The reflective surface of the film should not be electrically conductive.
- Scotch.
- Bituminous insulating tape.
- Installation electrical wires.
- Connection terminals.
- Thermal relay with emergency protection.
- Plastic reinforcing mesh.
- Polyethylene film.
- Electrical installation tools: wire cutters, pliers, etc.
- Multimeter, indicator electric screwdriver.
- Dry mixture for self-leveling thin screed under tiles.
- Adhesive for ceramic tiles.
- Tools for laying tiles.
- Measuring tools: tape measure, meter, square.
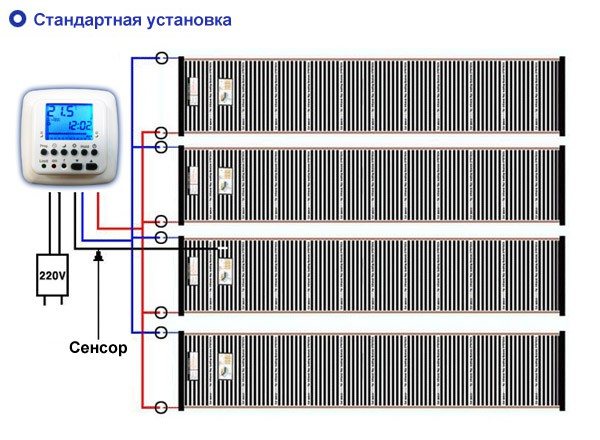
Standard installation diagram
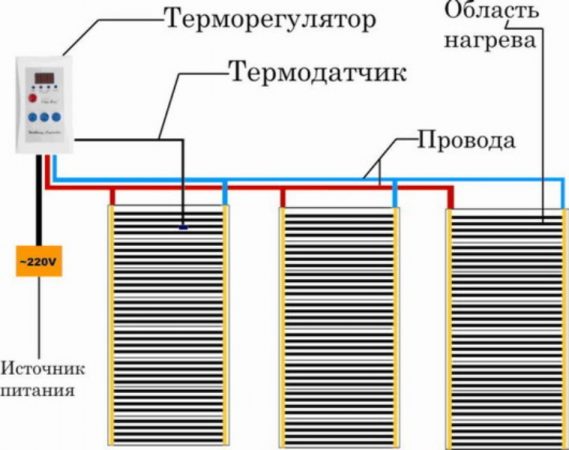
Schematic diagram of IPO connection
Laying ceramic tiles is the topic of another article. Here we will look at the preparation and installation of an infrared heated floor system.
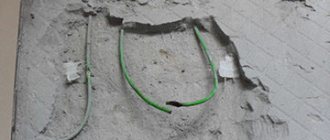
Step 1. The base must be thoroughly cleaned, sweeping out all debris. There should be no random screws, stones, pieces of reinforcement or wire, or other foreign objects left on the floor.
Step 2. Before installation, it is necessary to draw up a detailed plan of the room with the proposed locations of the furniture, and draw on it a diagram of the placement of the heated floor film. Mark the layout of the heated floor on the concrete base, stepping back about 40 cm from the walls.
Step 3. Lay the heat-reflecting film, cutting it into the necessary pieces.
Step 4. Tape all the joints of the heat insulator and glue it along the edges to the floor.
Step 5. Lay the heated film floor on top, cutting off pieces of the required length from the roll in the places indicated by the scissors symbol.
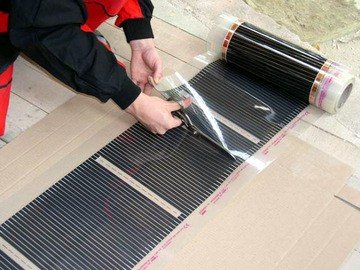
Lay the heated film floor on top, cutting off pieces of the required length from the roll in the places indicated by the scissors symbol.
Between the film floor strips, gaps of 5~10 mm should be left. The stripes should not overlap each other under any circumstances. At these intervals, the rolls of heated floors must be glued with tape to the foil film of thermal insulation. Along the edges of the underfloor heating tape, where the copper bus runs, special terminal clamps should be installed at the electrical connections.
Step 6. The clamps must be tightly compressed with pliers or special electrical pliers. The protrusions on the terminals should push through the plastic, ensuring reliable contact with the copper strip. The stripped ends of the mounting wire must be inserted into the terminals and crimped carefully.
Step 7. It is necessary to make a parallel electrical connection of all the cut pieces of the infrared floor to each other. Use pieces of bitumen or special thick electrical tape to seal the terminals on both sides, carefully covering the exposed ends of the wires and terminals. The remaining bare ends of the copper bus should also be insulated.
Step 8. At the location of the intended output, connect wires of the required length to the thermostat. Place a temperature sensor with a wire connected to it under the heated floor film at some distance. Cover everything on top with thick plastic film, also gluing it with tape. Roll out a plastic reinforced mesh on top of it so that its edges extend beyond the dimensions of the heated floor to connect a thin leveling screed to the concrete base of the floor.
Step 9. Prepare a solution for a thin screed. Screed under the tiles, carefully leveling the mortar with a layer of 8~10 mm. After it has dried well, you can glue the tiles on top in the usual way.
self-leveling floor
Film flooring is a rather delicate item and requires careful handling during all work. When working, it is better to wear shoes with soft soles. After connecting the clamp terminals to the floor tape, use a tester to check the electrical resistance of each piece for breaks, then do the same after electrical installation of all pieces into a single circuit.

Infrared heated floor under tiles
A warm home is one of the conditions for a happy family life. A correctly calculated and executed heating system is the key to warmth and comfort in the house. Warm floors significantly increase the comfort of any home, be it a small apartment or a country house. With proper installation, they will serve for a long time and safely, delighting all family members with a cozy and warm homely atmosphere.
READ MORE: Mounting adhesive for polyurethane skirting boards
Heating elements do not fit into places where low furniture will be installed. A minimum of 3 cm of free space is required. To direct heat upward, heat reflective insulation must be installed underneath the system. You cannot install elements based on foil, which corrodes over time.

Important points:
- Think in advance about the location for the thermostat. Wiring is supplied there;
- determine the areas where the underfloor heating system will be installed;
- the surface for installation must be clean and level;
- It’s better to lay material to reflect heat throughout the room, not just in the places where the system is placed. It is secured with tape to the floor, the joints must be even.
Installation is carried out in the following sequence:
- The roll of film rolls out across the floor. You can cut the film along the marked strips to determine the required size. Copper contacts are laid down. It is advisable to cut as little as possible.
- The clamp is fixed to a copper strip. One side is in thermal film, the other is on top of the copper strip. Fixed with pliers.
- The cut lines are sealed with bitumen insulation. If the cuts were not made along the intended strips, the entire surface of the cut should be isolated.
- The thermal film is fixed with tape to prevent displacement.
- The thermostat is installed on the wall. It is advisable to place it near an outlet.
- In accordance with the diagram, wires are laid from the heating sections to the thermostat. You should not place them along one wall. You can stretch it under baseboards.
- To avoid unevenness, you can cut grooves for the wires in the heat-reflecting layer.
- To connect the wires to the heating elements, the insulation at their ends is cut off. It is installed in the clamp and secured with pliers. The wire should not wobble in the installed space.
- Bitumen insulation is glued to the space where the end of the wire was fixed. The size should be such that it completely insulates the surface.
- The other ends of the wires are attached to the thermostat in accordance with the connection diagram on the instructions.
- A temperature sensor is connected to the thermostat. One end of it is secured with bitumen insulation to the black strip of the heating element. To avoid unevenness, a depression is made in the heat-reflecting layer.
- The performance of each heating strip is checked.
- Polyethylene waterproofing is installed.
Before laying the tiles, preliminary work is required. It can be laid on top of polyethylene. A painting mesh is placed on the waterproofing to increase adhesion to the surface.
The second installation option is to cover the surface of the waterproofing layer with gypsum fiber sheets. Install them on self-tapping screws to the base, screwing them between the heating elements. Next the tiles are laid.
Advantages of using quartz vinyl flooring and heated flooring
- Thermal conductivity.
Quartz vinyl tiles retain heat. - Fast heating.
Thanks to the small thickness of PVC tiles (up to 7 mm), heat spreads quickly and evenly. - Environmental Safety.
There are no harmful and toxic additives in the structure of quartzvinyl: there is no emission when heated. - Antistatic.
Static voltage does not accumulate on the surface, PVC tiles do not conduct current, and are absolutely safe in combination with a film heating system. - Stability.
Quartz vinyl tolerates temperature changes without consequences. - Versatility.
Quartz vinyl tiles of adhesive or lock type are compatible with all types of heating, except
infrared film type
.
It is not recommended to use quartz vinyl in conjunction with infrared heated floors
: The mats may short out, causing the surface to overheat.
For PVC tiles, heating above +50°C is critical.
If you choose
a high-quality
film floor, we use interlocking PVC laminate with glue-free installation.
Infrared film heated floor
In order to understand exactly how high-quality strip flooring differs from other varieties on the market.
Let's take a closer look at its main distinguishing characteristics:
- The most important distinguishing feature is the heating method. Unlike a water floor, the room warms up not due to an increase in the temperature of the water pipes, but due to infrared radiation, which is inherent in humans and other living beings, as well as the sun.
- It has a very thin layer of heating element, about 0.5 cm, so you will not lose any height at the ceiling.
- Due to non-aggressive heating, it is suitable for absolutely any floor covering. If you use quartz vinyl tiles, it is not recommended to heat them above 28 degrees.
- It is easy to mount and connect; there is no need to create perfectly flat surfaces.
- It can be used not only as floor insulation, but also for insulating walls, ceilings or any other surface. Often used to heat children's beds or walls near them.
- Due to the fact that the heating element is located in the shell, it is not afraid of moisture or small dents.
They are absolutely safe for humans; the element that conducts heat in them is carbon. Thanks to this system, you will be able to create comfort and maintain warmth in your home, your loved ones will get sick less and you will forever forget about frozen feet.
This type of heating is more beneficial for our body; infrared radiation is widely applicable in many fields, for example, in medicine. How much does it cost? This is perhaps one of the most expensive heating options, but it is completely worth the cost.
Typical installation diagrams
Scheme 1. Wooden flooring + water heating system + quartz vinyl
A water-heated floor is installed between the joists, waterproof plywood (at least 10 mm thick) is laid on top, and the finishing coating is quartz vinyl tiles.
If the adhesive type is used, then it is necessary to putty and sand the plywood at the points of attachment to the joists and along the seams. For interlocking laminate, no additional leveling is required.
Scheme 2. Cement-sand screed + water heated floor + PVC tiles
The pipes are sewn into a concrete screed: there is waterproofing on the bottom, and a finishing leveler on top.
Scheme 3. Concrete floor + cable heated floor + vinyl floor
Electrical cables are laid on a concrete base, and on top there is a cement-polymer screed and a finishing floor covering (quartz vinyl laminate).
Scheme 4. Cement screed + infrared heating + vinyl laminate
A simple and effective scheme - heated flooring under vinyl laminate. Film mats are laid on concrete, and on top there is a locking (not adhesive!)
quartz vinyl.
Vinyl flooring is becoming increasingly popular in the market due to its versatility and absolute resistance to moisture. But many buyers are still afraid to purchase such products, thinking that difficulties may arise when laying vinyl laminate flooring with their own hands. Let's take a closer look at the principles and features of laying plastic flooring.
What kind of heated floors are best laid under vinyl?
In general, almost any heated floor system is suitable for installation under vinyl flooring. When heated, vinyl floors do not emit harmful substances; they do not melt at temperatures up to 80 degrees, although the recommended heating temperature for vinyl floors is considered to be up to 40 degrees Celsius.
Mostly vinyl tiles for heated floors are laid over water floors, cable-electric and heated film floors. We will discuss the application of each type of underfloor heating system separately.
How to lay vinyl floor tiles is shown in the video below.
Option 1: Vinyl over waterproof floor on wood base
It’s worth mentioning right away that it is impossible to lay a heated floor system on a wooden base using an electrical circuit! This is not recommended from the point of view of firefighters and their requirements due to the risk of fires!
Thus, if the base contains wooden planks or other wood flooring, then choose a water floor followed by vinyl tiles or vinyl laminate.
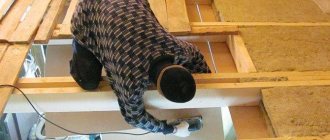
Installation is carried out as follows:
- A water circuit is laid on a wooden base, between which wooden logs are laid.
- A sheet of plywood or OSB is laid on top of the inter-pipe lags of the heated floor, which is secured with self-tapping screws for strength.
- Self-tapping screws are recessed into a sheet of plywood, and the insertion points are puttied.
- Flooring is placed on top of the plywood in the form of rolls, tiles or vinyl slats. If you use a vinyl covering with locks and an adhesive base, then sanding and sealing any unevenness caused by self-tapping screws is not necessary.
Option 2: Vinyl over concrete screed with water-heated floors
This method is used in most cases when it is necessary to lay a heated floor system with vinyl covering on concrete, which is most often found in our apartments.
In this case, the installation is done as follows:
- A layer of waterproofing material (roofing felt or simple polyethylene film) is laid on top of the concrete floor.
- A water floor system is being installed.
- The system is secured by laying a cement concrete screed.
- The final leveling coating is poured. It gives the floor smoothness and evenness.
- The last layer is vinyl covering.
Option 3: Vinyl Flooring Over Electric Flooring and Concrete
In the same case, if you have to insulate a concrete floor, you can use a system of electric heated floors and subsequent installation of vinyl covering. This is done like this:
- A floor system with an electrical circuit is installed on top of the leveled concrete.
- The system is secured on top with a layer of polymer-cement screed.
- After the screed has completely dried, the coating is ready for laying vinyl or roll vinyl covering. It is convenient to lay on such a floor both adhesive vinyl tiles and material with an interlocking joint.
Option 4: Vinyl flooring over concrete and underfloor heating film
This is the easiest way to create very warm floors using a radiant floor heating system and vinyl flooring. This is done this way:
- Lay a film heated floor system on the prepared (leveled, cleaned) concrete base.
- You can immediately lay a vinyl layer on top of the heated floor. It is important to take into account the fact that only vinyl covering with locking joints can be used for installation on a heated film floor!
Laying plastic laminate
Contrary to popular belief, laying PVC laminate flooring will not cause problems for any home craftsman. The type of fasteners used does not play a big role.
Laying methods
The choice of a specific solution depends on the materials used:
- Classic lock method. Relevant if the plastic laminate has a lock. To connect the panels, you just need to insert the locks into each other until you hear a characteristic click. The rest of the floor is laid in the same way, the process is similar to assembling a puzzle.
- Installation of vinyl covering with glue. In this case, it is necessary to purchase special adhesives to attach the coating to the base. Therefore, this method is rarely used. This option is relevant when installing vinyl on the wall.
- Installation of self-adhesive vinyl panels. Unlike the previous method, the glue is already applied to the back surface of the panels, which makes installation of the coating easier. This method is often used to install vinyl covering on a heated floor system.
- Laying PVC laminate with adhesive smart tape. At the ends of each panel there is a tape with an adhesive composition, which ensures gluing of two adjacent panels. Installation occurs in the same way as a regular interlocking laminate, but instead of a lock, the panels are fastened to each other using smart tape. This method is great for soft laminate flooring. Only parts of the floor are glued together, not snapped together.
Please note: when laying vinyl laminate flooring with adhesive, no backing is used! This also applies to self-adhesive models. And when laying plastic laminate with smart tape or lock, you can use an underlay.
Tools used
Depending on the type of PVC laminate used, the use of one or another tool from the following list is required:
- Special scissors or knife for cutting flexible laminate;
- Spacers-limiters (wedges);
- Pencil and ruler;
- Construction tape;
- Light hammer or mallet;
- Scotch;
- Special adhesive compositions, if required;
- Roller for rolling the coating during adhesive fixation.