Reasons for installing a drainage system Varieties of drainage schemes Arrangement of a closed system How to choose drainage pipes Drainage pipes made of plastic Pipe laying project Self-installation Operation of the drainage system Possible errors when installing drainage
Often groundwater and storm water have a destructive effect on the foundation of a building. There were cases when moisture accumulated in large quantities in the upper parts of the soil, which led to flooding of the basement or ground floor, dampness and deformation of the walls, and the appearance of fungus on them. An effective way to protect the foundation from such unpleasant consequences is to lay a drainage pipe.
Reasons for installing a drainage system
If the pipes are placed along the perimeter of the land plot, then a reliable drainage system can be built. It is known that ground and flood waters, as well as precipitation that falls in quantities exceeding the monthly norm, pose a serious danger to the foundation of private housing.
Most often, the laying of drainage pipes is carried out before the construction of the house begins. But it happens that after the completion of construction work, serious reasons arise for waterproofing the foundation. Then, under special conditions, you can start preparing the drainage.
Let's consider the situation when pipes are installed at the beginning of construction, but for specific reasons:
- high groundwater level - less than one and a half meters to the ground surface;
- gentle slope of the area, promoting regular accumulation of moisture;
- the presence of clay and loamy soil with low drainage characteristics;
- The building is located in an area where, according to statistics, the level of monthly precipitation is exceeded.
The depth of construction of other structures in the local area also plays an important role. If there is a buried foundation next to the main building, then groundwater will not be able to drain freely and will constantly accumulate under the house, increasing the risk of flooding. Asphalt and concrete blind areas on the site act as a barrier to the natural circulation of wastewater. In this case, it would be correct to connect stormwater waste to the central system.
Installing a drainage pipe eliminates the damage caused to the foundation from the accumulation of moisture in the ground around the home and changes in the level of wastewater.
What is drainage?
Based on the problem, it becomes clear that the drainage system is a means of removing or removing excess water from the soil or its surface. Thanks to the drainage network, which can consist of storm channels, wells, pipes, wells, etc. you can easily overcome the problem of flooding.
If you have one of the following problems on your site, think about laying drainage pipes:
- as already mentioned, high groundwater levels;
- there is a basement;
- the geoplastic procedure on the site is being prepared;
- Your area has heavy soils that themselves do not allow moisture to pass through easily.
The biggest advantage in the modern arrangement of a drainage system is a wide range of materials - a variety of pipes (their shape and diameter), filters, components, etc. Based on your data and needs, you can assemble a complete drainage network.
Varieties of drainage schemes
The following options for their preparation are known:
- open (superficial);
- closed (deep).
The first type - open - is necessary for draining excess liquid that has accumulated in the ground from precipitation. This drainage system is represented by trenches and ditches.
The second is designed to remove groundwater and protect the foundation of the building from destruction. For this purpose, a drainage pipe is laid in a ditch of a specific depth. Moreover, the tubular product must be perforated.
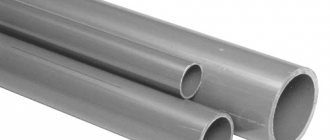
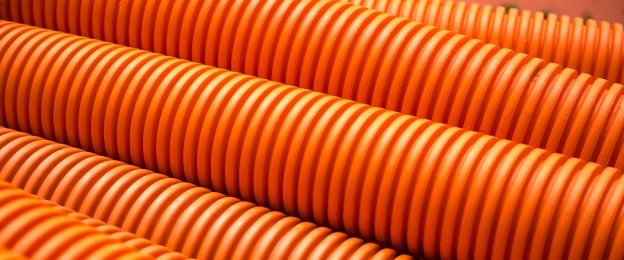
Types of plastic drainage pipes
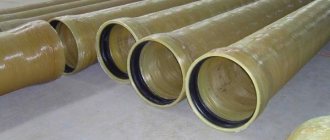
The range of products manufactured includes solutions for installing groundwater drainage systems under any initial conditions. The catalog contains:
- double-layer and single-layer drainage pipes (with stiffeners on one or both sides);
- designs with partial and full perforation;
- products with filter winding made of geotextile.
All types of products are supplied in coils of 40-50 m.
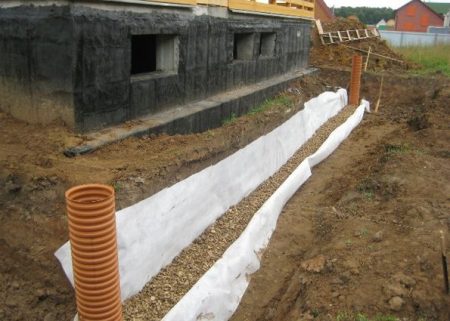
Arrangement of a closed system
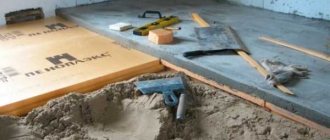
Before you begin this labor-intensive procedure, you need to prepare and purchase bulk building materials:
- Crushed stone of medium/large fraction, which is needed to obtain a stable layer that prevents dirt and bulky soil fragments from entering the system. This material also protects the corrugated pipe from the increased pressure of the earth layer.
- River sand creating a filtration cushion.
In addition to bulk substances, the following will be useful:
- Drainage pipes that form the drainage system itself. Depending on the intricacy of the project, the diameter and number of pipe products are selected. Recently, PVC products have become relevant.
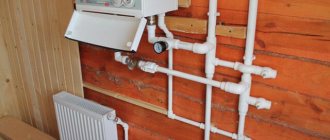
- Drainage pumps providing mechanical drainage. They are used when the site has suffered serious damage due to flooding by underground runoff.
How to lay a drainage pipe - a step-by-step guide
In addition, they are:
- One-/two-layer, the number of layers is introduced in proportion to the soil density.
- Flexible/rigid. The former have found application in complex branched schemes across the site, the latter in simple drainage projects.
- With/without filter casing. Most often, drainage pipes have a number of holes along their entire length. If they are not there, then using a drill and a thin drill, you can make holes yourself.
- Corrugated/smooth. On the building materials market you can purchase pipes with a filter coating on the surface - geofabric. If it is missing, then wrapping textiles around the perimeter of the pipe can be done independently, using the material at hand to secure it - thin wire or rope.
Self-installation
Laying drainage pipes with your own hands begins with specifying the installation location.
Placement can be done in two options:
- “Wall” drainage system, which is installed around the perimeter of the foundation of a private building and protects it from moisture getting inside.
- Drainage along the perimeter of the entire local area, allowing to protect the basement of the building, all utility structures, and green spaces.
Sequence of installation work:
- Mark the area where the drainage ditches will be located. With the help of a laser rangefinder, starting actions can be significantly simplified. In this case, it is necessary to pay attention to the accumulated excess water after rain, which clearly demonstrates the difficulties of water exchange due to the increased density of the soil or existing obstacles.
Operation of the drainage system
When arranging a drainage system, you need to think through everything down to the smallest detail, install it efficiently, and follow the basic rules of operation. Thus, the life of the drainage system will be significantly extended.
As a preventative measure, a mandatory inspection of the technical condition of drainage and wells will be required - approximately once every 4 years. The liquid level in inspection wells should be measured every 2 years.
Even a slight deviation of this parameter from the norm indicates:
- violation of the integrity of the tubular product;
- dense blockage;
- sludge deposits on the surface of products;
- partial deformation of the pipeline due to ground movement.
Such problems can be prevented if you promptly inspect the drainage system and clean it of various debris.
Drainage system maintenance rules
To prevent the pipe lumen from becoming clogged with sediment, the system is cleaned once every 3-4 years.
Ways to remove blockages:
- flushing with a garden hose;
- blowing with compressed air;
- mechanical cleaning with a metal cable with a wide nozzle;
- hydrodynamic impact on pollution using pneumatic equipment.
The pipes are flushed through inspection wells on both sides. Installing sand traps will significantly reduce the entry of insoluble particles into the channels. Special services are invited to clean deep routes.
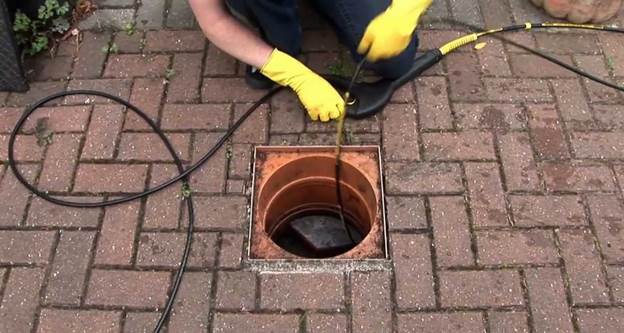
Cleaning the system from contaminants
It is not recommended to plant trees at a distance of 1.5-2 m along underground structures. When roots grow, they can damage the lines and disrupt the natural outflow of water.
Have the first signs of rising groundwater appeared in your area? Do not put off installing or updating a closed drain until the future. A long delay in time can negatively affect the comfort of living, the durability of the foundation, the condition of the lawn grass, trees and shrubs located in the problem area.
The appearance on the market of perforated plastic drains has significantly simplified the assembly of closed drains due to more efficient and reliable sealing of joints and interfaces. The range of additional mounting parts has also increased. Systems of increased complexity have become available for self-assembly, including two-level ones and those made from drains of different diameters.
If it is impossible to discharge drained water beyond the boundaries of the drained area and to install drainage water intakes, drainage tunnels are an excellent solution for its further disposal. Buying devices that are easy to install and durable in operation means investing in a cost-effective long-term project.
Technically impeccably installed tunnels represent a complete alternative to filtration fields and drainage absorption devices.
Possible errors when installing drainage
The quality of installation and the efficiency of the drainage system are interconnected. Any defects during operation can damage the system, which will lead to repair of the site or complete reinstallation of the drainage system. Therefore, we will add to the current topic: installation of a drainage pipe: how to lay it correctly.
The most common installation errors:
- the pipeline system was selected without taking into account soil conditions;
- the angle of inclination is changed or missing;
- at the initial stages there were no plans to drain water from wells;
- no geotextile or filter material;
- pipes are soldered in bad faith;
- the technical process for arranging the system was not followed - installation was carried out without filling sand/crushed stone;
- there is no perforation.
Knowing how to properly lay a drainage pipe, taking into account the location of the site and the condition of the soil; By preparing a laying plan and following the installation instructions step by step, you can achieve a high-quality drainage system. This means that the ground floor and basement of your building will be reliably protected from the negative effects of wastewater.
The installation of a drainage system requires mandatory compliance with the rules on how to lay drainage pipes. Drainage is necessary in most areas, since often after rain the water does not drain for a long time, which creates inconvenience for the owners and destroys the crop on the site. Water can cause destruction of the foundation, flooding of the cellar or basement.
To solve these problems, an artificial outflow of water is installed - a drainage system. Excess moisture in such a system is collected and removed outside the site. You can do without drainage if the water is rare enough, for example, only after heavy rains. But if puddles dry up on the site for a long time after rain, cellars and basements are periodically flooded, and many moisture-loving plants grow, then in this case a drainage system is simply necessary.
You can use the services of professionals; it will cost a hefty sum, but the system will be built correctly and will work well. Although there is a possibility that the specialists will not be of a very high level, and certain problems will still arise. Therefore, having decided to use the services of a specialist, you need to learn more about him and read reviews.
If there is no extra money, and the owner has minimal skills and knowledge, you can do the work yourself. Laying drainage pipes with your own hands does not require special training.
Types of drainage systems
There are a number of types of drainage systems that differ in labor intensity and cost of construction:
Open drainage. The cheapest and easiest option to implement. A ditch with sloping sides, approximately 0.7 m deep, is dug along the perimeter of the flooded area. The water is collected in a common ditch. Disadvantages of the system:
- Grooves can spoil the overall appearance of the site.
- Drains (ditches) require periodic cleaning. The walls may crumble and the bottom may become clogged.
Drainage trays. Improved open drainage. Special trays (made of concrete or plastic) are placed at the bottom of the grooves. When laying, you must maintain a slope. Special grids are placed on the trays to avoid clogging.
Trenches filled with crushed stone and sand. This is a simple type of closed drainage. The grooves are filled with crushed stone, and sand is poured on top of it. Water passes through the drainage material and is collected in a common ditch.
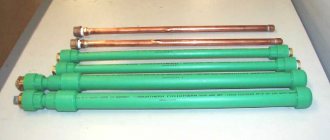
Drainage using drainage pipes. The most labor-intensive and most effective design. The trenches contain drainage pipes - products with drilled holes through which water from the site penetrates into the pipe and is discharged through the system into the drainage basin. Ceramic, asbestos-cement, and plastic pipes are used. You can drill the holes yourself or purchase ready-made pipes with holes. Plastic pipes have the best characteristics. They can be used for up to 50 years, have high strength, are not subject to corrosion, and are lightweight, so the installation of such pipes is very simple.
Types of drainage
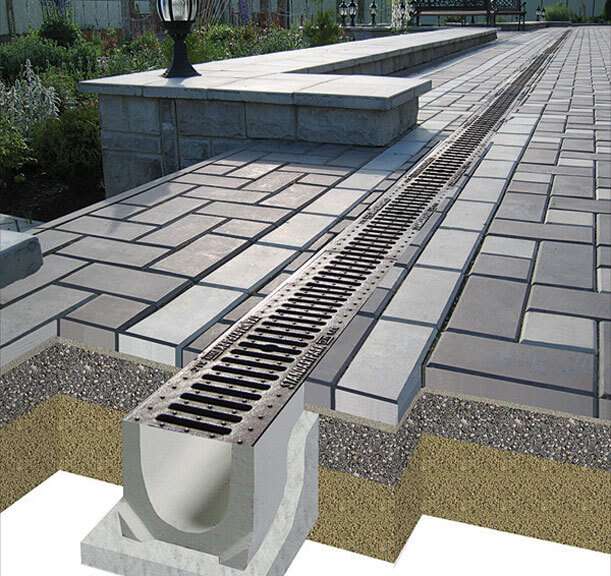
Drainage can be superficial or deep. Surface drainage, which is also called storm drainage, is in turn divided into linear and point drainage.
Linear is a system of gutters and sand traps dug into the ground and covered with gratings on top. Such drainage is laid around the building and along the sides of sidewalks and garden paths. Water flows into it and is then discharged into the sewer. The gratings must be strong enough to withstand the load if a person steps on them or a car passes over them.
Point pits are pits that are installed directly under the drain pipes of the drainage system. They are small storm inlets into which water flows and is then discharged into special containers dug into the ground, or enters a linear drainage system connected to the central sewer system. Complete with rainwater inlets, manufacturers of drainage systems supply siphons that block the spread of musty odors, and baskets in which garbage is collected. The pits are equipped with gratings on top. Point drainage helps maintain the integrity of the blind area and basement of the house, does not allow water to enter the basement, and protects against the appearance of ice on sidewalks and transport areas.
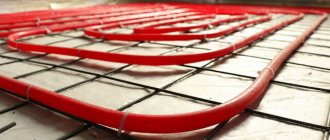
Deep – this type of drainage is installed at approximately one and a half meters depth. To do this, dig trenches around the house (approximately 1 meter away from it), making a slope in the direction of the collector. Sand is mixed with gravel and poured to the bottom, and then perforated pipes are laid. They are again covered with sand mixed with gravel and covered with turf. Water flows from the side pipes into the central one, after which it is directed to the drain well or to the central sewer. As a rule, drain wells are used if there is no possibility of draining water into the sewer system.
Laying drainage pipes
Before starting work, you need to determine the groundwater level, the volume of precipitation, and study the characteristics of the soil. Based on this, determine the depth of the drainage pipe and the diameter of the pipes. You need to determine the required quantity:
- Drainage pipes.
- Connectors.
- Crushed stone, gravel.
- Geotextiles.
Sequence of work:
- Dig a drainage ditch of the required depth, about 40 cm wide. The basic rule for effective operation of the system is to maintain a consistent slope of the drainage pipe during installation, so when digging a trench, you need to provide for a slight slope towards the drainage basin. The catchment well is dug at the same time as the ditch. If a house is flooded, then a ditch is dug around the perimeter of the house, if the plot is located - along the perimeter of the plot.
- Geofabric is laid at the bottom of the ditch - a special material that prevents clogging of the system. Then medium-sized crushed stone (or gravel) is poured approximately 10 cm deep and compacted. In this case, it is also necessary to maintain a slope of 1 cm per 1 m of ditch length.
- Drainage pipes are laid on the crushed stone. The diameter of the pipes depends on the amount of water that will need to be drained. The greater the flooding of the area, the larger the diameter of the pipes required. Typically, in summer cottages and country houses, pipes of 20 cm in diameter are used. To avoid clogging of the pipe openings, before laying them, they are wrapped in a filter material, for example, geotextile or coconut fiber cloth.
- The drainage pipes are being connected. Fittings act as connectors - parts that allow you to mount connections, branches, and turns.
- The pipes are covered with crushed stone and covered with the edges of geotextiles laid at the bottom of the ditch. Fill the ditch with soil.
Installation of drainage systems
Let's look at how drainage is installed and what are the nuances of pipe laying.
Planning
At the first stage, a scheme for laying drainage pipes should be drawn up. A preliminary geodetic examination of the site will be very helpful in carrying out this work, as a result of which the types of soil and the level of groundwater will be determined. Based on the results of the examination, the diameters of the pipes are selected, as well as the depth of their installation.
Advice! It is advisable to entrust drawing up a drainage diagram and performing calculations to specialists.
Laying
How should pipes be laid in a ditch correctly?
- A layer of sand 15 cm high is poured into trenches dug to the required depth.
- Geotextiles are laid over the sand so that the edges of the fabric cover the sides of the ditch.
- A layer of fine crushed stone is poured onto the geotextile.
- Pipes are laid on top of the crushed stone with the perforation down.
- When laying pipes, it is necessary to maintain a slope directed towards the collection well. The slope is at least 3 degrees.
- To be able to monitor the operation of the system and, if necessary, flush it, you need to plan the installation of inspection wells. The minimum distance between wells is 50 meters. In addition, wells must be placed at places where the pipeline turns or when its angle of inclination changes.
- The choice of filter is made depending on the type of soil. If it is light sandy loam or loam, then it is worth using pipes wrapped in geotextiles. In heavy soils, it is more profitable to use pipes wrapped in coconut fiber cloth.
- Crushed stone is poured over the laid pipes; as a rule, the thickness of the top filling is 40 cm.
- The top layer of crushed stone is covered with geotextile, which was previously secured to the sides of the trench.
- The trenches are covered with soil from above and covered with pre-cut turf.
Mistakes you shouldn't make
- Wrong selection. For example, pipes without a filter cannot be used in loamy soils.
- Unmaintained slope.
- Incorrect choice of location for installing a collection well or untimely removal of water from it.
So, the drainage system is a necessary element to protect the house and site from excess soil moisture. When installing drainage, it is extremely important to correctly develop its design and carry out installation in strict accordance with the technology. Errors made during installation will lead to the fact that water from the foundation will not be drained in full, that is, the efficiency of the system will be reduced.
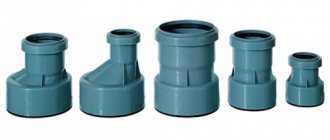
Fittings: types, features, characteristics
To install a drainage system, drainage pipe fittings are used. There are a number of types of connectors:
- Coupling (universal, transitional). Connects pipes of the same or different diameters.
- Tee (regular, with a turn, transitional). Allows you to create branches.
- Cross. Connects 4 pipes.
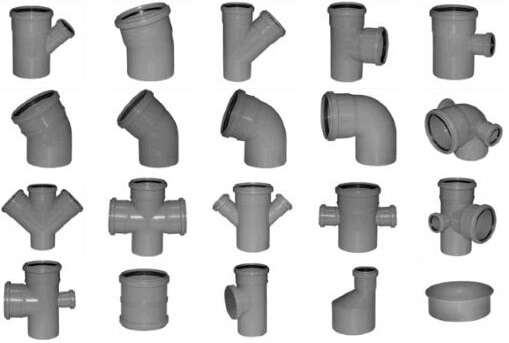
A variety of types of connectors allows you to arrange a variety of drainage system designs. The use of fittings guarantees the tightness and strength of the connections. Installation of pipes using fittings is very simple and can be easily carried out by a non-specialist. Sealing materials are not required when installing using fittings.