Home / Features of various rooms / Garage / We insulate the ceiling in the garage
A garage is not only a place where you can simply park your car, it is also a place where you can carry out some maintenance work on it.
And the car here is in more comfortable conditions than in the parking lot near the house. To make the stay of the vehicle and the presence of the owners even more comfortable, it should be insulated. On the sides, there are usually other exactly the same boxes, therefore, there will be less heat loss through the walls, but the insulation of the ceiling in the garage should be in one of the first positions, since it is through the top that the main heat leaks occur.
Insulation methods
The choice of material for this largely depends on the design features of the garage itself. If this is a separate building, then, as a rule, it has a roof and ceiling, the thickness of which can triple the heat-saving pillow. This is a method of external thermal insulation.
If this is an underground box, or one of several in a garage area, then the roof will be shared with several other buildings and the installation of an external heat-saving layer will be problematic. Here you need an insulation device from the inside.
The methods differ not only in the location of installation of the insulating material, but the material itself also needs to be different. When thermally insulating from the outside, you can use expanded clay, which can simply be scattered on the outer surface of the garage ceiling, but this cannot be done from the inside.
When installing a heat insulator internally, another factor intervenes - the height of the box. If the room is not high enough, then installing too thick a heat insulator will take away the already small height of the walls, and this is undesirable.
Accordingly, not only the place where the bulk of the work will be done changes, but also the insulation material. Ultimately, everything affects the final cost of garage insulation work.
Foam insulation process
A basement with reinforced concrete floors is considered a room with high humidity. Experts recommend using modern synthetic insulation. The foam plastic shows a good price-quality ratio.
To use this insulation, it is enough to prepare an adhesive composition. Apply the glue directly to the concrete surface of the ceiling. To do this, we use a comb with fine teeth. Their length should not exceed 1 cm. We apply the plates tightly enough so that the gaps remain minimal. After gluing all the parts, the joints can be covered with remaining glue.
If further finishing is planned, then the foam ceiling must be attached with dowels. At least 5 fasteners are required for each plate. When using a material such as polystyrene foam, a couple of dowels are enough. After this, the foam can be plastered and puttied.
Insulation of the ceiling in the garage basement
If the ceiling of the cellar in the garage is made of sheet iron, then for insulation it is necessary to make a frame. For this you can use profiles or wooden slats. The frame is suspended at some distance from the main ceiling. The heat insulator is distributed and secured in the resulting niches.
This can be polystyrene foam or foil polyethylene foam. When using the second option, additional reinforcement with wooden slats will be required. The joints are clogged with polyurethane foam or sealant. After all the procedures, the ceiling can be sheathed with boards or PVC panels. Boards must be treated with protective agents. The efficiency of heat saving depends on the quality of work.
Materials
Depending on where the heat-saving layer needs to be installed, different materials are needed. Almost all possible options are suitable for external insulation.
Expanded clay is the cheapest option. To make the garage warmer, you can simply sprinkle it in a layer of about 20 - 30 centimeters on the outer surface of the ceiling of the garage box. To ensure the safety of expanded clay and extend its service life, you need to pour it onto a pre-laid layer of vapor barrier and cover it with some kind of waterproofing material on top.
For internal installation, everything is much more complicated - bulk heat insulators are not suitable here. It is necessary to attach a layer of heat insulation to the surface of the existing ceiling, which inevitably takes away the height of the walls. You can do this with minimal loss of space by choosing a heat insulator of the minimum thickness.
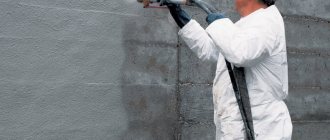
These are penoizol and polyurethane foam sprayed onto the ceiling. The layer thickness will be minimal, and their thermal insulation qualities are among the best. The disadvantage, both in the case of polyurethane foam and penoizol, is the rather high cost of the material itself, and the impossibility of applying it to the surface without a special sprayer.
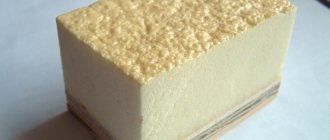
Polystyrene foam is the opposite of previous thermal insulators.
It is as cheap as possible, but at the same time it takes up a lot of space above your head. It’s easy to install - just buy tile adhesive, and you can glue the heat insulation boards directly onto the existing floor. Thermal insulation qualities are excellent, although, for best efficiency, you will need to fill all the seams between the foam boards with polyurethane foam.
Penoplex can be classified as the same type of insulation as polystyrene foam. It is very similar to its brother, but is very different in characteristics.
This material is much thinner, which will save space and retain heat better. Insulating the ceiling in a garage using polystyrene foam will be more expensive than using polystyrene foam. Installation is carried out in the same way as with foam panels - you can simply glue them to the ceiling.
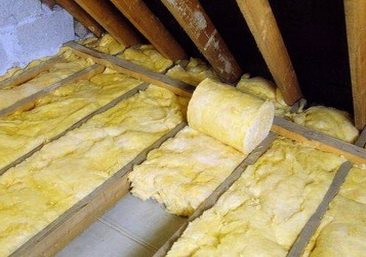
Mineral wool is no less popular than polystyrene foam. In terms of cost, it is somewhat more expensive, however, not so much that this becomes an obstacle to its use. Installation is more complicated - you will have to build a frame in which a layer of mineral wool will be laid, or you need to attach hangers to the surface of the ceiling, with the help of which you can fix the insulation boards.
Penofol. It is a thin sheet of polyurethane foam, covered on one or both sides with foil.
It will cope well with slight cold snaps, but it does not save well from low negative temperatures. This option is suitable for centrally heated garages. Thanks to the reflective ability of the foil with which it is covered, it retains heat indoors quite well.
If the box is not heated constantly, but only when the owner is in the garage, the use of this material will not be very effective. It is much better to use a combination of penofol with other heat insulators. Then, the maximum effect will be achieved.
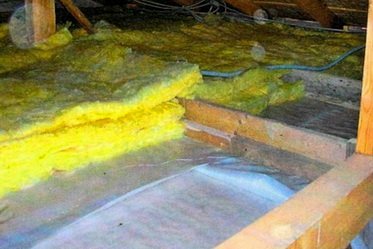
External finishing, with any chosen insulation, can be completely different - from lining to plastic panels. The most economical solution would be plastic coverings, and lining will add coziness to the room. Choose the garage owner.
Detailed characteristics of materials and step-by-step installation instructions
Let's get acquainted with the characteristics of the recommended materials and figure out how to insulate the garage ceiling without the involvement of professionals, that is, on our own.
Styrofoam
Laying insulation under the garage roof.
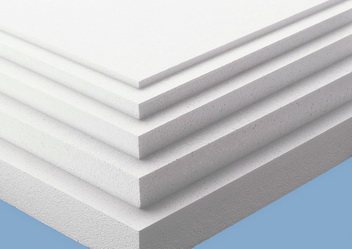
A relatively cheap option for insulation, it retains heat well, is easy to use, durable, waterproof, and does not rot. However, it is flammable (it releases toxic substances during the combustion process), except for the PBS-S brand, which is treated with a fire retardant that prevents combustion.
The sheet size is usually 100x100 cm, with a thickness of 20 to 100 mm. This is perhaps the most economical and affordable insulation option.
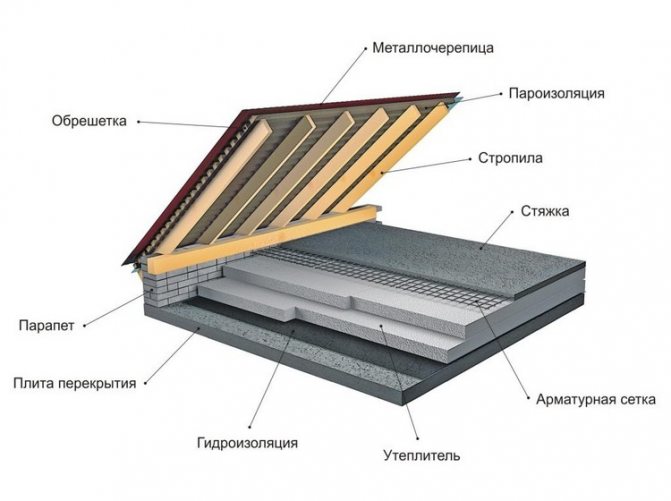
External insulation is carried out in several stages: surface preparation, creation of sheathing, vapor barrier, thermal insulation, waterproofing, second tier, roofing material.
Insulation inside the garage can occur in several ways - attaching slabs to the ceiling without finishing; gluing to a metal ceiling, putty and plaster; installation between metal and wooden profiles, followed by a layer of foiled polyethylene foam, and then PVC panels.
Mineral wool
Mineral wool is made from natural components that are used in the manufacture of glass, blast furnace slag waste and volcanic rocks. There is cotton wool, on one side covered with aluminum foil, which increases the thermal insulation properties.
Materials for finishing and insulation of ceilings.
This material is fire-resistant, environmentally friendly, easy to install, withstands the action of aggressive chemicals, and is affordable.
However, it has a rather significant drawback - the lack of moisture resistance. Therefore, additional waterproofing of the ceiling in the garage is required. Mineral wool is produced in rolls or blocks; its thickness ranges from 20 to 200 mm.
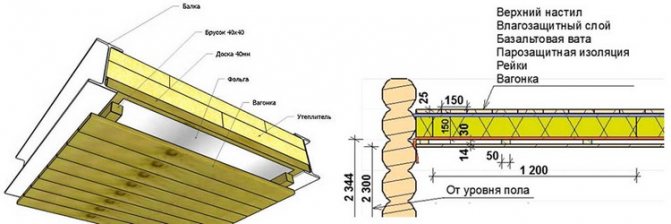
Installation of mineral wool also occurs in tiers: a ball of roofing film for vapor barrier, the insulation itself, and again a film fixed around the perimeter.
Glass wool
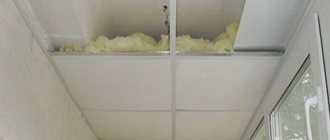
A subtype of mineral wool. One of the most common heat insulators. Does not burn, retains heat well, durable, elastic. Used for both interior and exterior decoration. However, it has an unpleasant odor and does not absorb moisture, so during installation the glass wool is covered with a moisture-proofing membrane on both sides.
You need to work with the presented material carefully, since glass wool is made from glass waste.
Waterproofing and insulation of the ceiling.
Remember to always use a respirator, safety glasses, protective clothing and well-rubberized gloves.
Cotton wool is sold both in rolls and in slabs. The latter are more expensive, but they are also easier to work with. In addition, they are quite strong in bending and compression.
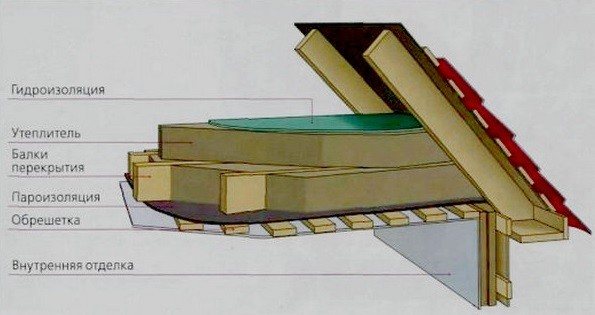
Fiberglass goes through the following installation path: sheathing (wood or metal is used as a frame), waterproofing, thermal insulation, vapor barrier, second tier, finishing material. Wood must be treated with an antiseptic.
It is important that the height of the sheathing is higher than the wool slab. When internal insulation is carried out, stages must also be followed: water barrier, thermal insulation, vapor barrier.
Expanded polystyrene
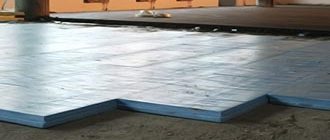
Extruded polystyrene foam (aka penoplex) is an improved version of polystyrene foam. It is durable, not afraid of moisture, and has excellent thermal insulation properties. Sold in the form of rectangular sheets measuring 120x60 cm and 1-10 cm thick.
During installation, you can limit yourself to only two dowels. It tolerates layers of plaster and putty without problems. To work with the material, use a plaster mesh. During insulation with Penoplex, gaps remain that should be sealed with polyurethane foam.
Insulation with sawdust
One of the most proven and cheapest ways to insulate a wooden house is sawdust.
After all, this is the method our ancestors used, and judging by the condition of these houses, it is a reliable method. For insulation, it is advisable to use medium-fraction pine sawdust. Before use, they must be dried for 6-12 months to prevent rot.
Sawdust is only suitable for insulating the ceiling from above.
To do this, different mixtures are used; cement, lime or clay are added to sawdust. Sawdust must be treated with copper sulfate or boric acid. Boards are attached to the floor beams, which need to be treated with an antiseptic solution.
Sawdust is laid on them in layers, constantly compacted; a small layer of ash from bugs and mold is scattered on top. A vapor barrier should be attached to the bottom and top of the sawdust. After the mixture has dried, the floor is laid.
Advantages:
- Excellent thermal and sound insulation.
- The material is cheap, sometimes you can get it for free.
- Durability.
Flaws:
- Very labor intensive to use.
- Instability to moisture.
- Possibility of rodents and insects.
- Risk of fire if used in its pure form.
Insulation of the ceiling from the inside
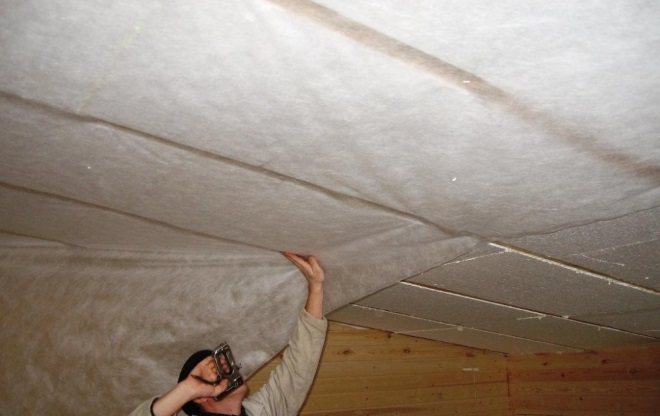
Insulation of the ceiling in the garage from the inside
If for external insulation it is sufficient to arrange an even layer of insulation material, then with internal thermal insulation the process is somewhat more complicated.
Application of foam plastic
Many owners are puzzled by the question of “insulating the ceiling in the garage with polystyrene foam” alone?
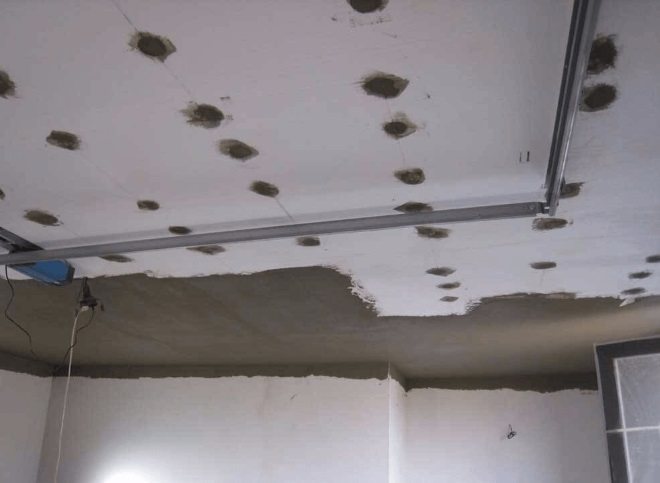
Ceiling insulation with foam plastic
The process boils down to the following algorithm of actions:
- Elimination of possible floor leaks. To do this, if the ceiling is assembled on the basis of concrete slabs, the surface is externally sealed by installing a protective layer of rolled roofing felt, which “sits” on the liquid tar.
- For internal insulation, foam boards with a thickness of at least 20 mm are selected. For ease of cutting the material, a special knife with a sharp blade of the “stationery” type is used.
- The slabs are fixed using special glue or using disc-type dowel-nails (2-3 pieces are enough for a sheet with an area of 500 by 500 mm). Holes for fasteners are made with a hammer drill. Another option for installing a foam layer is to use tile adhesive. When working with concrete surfaces, for gluing you can use polyurethane foam, which is applied to each sheet pointwise (in the corners and center), and then pressed tightly to the surface to be insulated.
- Possible gaps at the junction boundaries of foam sheets are sealed with silicone frost-resistant sealant. Large cracks are foamed with polyurethane foam.
Polystyrene foam sheets have a low specific gravity. For this reason, foam insulation is popular in cases where it is impossible to weigh down the ceiling. This is especially important for ceilings with a high degree of wear and tear.
An alternative to conventional foam sheets is extruded polystyrene foam. The structure of the material is more durable than classic foam sheets. In addition, extruded foam sheets have special grooves/recesses along their edges for tight joining. This eliminates the formation of straight cracks, which means heat leakage will be minimized.
To further improve the ceiling, it is advisable to apply a layer of cement-based plaster. To ensure the reliability of the plaster layer, pre-fix a mesh reinforcing fabric made of synthetic threads. This will save the plastered surface from possible cracking in the future.
Insulation with mineral wool
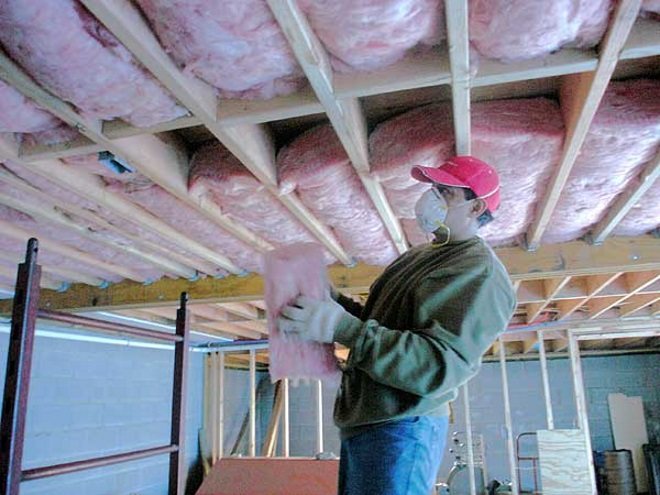
Ceiling insulation with mineral wool
The material has a low degree of thermal conductivity and does not support the spread of fire. In addition, the material is of natural origin, so it does not pose an environmental hazard to the car box.
So, how to insulate the ceiling in a garage with your own hands by applying a layer of mineral wool. To do this, the following sequence of actions is observed:
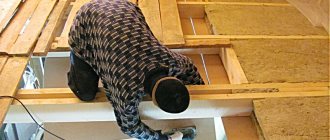
- Frame assembly. Without this technical element, laying mineral wool is not possible. The frame is assembled using wooden blocks. An alternative to bars is a tin ceiling profile. The frame based on profiles is arranged using special steel hangers. Along the perimeter, the horizontal of the future frame is “beaten” with a laser or bubble level. Tin guides (27 by 29 mm) are fixed along the marked horizontal line, into which the main profiles 60 by 27 mm are inserted. The main profiles arranged on a cross should form cells of 500 by 500 mm.
- Application of a vapor barrier film that prevents the accumulation of condensation, which will allow the mineral wool to “breathe”.
- Mineral wool installation. The most accessible way to install mineral wool is to lay the material behind the frame structure. A more expensive option, including in monetary terms, is fixation using disc-shaped dowel-nails.
- Covering the frame with laid insulation. For this, two types of materials are most practical: metal profiles and PVC panels. The first option forms a hard surface that does not require additional painting activities. The second type of sheathing material is an additional insulating layer, which also has an aesthetic side. PVC panels in the crossbar are a set of cavities that act as a buffer zone between the interior of the garage and the insulated ceiling.
Expanded clay as a heat insulator
A very common insulation material is expanded clay - baked clay in the form of granules. This is a porous, environmentally friendly material.
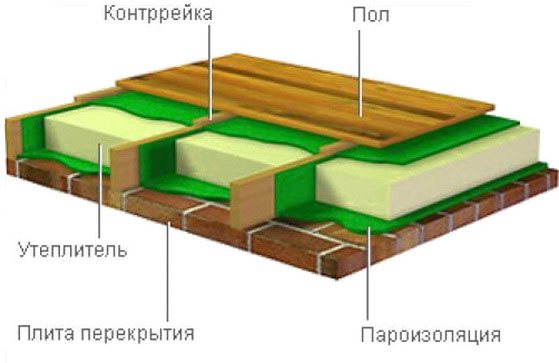
Due to the low weight there is no additional load on the structure. Expanded clay as a thermal insulation material can only be used on top of the ceiling. First, boards are laid on the ceiling beams, then a layer of insulation, laying the insulation itself with a height of 14 -16 cm and flooring.
Advantages:
- Does not decompose.
- Fire resistant, fireproof.
- High sound insulation.
- Rodents and bugs cannot live in it.
- High frost resistance, can be used in harsh climatic conditions.
- Low price.
Flaws:
- Has a large amount of crumbs and dust. When laying, a substrate is required.
- When exposed to moisture, it does not dry out for a very long time. When using, be sure to use waterproofing.
Insulating the ceiling with mineral wool is an environmentally friendly and cheap option
One of the cheapest ways to solve the problem of room insulation is mineral wool. In addition to thermal insulation, this insulation allows you to increase the sound insulation of the room. All types of mineral wool are made from natural materials.
Slabs (mats) of various sizes and heights and in the form of rolls are available for sale.
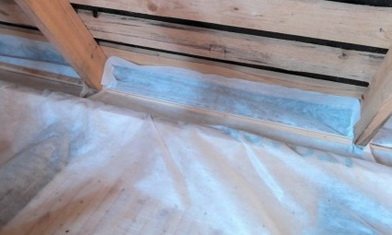
Methods for attaching mineral wool are varied depending on the distance between the rafters and the density of the wool: it can be secured using a stapler, it can be inserted very tightly between the bars, you can assemble a lathing from the slats from below, under a layer of wool, or secure it with a nylon mesh.
Advantages.
- The most inexpensive type of insulation.
- Environmentally friendly, made from natural raw materials.
- Durability.
- Fire safety.
- Low thermal conductivity.
- Good noise insulating qualities.
Flaws:
- The main drawback is its lack of resistance to moisture.
- When moisture gets in, the insulation becomes deformed and loses some of its functionality.
- Some types, such as glass wool, have a porous structure and during operation small particles get onto the skin and into the respiratory tract, which is quite harmful to health. When working with such materials, protective equipment is required.
- Can only be used in rooms with high ceilings, since after installing this insulation, the height is reduced by 8 - 15 centimeters.
Waterproofing the ceiling in the garage
Garage cooperatives, so widespread throughout our country, were built for the most part by the hands of car owners themselves. There was no need to talk about full compliance with the technology then, and water flow, both in the lower floor and on the ceiling of the main room, can be observed quite often.
The appearance of wet spots (and in more serious cases, leaks) indicates that water has found its way from outside to inside the room. In a one-story building, we are talking about precipitation, and if the garage is multi-story and the box is not on the top floor, we are talking about emergency flooding with water from the upper floors due to damage to communications.
The most effective method of dealing with external leakage is to block the flow of water from outside. The easiest way to do this is at the construction stage, when there is direct access to the floor panels from the outside. Here, waterproofing is carried out step by step in combination with thermal insulation. But if there is a leak in the garage, then there is a violation of the existing coating.
Most garages are covered with soft roofing materials. To eliminate the damage, you need to carefully inspect the entire roof.
Most often, water can seep in places where ventilation ducts and electrical wiring are installed, when there is a through communications input through the ceiling panel.
There may also be cracks or cuts as a result of careless snow removal or falling heavy branches.
The easiest way is to carry out local repairs at the site of damage. This can be done by applying a patch of rolled waterproofing material or with a special repair mastic. It is faster and more convenient to eliminate leaks from the outside using polymer-bitumen mastics. They are available in different containers, including small ones - 3-5 kg, do not require special equipment, and are applied with a regular brush. They may be called “Liquid roofing”, “Liquid rubber”, etc. An example of such local repairs can be seen in the video.
It is important to remember that to completely prevent moisture stains on the ceiling, you need to eliminate the very cause of the leak!
Major prevention of leakage may entail a complete replacement of the roofing; this procedure is quite lengthy and expensive. It’s good if you can accurately determine the location of the damage to the roof, in which case local repairs can be performed. If this is not possible, the ceiling in the garage is waterproofed from the inside of the room.
Among the waterproofing materials available on the market, several main groups can be distinguished:
- Rolled
- Coating
- Injectable
Rolled materials are used for waterproofing from the side where water enters (i.e. from the outside), and they are not suitable for blocking moisture from the inside.
Injection waterproofing is a fairly effective method when internal voids in concrete and construction joints are filled using the injection method of a special composition. Often moisture penetrates through cracks in the panels, and in this case, filling the space internally with insulating material gives an excellent result. However, this technology requires special equipment and is quite expensive. Work under this scheme is carried out by construction companies.
Injection waterproofing is carried out as follows: in places where water leaks, holes are drilled, penetrating into cracks, butt seams and voids. Then special packers are inserted into them, through which an insulating material is then injected (this can be a polyurethane or epoxy compound, acrylate gel). For large voids, polyurethane insulation is well suited - this material expands when dried, just like regular polyurethane foam.
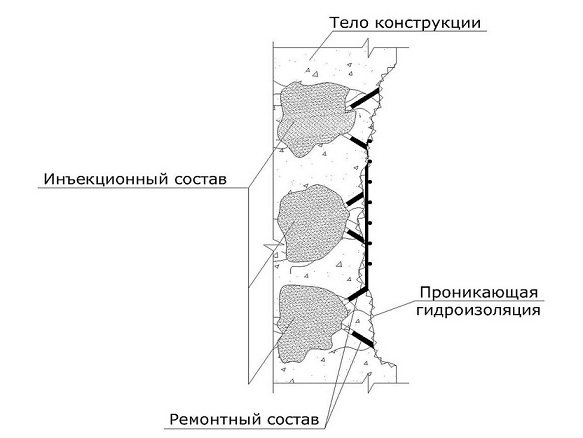
Injection waterproofing
The injection method can completely fill the space through which water penetrates.
It often happens that moisture appears through microcracks or capillaries in the ceiling. The best solution here would be penetrating waterproofing of the garage ceiling.
These materials include Portland cement, quartz sand and special chemical additives. The principle of operation of such waterproofing is that when applied to a concrete slab that is wet from a leak, chemicals are drawn into capillaries filled with water and enter into a chemical reaction with the cement that is part of the concrete. As a result, a crystalline structure is formed, which subsequently completely prevents water from seeping through. In addition, the structure of the ceiling itself is significantly strengthened.
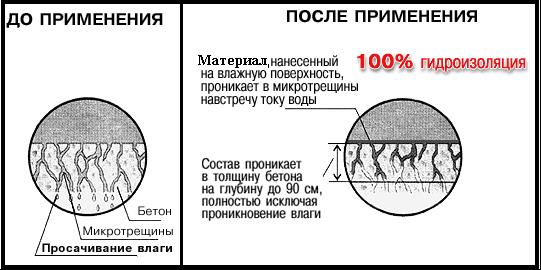
Operating principle of penetrating waterproofing
Before applying penetrating waterproofing material, it is necessary to completely clean the surface of the ceiling from paint, grease, putty and treat it with a wire brush.
Important! Penetrating waterproofing is effective only if the pores of the concrete are open, i.e. the so-called layer has been removed “cement laitance” - a cement film on the surface of reinforced concrete slabs.
This can be achieved mechanically (sandblasting, metal brush), but it will be faster and cleaner to carry out chemical treatment - milling with a special compound such as “Khimfrez” (Gambit “Frez”, Crystallizol Khimfrez, Lepta Khimfrez, etc.). This is a liquid that dissolves the cement film, thereby opening the porous structure of concrete.
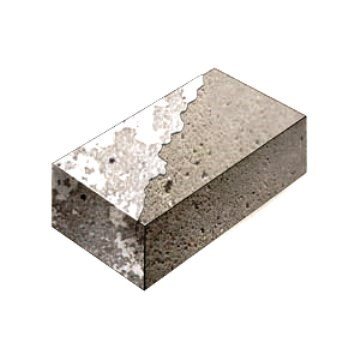
Dissolution of cement film
In addition to the fact that when performing waterproofing work with penetrating materials the pores must be opened, the concrete itself must be saturated with moisture. Therefore, if the ceiling is completely dry, it must be moistened generously several times.
After the concrete surface is prepared, a layer of waterproofing is applied to it, previously sealed with water according to the manufacturer’s instructions. To apply penetrating waterproofing, a brush or spatula can be used, depending on the required layer thickness.
The maximum amount of material applied may vary, so the application technology must be strictly followed. Usually there is a need to maintain freshly applied waterproofing in a wet state for about three days.
If there is a need to insulate the seams/joints between the floor panels, then a dovetail cut is made along the seam (the wider part should go in the inner part). Cracks are also filled with fines. Then the surface is cleaned and primed (coated) with a layer of standard waterproofing. After this, the embroidered seam is filled with a special joint compound, which is available from every manufacturer of penetrating waterproofing materials.
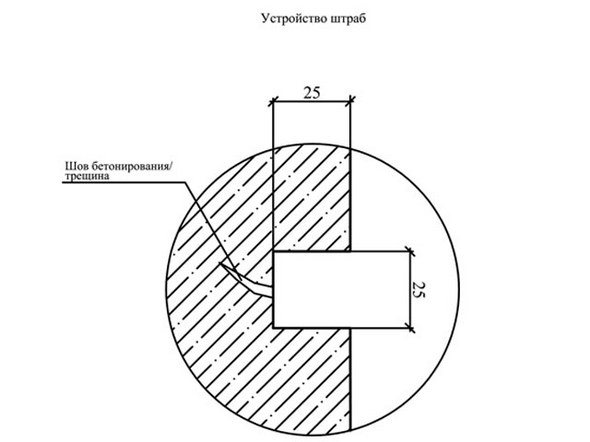
Insulation of seams/joints between floor panels
Among the manufacturers of insulating mixtures we can note such as Lakhta, Penetron, Xypex, Kristallizol, Kalmatron, Gidrotex, etc.
The process of waterproofing penetration into concrete and the formation of a crystalline structure in the capillaries can last up to 28 days. Therefore, further decorative processing (leveling, puttying, painting, etc.) is recommended to be carried out no earlier than this period. Before applying further finishing, the surface should be wire brushed to improve adhesion. This may not be done if the ceiling is covered with thermal insulation materials (expanded polystyrene) or covered with ceiling panels.
Video instructions for application using Lakhta penetrating waterproofing as an example can be viewed in the video:
In conclusion, let us remind you that the best way to protect the ceiling in the garage is to prevent moisture from entering from the outside. In addition to the roof, you also need to pay attention to the waterproofing of the ends of the panels, because rainwater can also leak from the side surfaces of the slab, getting into the technological cavities and then flowing into the room.
Read more
Add a comment
Insulation of the ceiling from above from the attic side
Between the joists or beams you need to put waterproofing.
After this - polystyrene foam, laid very tightly, without gaps. Then again a layer of insulation. After this you can make the floors.
There are two ways to fasten foam plastic indoors. With the first, a frame is first made from wooden beams or a metal profile.
Sheets of insulation are cut out in accordance with the cells of the frame and secured with dowels or glue. In the second, more economical method, sheets of foam plastic are immediately attached to the ceiling using special glue. In this case, the ceiling must first be prepared.
Advantages:
- Low thermal conductivity.
- Low hygroscopicity, which allows you to avoid vapor and waterproofing when installing.
- Retains its characteristics throughout the entire period of operation.
- Has good sound-absorbing properties.
Easy to install, light weight, cuts well.
Flaws:
- Short service life 5-10 years.
- Cannot be used in homes with poor ventilation. The material is vapor-proof; moisture causes mold and mildew to appear in the room.
- When burned, it releases harmful substances that are hazardous to health.
- Reduces the height of the room by 5-6 cm.
Insulation of the ceiling from below using lathing
To avoid condensation (see Condensation in the garage, what should I do?), insulation of the ceiling in the garage with polystyrene foam is done both from the outside and from the inside. Foam boards are attached to the surface using special glue, and it is worth additionally using plastic mushrooms, which will make the fastening more durable.
Surface preparation
For proper fastening, the surface must be properly prepared. The durability of the structure will depend on this. For a metal garage, the sheets are simply attached to the ceiling surface using glue. But this is not how the work is done for brick. It will be necessary to make the frame and finish the front part after installation:
- To begin with, the entire surface is cleaned with a metal brush. And an inspection is done. The surface must be without previous coating. If there are concrete peelings, then they should be removed with a hammer and chisel;
- Now you need to treat the surface with an antifungal antiseptic, which will protect you from troubles in the future;
- Now we need to install the sheathing on the ceiling. To which the finishing material will subsequently be attached. For this, PVC panels are most often used. Which are not expensive and you can get a high-quality surface for not a lot of money;
Attention: If you use wood for sheathing, then it should be treated with antiseptics before installation. Give preference to a deep penetration liquid and apply the coating a couple of times. This will significantly increase the service life of the structure.
- Now we determine the level of ceiling mounting. To do this, take the thickness of the profile and make a mark on the wall. At this level we will need to apply the coating;
- We transfer the mark to other walls, for this we use a hydraulic level. It is with its help that this can be done most accurately. We transfer;
- After this, we connect the lines and use nylon thread for this. The size is just off;
- Now we cut the beam into the required size and fasten it around the perimeter of the room. To do this, we use a hammer drill, with which we make holes in the wall and fasten it using dowels;
- Do not use dowels from kits. To do the job, it is better to purchase plastic separately and screws for it, which should be taken a couple of mm apart. more from the hole cross-section;
- Now we need to attach the cross bars. To do this, when choosing a step size, the following factors should be taken into account. This is the width of the foam and the length of the plastic panels. We make markings and fasten the block as we did before.
Styrofoam fastening
We continue to make the ceiling in the garage from polystyrene foam between the transverse profile. We attach foam here. We do it as follows:
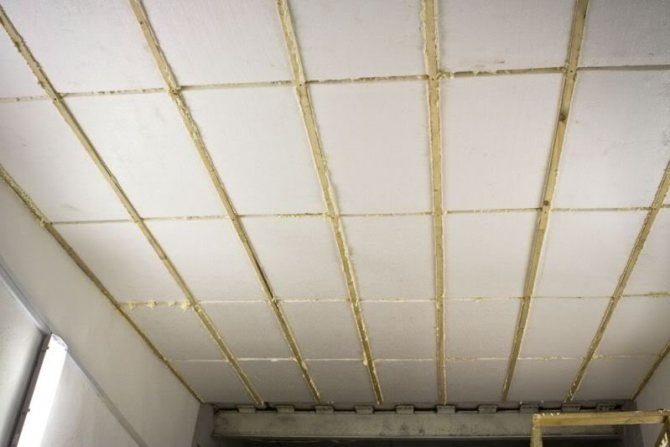
Laying foam plastic for frame insulation
- We apply glue to the ceiling plane and apply it to the foam;
- Apply and press;
- We make holes with a puncher and install plastic mushrooms;
- We wait for complete drying and after this connection the foam is filled with construction foam;
- We do the wiring;
- We install finishing materials. This could be plastic or drywall.
The foam ceiling in the garage is completely ready.
What is better penoplex or polystyrene foam?
Experts say that when insulating private houses, the heat insulator most often used is penoplex.
Penoplex appeared on the market relatively recently and in recent years has been displacing the familiar foam plastic from the building materials market. These are identical, very similar materials, both are made from polystyrene. Penoplex is used for insulation of wooden and concrete ceilings.
When insulating the ceiling with penoplex from above: first, a subfloor is made along the joists, and penoplex is placed on top. A 1-2 cm screed is poured directly onto the insulation boards. The flooring material is laid on top of the screed.
Possible thermal insulation materials
Before you insulate the ceiling in the garage from the inside, you need to decide on the type of insulation layer and check the quality of the roof covering. It is important to note that garage ceiling insulation can be done both from the outside and from the inside. Carrying out one or another version of thermal insulation work depends on the roof configuration:
- If the car box has a regular one-sided slope made of concrete slabs, then it is advisable to carry out insulation from the inside. Materials for carrying out the work can be polystyrene foam or miniplate.
- If the garage roof has a traditional gable configuration with sufficient attic space, then the best option is to insulate it from the outside of the ceiling. In this case, insulating materials such as a layer of wood shavings (sawdust), mineral slabs, and expanded clay are used.
Features of using insulation indoors
A sheathing is installed on the ceiling.
Penoplex is fixed to the ceilings using fasteners close to each other. A reinforcing fiberglass mesh is glued onto the insulation boards. The finishing of the ceiling is completed with any finishing material.
Advantages:
- Low thermal conductivity coefficient.
- Excellent, almost zero, water absorption.
- Strength and durability.
- Environmentally friendly.
- Resistant to mold and rot.
- Increases sound insulation.
Flaws:
- Easily destroyed by nitro paints.
- Practically does not allow air to pass through.
- Due to its high density, adhesives are not attached to it. You must first glue the synthetic reinforcing mesh.
- When smoldering, it releases harmful toxic substances that are hazardous to health.
- When used indoors, it reduces the height of the room.
The effectiveness of ceiling insulation with polystyrene foam
Expanded polystyrene is a type of polystyrene foam.
They have the same chemical composition; the raw material for their production is polystyrene, but the manufacturing process is significantly different. When producing polystyrene foam, the raw materials are treated with water steam. To obtain expanded polystyrene, granules are melted, so it has a very dense structure.
The advantages and disadvantages are almost the same as those of polystyrene foam. The quality characteristics in some respects are higher than those of polystyrene foam.
For example, it is very durable, its density is 40 kg per 1 m3, inside it is homogeneous, without granules, and does not absorb water. Thanks to these characteristics, expanded polystyrene is very effective as a heat insulator. But its price is higher compared to other types of foam.
