Installation of ventilation grilles
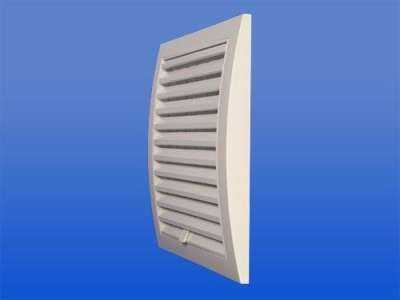
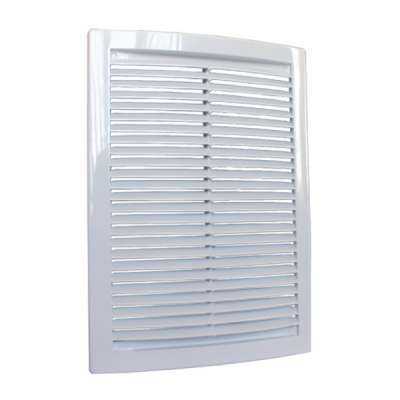
The ventilation grille, despite its simplicity, is a reliable design solution. The rigidity of the product is ensured by a durable frame. It can be combined with the air duct or fixed to the wall surface. In larger lattices, the structure is divided into several smaller sectors, and this is done using a frame. Due to this, the strength characteristics of the product are increased. A removable plastic or metal panel covers the working area of the grille. It should be noted that distributors are:
- adjustable– the direction of air masses can be changed;
- non-directional action – oxygen easily penetrates into the room, often playing a decorative role.
- with shut-off valves. Grilles of this type are installed at enterprises, warehouses and industrial complexes. They eliminate the effect of reverse draft and prevent the penetration of dust and small insects. This design ensures that contaminated air moves exclusively outward. It can also be installed in an apartment to prevent unpleasant odors from coming from neighbors.
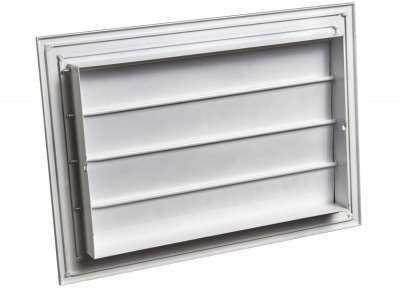
- Inertial blinds their operation is similar to solutions with a check valve. Horizontal slats move and block the air flow. To ensure quick adjustment, light and reliable materials (PVC, aluminum) are used.
Ventilation grilles are often equipped with horizontally located blades, thanks to which you can regulate the intensity and direction of the supplied air.
The cleaning process boils down to removing the decorative overlay. After which the product can be treated with detergent and washed under running water.
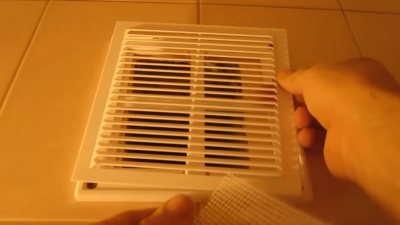
Removing the decorative part for cleaning
Supply system
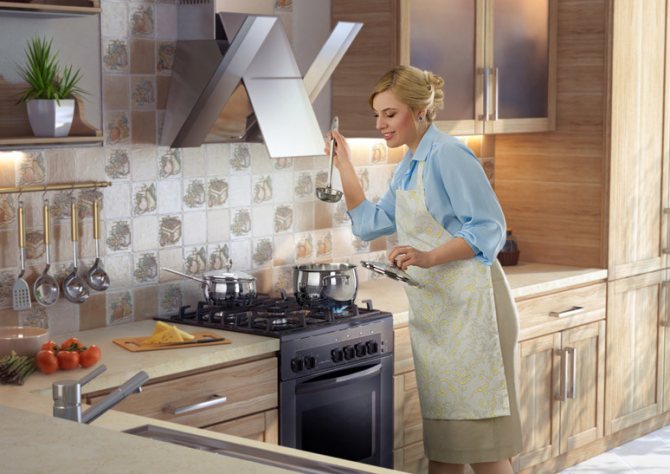
Such a kitchen hood without venting into the ventilation works to take in oxygen from the street to ensure a constant flow of fresh air. At the moment of exit, the flow arrives in a purified state and slightly heated; all properties of the equipment can be easily adjusted.
The possibilities are very extensive; thanks to settings and modern sensors, air enters the apartment at room temperature, without creating discomfort or causing harm to health.
A special heating element is responsible for the process. Although, in fact, the kitchen is without ventilation, it becomes quite easy to breathe, this is due to modern filters that prevent the penetration of dust.
Each device is equipped with an automatic overheating protection system, which virtually eliminates the possibility of breakdowns. The noise from the device is not audible indoors, as well as external signals from cars and extraneous sound.
Purpose and role
In fact, the ventilation system is one of the most important engineering structures of any house, regardless of whether it is private or multi-apartment. It is ventilation that is responsible for proper air exchange, as well as for comfortable climatic conditions in each individual apartment or room. The system has its own ventilation ducts, at the inlet and outlet of which a grille is mounted.
It performs several functions at once, namely:
- protects the mines from possible clogging, as objects and animals may accidentally fall into them;
- correctly distributes air flows, especially for supply-type ventilation grilles;
How to install the ventilation grill correctly will depend on the material from which it is made. But, as a rule, all work options can be completed independently, without the help of specialists.
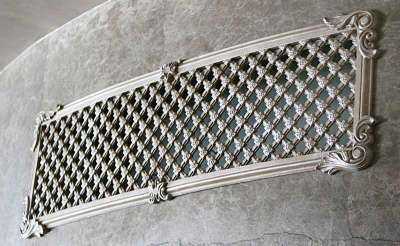
Shapes and materials of gratings
A wide range of specialized solutions are available for sale. Regardless of the type and model, ventilation grilles are available in 3 forms, similar to an air duct:
- square;
- round;
- rectangular.

Due to such diversity, it is possible to choose the optimal product that complements the interior of the room. Recently, they are increasingly resorting to individual orders, when the size and shape are selected taking into account the interior of a residential or industrial premises. They may differ in color, design and style.
Modern industry uses several materials for the production of air distributors:
- plastic;
- aluminum alloys;
- wood;
- ceramics;
- brass;
- Cink Steel.
Let's take a closer look at the most common options.
Plastic products are considered the most affordable on the market. They are based on only 2 materials - polyvinyl chloride and polystyrene. They can be installed not only near ceilings, but also on doors and walls. The products are widely used in offices, cottages and apartment buildings. For multi-level ceilings, round lattices are created. Their key drawback is that over time the surface becomes rough and turns yellow.
Plastic option in the interior
Aluminum ventilation grille is no less in demand on the market. It is characterized by increased resistance to aggressive substances and humid environments, and they also boast low weight. These products are widely used in residential and industrial buildings. The material is powder coated. One of the disadvantages is the high price.
Aluminum option in the interior
Wooden models are specialized solutions for saunas and bath complexes. These modifications boast a custom design. It should be noted that the popularity of natural and environmentally friendly wood is growing. Be that as it may, products with a latch fit perfectly with the interior. Such gratings have 2 main disadvantages: they require periodic treatment with fire retardants and other protective compounds, and their cost is quite high.
ATTENTION! wooden products are recommended for indoor use only.
Wooden option in the interior
Metal products are used mainly in industrial complexes and large enterprises, but they can also be installed in ordinary buildings. They boast exceptional reliability, thanks to which they can easily cope with powerful air pressure, not to mention all kinds of small particles. Such products must be periodically treated with anti-corrosion compounds. As for the disadvantages of metal gratings, there are only 2 of them - high cost and impressive weight.
Metal option in the interior
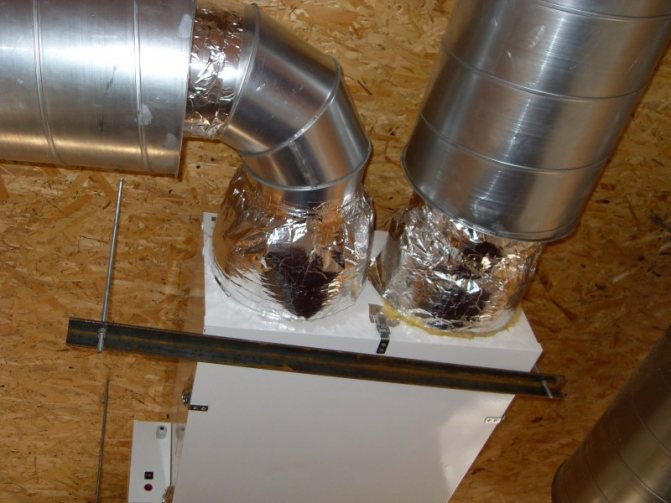
Vakio for exhaust ventilation of the kitchen of a private house.
The standards and rules for organizing cottage ventilation are regulated by the provisions of the updated version of the building rules SP 55.13330.2017 Single-apartment residential houses.
According to clause 9.7,
the minimum performance of the home ventilation system in maintenance mode should be determined based on at least a single exchange of air volume per hour in rooms with constant occupancy. In service mode, at least 60 m3 of air per hour must be removed from the kitchen, and 25 m3 of air per hour from the bathtub, toilet, shower room, and toilet.
The air exchange rate in other rooms, as well as in all ventilated rooms in non-working mode, must be at least 0.2 room volume per hour.
The set of rules considers the ventilation of a single-apartment building from the standpoint of energy saving, providing for two modes of its operation: - maintenance mode - active mode, used during periods of presence of people in residential premises or active use of non-residential premises for their intended purpose; - non-working mode - passive mode used when there are no people in residential and non-residential premises.
The set of rules does not make any difference in the volume of kitchen ventilation depending on the type of equipment installed in it (electric or gas stove), requiring in any case the removal of 60 m3/hour of exhaust air, and only in service mode, when cooking or eating occurs.
The set of rules recommends, in order to save energy, to reduce the frequency (volume) of ventilation in all ventilated rooms (no exception is made for the kitchen) in non-operating mode down to 20% of the maintenance mode, that is, up to 12 m3/hour. .
The requirements for removing 100 m3/h of air from the kitchen are provided for by the Building Rules SP 54.13330-2016 RESIDENTIAL MULTIPLE APARTMENT BUILDINGS (see Table 9.1) refer to multi-apartment buildings and have no basis for use for a cottage.
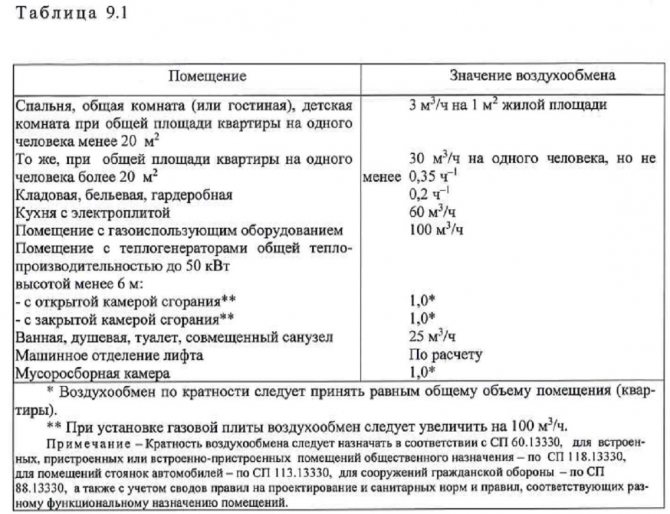
SP 55.13330.2017
The Wakio device provides complete air exchange up to 60 m3/hour , that is, fresh air supply up to 60 m3/hour and exhaust air removal up to 60 m3/hour.
When installed in a kitchen, it ensures standard air removal in accordance with clause 9.7 of SP 55.13330.2017 Single-apartment residential buildings.
In addition, the Wakio device has a special exhaust ventilation mode, in which the exhaust volume is up to 120 m3/hour . The use of this mode for kitchen ventilation in service mode ensures compliance with even more stringent requirements of SP 54.13330-2016 related to apartment buildings.
Design features and material
All ventilation grilles, in addition to the method of fastening, also differ in their design features. Modern products, depending on their functionality, can be as follows:
- adjustable - such a system is additionally equipped with special movable dampers, with which you can change the flow area;
- unregulated - this structure is absolutely motionless;
- inertial - have rotating lamellas that can change their position depending on the force of air pressure and its direction:
- combined - the most popular models, as they are equipped with a pipe with which you can connect an exhaust hood installed above the gas stove.
All grilles are selected taking into account the size of the opening of the ventilation system and its shape. External models are taken with a small margin so that it is possible to cover all sections of the hole. The most popular are rectangular and round planks, which are made from durable, environmentally friendly materials that are resistant to moisture. These types include:
- steel;
- aluminum or copper alloys;
- tree;
- plastic.
Before choosing one model or another, you need to decide where exactly the ventilation grille will be mounted. It is not difficult to install the structure with your own hands if you follow the instructions and follow the sequence of actions.
Types of ventilation systems
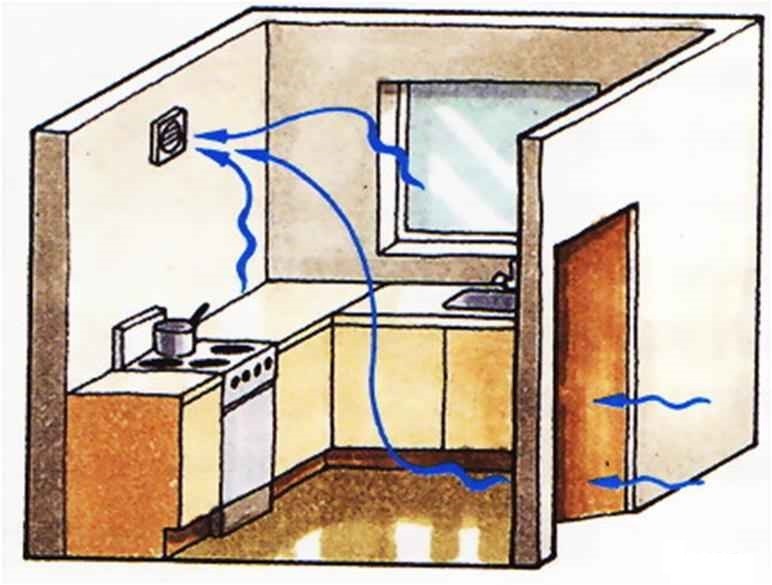
Today, two different ventilation systems are most often used: natural and forced. The first is a pipe or channel system that operates on the principle of a difference in pressure or temperature inside and outside the room. In other words, this is a channel or pipe, one end of which is located in the kitchen, and the other on the street. Since the temperature in the kitchen during cooking is always high, the heated air rises through the ventilation ducts and goes outside. Therefore, when creating natural ventilation, it is very important to correctly assemble the system diagram.

A forced system is a structure in which a special device is installed into the ventilation distribution of channels or pipes, creating a pressure difference inside the system. Usually its role is played by a fan.
The forced model will work much more efficiently if you choose the right fan taking into account its performance. But this criterion is not mandatory. Therefore, when it comes to safety inside the kitchen, natural ventilation is implied. And if we talk about indoor comfort, then we mean a forced ventilation system.
Natural ventilation is low-power and therefore removes a small amount of polluted air from the kitchen. But he does this constantly and without stopping. The flow-through model of the hood is more efficient and powerful in this regard, but it only works when the fan turns on. Therefore, to ensure safety and comfort, two systems are installed at once. In addition, a flow hood with an air duct leading outside is already considered a forced ventilation option.
Pros and cons of natural ventilation
The positive characteristics of natural ventilation include:
- No additional energy is required to remove air.
- Providing general air exhaust together with bathrooms.
- Quiet operation.
The negative characteristics of natural ventilation include:
- If it's hot outside, the efficiency of the system decreases sharply. There may be a reverse flow of air from the street into the room. There is only one way out - to ventilate the kitchen more often.
- Cannot cope with high concentrations of polluted air, especially odors. For example, if you fry meat with onions in a large frying pan, the aroma will spread throughout the apartment.
- When removing a certain volume of polluted air masses, the same volume of clean air is required. Only if this condition is met will the system work effectively.
- Over the years, the canals become polluted, which affects the efficiency of pollutant removal.
Read also: Kitchen design options with a gas boiler
Rules for installing natural ventilation
Installing ventilation in the kitchen is a difficult and responsible task. Residents of city apartments are luckier, because multi-storey buildings already have a ventilation network. But owners of private houses will have to install ventilation with an exhaust hood in the kitchen during the construction process.
Natural ventilation systems
The system is based on channels or pipes, or more precisely, their cross-section. They are determined in accordance with such kitchen parameters as: the type of stove installed and the number of its burners, the size of the room, the type of building, the climatic conditions of the area, and so on. All this is documented in hygiene and construction standards. Let's consider the basic provisions regarding the installation of exhaust ventilation in the kitchen.
- If a gas stove with four burners is installed in the kitchen, then a ventilation system is assembled that can remove polluted air from the room in the amount of 90 m³/hour. To do this, a ventilation duct with a cross-section of at least 0.02 m² is installed above the roof. This is either a pipe with a round cross-section with a diameter of 16 centimeters, or a channel made of brick (by the way, the masonry can be laid in half a brick) measuring 14x14 centimeters.
- The entrance to the system from the kitchen should be located either on the ceiling surface or on the wall at least 30 centimeters from the ceiling.
- The draft is provided by the height of the ventilation duct. Its upper end should be located at a height of 2.5-5 meters from the edge of the ridge of the roof of the house. In this case, you need to make sure that in unheated rooms (for example, in the attic) the pipe is insulated. The cold section reduces traction, as a result of which condensation will form inside, which will negatively affect the quality of the structure.
Types of exhaust grilles
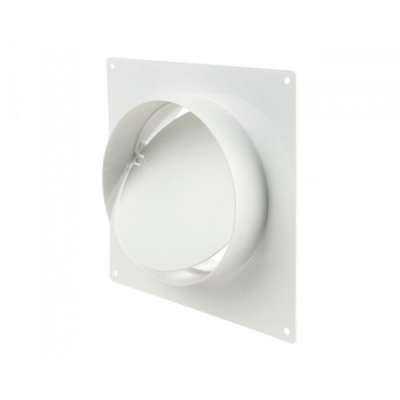
Metal and plastic types of ventilation grilles, depending on the purpose and location of installation in the air duct, are: exhaust and supply. Depending on the installation location, these products are:
- external;
- internal;
- interchangeable.
Domestic
One of the most popular types on the market. Taking into account the features of functioning and fastening, they are:
- overhead – used primarily in residential buildings, in systems where natural draft predominates. The presence of a mosquito net prevents insects from entering the premises. They are often equipped with a check valve. The throughput can be adjusted using movable slats;
- slot models - installation of ventilation grilles of this type is in demand primarily in areas where it is necessary to ensure the inconspicuousness of the product. Their design and appearance matches the room;
- models with check valve . Popular solutions equipped with inertial blinds and a reverse draft valve. Often used as a functional element for an exhaust device.
External
External products are available for sale in several types of designs:
- frontal models – installed mainly in attics. They are distinguished by a wide edging and a magnificent appearance;
- door models – functionally replace the supply valve, which is primarily relevant for those rooms where it is necessary to ensure natural air supply;
- floor-standing models are an ideal solution for organizing the supply of fresh oxygen to the lower part of the room. These can be fixed or adjustable solutions;
- plinth grilles - used primarily as a protective element against rodents. Installing a ventilation grill will protect basements, attics, and basement floors from small pests.
Internal transfer
As for internal transfer options, they can be different not only in color, but also in shape. They feature an attractive design. Among professionals, products of round and rectangular shapes are primarily in demand. Their main feature is the absence of valves.

Fireplace protective elements are widely used in fireplace rooms, which ensures the supply of heat to the room. The penetration of cold air masses is carried out through the lower part of the grille, and after warming it is redirected into the room.
Installation of several ventilation grilles within one fireplace is an important component of effective air exchange.
Note! Fireplace models are made from refractory and fireproof materials. Given the variety of patterns and shades, they are classified as decorative.
Types of ventilation modules
Ventilation modules for kitchens are quite diverse and are divided into exhaust, supply and natural.
- Exhaust - due to extraction, a vacuum of pressure is created and fresh air is drawn into the kitchen.
- Natural ones work with a pressure difference.
- Supply air - fresh air is forced into the room, displacing old air.
To purify the air in the kitchen, special devices are installed.
- The unit has an unusual mount for a kitchen table or wall-mounted version.
- A popular flat hood mounted directly above the stove.
- For an apartment in an apartment building with a suspension from the ceiling.
- Corner.
- Wall-mounted, above the stove.
All units are divided into flow and circulation.
- Flow-through systems remove contaminated air masses into the mine; this is a very good way.
- Circulation systems are based on purification by filters
Individual ventilation is complex, like the option shown in the photo below. Requirements arise for the design and installation of the umbrella with devices for catching fat particles. Additional questions for the installation site to combat noise. Due to work in several zones at once, the social exchange system is not very productive.
If the area of your room is about seven to nine square meters, then pulling with pressure seems like an ideal option.
The most popular types of ventilation grilles
Construction stores offer many models of ventilation grilles: round, rectangular, external and internal.
External air supply
supply ventilation grille with electrically adjustable shutters
External ventilation grilles are available in the following options:
- The gable grille is specially designed for ventilation of attic spaces. It is always made with a wide edging, making it more decorative;
- Basement ventilation grilles with dimensions of 15x15 cm, 24x24 cm, 37.5x37.5 centimeters must be reliable and protect the basement from rodents;
- Door ventilation grilles are used instead of a supply valve if there are no other ways to organize air supply into the house;
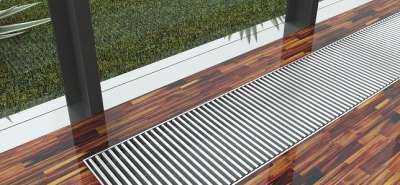
- Floor ventilation grilles are indispensable when organizing an influx that displaces exhaust air from the bottom up. Floor ventilation grilles can be adjustable or stationary. In the first case, blinds are inserted into a metal frame, which can be rolled into a roll.
| Grille name | Installation locations | Functions | Additional features |
| Domestic | Output of supply and exhaust air ducts in the room | 1. Correction of the direction and intensity of air flows. 2. Room design | Blinds, latches |
| External | External outlet of air ducts of any type | 1. Protection against birds, mice, and dry leaves getting into the air ducts. 2. Decorative function | 1. Heating to avoid ice in winter, 2. Dampers, dampers, blinds. |
| Transfer | Interior partitions and doors | Ensuring free air movement in the room | Sound and light insulation, blinds |
Table 1. Main characteristics of ventilation grilles
Internal exhaust
overhead grille with blinds
- Overhead ventilation grilles are used in residential premises equipped with natural draft. The mosquito net protects the apartment from insects. If the ventilation grille has a non-return valve, residents will not be at risk of backdraft. Ventilation grilles with or without blinds are installed in kitchens and bathrooms. The throughput of the ventilation grille is regulated by movable slats;
- Ventilation grille with valve and connection for kitchen hood . They are made of polyvinyl chloride and can be equipped with a check valve or inertial blinds. At the same time, they provide natural draft and outflow of air from the kitchen hood;
- Slotted ventilation grilles are installed where ventilation must be invisible. The dimensions of the ventilation grilles are selected to match the design of the ceiling and are hidden between levels or decorative elements.
Internal supply
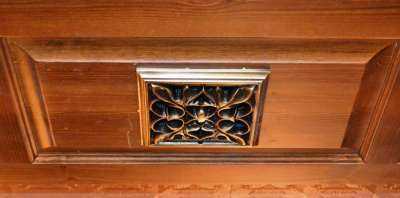
fireplace ventilation grille
Internal supply grilles are made in various shapes and colors, sometimes with attractive designs. The round shape of ventilation grilles is popular among architects, as it is the most harmonious and inconspicuous. Supply ventilation grilles are never equipped with valves. Designer pieces are created using hand-processed wood, forged elements, and laser cutting. through fireplace ventilation grilles . The cold convective flow enters the fireplace through the lower grate and warms it into the room through the upper one. Therefore, a pair of ventilation grilles should be located in the fireplace duct.
Ventilation grilles for fireplaces are made only from fireproof and non-fusible materials. They can be classified as decorative ventilation grilles for their variety of colors and patterns.
How to combine several channels into one channel
How to properly make natural ventilation in a private house
Natural ventilation channels
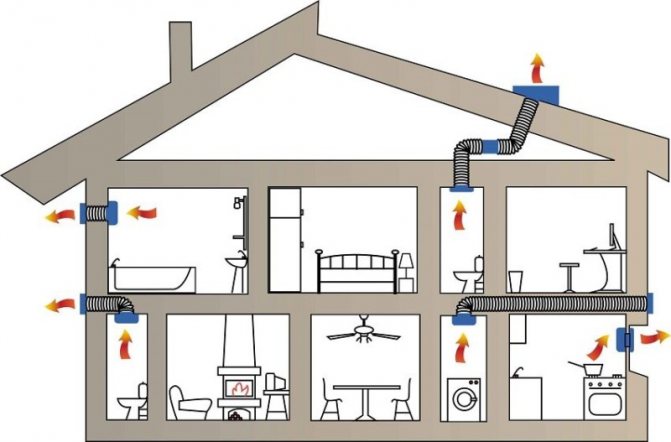
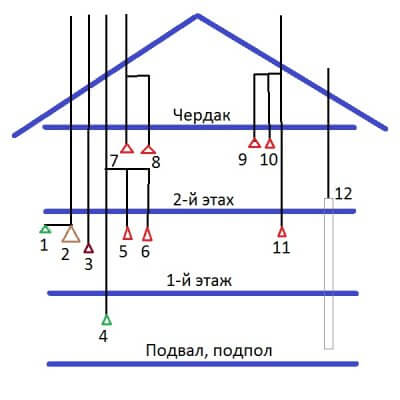
In previous articles on this topic, air circulation patterns in a house or apartment were published, as well as the advantages and disadvantages of a natural ventilation system. For effective ventilation, each room of the house must have two ventilation devices: one for air supply, the other for removing air from the room.
Each room in a house or apartment is equipped with two supply and exhaust natural ventilation devices according to one of three options:
A supply valve in a window or external wall for air flow. A flow hole into an adjacent room with an exhaust duct (hole in a door or internal wall, partition) to remove air.
For air supply, there is a flow hole from the adjacent room with a supply valve, and for air removal, there is an exhaust ventilation duct.
A supply valve for inflow, and an exhaust ventilation channel for removing air.
Check whether in the house or apartment where you currently live, whether all rooms have supply and exhaust ventilation devices?!
In which rooms should exhaust ventilation ducts be installed?
Exhaust ducts for natural ventilation must be provided from the following areas of the house:
Sanitary facilities - bathroom, toilet, laundry room.
Kitchens.
Dressing room, storage room - if the doors of the premises open into the living room. If the doors open onto a corridor (hall, kitchen), then you can do one of two things: arrange an exhaust duct from the premises or install a supply valve in a wall or window.
The boiler room must have both a ventilation duct and a supply valve.
From rooms separated from rooms with a ventilation duct by more than two doors.
On the floor above the first, if there are entrance doors from the stairs to the floor, ventilation ducts are made from the rooms indicated above, and/or from the corridor, hall.
On the floor above the first, in the absence of entrance doors from the stairs to the floor, a ventilation duct and a supply valve are installed in each room of the floor.
In other rooms of the house that do not have natural ventilation exhaust ducts, a supply valve must be installed in a window or in a wall and a flow hole into the adjacent room.
In addition, natural ventilation exhaust ducts are used for ventilation:
Spaces under the wooden floor of the first floor on joists.
Basement space to protect against radioactive radon gas.
Sewer riser.
Building rules (clause 6.5.8 SP 60.13330.2016) require that in residential buildings, for premises housing gas equipment (gas boilers, water heaters, stoves, etc.), mechanical forced exhaust ventilation and natural or mechanical supply ventilation are provided.
Location and dimensions of ventilation ducts
The minimum side size of the natural ventilation channel is 10 cm, and the minimum cross-sectional area is 0.016 m2, which approximately corresponds to the diameter of a standard ventilation channel pipe - 150 mm.
A channel of minimum size will provide air exhaust in a volume of 30 m3/hour with a vertical pipe length of more than 3 m. To increase the efficiency of the exhaust, increase the cross-sectional area of the channel or the length of the channel. Channels less than 2m long. do not provide the necessary intensity of natural ventilation.
In practice, the length of the ventilation duct on a floor is usually determined by design considerations - the number and height of the upper floors located above, the height of the attic, the length of the pipe above the roof. On the floor, the length of all channels must be the same. This is done so that the traction force in each channel on the floor is approximately the same.
The cross-sectional dimensions of the channels on the floor are often made the same, but for design reasons - it’s more convenient. The performance of the ventilation channel in a particular room on the floor is adjusted by choosing the size of the ventilation grille.
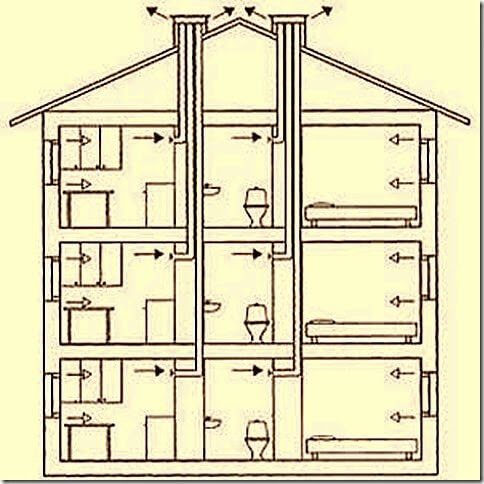
Ventilation ducts from the premises of the house on different floors are placed side by side, combining them into a block of ventilation ducts.
For design reasons, they try to lay several ventilation ducts from rooms on the same floor side by side, in one place - to create a block of ventilation ducts.
Examples of rational combination of exhaust ventilation ducts on the floor into one block (riser).
Concrete blocks for laying ventilation ducts.
The cross section of the channel is 12x17 cm (204 cm2).
Height - 33 cm.
Wall thickness 4 cm.
The outside thickness of the block is 25 cm.
The block can have 1-4 holes.
A block of ventilation ducts in stone houses is usually placed inside the load-bearing internal wall of the house or attached to the wall.
The block is laid out from masonry materials, for example, brick. In brickwork, it is convenient to make channels with a cross-section that is a multiple of the size of the brick, taking into account the thickness of the joints - 140x140 mm. (1/2 x 1/2 brick) or 140x270 mm. (1/2 x 1 brick)
They produce hollow concrete blocks specially designed for laying ventilation ducts.
A block of ventilation ducts made of masonry materials must be supported on a foundation or on a reinforced concrete floor.
In other cases, for example, in wooden or frame houses, a block of ventilation ducts is assembled from plastic or galvanized steel pipes. The block of pipes is covered with a box.
How to combine several channels into one channel
In a private house, the number of channels is small, so there is no need to combine air flows from several channels (rooms or floors) into one, as is often done in apartment buildings. Each natural ventilation channel in a private house should begin in the room and end at the head on the roof. Any combination of two or more channels impairs ventilation performance.
In some cases, there is still a need to combine several channels, to combine them into one common natural ventilation channel.
Ventilation grilles in the room
Both exhaust and supply grilles, as well as transfer models, are installed inside the house. We list all the most popular ventilation grilles in everyday life, which solve different problems.
Plastic supply and exhaust models are easy to install with your own hands. They serve to ensure interroom air exchange and perform a decorative function. To maintain sound insulation, they are equipped with inclined slats that allow air to pass through but reflect sounds. They are made of modern high-quality, safe plastic and are easy to maintain. The design includes a removable top panel - you can simply snap off the element, wash the inside of the grille and insert the panel again.
Door grilles solve the problem of interroom air exchange, but are placed in the doors. Most often - in bathrooms, kitchens, etc. Another possible area for using such models is a window sill. Through the grille in the window sill, heated air from the heating radiator freely penetrates into the room. The material for production is also plastic.
Plastic grilles installed in the places where the corrugation exits from the hood in the kitchen . As a rule, these products have a round hole and are additionally equipped with deviators - devices that prevent reverse draft. They are made dismountable for easy cleaning. Overhead models are used in rooms where ventilation has natural draft.
Installation of metal ventilation grilles indoors is carried out both on ceilings and on walls - as an element of ventilation, heating and air conditioning systems. To protect against the penetration of insects, the products are equipped with mosquito nets.
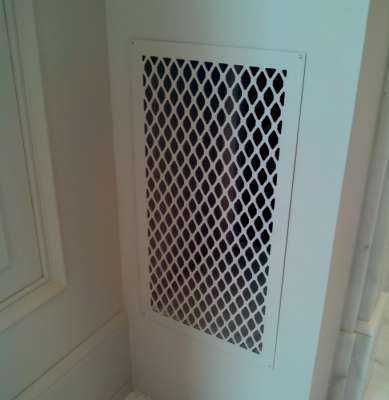
Slotted models make it possible to make ventilation outlets almost invisible. Their sizes depend on the design of the room, and installation is carried out between ceiling levels or decorative elements on the walls.
How to increase hood performance
Using round ducts
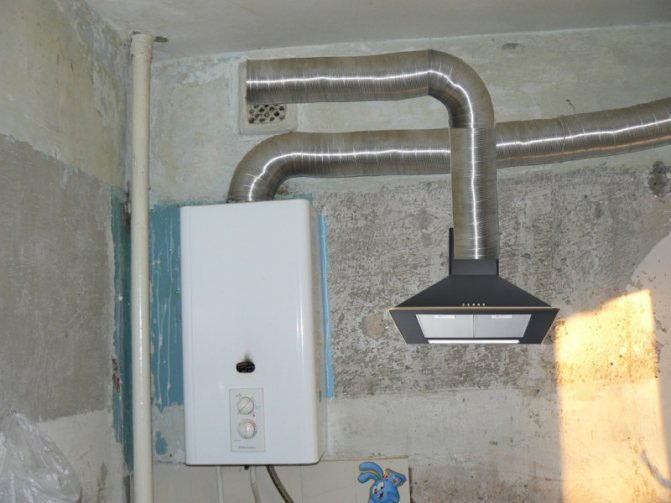
You can join the ventilation duct without reducing the cross-section of the air ducts; for this purpose, round cross-section ventilation ducts are used as an air duct. Sometimes it is possible to get rid of an extra turn. All these measures will increase the efficiency of the hood. But there is one problem. It is prohibited to connect the hood to the standard ventilation duct.
Our channels are not designed to pass such a large volume of air. You might just harm your neighbors. The more efficient we achieve from the hood, the more odors we will send to our neighbors.
Installation of a hood with access to the street
You can make a branch from the hood to the street, through the wall with one turn. Since this hood connection has the lowest resistance possible, we get the highest performance of the kitchen hood. That is, exactly what the hood was purchased for. When exhausted through an external wall, the air is released to a distance of about 3 meters from the facade, which ensures that your neighbors living on the floor above do not get it through an open window.
Usually, users of hoods do not worry much about their neighbors and choose the simplest method, connecting to the ventilation duct.
Kitchen hood to the street
The main difficulty that arises when a kitchen hood is brought outside is the hole in the outer wall. The hole is made with special equipment, a diamond drilling unit. The result is a neat, even hole. A small, round, louvered grille appears on the façade. The hole can be made both at the repair stage and in a clean room.
When starting such a remodel, you may have many questions. I will try to answer some of them below.
Grilles on the outside of the building
If you plan to install ventilation grilles outside the room, then metal models are often chosen. Plastic exhaust grilles are used when installation of a ventilation grille is required outside, and at the same time it is necessary to save money. To prevent backdraft from occurring, they are equipped with special gravity blinds and dampers.
Pediment models are designed for installation in attics.
Basement - mounted in basements. They pay special attention to protection against rodents.
Basic installation methods
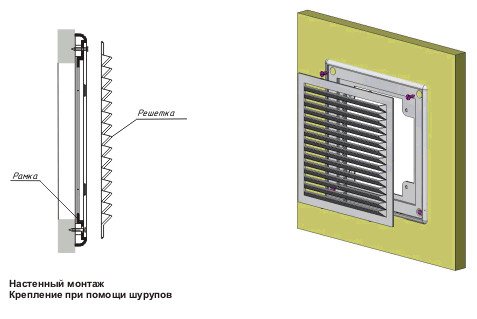
Installation of the ventilation grille does not require special knowledge and skills. It can easily be done by a home craftsman with patience and accuracy. Most industrial products consist of two parts:
- main body, mounted directly on a hole in the wall or door;
- a removable part inserted into the openings of the housing, which allows you to inspect and clean the channels of the ventilation system without any problems.
Begin to hang the internal ventilation grille from the first part, which plays the role of a frame. This is done using fastening materials or adhesives. Before this, the outer surface of the ventilation hole is prepared accordingly. It should be smooth and clean. Typically, the grille is placed on the wall after the finishing coat has been applied to it. This can be done in different ways:
- Fastening with screws or self-tapping screws is carried out on a solid wall made of concrete, wood or plasterboard. To do this, through holes are drilled in the grill body in places covered by the removable part, which are countersunk to the shape of the cap. You will have to install dowels in concrete or brick in appropriate places using a drill. When constructing a grating without a removable part, after installation, the screw heads are puttied and painted to match the color of the base material.
- Fastening with plinths or glazing beads is usually used for wooden products that fit well into a country-style interior made entirely of wood. In this case, self-tapping screws or finishing nails with a reduced head size are also used.
- Industrial models with standard spring-pressed spacer elements included in their device can simply be inserted into the ventilation hole, which must have standard dimensions for this.
- The easiest way to attach a plastic grill to any base is with glue. This is especially true for walls lined with fragile materials such as ceramic tiles. For this, compositions such as “liquid nails” are usually used. They are applied in a continuous stripe to the back side of the part, which is pressed against the wall and fixed with masking tape until completely dry. In this case, it will no longer be possible to dismantle the fragile part without destroying it.
The removable part of the grille is tightly inserted into the base fixed to the wall. In this case, for aesthetic reasons, it is better to rotate it so that the holes between the slats of the blinds are not visible to a casual observer standing on the floor of the room. When selecting and installing the transfer grids, pay attention to ensure that light rays do not directly pass through them. This can impair sound insulation and does not look very nice.
Plastic models usually include a thin mesh, which quickly becomes clogged with dust, reducing the effectiveness of the ventilation system. That's why most craftsmen don't install it. Otherwise, you will have to regularly clean the mesh.
Methods for installing ventilation grilles
This section outlines simple instructions for installing a simple overhead grille design, which can be done using several methods:
- Fastening with flush-mounted screws is perhaps the simplest and most affordable way to independently install a ventilation grill. It can be used on virtually any wall surface (cement, wood, brick, plasterboard).
It is performed as follows:
- Mark the installation location on the wall.
- In the case of cement and brick walls, you will need to drill holes for dowels with a drill or hammer drill.
- The mounting holes on the grill itself are processed so that the head of the screw that is screwed in is flush with the surface of the frame.
- Then we attach the product and screw in the screws.
Note! Whatever method you use, the main thing is a very tight attachment to the wall without cracks or gaps. In some cases, it is also possible to use silicone sealant to seal the channel.
- Wooden ventilation grilles are attached using plinths or glazing beads. Products of a different type are also fastened, but in a room with wooden cladding or decorated with wooden objects.
- Fastening with fast-acting glue such as “liquid nails” (Dragon, Titan), silicone, etc.
Along with this method, it is intended to function like this:
- Squeeze out a strip of glue using a special gun along the contour of the ventilation barrier.
- Press the grate well against the wall.
- Mounting foam will help fix it in this position.
- The next day the foam is removed.
- Another common and simple method is mounting on spacers.
Advice! In places where it is not ergonomic and probable that the grille will be sealed into the ventilation system, an adapter for the ventilation grille is used.
For indoor installation, give preference to environmentally friendly, non-toxic products.
Some installation rules
If you are planning to install the grille yourself, you need to remember some important rules. So, how do you install a ventilation grill so that it does its job effectively?
The optimal height of the ventilation outlet (or inlet) in the room is 2 meters from the floor level. In cases where it is impossible to mount the grille to the wall, you can mount it into the floor. Then you need to make sure that it does not interfere with walking. In a room with a low ceiling, you can install a ceiling grille. The same applies to rooms with suspended and suspended ceilings. A decorative door ventilation grill will save the day when there are no other options.
How to properly install a ventilation grille
Fastening is possible in several ways. Which one you choose depends on the installation location and the type of grille itself.
Fastening with special latches . Not a completely reliable method, although it preserves the aesthetic appearance of the product itself. If the vent has uneven edges, the clip will be difficult to snap into place. In this case, you can use a special leveling mounting frame. Installation on structurally provided latches, grips or screws is a convenient method. However, a grille with such details is more expensive than a regular one, this needs to be taken into account. Fixation using liquid nails is a very convenient method. But remember that if necessary, you will not be able to remove and rearrange the grille after gluing it. But the fixation is reliable, there is no need to level the surface of the base before installation, and the appearance of the product does not suffer. Fixation with self-tapping screws or screws is a method best suited for installing outdoor models. As a rule, such grilles already have holes for fasteners. Pros - reliable connection, cons - unsightly appearance, although this problem can be easily solved by painting the heads of screws or screws in the color of the grille. The experts who install such ceilings know best how to install a ventilation grille in a suspended ceiling In short, a plywood base is first placed on the rough ceiling, after the canvas has cooled, a slot is made in it for the grille, a tread ring is firmly glued to the canvas, and then the grille can be attached. In window sills, the grille is installed on one side, in doors - on both sides, for an aesthetic appearance. Both models are matched to the color of the window sill or door leaf. In essence, installing a ventilation grill yourself is quite simple; the main thing is to choose a model that is suitable in design and price.
Finding out how to properly install the ventilation grille
Ventilation is one of the most important engineering systems necessary to ensure a comfortable climate in any type of premises. In residential ventilation systems, the most common equipment for air ducts and ventilation shafts is grilles. They are installed in the opening of the ventilation duct directly at the entrance of the air flow that has already washed the room.
In the process of installing a ventilation barrier, one thing is important - tightness of pressing
Methods for installing ventilation grilles
This section describes simple instructions for installing a simple overhead grille design, which can be done in several ways:
Fixing the grille to the wall using masking tape is only suitable for temporary fastening, for example, to mark holes for drilling
- Fastening with screws “sunk” is perhaps the simplest and most affordable method of installing a ventilation grill yourself. It can be used on almost any wall surface (concrete, wood, brick, plasterboard).
It is performed as follows:
- Mark the installation location on the wall.
- In the case of concrete and brick walls, it will be necessary to drill holes for the dowels with a drill or hammer drill.
Drill carefully, since the walls around the ventilation duct are usually hollow, it is better to take self-tapping screws with a dowel
- The mounting holes on the grille itself are processed so that the head of the screw is screwed in “flush” with the surface of the frame.
- Next, we attach the product and screw in the screws.
Do not forget to regularly remove the grille and clean it from accumulated dirt and dust.
Important! Whatever method you use, the main thing in the process is very tight fastening to the wall without cracks or gaps. In some cases, you can even use silicone caulk to seal the channel.
- Wooden ventilation grilles are attached using plinths or glazing beads. Products of a different type are also fastened, but in a room with wooden cladding or decorated with wooden objects.
- Fastening with quick-acting adhesive such as “liquid nails” (Dragon, Titan), silicone, etc.
With this method you should proceed as follows:
- Squeeze out a strip of glue using a special gun along the contour of the ventilation barrier.
- Press the grate firmly against the wall.
- Mounting foam will help fix it in this position.
- The next day the foam is removed.
- Another common and simple method is mounting on spacers.
Advice! In places where it is not convenient or possible to install the grille hermetically into the ventilation system, use an adapter for the ventilation grille.
For indoor installation, give preference to environmentally friendly, non-toxic products.
Grilles for ventilation systems are presented on the modern construction market in a wide variety of shapes, sizes, designs and materials. Depending on the above parameters, the price of a particular product also changes. In the following sections we will tell you about the features of these products.
An inexperienced person will not select the right grille for his ventilation duct the first time.
Installation location
Experts distinguish ventilation grilles based on their main characteristics. The dominant place in the classification of the products we are considering is occupied by the place and method of their installation. Based on this feature, ventilation grilles are divided into:
- Internal - usually beautiful ventilation grilles are installed from the inside of the premises. Their designs are not subject to special loads, so they are made mainly of plastic.
Such products are characterized by:
- Small sizes.
- Visual appeal.
- Variety of styles and colors.
All this allows anyone, even the most demanding buyer, to choose the most suitable model, organically combined with the overall interior design of the room.
Types of kitchen stains
The most dangerous type of pollution that affects the health of the home owner is carbon monoxide, also known as CO. Owners of electric cookers are not at risk from this chemical element, because it is released only when natural energy resources are burned: gas, wood, coal, and so on.
CO (carbon monoxide) is odorless and is not absorbed by activated carbon, so recirculating hoods are useless against it. Of course, a large concentration of this substance will be required for it to have a negative effect on the human body. Back in Soviet times, standards were developed according to which ventilation systems in the kitchen were built. They ensured trouble-free removal of gas that appeared in small quantities during the combustion of natural fuel. This system guaranteed the safety of people in the kitchen.
Over the years, ventilation ducts become overgrown, since no one ever cleans them, as a result of which the efficiency of general house ventilation decreases, which, in turn, affects the removal of polluted air. Therefore, manufacturers of local ventilation systems offer compact devices that provide air removal from the kitchen. The simplest option is an exhaust fan on the window. This device worked effectively and still works in many apartments.
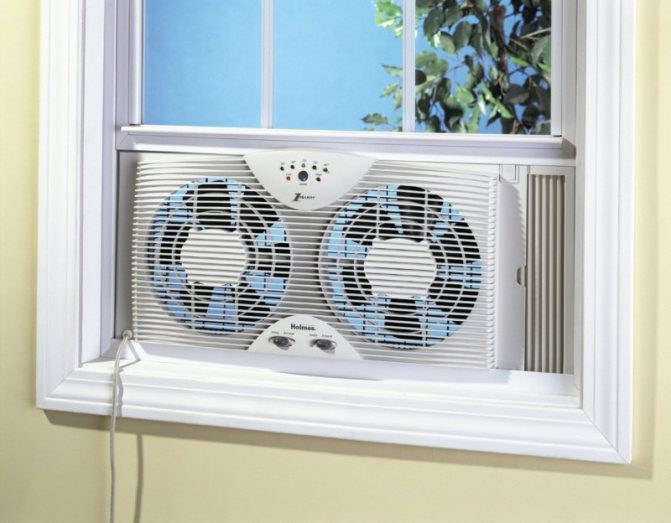
Exhaust fan on window
In addition to these kitchen contaminants, the following are released in the kitchen during the cooking process:
- Smoke is a choking smoke that appears during the combustion of certain products. It concentrates in the air in the form of volatile particles, mainly fat and oil. Doctors classify this type of pollution as a dangerous “carcinogenic” substance. They settle in the lungs, causing great harm to humans. But in greater quantities they accumulate on walls and furniture, worsening the appearance and quality of products.
- Steam. This type of pollution worsens the indoor microclimate, making it uncomfortable for a person to be in the kitchen.
Read also: Plastic pipes for kitchen hoods
Thus, the utility network is one of the types of ventilation in the kitchen of an apartment or house. But for owners of electric stoves, ventilation is a criterion for cleanliness and hygiene of the kitchen, and for owners of gas stoves it is a safety issue.
Basic installation methods
The grille is installed based on its purpose - bathroom, living room, basement
The installation location and orientation of the grille depends on its purpose and level of location.
The first thing you need to decide is the direction of the blinds. They perform more of a camouflage than a guiding function. Based on this, it is better to place the products so that the lattice panels cover the mesh. If it is under the ceiling, it needs to be installed with the blinds facing up. And vice versa - install the ventilation grille near the floor with the blinds facing down.
It is advisable to hang models of large size and weight on strong and long self-tapping screws that can withstand heavy loads. If the gratings are attached to tiles, it is better not to spoil them with extra holes, but to glue them to a transparent or colored solution.
Conclusion
Having read the information described above, you have definitely found the answers to the questions posed and now have an idea of what a ventilation grille is and how it is attached to the wall. Do not forget that ventilation of the room is necessary not only for aesthetic reasons (to remove odors), but also for health benefits (air space is discharged).
Sources
- https://mystroiteli1.ru/ventilyaciya/ventiliacionnaia-reshetka-vidy-razmery-i-ystanovka.html
- https://TopVentilyaciya.ru/ventilyaciya/elementy/kak-ustanovit-ventilyatsionnuyu-reshetku.html
- https://StrojDvor.ru/ventilyaciya/kak-pravilno-vybrat-ventilyacionnuyu-reshetku-podxodyashhego-vida-tipa-i-razmera-metody-ustanovki/
- https://ventazbuka.ru/v-zdanii/v-kvartire/ventiliacionnie-reshetki.html
- https://AeroClima.ru/ventilyaciya/ustanovka-reshetki/
- https://uchebniksantehnika.ru/ventiliatsiia/vyiasniaem-kak-verno-ustanovit-ventiliatsionnuiu-reshetku.html
- https://SavoPenza.ru/sistemy-otopleniya/kak-postavit-ventilyacionnuyu-reshetku-2.html
- https://StrojDvor.ru/ventilyaciya/sposoby-pravilnoj-ustanovki-ventilyacionnoj-reshetki/
[collapse]