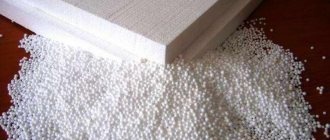
If you ask someone which of the materials for insulating facades is the most famous, then more than half of the respondents will answer directly - polystyrene foam. And indeed it is. It is inexpensive, lightweight, not afraid of moisture and easy to work with. The main part of the composition is air. That is why the material has excellent sound and heat insulation qualities. With all this, the question arises: how to attach foam to the wall? After all, this is what insulation work consists of. There are two options for fixing foam sheets. Some of them are done using a foam dowel.
In this article we will look at what a dowel is, what types of dowels exist and how to choose the best option. Moreover, you will find out the answer to the question - how to attach polystyrene foam to the wall. We will go through step-by-step instructions and provide a training video.
Dowels for foam plastic, what are they?
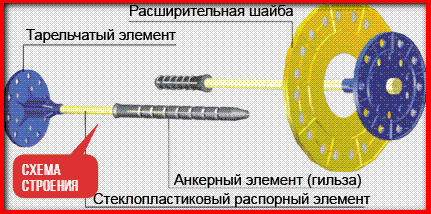
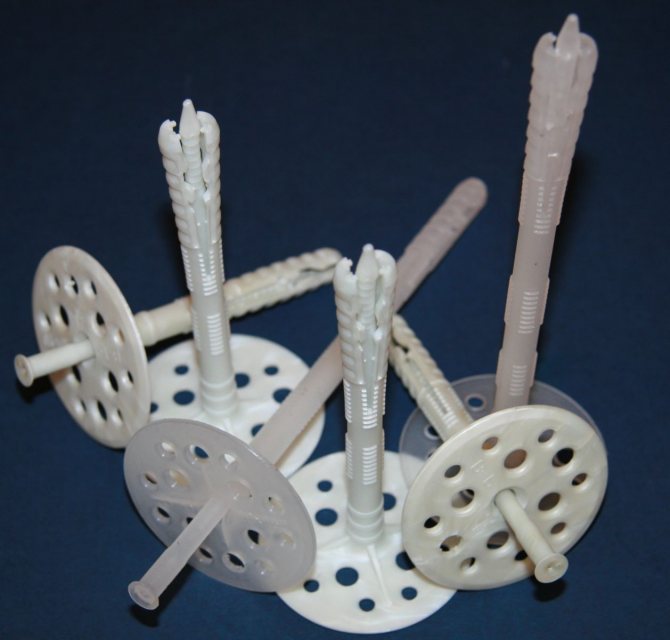
To put it simply, dowels are products that allow foam to be fastened to any surface. The element consists of several parts and plays an important role. In fact, without it, insulation is impossible, since over time the foam will fall off under wind load. Let's take a closer look at what it consists of:
- Hat or umbrella. Thanks to it, the load will be distributed over the entire surface of the foam sheets that are attached to the wall.
- Spacer element. It serves to better hold the insulation on the surface. The spacer element is securely fixed in the wall, after which it is not so easy to get it back.
- Nail. It is hammered into the spacer to achieve a tight fixation.
- Some mushrooms may have an anchor sleeve, which serves for additional fixation.
- Sometimes dowels have expansion washers that increase the contact area with the foam and distribute the load. They are often used specifically for soft materials that can be deformed.
This is what the dowel looks like. It will hold the foam sheet to the wall, securely fixing it for many years. In order for the fastening of foam plastic to the wall to be reliable and durable, you need to take into account some requirements for fasteners.
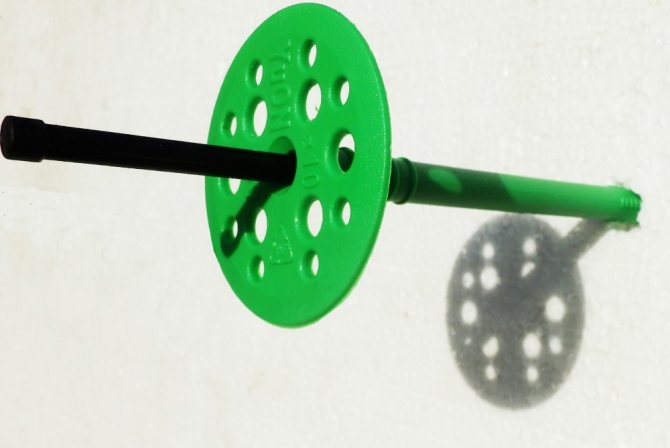
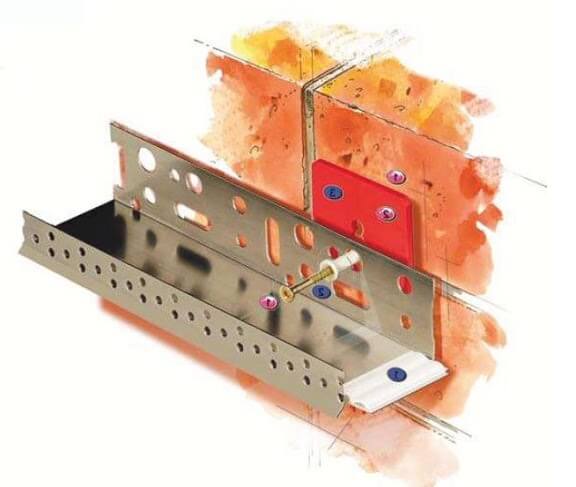
Fungi for attaching insulation
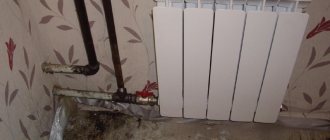
When preparing building facades, if necessary, drainpipes, signs, metal protective elements of window openings, parapets, horizontal wall ledges and other elements that impede the work should be dismantled. In places where elements, equipment and communications are located on the walls, the dismantling of which is unacceptable, local breaks should be made in the insulation structure in accordance with the units and parts developed in the design documentation.
Preparing walls and their surfaces
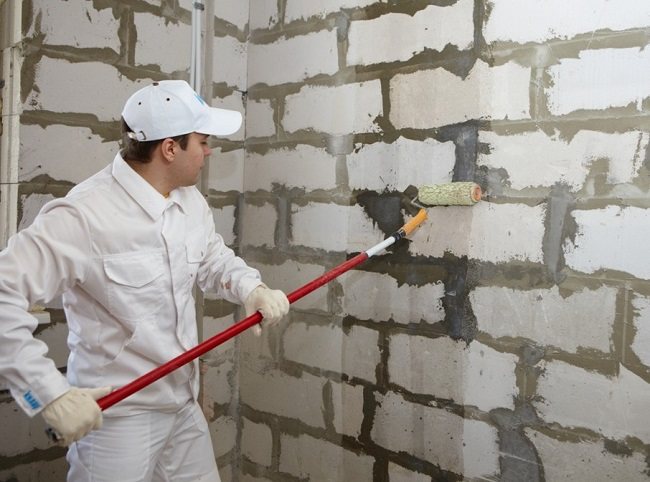
Before preparing the walls and their surfaces for the implementation of the “Termosuba” system, it is necessary to identify its outer layer, plaster and finishing layers that have collapsed or are not connected, for one reason or another, with the main material of the walls. In case of destruction of the outer layer of wall material to a depth of up to 50 mm or the need to strengthen the walls, it is allowed to apply M75 cement-sand mortar over a metal mesh. Local protruding parts of the base with a thickness of more than 30 mm should be knocked down, and overhangs of finishing layers should be removed. If the wall surfaces are contaminated with substances that reduce the adhesion of adhesives, it is necessary to clean the bases with steel brushes, spatulas or the jet method.
Product requirements
It is clear that the fixing dowels will be subject to high loads. In addition, they are in an alkaline environment and in extreme conditions. All this suggests that the fastening elements must meet certain requirements. Let's look at them:
- Resistant to destruction. It is important that the fungus, nail and other elements are highly durable. The nail is made of galvanized steel. Otherwise, other metal may react and rust. Sometimes materials under a wet facade are secured with dowels. Then the fungus is covered with a layer of plaster and becomes mired in alkali.
- It is important that the fastener has a low thermal conductivity. Why? Because the dowel passes through the polystyrene foam and is fixed in the wall. This means that he is a bridge of cold. Then the quality of insulation will not be 100% effective.
- The dowel should hold the insulating material well. Typically, foam plastic is fixed with glue and reinforced with dowels. As for the ventilated facade, basically only the fungus retains the heat-insulating material. It is important that the fungus ensures excellent adhesion of the insulation to the wall.
These are the basic requirements that should be followed. There are many options on the market for products that can be used for fastening. Let's take a look at this assortment.
dowel for insulation plastic nail, 1x9cm, 50 pcs
Product added to cart
for thermal insulation with plastic nail, size: 10x90mm, 50 pcs.
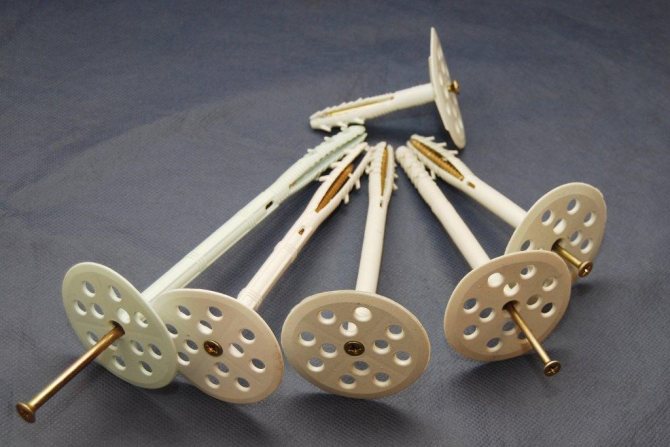
A dowel for insulation (a plastic nail) is best used for attaching foam plastic, penoplex (extruded polystyrene foam) and mineral wool in the form of slabs to concrete, brick and any hollow bases (such as hollow bricks). Available in an assortment of colors: black, white or red.
- Characteristics
- Description
- Reviews
A dowel for insulation (a plastic nail) is best used for attaching foam plastic, penoplex (extruded polystyrene foam) and mineral wool in the form of slabs to concrete, brick and any hollow bases (such as hollow bricks). Available in an assortment of colors: black, white or red.
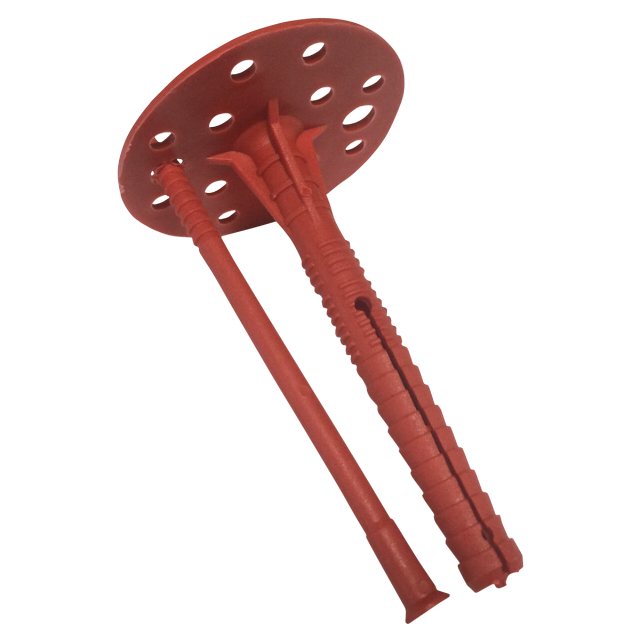
Types of fasteners
After considering all types of products, you can choose the option that suits best. There are three main types of elements. You can easily buy them at any hardware store. Here is the list:
- made of galvanized steel;
- made of plastic;
- with thermal head.
You need to consider each of the options to understand how to attach the foam to the wall.
Steel
Usually the nail for it is made of galvanized steel. It happens that it is made from polyamide. The advantage of the material is that it is quite durable and can withstand heavy loads. However, despite the fact that galvanized steel has a high degree of resistance to corrosion, it is not completely protected from it. In addition, metal is not the best material for thermal insulation. It conducts both heat and cold perfectly. Therefore, cold bridges and condensation sometimes appear at fastening points. Despite all this, the cost of such dowels is the highest.
Characteristics of galvanized steel dowels:
- the spacer element is made of impact-resistant polypropylene;
- anchor - low-carbon galvanized steel;
- capable of withstanding a load of as much as 750 kg per 1 m2;
- can be operated at temperatures from -50 to +60 degrees Celsius.
Basically, such dowels are used in cases where it is necessary to install heavy insulation with a large load of finishing materials. Then it is impossible to use plastic dowels.
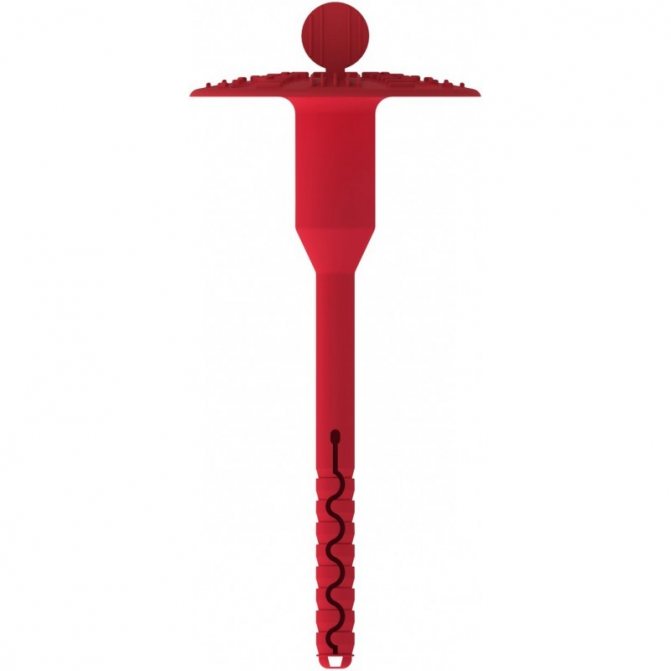
Plastic
This is a great dowel for foam. If we compare, it is used much more often than products made of galvanized steel. There are many reasons for this. Firstly, it has a low cost. Secondly, its thermal conductivity coefficient is lower, and hence the likelihood of the formation of cold bridges. The only thing is that they are not so durable and cannot withstand such a load. Although for foam insulation the load is small.
Characteristics:
- made of durable plastic, nails can be nylon;
- has a low heat conductivity coefficient;
- can be operated at temperatures from -30 to 80 degrees Celsius;
- The dowel can withstand loads up to 380 kg/m2.
This is why plastic products are so common. We can say with confidence that this is a better option for insulation than metal dowels.
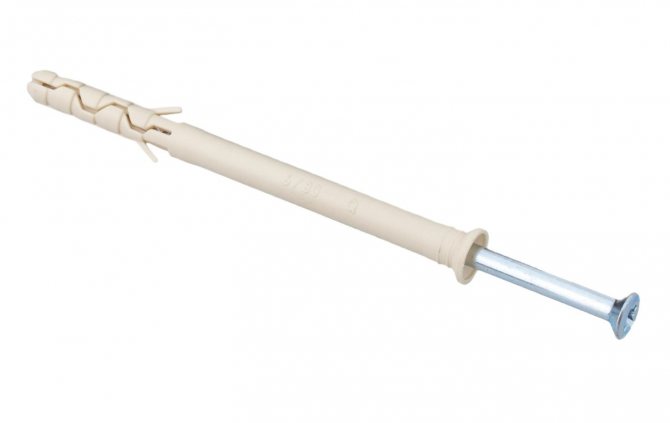
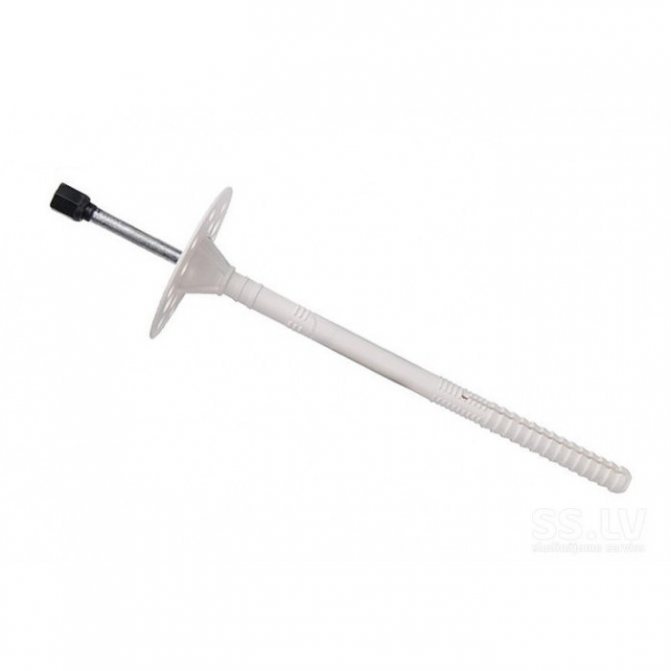
Products with thermal head
It consists of an umbrella with a metal nail. The end of the nail or anchor has a polymer head. This approach is used to fix polystyrene foam to different surfaces, however, this is exactly the option that is needed for wooden walls.
What is the purpose of the thermal head? It reduces thermal conductivity. This means that the formation of cold bridges is excluded. We can say that this type is something between a steel dowel and a plastic one. It gets its strength from steel, and its low thermal conductivity from plastic. However, the products have a significant drawback - high cost.
If we are talking about cost, then it is logical to compare all 3 types. So, for a metal dowel you will have to pay from 4 to 9 rubles per 1 piece. If we talk about plastic products, then 1 pc. will cost 2-5 rubles. But products with a thermal head cost from 9 to 30 rubles apiece. All dowels are sold in packs of 800 to 3000 pieces. There is also wholesale trade. To insulate a small house, you will need about 300 pieces.
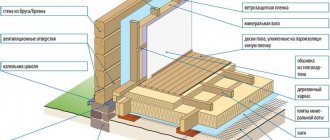
Rules for installing insulation
To effectively perform thermal insulation with penoplex, it is very important to know the installation rules. They look like this.
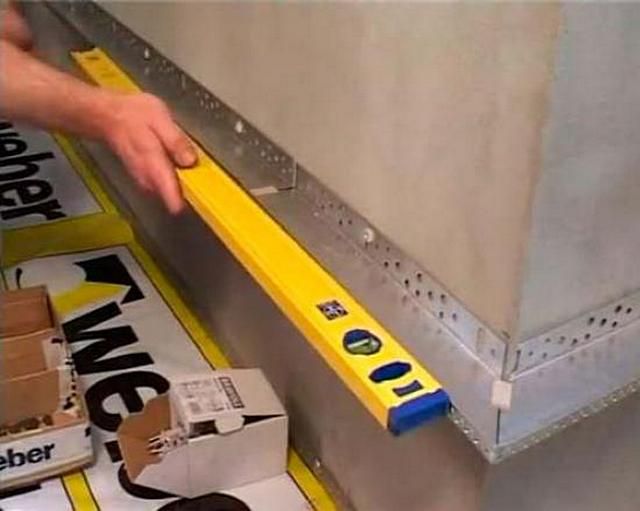
At the initial stage of work, a starting bar is set. This is a wooden strip or perforated corner. The plank is designed to keep the slabs from sliding and also indicates the direction of laying. It is selected according to the thickness of the penoplex.
It is possible to buy a ready-made set, including strips, external and internal mounting angles for joints.
The choice of method of fastening the slabs depends, firstly, on the coating material, and secondly, on the operating conditions. Insulation is installed on concrete and brick using the following adhesives and fasteners.
Using a bitumen-polymer thick sticky composition is a simple and cheap way to glue insulation. Due to its special properties, mastic is used on buildings located in special conditions.
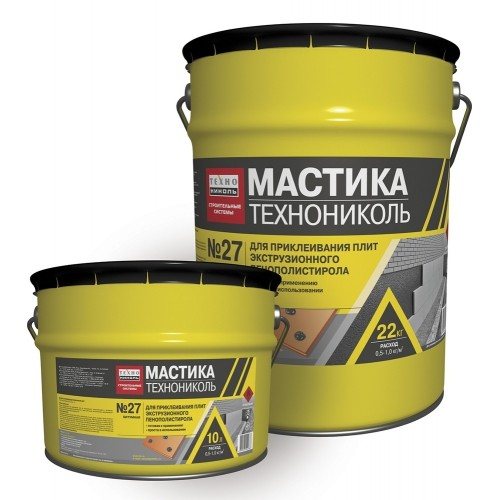
The material is packaged in tubes. To work you need to have a special gun.
When laying, the edges and center of the slab are coated with mastic. After this, the insulation is applied to the base and held in place for up to an hour. If necessary, the slab can be moved at this time.
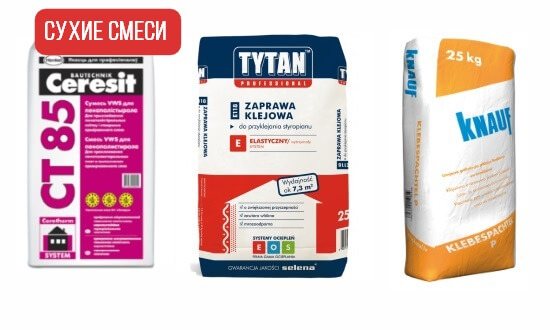
The main binding element of dry mixtures for insulation is cement.
Before use, the adhesive solution is mixed in water according to the instructions indicated on the package. For high-quality adhesion, after mixing, the solution is allowed to settle for two hours to obtain a homogeneous composition without water.
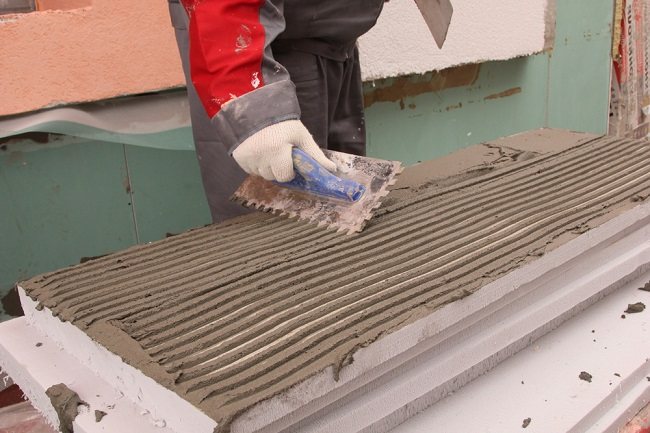
Applying glue to penoplex with a notched trowel
Before laying, the adhesive is applied to the foam plastic with a notched trowel, and then the insulation is applied to the base and held for several minutes. With this type of fastening, additional reinforcement with dowels is not required.
- Glue.

Mixing glue for penoplex
Adhesives with the addition of cement are very common due to their ability to level the surface. With such glue, as a rule, additional fasteners are used.
The composition is applied to the slab in a continuous or dotted manner up to 200 mm wide.
Technology of fastening with adhesive mixture and dowels:
Polyurethane foam has become widespread. However, it is not suitable for fastening foam boards, as it collapses over time and does not hold the load well.
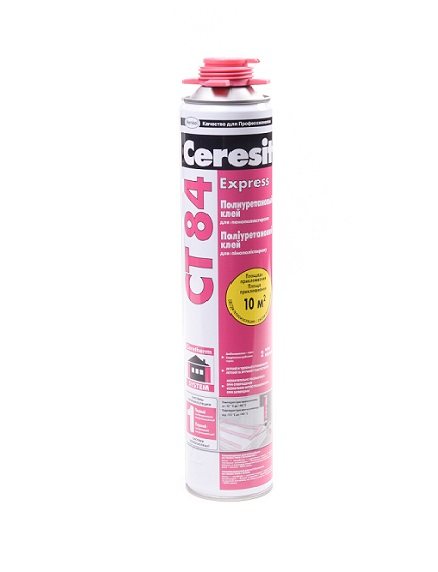
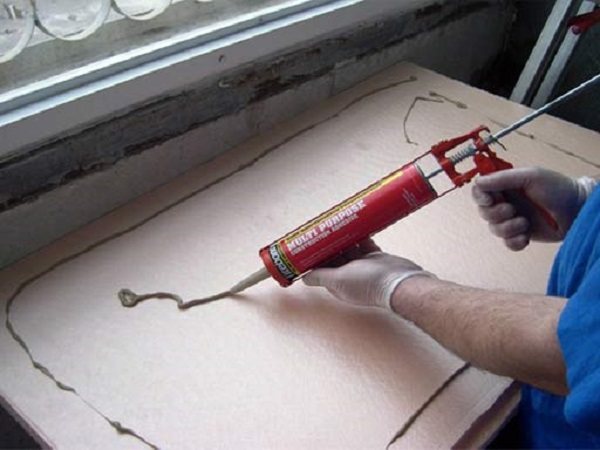
A special material for external fastening of insulation is adhesive foam in the form of a polyurethane foam binder. It has improved adhesion and good grip. Penoplex slabs installed with such an adhesive composition reliably adhere to concrete and stone walls.
During installation, adhesive foam is applied from a gun along the perimeter of the slab and in the center. Then the insulation is pressed against the base for a few seconds. After 20 minutes, the slab is firmly set, but further work can only be done after two hours.
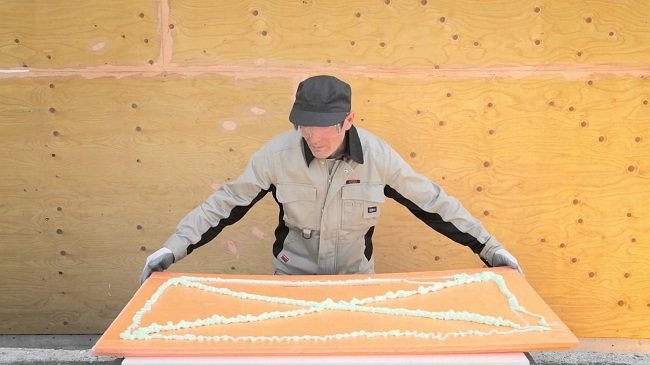
Adhesive foam fastening technology:
- Glue "liquid nails".
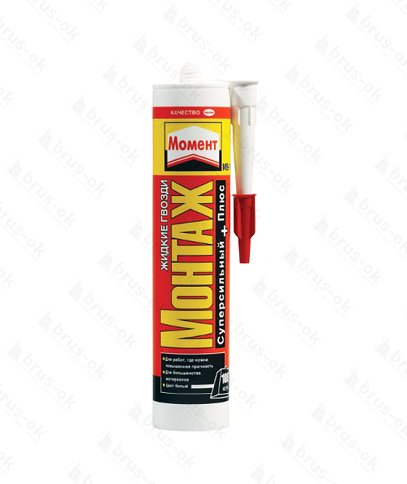
This is a well-known adhesive composition that is widely used in everyday life. It glues quickly and reliably. When insulating, it is used in small and hard-to-reach areas. To apply such glue to a large area of coverage will require significant costs.
Glue has strict requirements for the condition of the surface. It should be smooth and coated with primer.
Priming the surface before gluing
“Liquid nails” are packaged in tubes, so they are applied pointwise with a special gun: in the center and along the edges of the slab. The glue dries quickly, so the insulation is applied to the base and then held in place for about a minute.
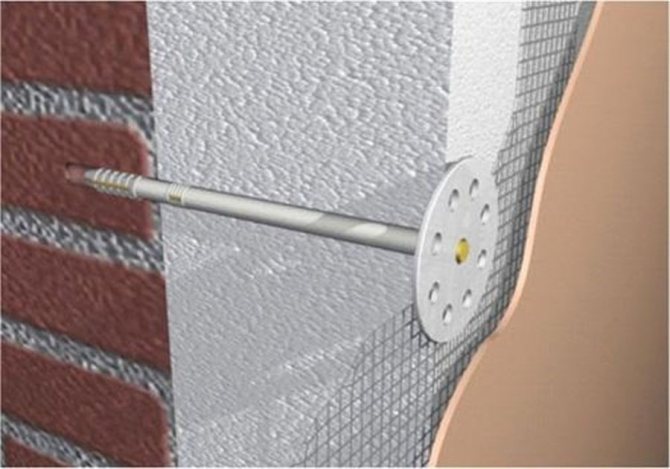
- Disc dowels.
To improve strength, fastening the insulation with dowels is combined with gluing. Unfortunately, drilling holes for dowels breaks the seal of the slab, which means there is a passage for the cold.
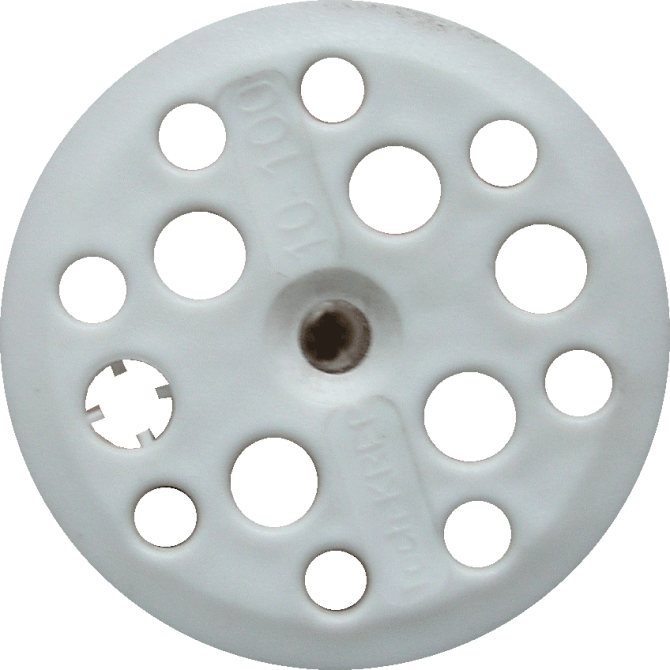
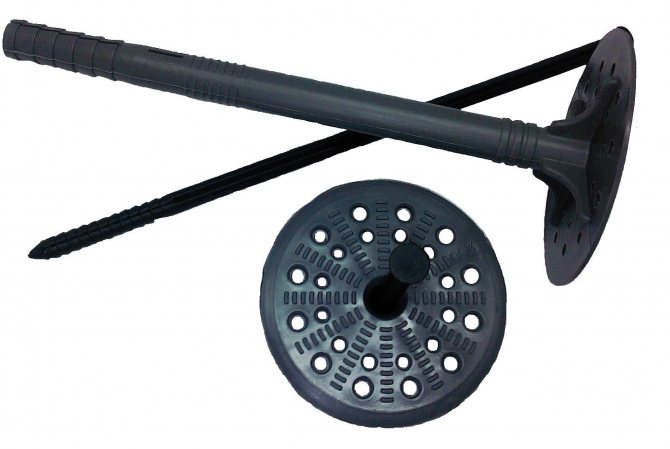
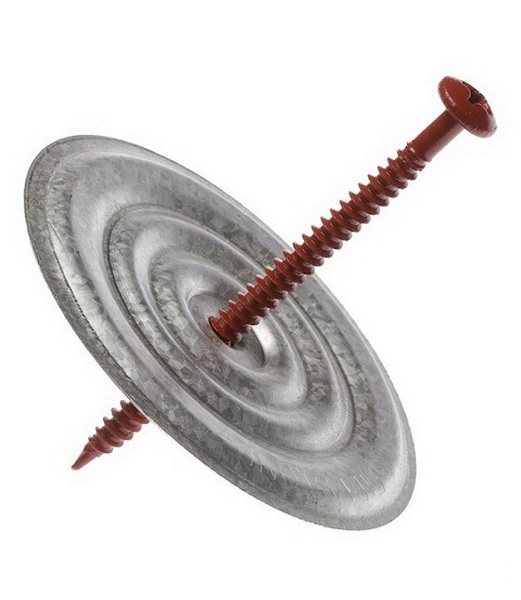
The widely used mushroom-shaped fastening dowel has a core, a sleeve and a wide head. It can be solid plastic and hollow for use with a screw or nail. The spacer zone prevents the dowel from being removed from the hole and also ensures reliable fastening.
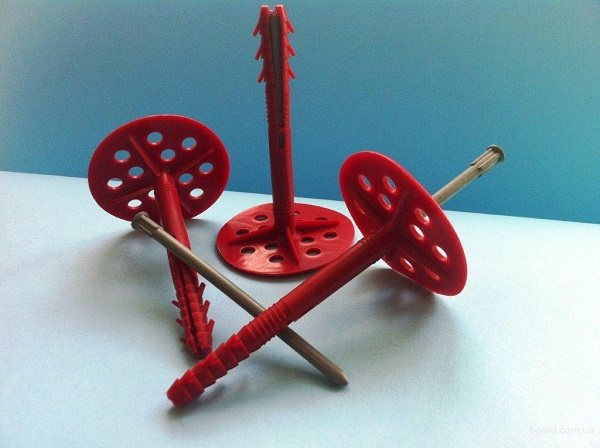
The core can be made of plastic or metal
Before installation, a hole is drilled in the insulation. The dowel is installed so that the cap does not protrude beyond the surface of the insulation. After this, the spacer element is screwed in or hammered in.
Each slab is secured with five dowels: four at the edges and one in the center. For adjacent slabs, the common fasteners are located inside the seam.
Most often, self-tapping screws are used to strengthen the fastening of plates made by other methods. They are used when there is a wooden sheathing on the surface.
At least five dowels are used to fasten each slab. For them, holes are drilled in the insulation. To prevent the self-tapping screw from pushing through the slab, a washer is placed under its head.
ADVICE!
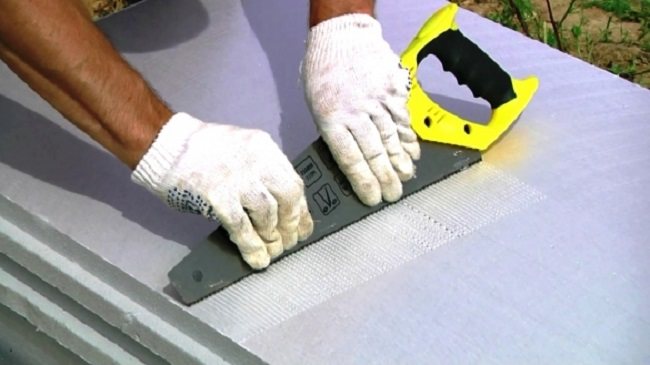
Penoplex boards have a smooth surface, so for better adhesion before gluing, you need to treat them with a needle roller or scratch the surface with a hacksaw.
An important point in installing elements is calculating the length
If you need to properly attach foam to a surface, then the main task is to choose the length of the dowel. When the length is insufficient, the foam will be poorly secured and fall off. Large sizes can damage the wall from the inside. The purpose of the dowel is to completely pierce the foam and secure it to the wall, as shown in the photo.
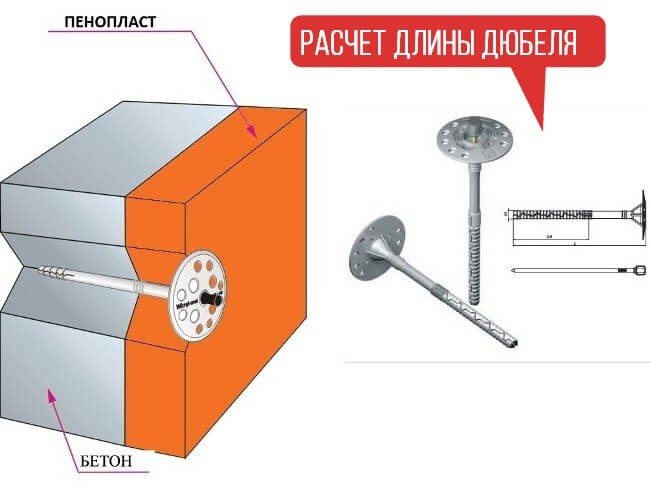
There is a special formula that makes it easy to calculate the required dowel length for insulation:
L=H+I+K+W. How does this stand for? L is the required length of the element, H is the thickness of the foam, K is the thickness of the adhesive layer and plaster (if any), I is the indicator of the depth of the dowel into the wall (at least 5 cm), W is taking into account the curvature of the wall. What does it look like in practice? For example, you chose 100 mm thick foam. In this case, the glue layer will be 5-10 mm. This means that a dowel 160 mm long (100+10+50) will be sufficient. If the wall has a skew of 50 mm, then the indicators will be different. In this case, it will be: 100+10+50+50=210 mm dowel. Now that the dowels have been selected and purchased, you can consider how to attach them.
Calculation of the number and length of dowels
When choosing the parameters for attaching the insulation to the wall, you can not pay attention to the load-bearing load, since due to its looseness, the density of the insulation is significantly less than the similar characteristics of the walls and ceiling.
This parameter is indicated in the documents for hardware, in particular, the pull-out load. In practice, this data is not used when choosing a product.

The following parameters are considered important:
- Length - when choosing the length, it is worth considering not only the thickness of the insulation and all other existing layers (glue, vapor and waterproofing, wall unevenness), the dowel must penetrate the wall to the minimum allowable amount. This value is different for each building material. The parameters of hollow and cellular concrete and brick are different - they are indicated in the certificate, which must be studied.
- The diameter of the disc element should be larger, the more loose the material is attached to the wall or ceiling. Dense foam plastic can be fixed with an umbrella with a small head, while mineral wool requires the largest discs.
- The number of umbrellas directly depends on the installation scheme - often 5 elements are required for one insulation plate - fastening is carried out in the corners and in the center. Well, if the insulation is attached to the facade, then the number of fungi is calculated based on the consumption per plate (1 sq. m.). The number of dowels in one plate directly depends not only on the size of the plate itself, but also on the wind load. Therefore, when installing insulation on a facade, from 7 to 9 fungi per square meter are used, which depends on the height of the building and the wind rose.
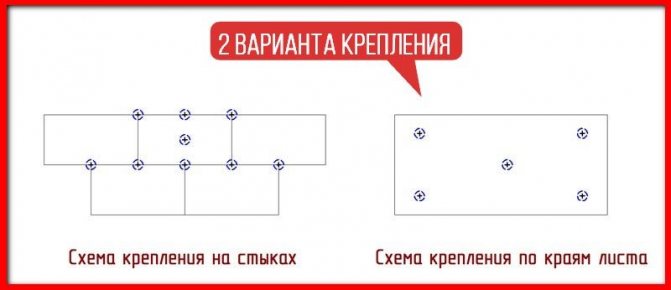
Mounting diagram
Basically, foam plastic boards are fixed according to a certain pattern. It indicates where and how many dowels are required on the surface. One of the popular schemes is fixing along the edges. What is it? In this case, about 5-6 dowels will be needed per 1 m2 of insulation. If you take a sheet of foam plastic, then it is fixed at each corner (4 pieces), retreating 5-10 cm from the edges. To secure the result, fix one or two dowels in the center of the sheet.
The second scheme involves fixing products at the joints of sheets. It turns out that the hat will hold three sheets at the junction. Then one dowel is also driven in in the center. Below is a photo that clearly illustrates these types of circuits.
Some “professionals” among the people, when performing this work, use only one dowel, mounting it in the center of the slab. Saving should be economical, however, this is not the case. With this approach, the foam will fall off soon. When choosing how many dowels are needed for fixation, take into account the number of floors, as well as the area being processed. For example, it is recommended to use more dowels to fix corners. And for a building that is higher than 8 m - about 7 pcs. per 1 m2, when building above 20 m - 9 pcs. It's all about the wind load: the higher it is, the stronger it is.
Mushrooms for attaching insulation: dimensions, scope of application, installation technology, price per piece
The use of dowels with disc-shaped caps is a prerequisite for the technology of fastening external thermal insulation. Glue and lathing are not enough to ensure reliable fixation of insulation boards and protect fragile and loose building materials from wind, mechanical tearing and warping of joints. The main requirement for the fastening elements is the presence of a wide umbrella cap and the correctly selected length of the spacer (in addition to passing through all the outer layers, the dowel must sink into the wall by at least 4.5 cm). Attention is also paid to the material of the nail and the thermal protection of the head.
- Types of fastenings
- Mushroom installation technology
- Prices
Types and features
All fungi for fastening insulation have a wide cap with a diameter of 10 mm and an elongated wedging zone (approximately from 100 to 220 mm), which can withstand the main load - the weight of the slab and cladding. Depending on the material of the nail, there are such varieties as: mushrooms with a plastic anchor, metal and dowels with a thermal head. They all have different sizes and strength; the choice of a specific fastening option is influenced by the weight of the insulation.
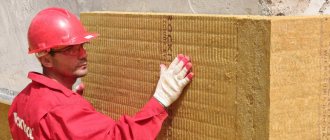
The first type is made of polypropylene or polyamide and is used to attach lightweight thermal insulation, most often mineral wool. A distinctive feature of these products is conical holes in the cap, which enhance the reliability of fixation, light weight (about 15 g), low thermal conductivity coefficient (0.004 W/m K), withstand load - from 20 to 380 kg. The operating temperature range varies from -40 to +80 °C. The advantages of plastic fasteners include an affordable price (no more than 5 rubles), chemical inertness and compatibility with any insulation. The disadvantages are the weight limit; polypropylene dowels are not suitable for fastening the thermal insulation layer in facades with heavy cladding; in this case, it is better to buy another type.
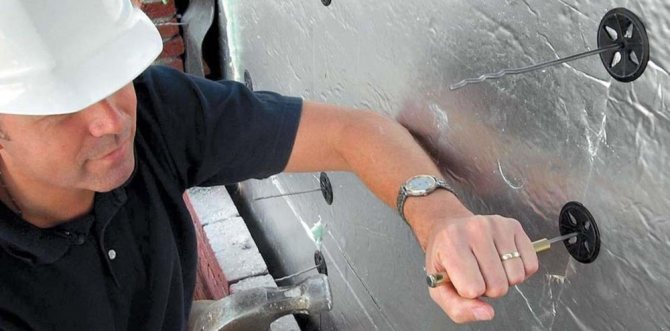
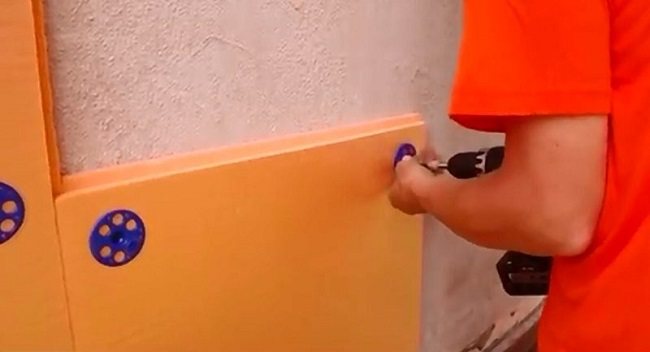
Installation of dowels for foam plastic
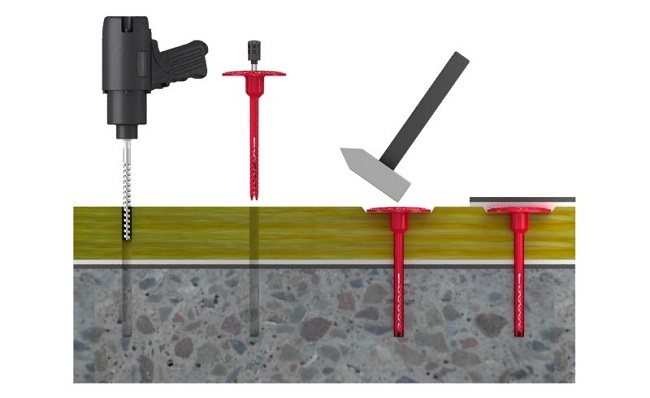
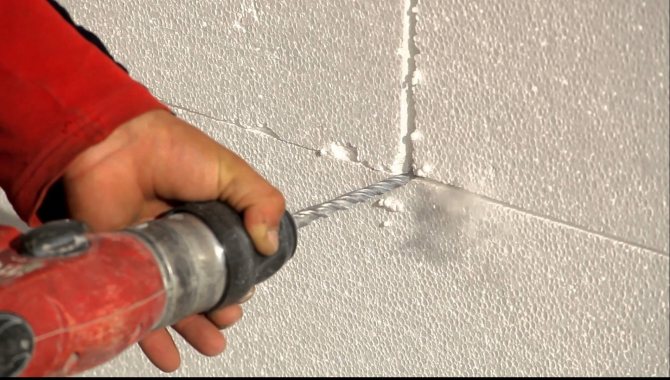
Now you can start practicing. The work itself is not difficult, but requires a special approach and responsibility. To complete the task you need a power tool, namely a hammer drill. We will use it to drill holes for the dowels. In this case, it is important to choose a drill that will correspond to the diameter of the rod. In this case, its length should be 1 cm longer.
So, the whole process consists of 3 main stages:
- Holes should be drilled in the required places. They should be even.
- After which the dowel or spacer itself is inserted into the hole. In this case, the cap should be flush with the foam.
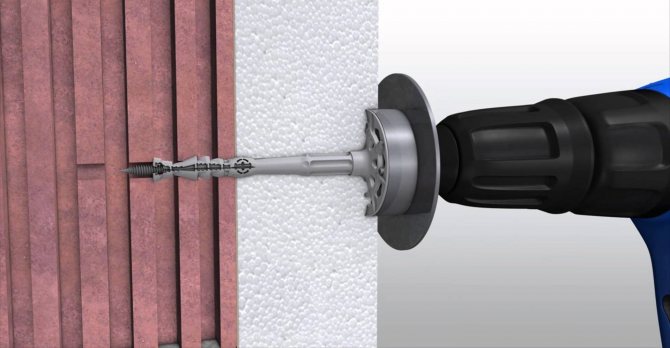
- All that remains is to insert and hammer or drill the fixing nail or anchor. If the umbrella has a lid, then it is covered with it.
That's all, installation is considered complete. All elements are recorded using this principle. To make the process clear and simple, watch this training video before starting. Then you will definitely not make any mistakes.
Let's sum it up
Now you know how to attach foam to the wall. Usually, fixation methods are combined: first, the foam is placed on glue, after which the fastening is reinforced with dowels. In any case, with this knowledge, even a beginner can cope with this task. You just need to choose the type of dowel, its length and fastening pattern. And then, according to the instructions, it is easy to mount.
Recommended Posts
Japanese houses made of polystyrene foam
Cement mortar for bricklaying
Gypsum stone for interior decoration + photo
Polymer concrete: composition, characteristics
What kind of mortar are fireclay bricks placed on?
Polyurethane adhesive for foam plastic